
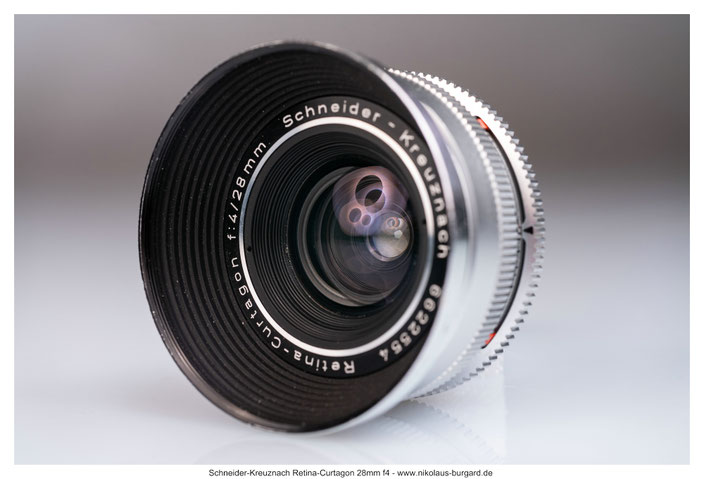
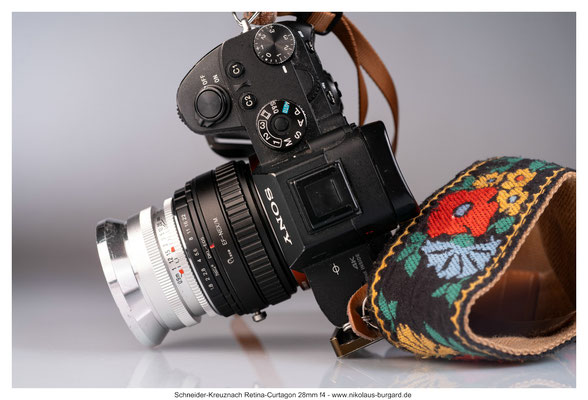
Schneider-Kreuznach Retina-Curtagon 28mm f4
Deutsche Textversion /
English Text Version (sorry for errors, no native english speaker)
17.03.2026
Das
Schneider-Kreuznach Retina-Curtagon 28mm f4
gehört zur Gruppe der frühesten Retrofokus-Weitwinkelobjektive.
Erschienen ist es im Jahr 1959 für die Kodak Retina-Reflex-Kameras, seine Konstruktion erfolgte aber bereits im Jahr 1955 durch Günter Klemt (also nur 3 Jahre nach dem allerersten 28mm-Retrofokus-Objektiv, dem Angenieux R11 28mm f3.5). Vor allem die Kompaktheit des Schneider-Objektives war für den damaligen Stand der Technik beeindruckend.
Dank Marko Kröger, einem der Autoren der Seite www.zeissikonveb.de, kann ich euch hier auch den genauen Linsenschnitt des Objektives präsentieren, das für seine Zeit besonders hochbrechende Glassorten aufwies und dessen verkittetes Hinterlinsenpaar eine besonders gute Korrektur ermöglichte:
2026-03-17:
The
Schneider-Kreuznach Retina-Curtagon 28mm f/4
is one of the earliest retrofocus wide-angle lenses.
It was released in 1959 for the Kodak Retina SLR cameras, but its design was completed as early as 1955 by Günter Klemt (just three years after the very first 28mm retrofocus lens, the Angenieux R11 28mm f3.5). Above all, the compactness of the Schneider lens was impressive for the state of the art at the time.
Thanks to Marko Kröger, one of the authors of the website www.zeissikonveb.de, I can also present here the exact optical design of the lens, which featured particularly high-refractive-index glass types for its time and whose cemented rear lens pair enabled particularly good correction:

Einige technische Daten:
- Länge: 41,6mm
- Gewicht: 234g
- Optisches System: 7 Linsen in 6 Gruppen
- Blende: von f4 bis f22, Blendensteuerung in der Kamera bzw. im Adapter, 5 Blendenlamellen
- Naheinstellgrenze: 90cm
- Erscheinungsjahr: 1959
- Anschluss: DKL
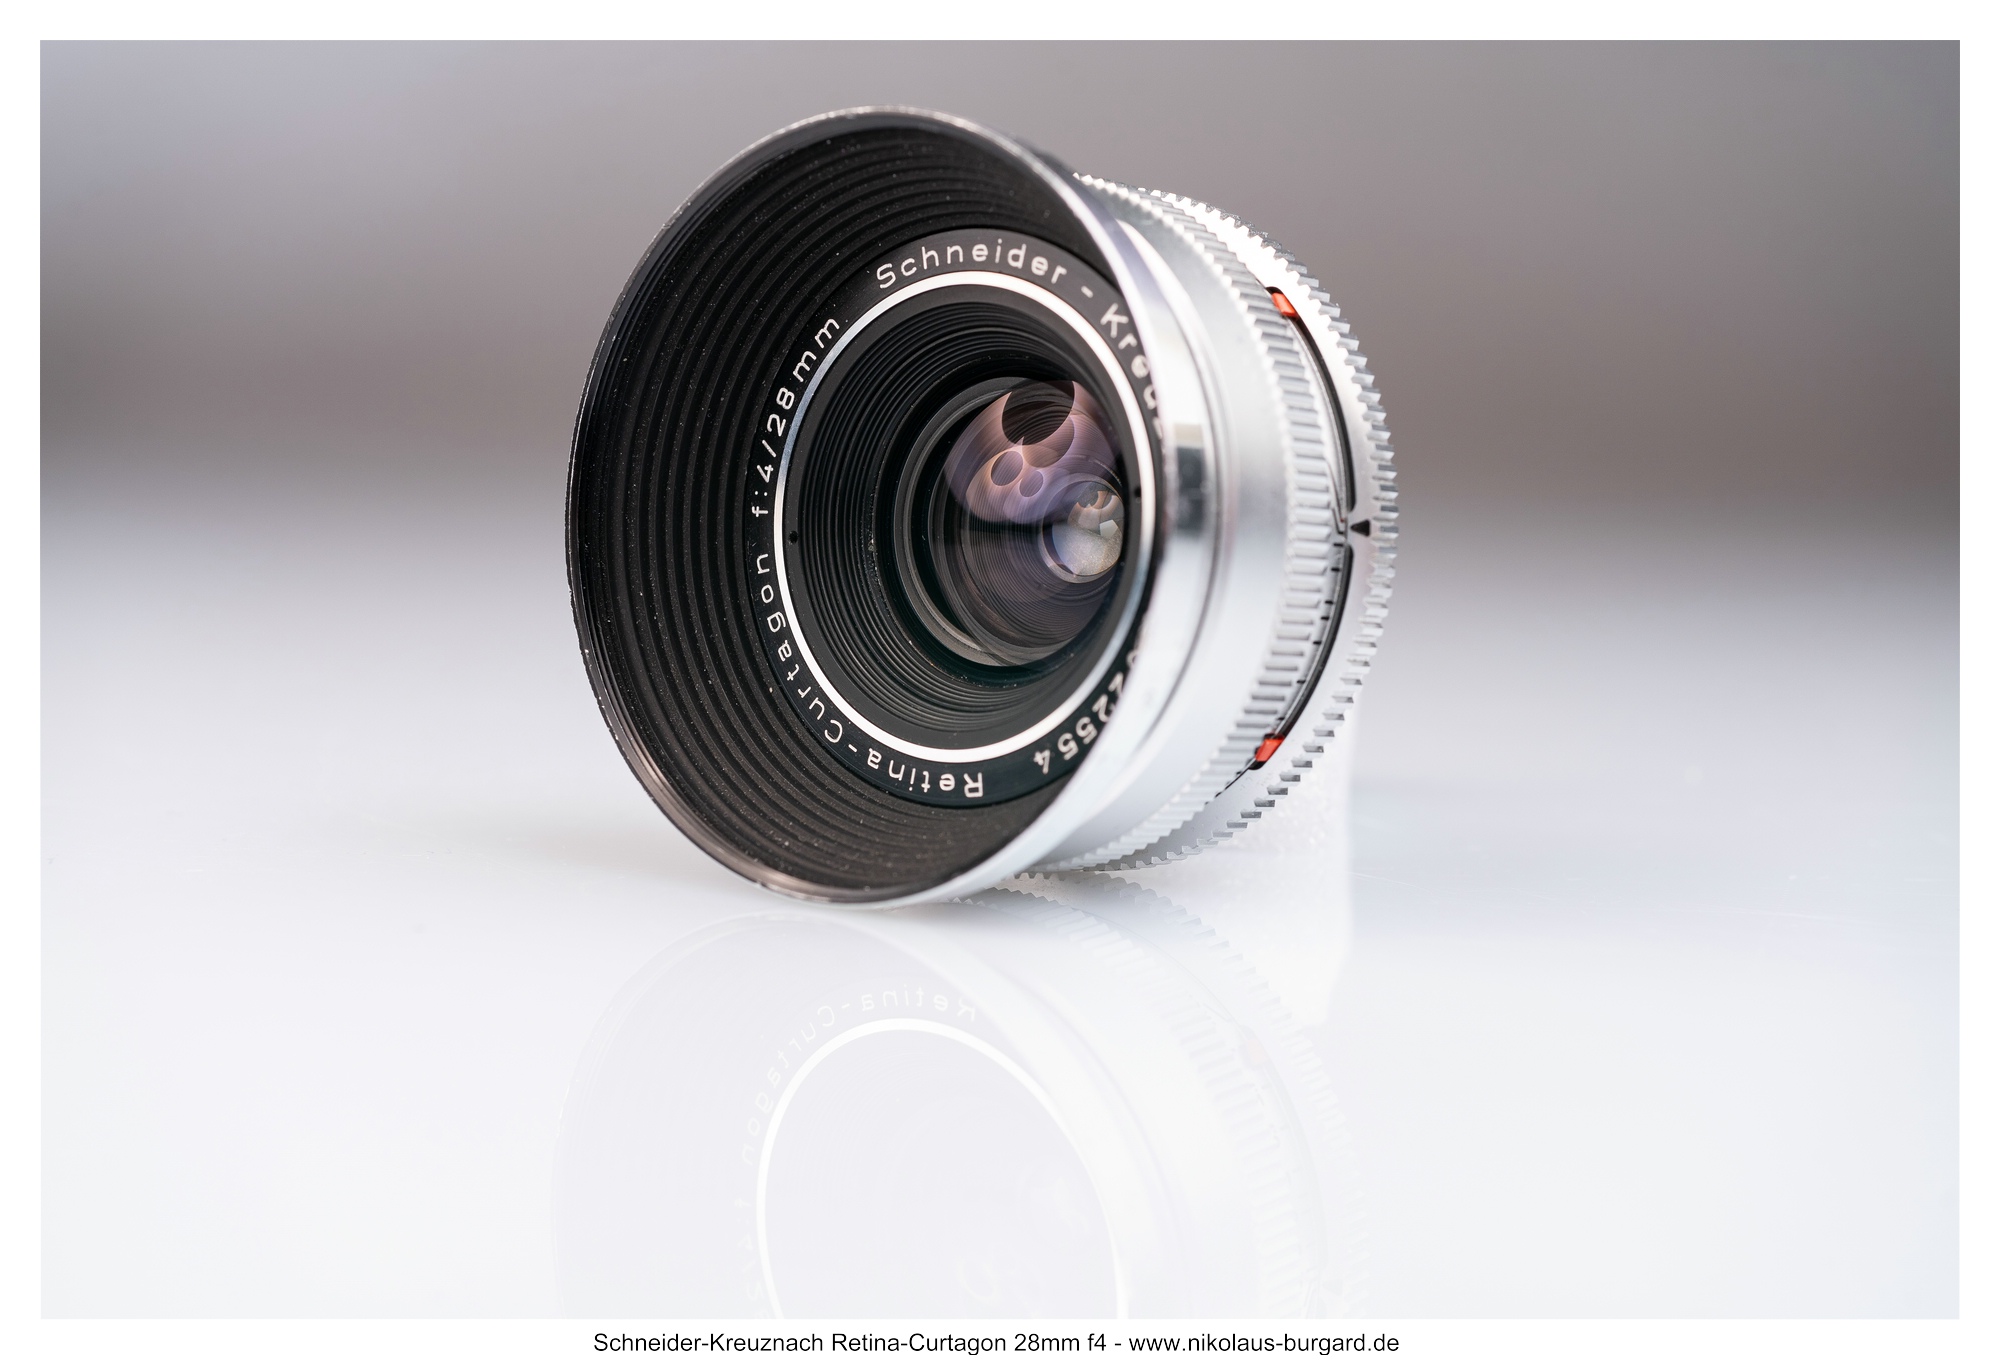
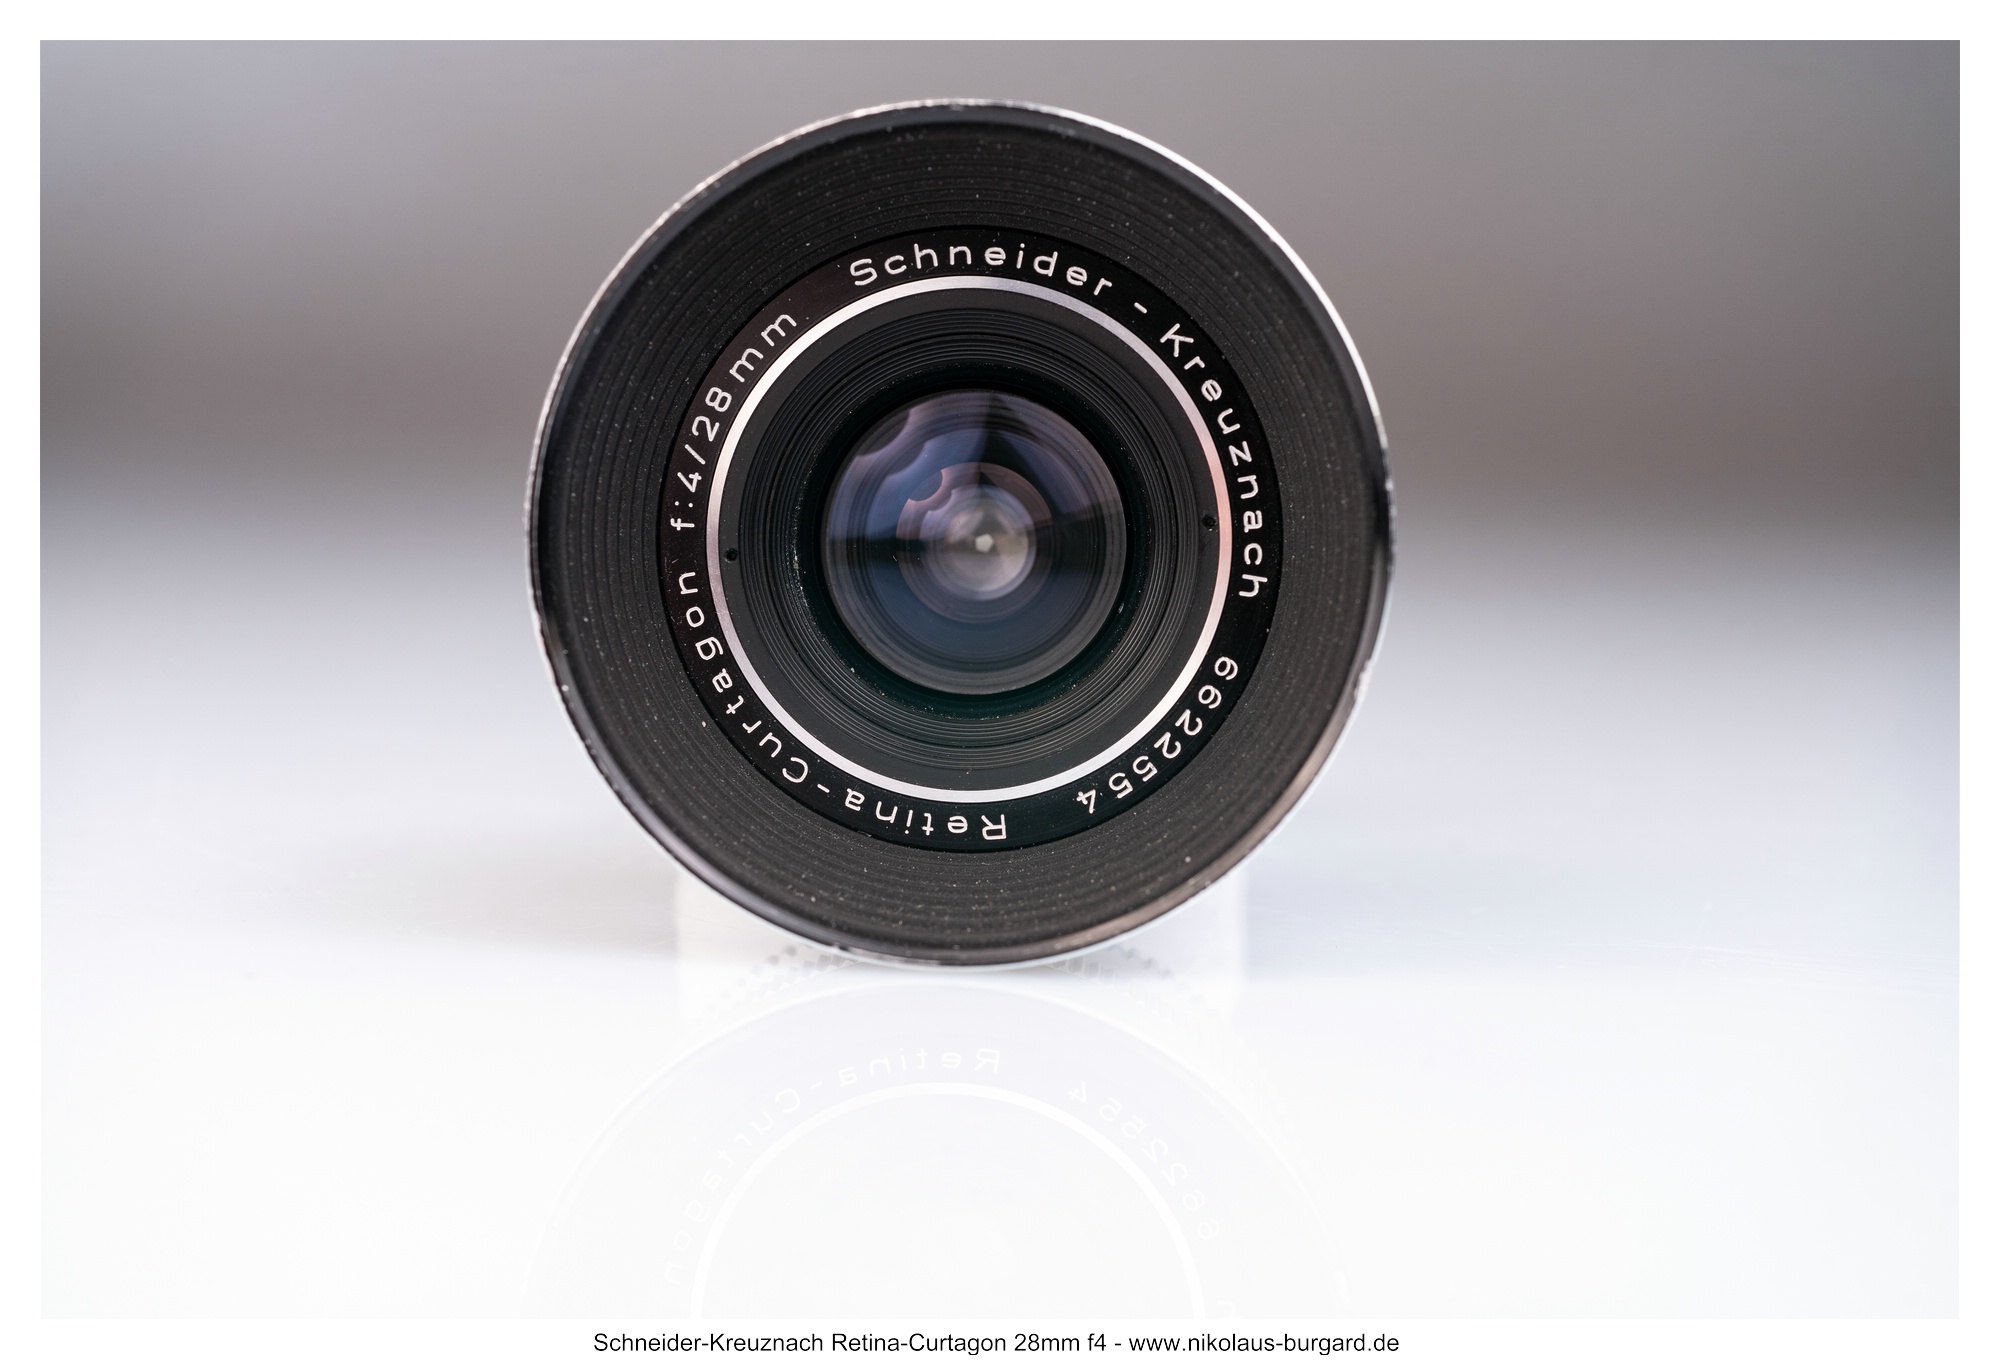
Und so sieht das schöne Objektiv aus:
Some technical specifications:
- Length: 41.6 mm
- Weight: 234 g
- Optical system: 7 elements in 6 groups
- Aperture: f/4 to f/22, aperture control via the camera or adapter, 5 aperture blades
- Minimum focusing distance: 90 cm
- Year of release: 1959
- Mount: DKL
And here’s what this beautiful lens looks like


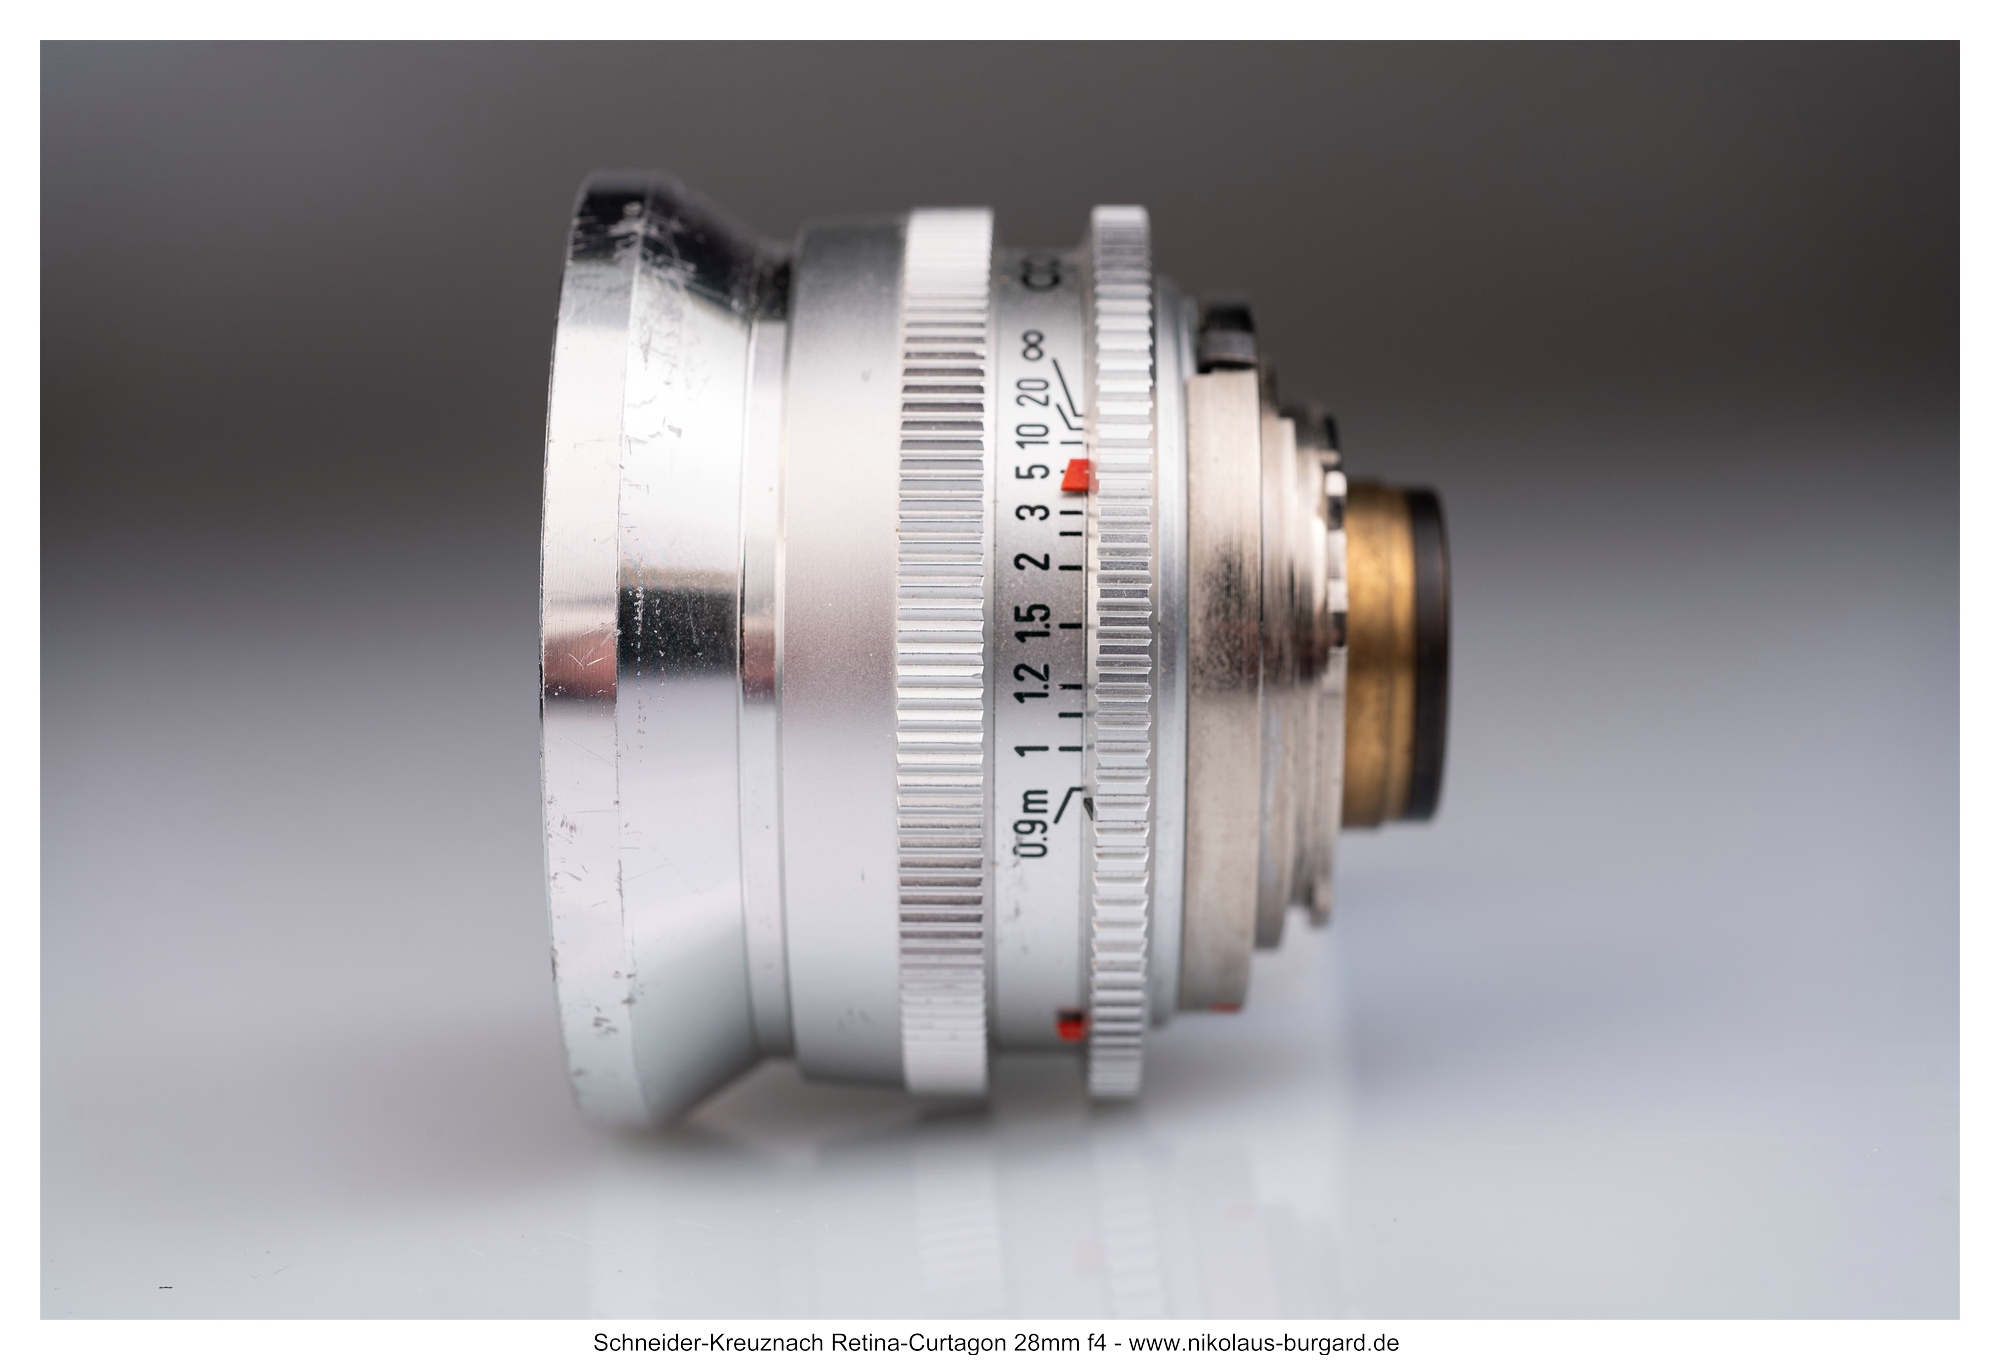
Das Objektiv hat eine normale Auszugsfokussierung.
Am Kürzesten ist es bei unendlich-Einstellung,
je weiter man in den Nahbereich fokussiert, desto länger wird es.
The lens has a normal extension focusing.
It is shortest at infinity setting,
the further you focus into the close range, the longer it becomes.


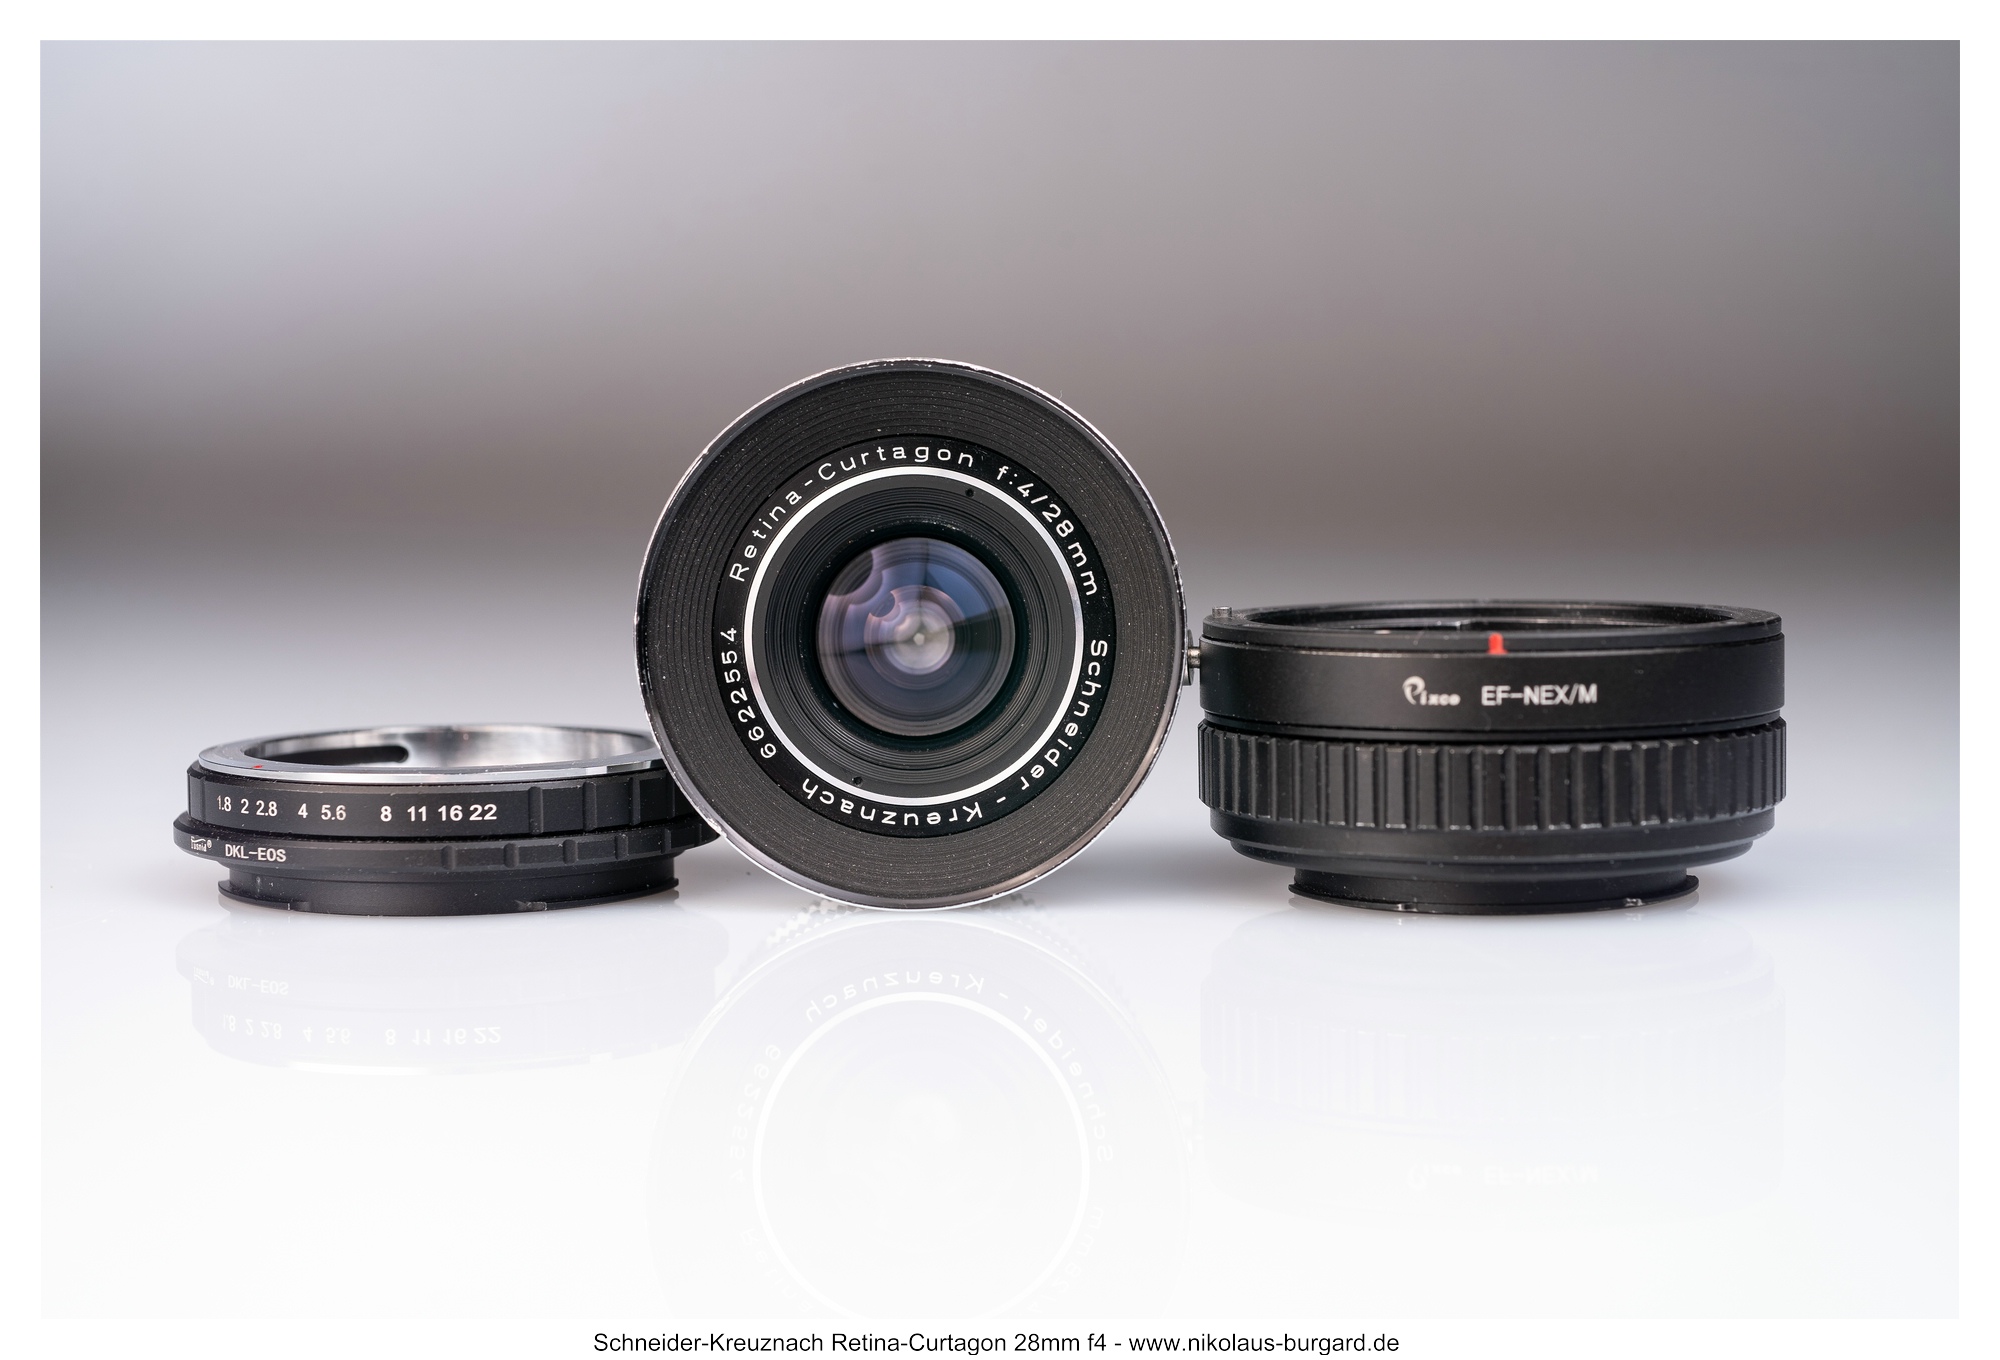
Die einfachste Methode der Adaption ist ein handelsüblicher Adapter DKL auf (in meinem Fall) Sony E-Mount. Diese Adapter sind für alle Systemkameraanschlüsse bei den großen Handelsplattformen zu bekommen.
Ich adaptiere die DKL-Objektive auf einem anderen Weg, der mir den zusätzlichen Einsatz eines Helicoid-Adapters ermöglicht.
Hierzu benötigt man als erstes Element einen DKL auf Canon EF-Adapterring.
Dieser enthält auch die Blendensteuerung.
Das zweite Element bildet ein Canon EF auf Sony E-Mount Helicoid-Adapter.
Diese sind ebenfalls bei den großen Handelsplattformen erhältlich, z.B. wie in meinem Fall von Pixco, aber auch von anderen Anbietern.
Diese Helicoid- bzw. Macro-focusing- Adapter bieten den Vorteil, von unendlich bis in einen deutlich erweiterten Nahbereich fokussieren zu können.
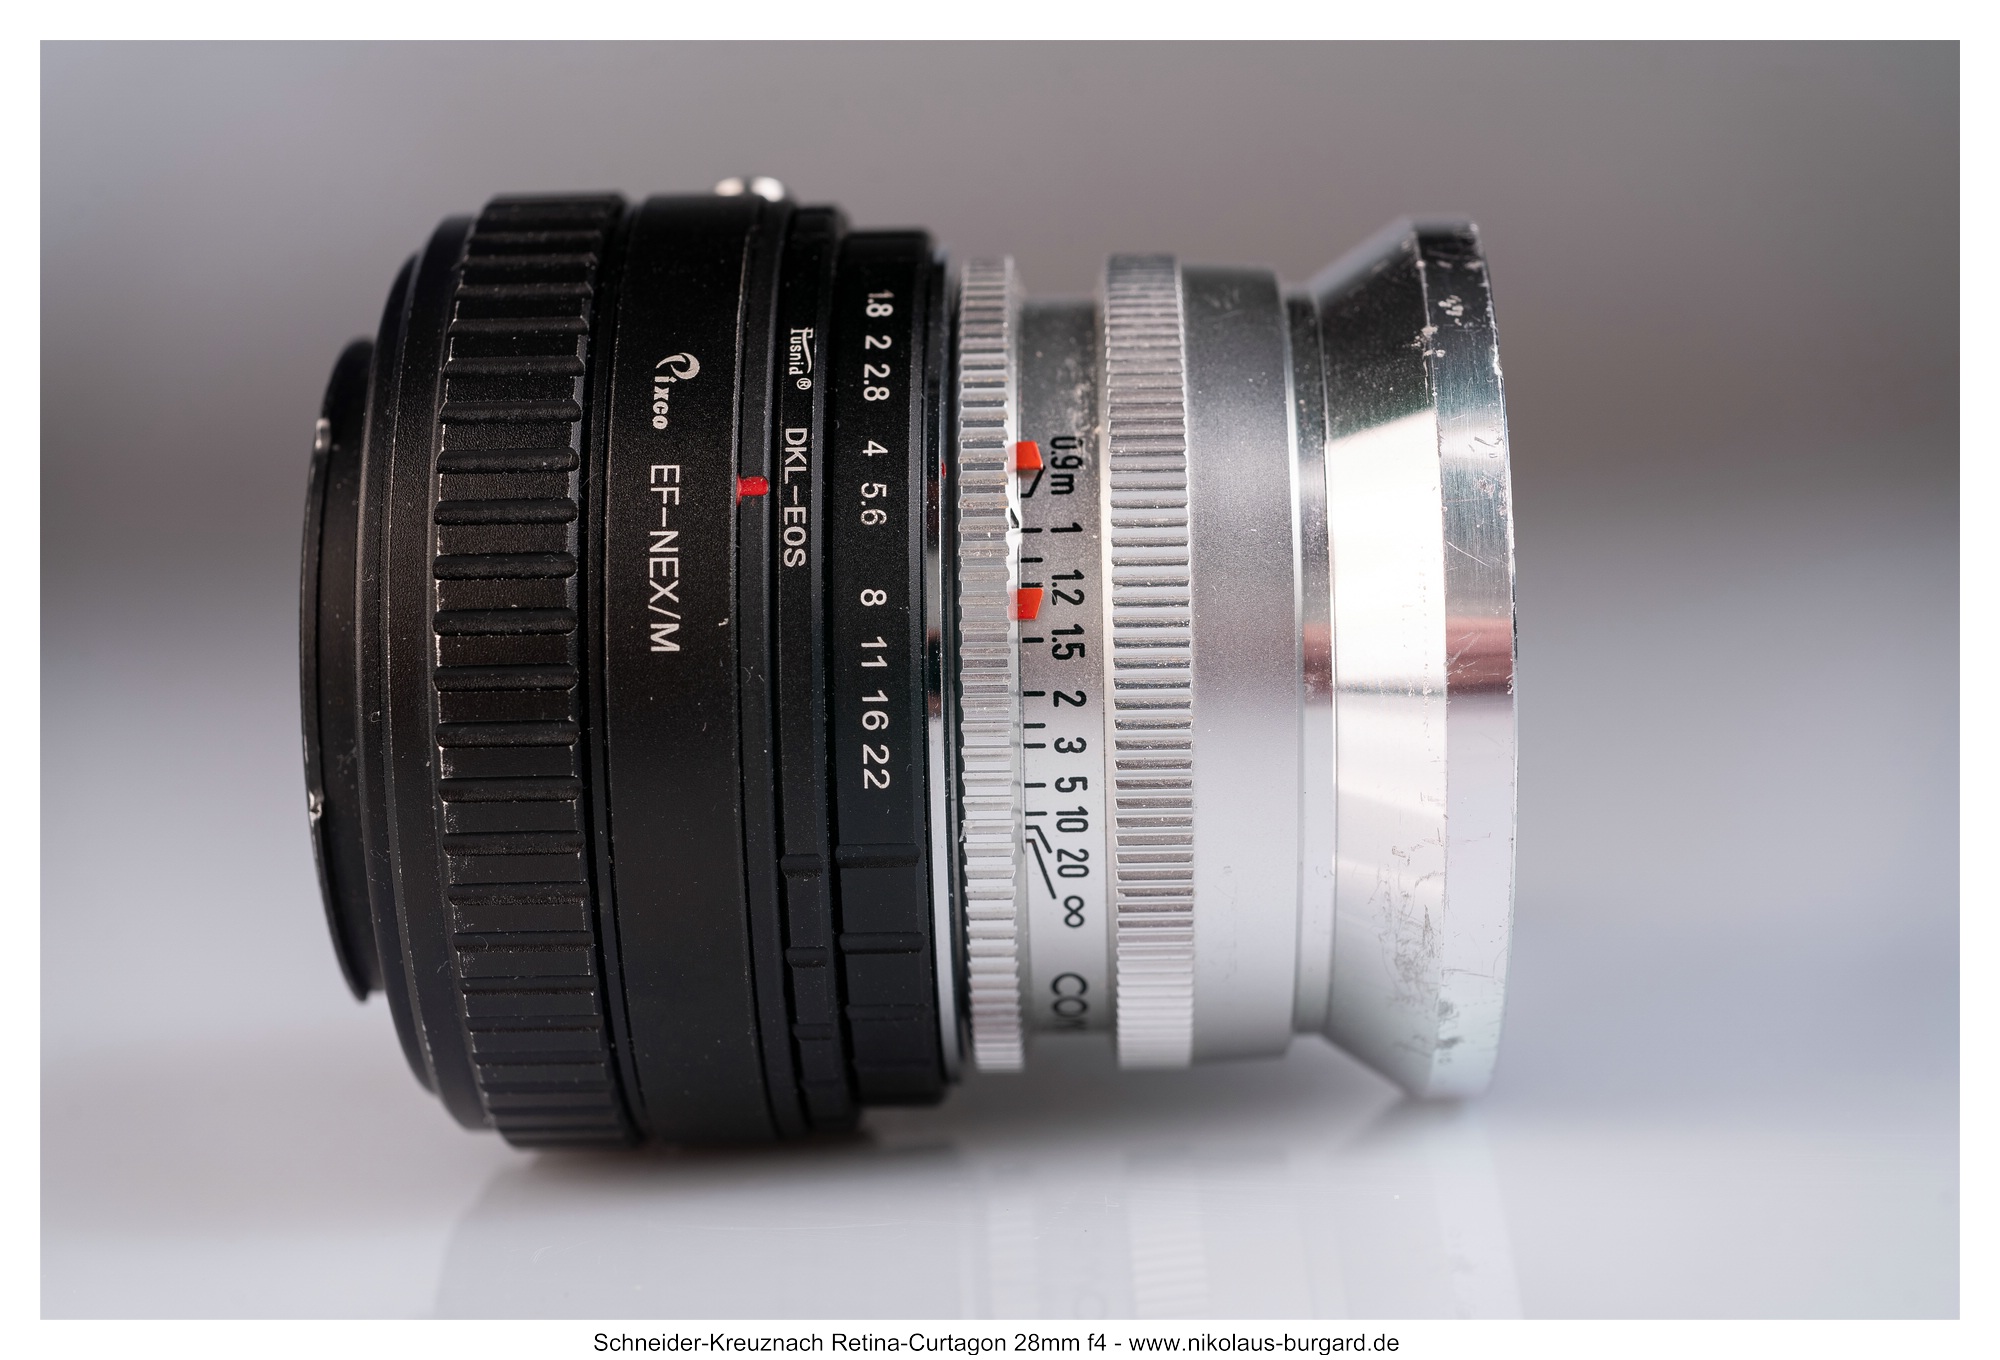
Ihr seht beide Adapter hier neben dem Objektiv und im zweiten Bild das Objektiv mit bereits montiertem DKL auf Canon EF-Adapterring neben dem Helicoid-Adapter, anschließend dann das fertige Adapter-Stacking zur Montage an die Kamera:
The simplest method of adaptation is a standard DKL to Sony E-mount adapter (in my case). These adapters are available for all mirrorless camera mounts on major online marketplaces.
I adapt the DKL lenses using a different method that allows me to use a helicoid adapter as well.
For this, the first element you need is a DKL-to-Canon EF adapter ring.
This also includes the aperture control.
The second element is a Canon EF-to-Sony E-mount helicoid adapter.
These are also available on major retail platforms, e.g., as in my case from Pixco, but also from other suppliers.
These helicoid- or macro-focusing adapters offer the advantage of being able to focus from infinity down to a significantly extended close-up range.
You can see both adapters here next to the lens, and in the second image, the lens with the DKL to Canon EF adapter ring already mounted next to the helicoid adapter, followed by the finished adapter stack ready for mounting on the camera:

Und so sieht das Objektiv fertig adaptiert an eine der Testkameras aus:
And this is what the lens looks like when fully adapted to one of the test cameras:
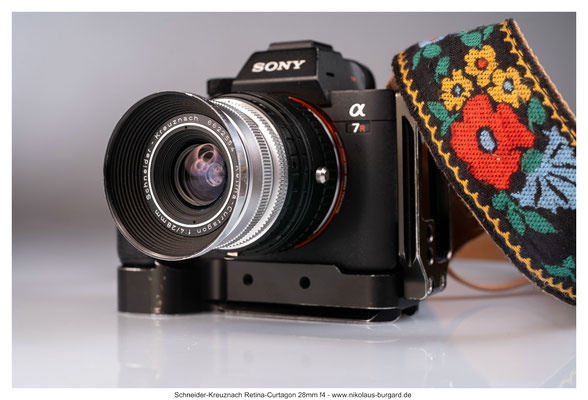

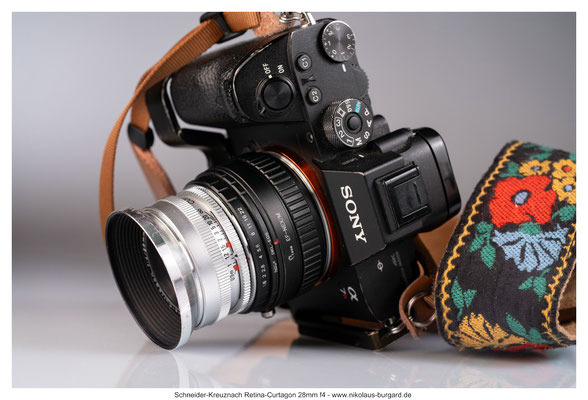
Die Kombination aus Objektiv, Adapter und Kamera ist in der Länge vergleichbar mit den Weitwinkelobjektiven der anderen etablierten Hersteller.
Das Objektiv selbst hat die über 6 Jahrzehnte sehr gut überdauert und sieht bis auf ein paar Kratzspuren an der integrierten Gegenlichtblende noch sehr gut aus, auch die Fokussierung läuft noch seidenweich.
Die Linsen sind Kratzerfrei und es gibt auch keine Beläge auf den inneren Linsen.
The combination of lens, adapter, and camera is comparable in length to the wide-angle lenses from other established manufacturers.
The lens itself has held up very well over the past six decades and still looks great, aside from a few scratches on the built-in lens hood; the focusing mechanism also still operates smoothly.
The lenses are scratch-free, and there is no coating on the inner lenses.
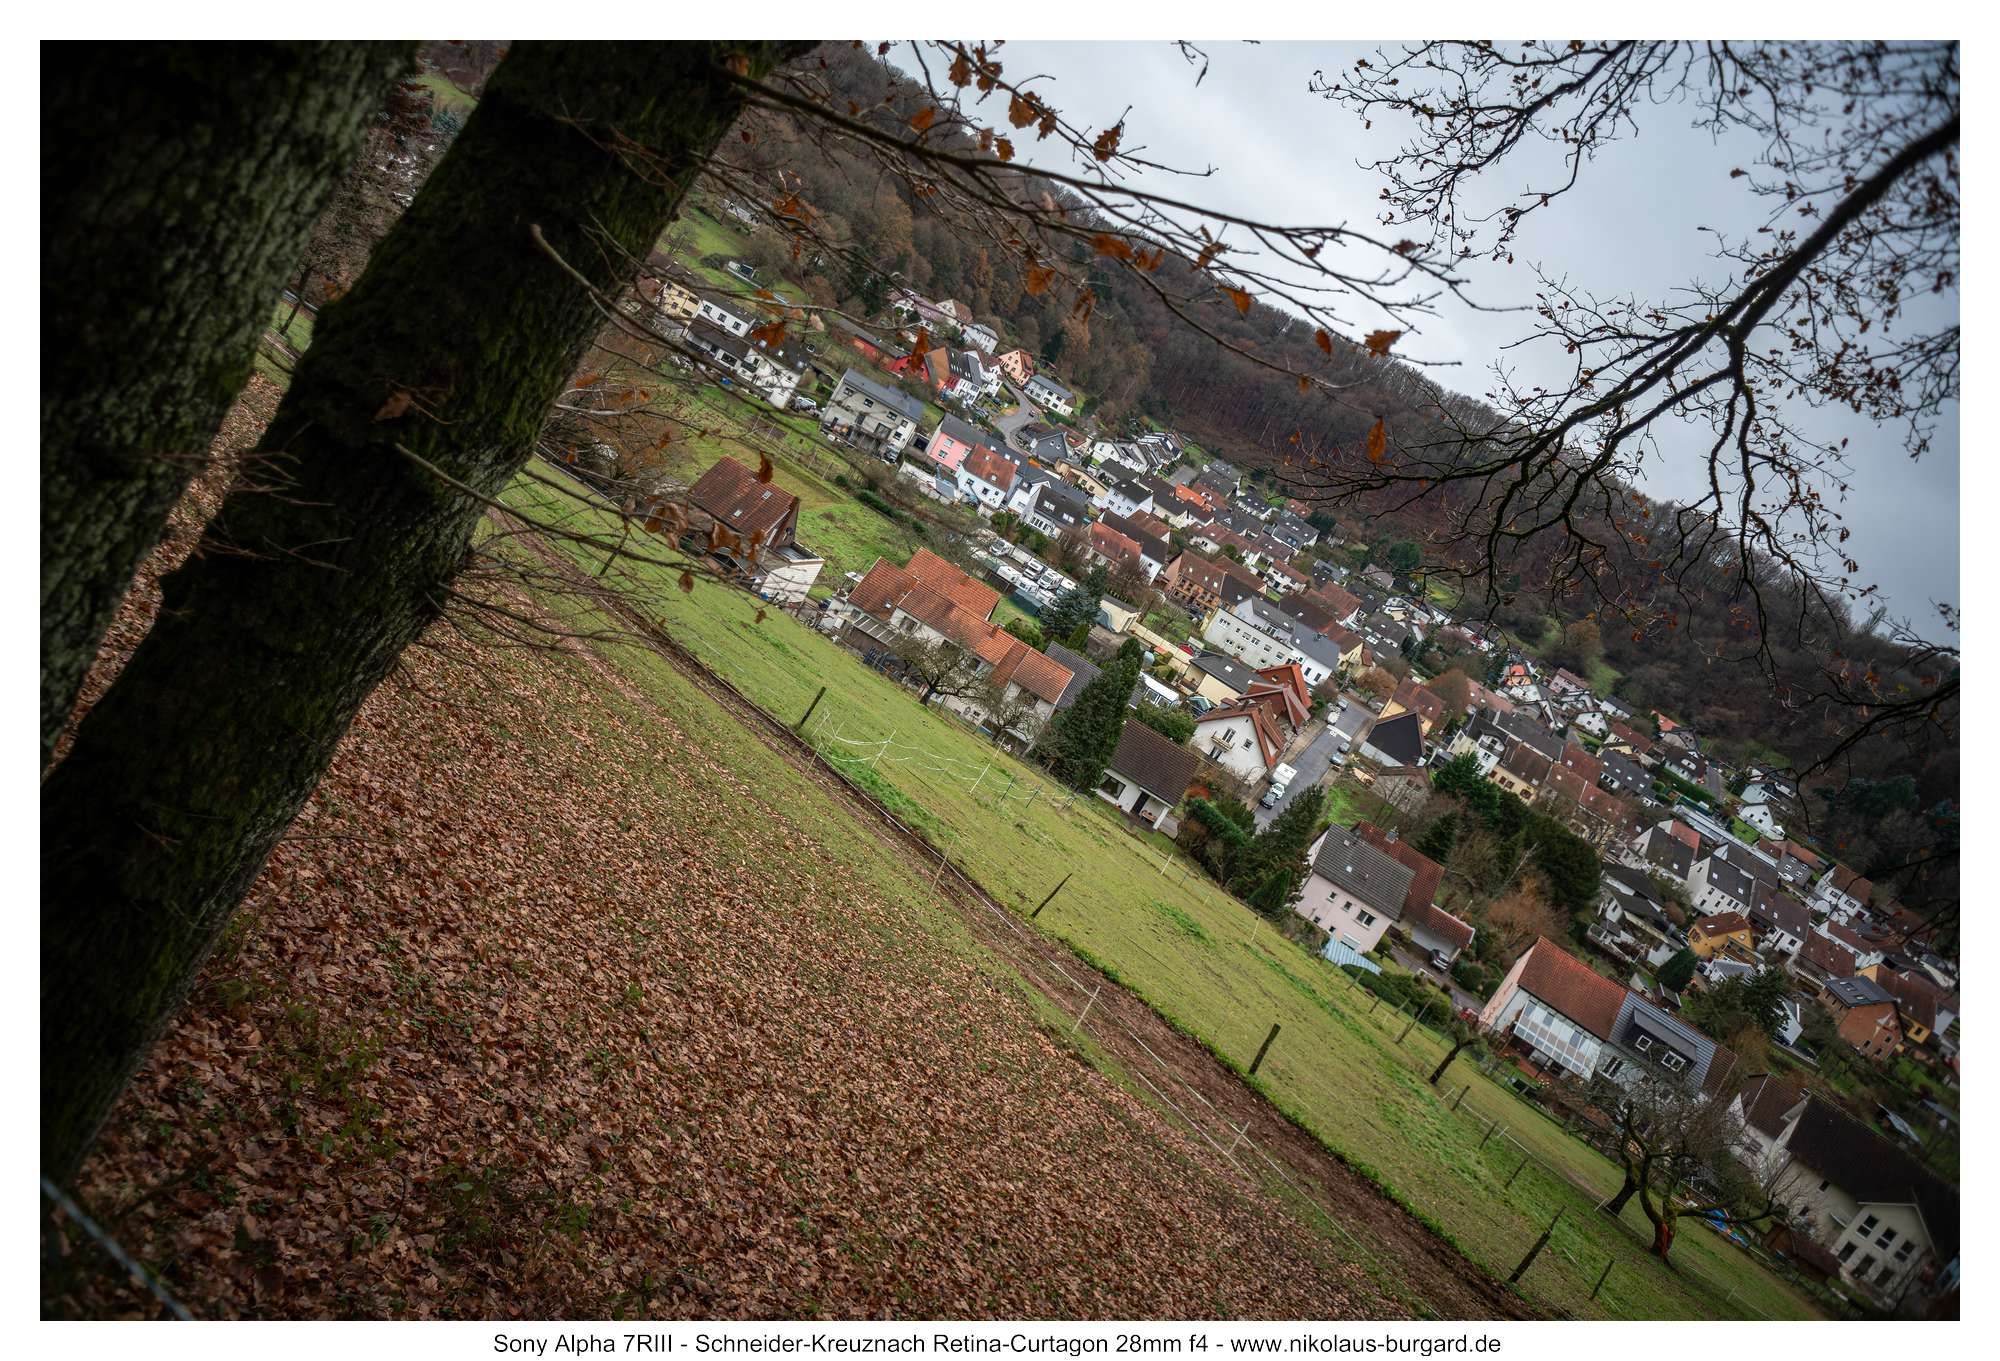
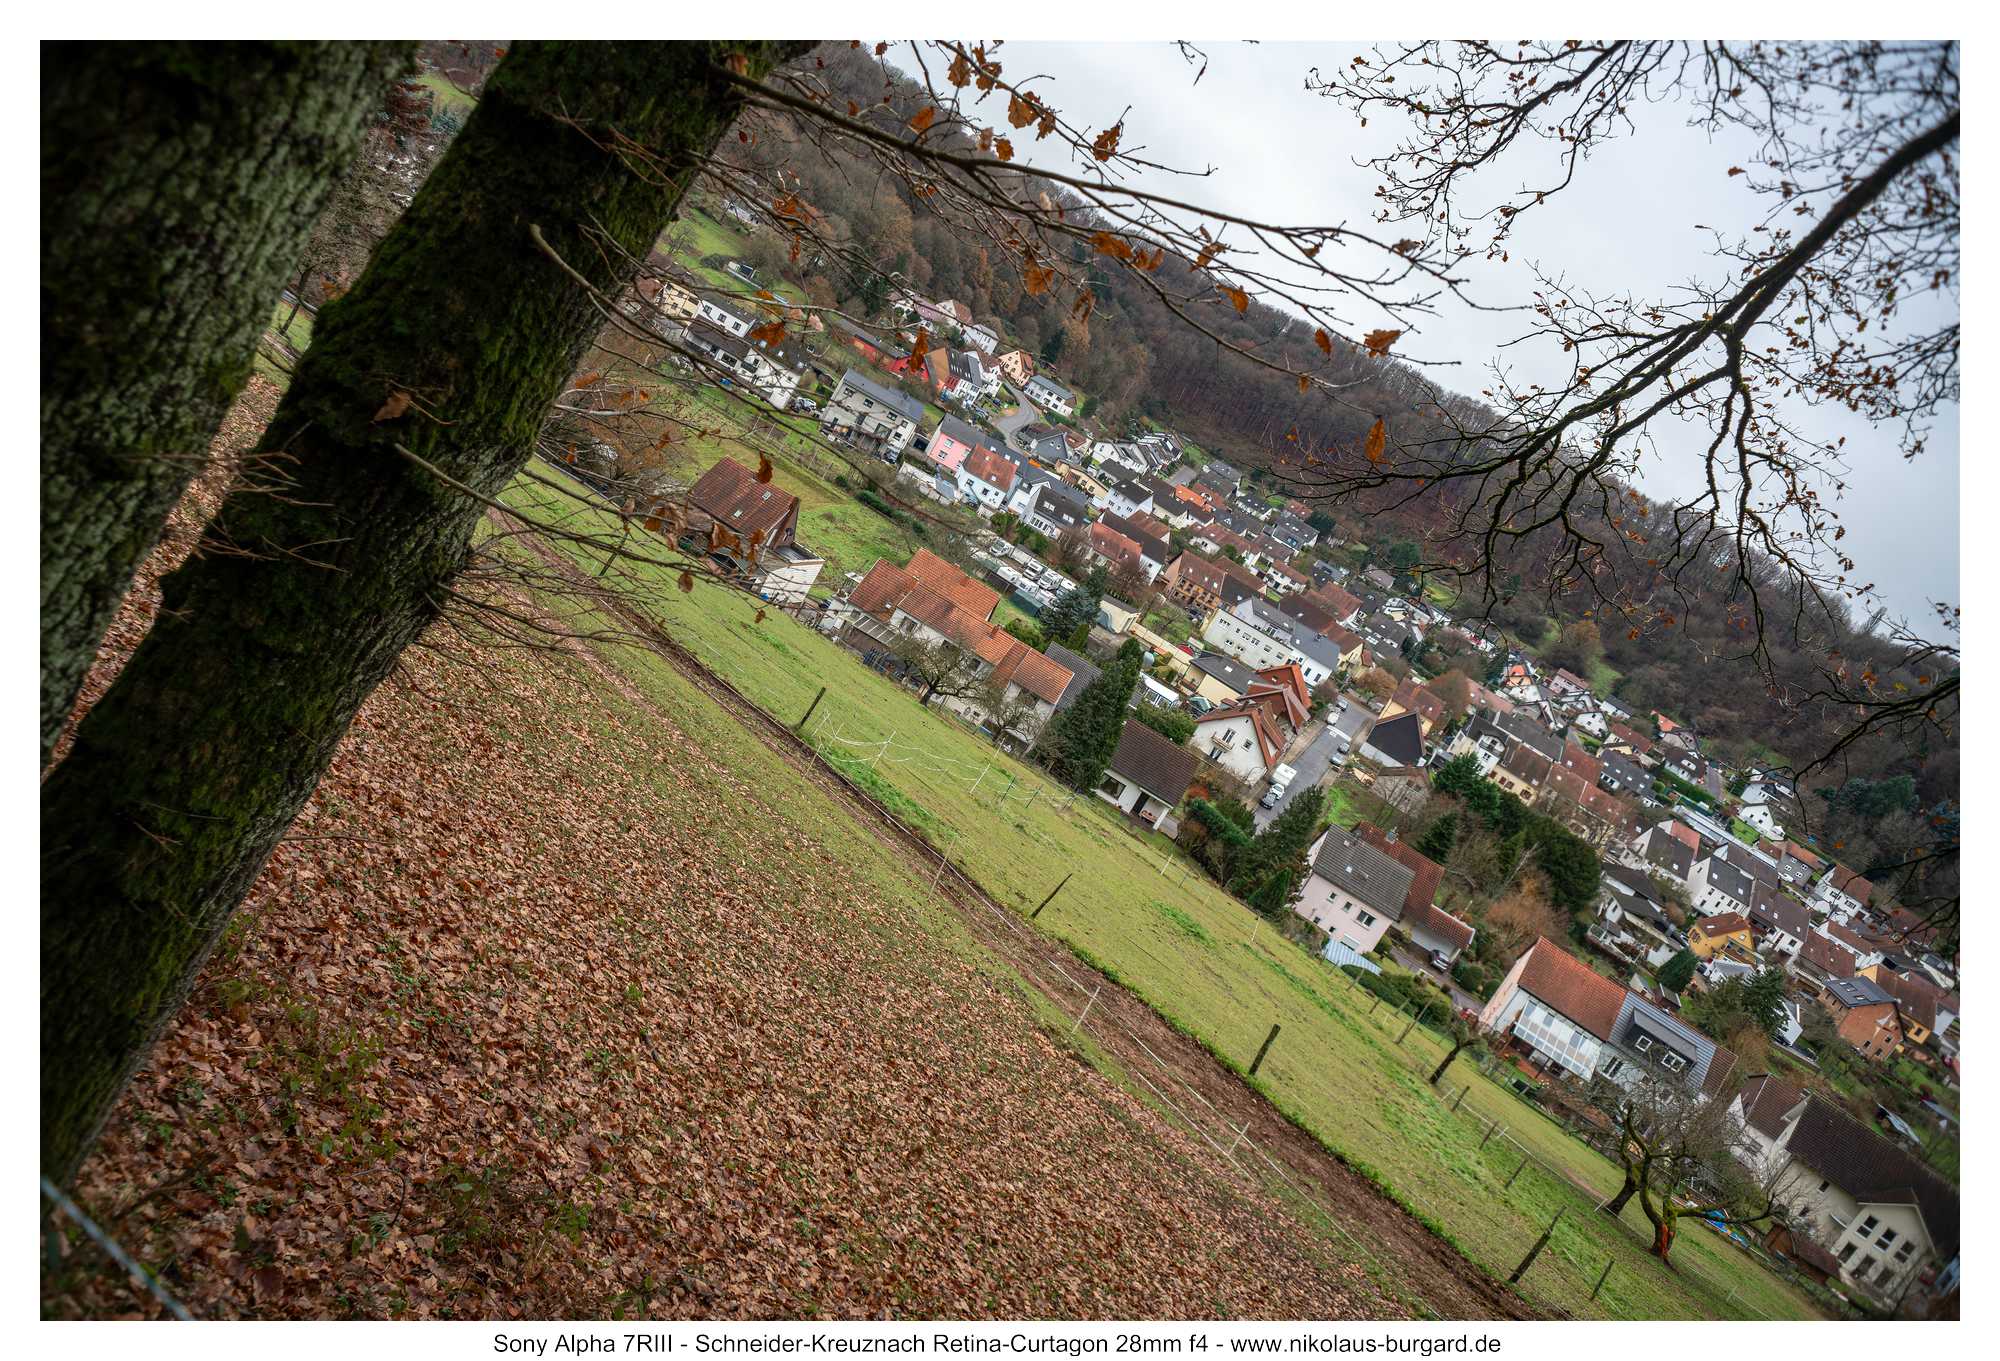
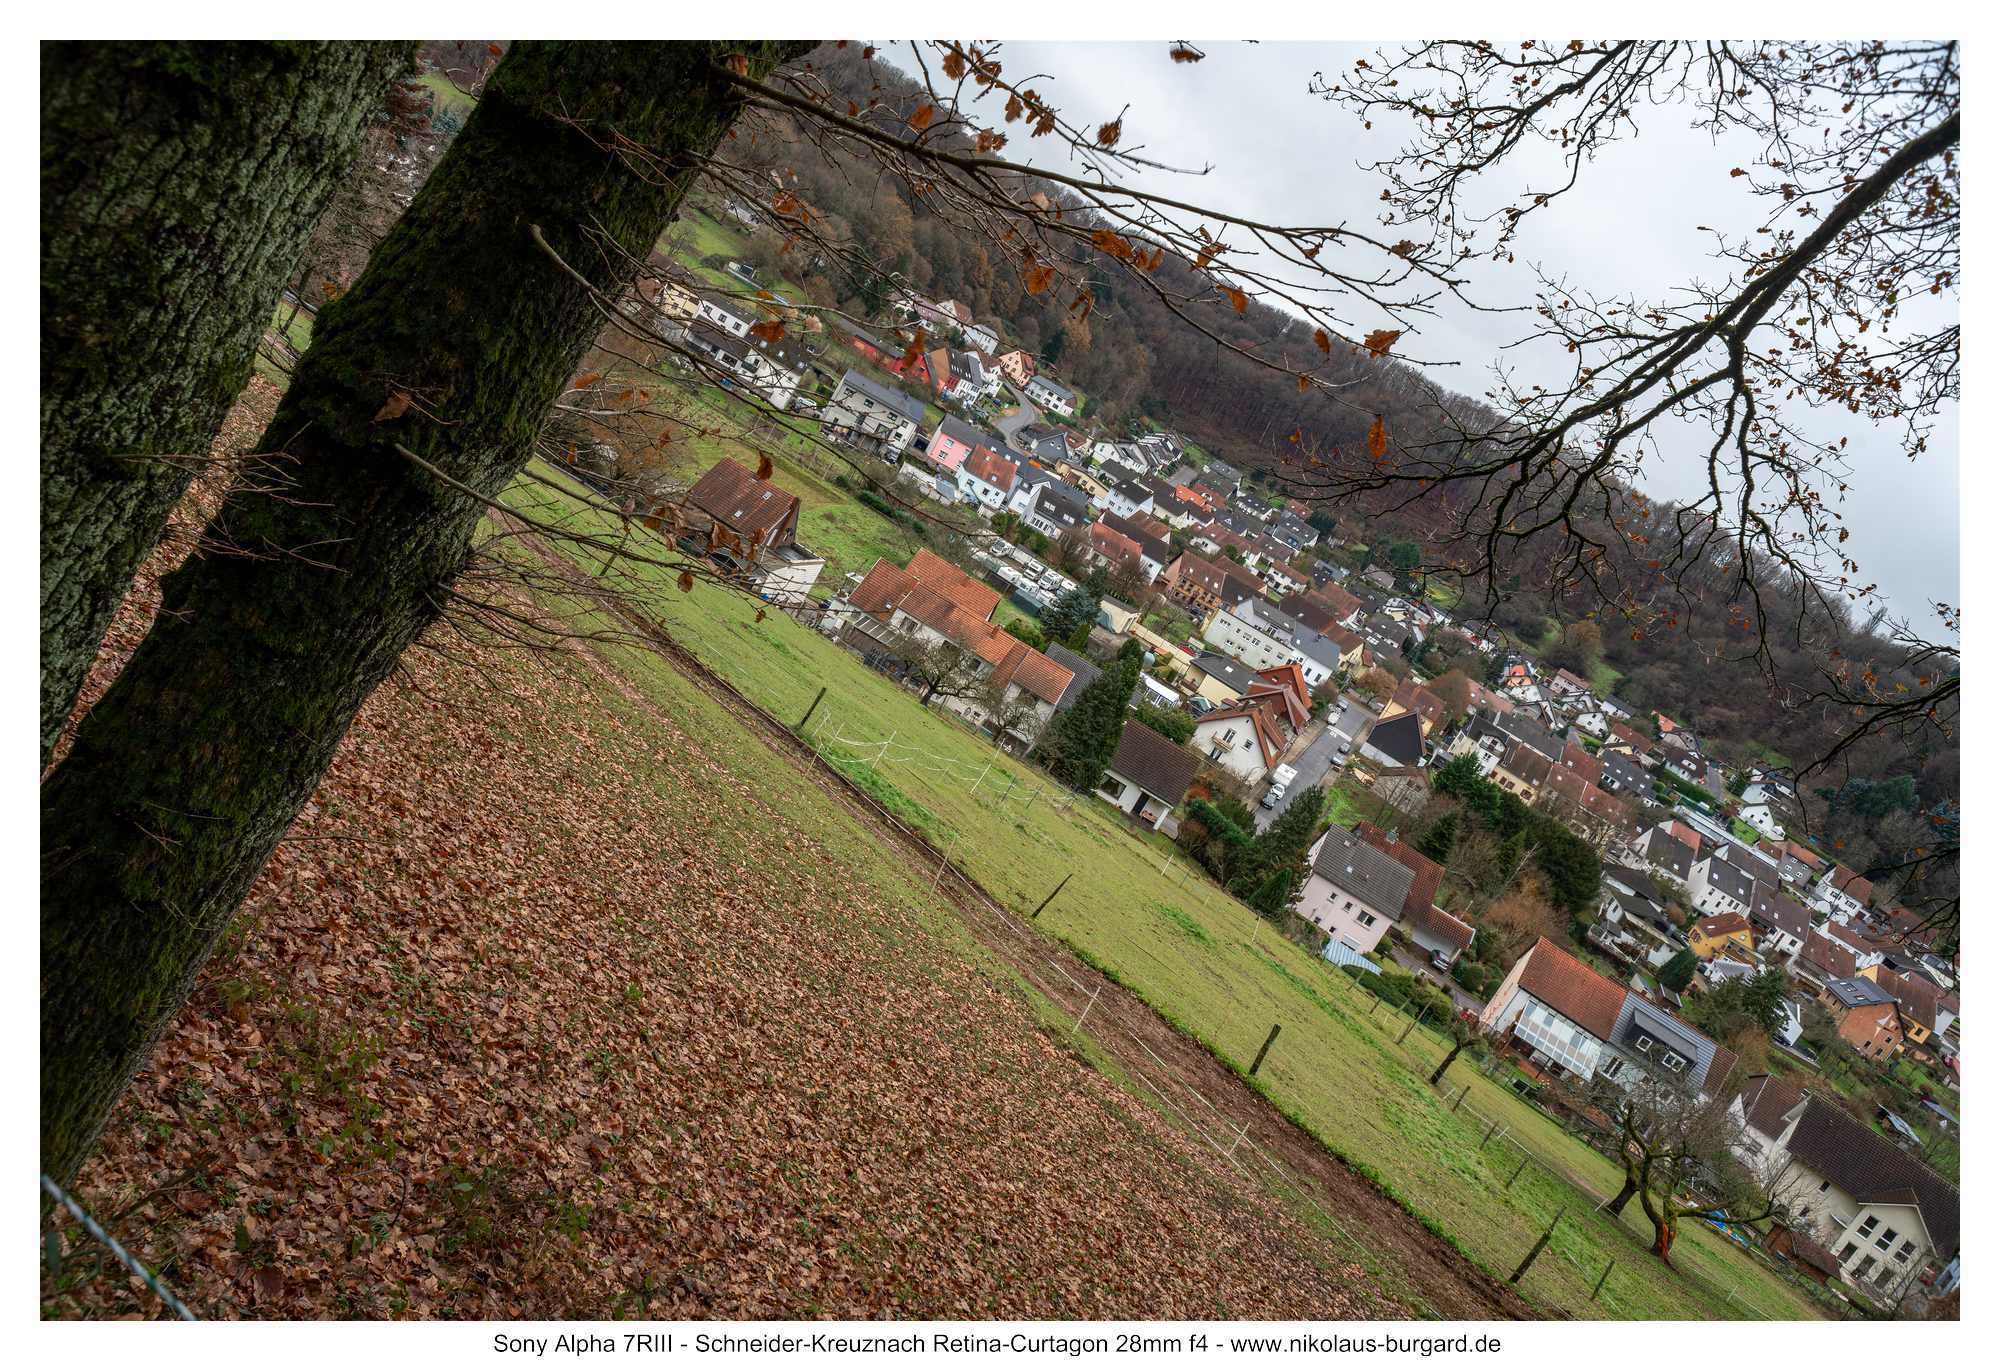
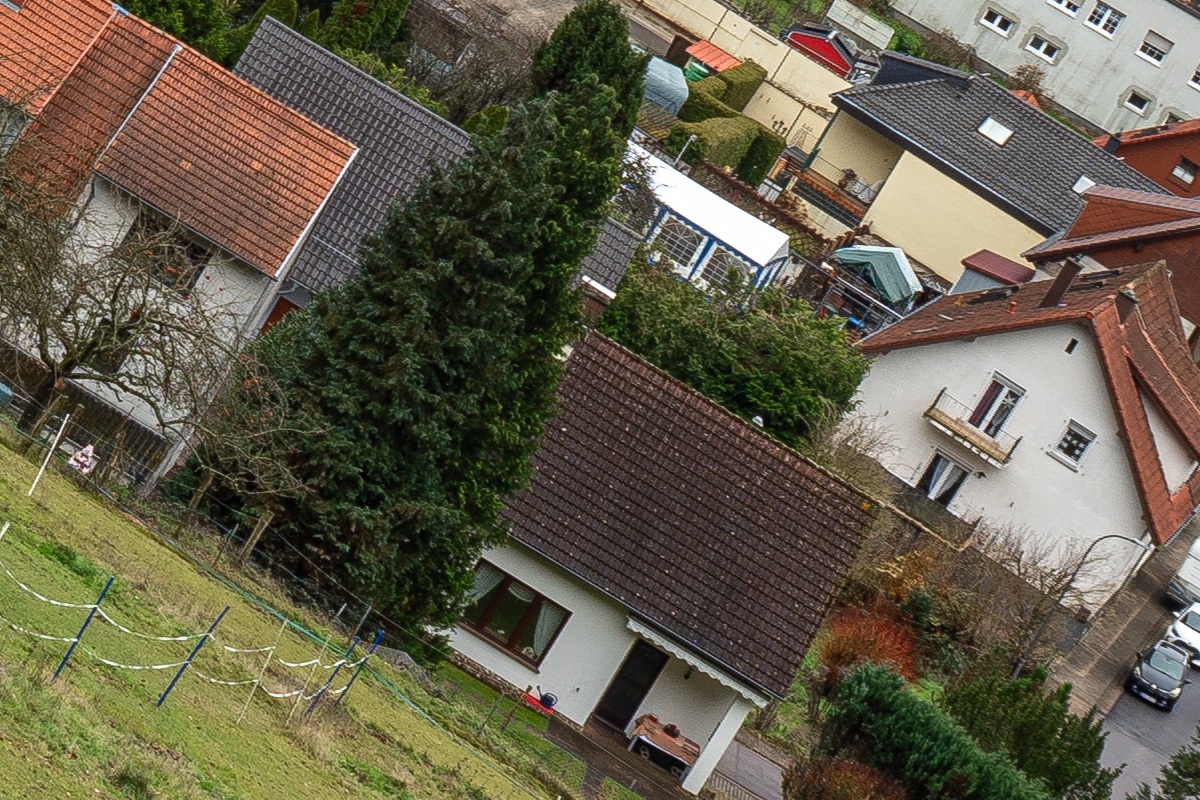
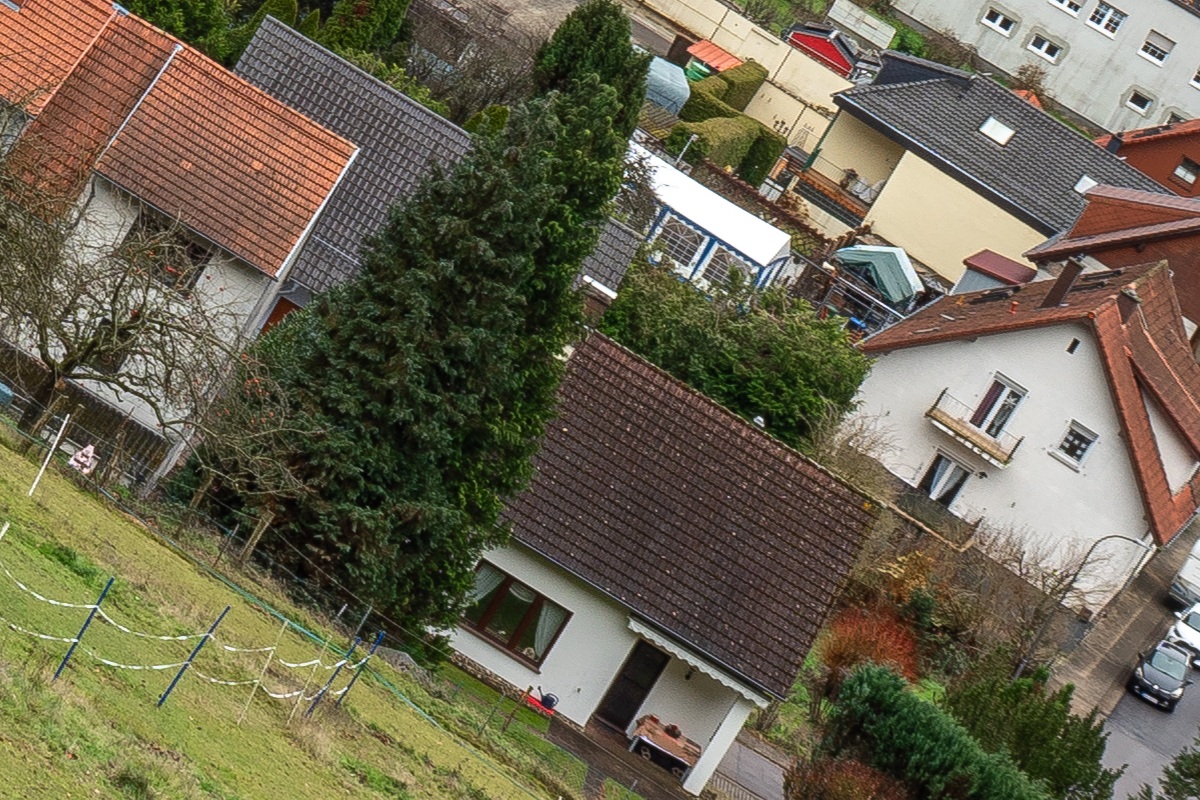
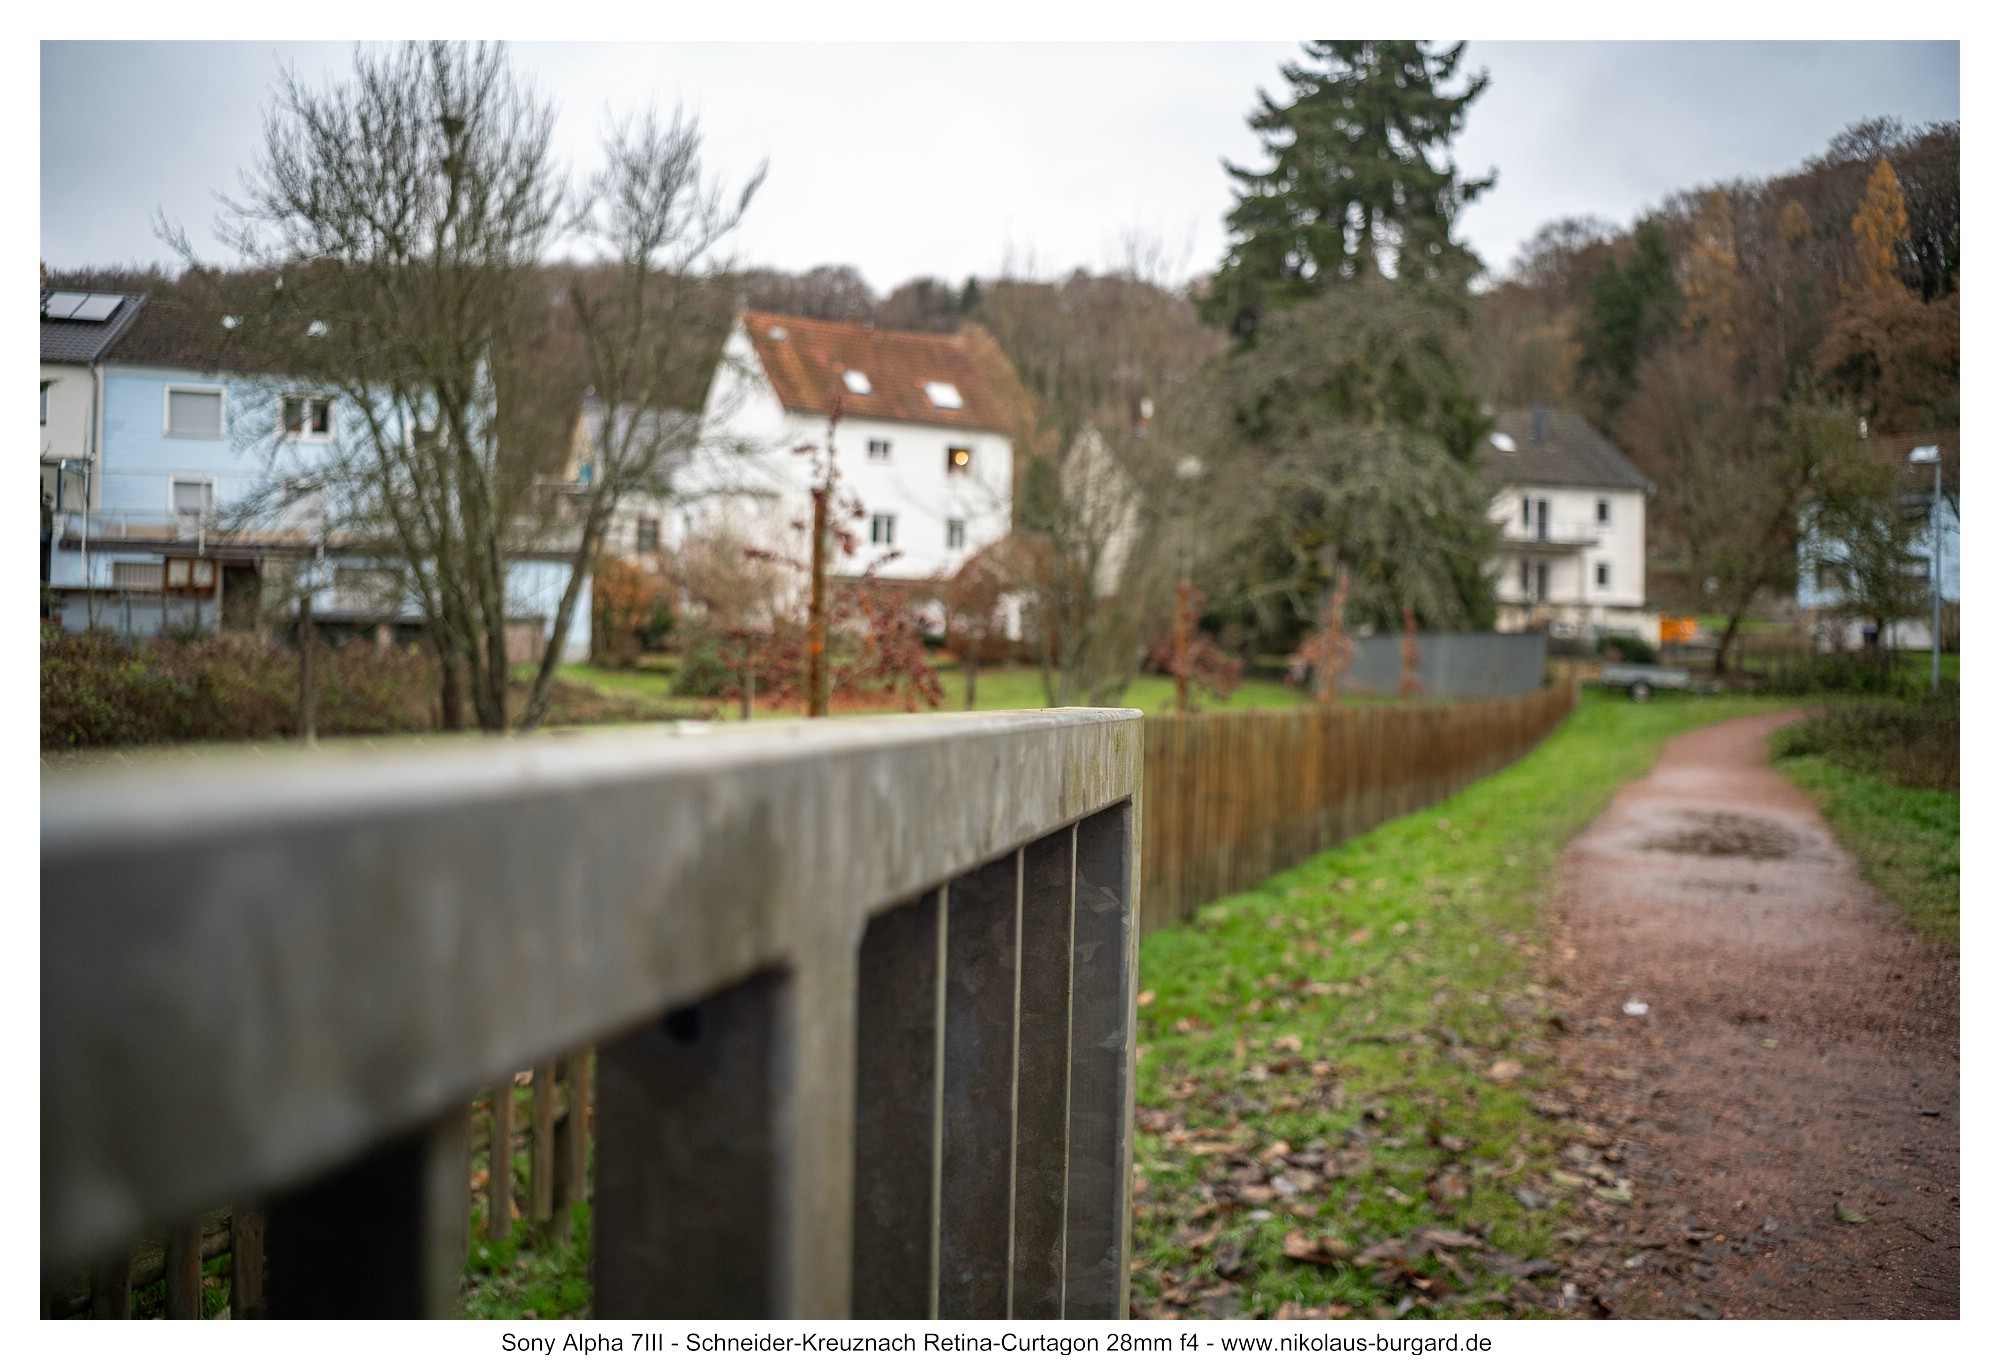
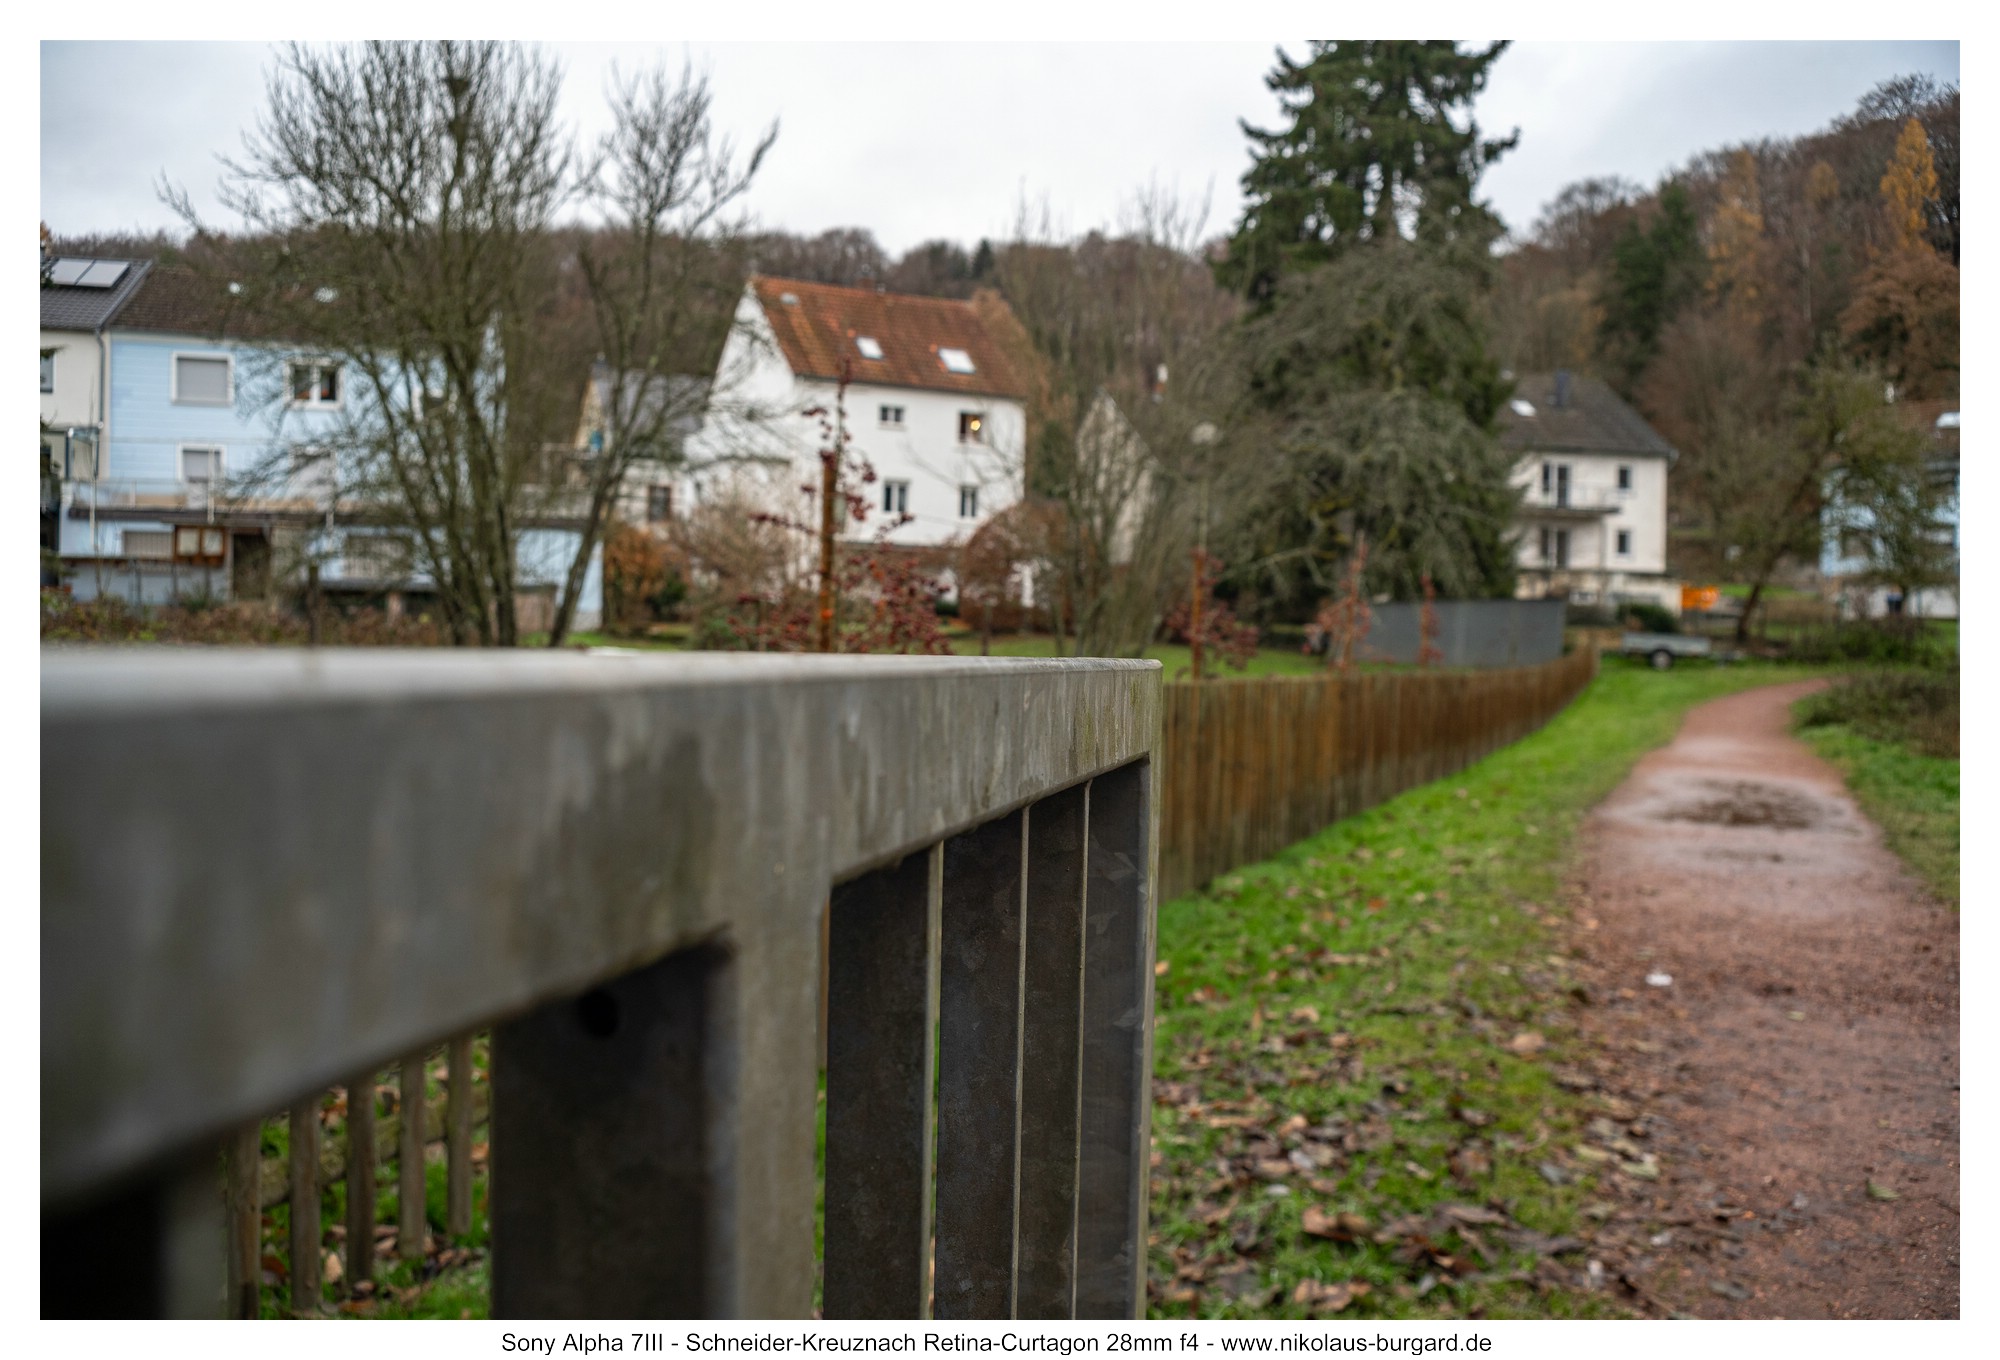
Bildschärfe / Sharpness
Ich habe an der Sony Alpha 7RIII (42 MP) eine Bildreihe zur Bewertung der Schärfe für euch angefertigt, bei der sowohl das Bildzentrum als auch die Bildecke in einer Schärfeebene liegen.
Fokuspunkt war das Dach des Hauses links der nach oben führenden Straße, das Haus in der rechten unteren Bildecke liegt auf der gleichen Höhe.
Die Blendenreihe zeigt die Werte f4 - f5.6 - f8 - f11
I took a series of images on the Sony Alpha 7RIII (42 MP) to evaluate the sharpness for you, in which both the center of the image and the corner of the image
are in the same plane of focus.
The focal point was the roof of the house to the left of the road leading up, the house in the bottom right corner of the image is at the same
height.
The aperture series shows the values f4 - f5.6 - f8 - f11


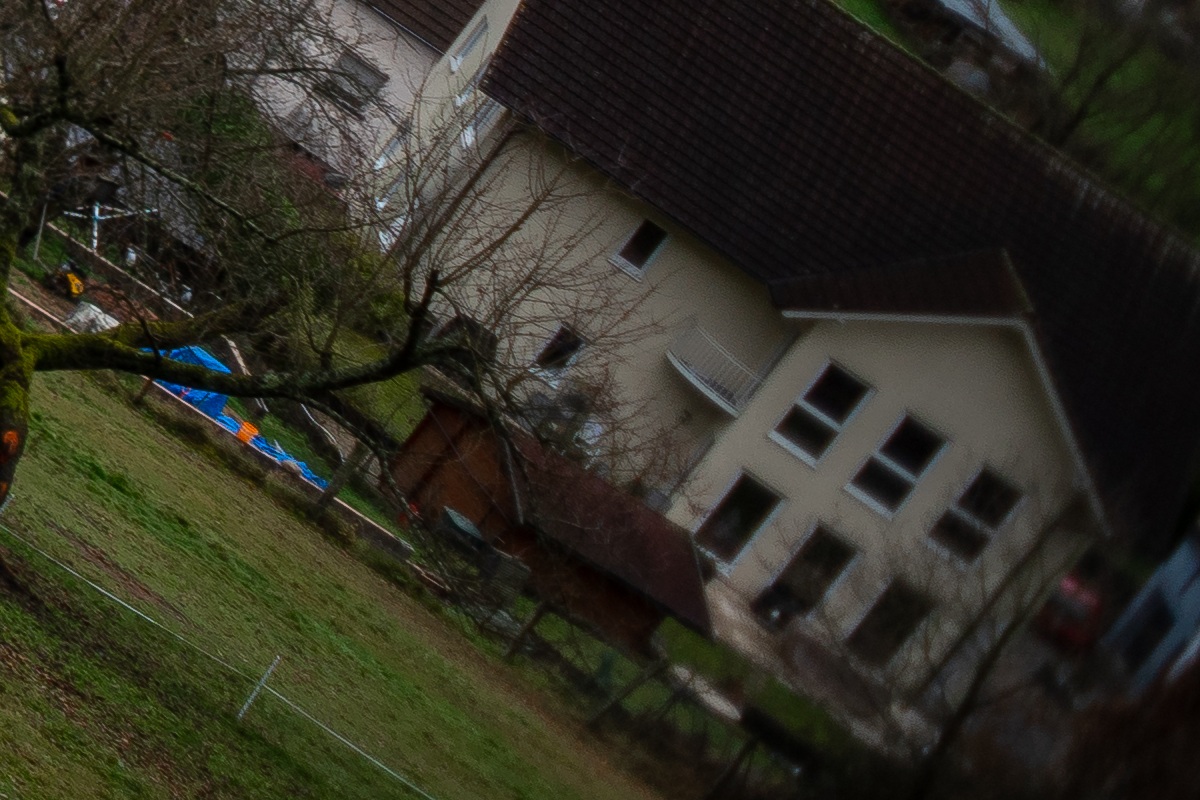
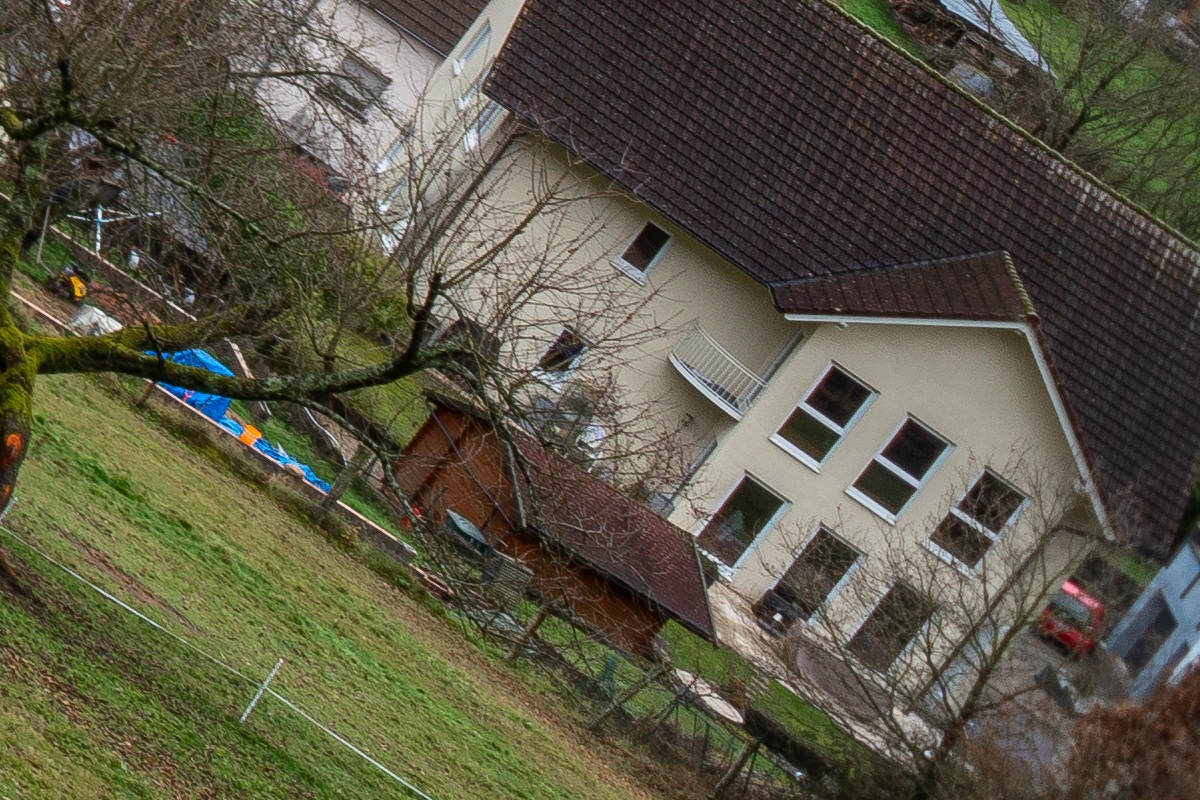
Die vom Objektiv verursachte Vignettierung ist bei Offenblende f4 sehr stark.
Selbst bei f5.6 ist sie noch sehr präsent, erst ab f8 wird sie etwas geringer. Man muss bis f11 abblenden, um sie nicht mehr wahrzunehmen.
Als nächstes folgen 100%-Vergrößerungen aus der Bildmitte vom Fokuspunkt,
in der gleichen Reihenfolge wie oben:
The vignetting caused by the lens is very pronounced at the maximum aperture of f/4.
It is still very noticeable even at f/5.6; it only becomes slightly less pronounced starting at f/8. You have to stop down to f/11 to no longer notice it.
Next are 100% enlargements from the center of the image at the focus point,
in the same order as above:


In der Bildmitte ist die Schärfe bei Offenblende f4 recht gut. Die Kontraste sind noch stark steigerungsfähig.
Bei f5.6 steigert sich die Schärfe leicht und die Kontraste machen einen deutlicheren Schritt.
Bei f8 und f11 sind die Bildschärfe und auch die Kontrastleistung in der Bildmitte sehr gut.
Auch aus der Bildecke habe ich 100%-Vergrößerungen angefertigt:
At f/4, sharpness in the center of the frame is quite good. Contrast still has significant room for improvement.
At f/5.6, sharpness improves slightly, and contrast takes a noticeable leap forward.
At f8 and f11, both image sharpness and contrast performance in the center of the image are very good.
I also created 100% enlargements from the corners of the image:


In der Bildecke ist die Schärfeleistung bei f4 nicht der Rede wert. Die Vignette dunkelt das Bild noch extrem ab und Astigmatismus gepaart mit der sphärischen Aberration erzeugt einen starken Schleier über der Ecke.
Bei f5.6 steigert sich alles nur minimal, wir haben "es ist etwas zu erkennen"- Niveau erreicht und die Vignette ist sichtbar verringert.
Bei f8 gibt es einen sichtbaren Schritt was die Grundschärfe angeht, leider erreicht diese noch nicht die äußerste Ecke. Auch die Kontrastleistung ist nun ordentlich und die Vignette noch einmal gemildert.
Bei f11 ist die Leistung bis fast in die äußerste Ecke wirklich gut - die allerletzten Pixel verbleiben etwas weich.
Bei allen Vergrößerungen aus der Bildecke sieht man sehr feine Spuren von lateralen chromatischen Aberrationen, am ehesten an den Fensterrahmen.
Für ein sehr altes 28mm-Weitwinkel-Objektiv schlägt sich das Retina-Curtagon im Schärfekapitel (durchaus überraschend!) wirklich rüstig.
Im Bildzentrum ist die Schärfe schon ab Offenblende gut, ab f5.6 gibt es nichts mehr zu klagen.
Randscharf ist es ab f8.
Die Bildecken braucht f8-f11, wenn dort bildwichtige Elemente liegen.
In der fotografischen Praxis habe ich bei allen auf f8 oder f11 abgeblendeten Bildern eine sehr gute Schärfe über das ganze Bild erhalten, wie man an den vielen Bildbeispielen gut sehen kann.
In the corners of the image, sharpness at f/4 is negligible. Vignetting still darkens the image significantly, and astigmatism combined with spherical aberration creates a heavy haze over the corners.
At f5.6, everything improves only minimally; we’ve reached the “you can make something out” level, and the vignetting is visibly reduced.
At f8, there’s a noticeable improvement in overall sharpness, though unfortunately it doesn’t quite reach the very outer corners. Contrast performance is now decent, and the vignetting is further reduced.
At f11, performance is really good almost all the way to the very outer corner—the very last pixels remain slightly soft.
In all enlargements from the image corner, very fine traces of lateral chromatic aberration are visible, most notably on the window frames.
For a very old 28mm wide-angle lens, the Retina-Curtagon performs surprisingly well in terms of sharpness.
In the center of the frame, sharpness is good even at wide-open aperture; from f5.6 onward, there’s nothing to complain about.
Edge sharpness is achieved at f/8.
The image corners require f/8–f/11 if important elements are located there.
In practical photography, I achieved very good sharpness across the entire image for all shots stopped down to f/8 or f/11, as can be clearly seen in the many sample images.
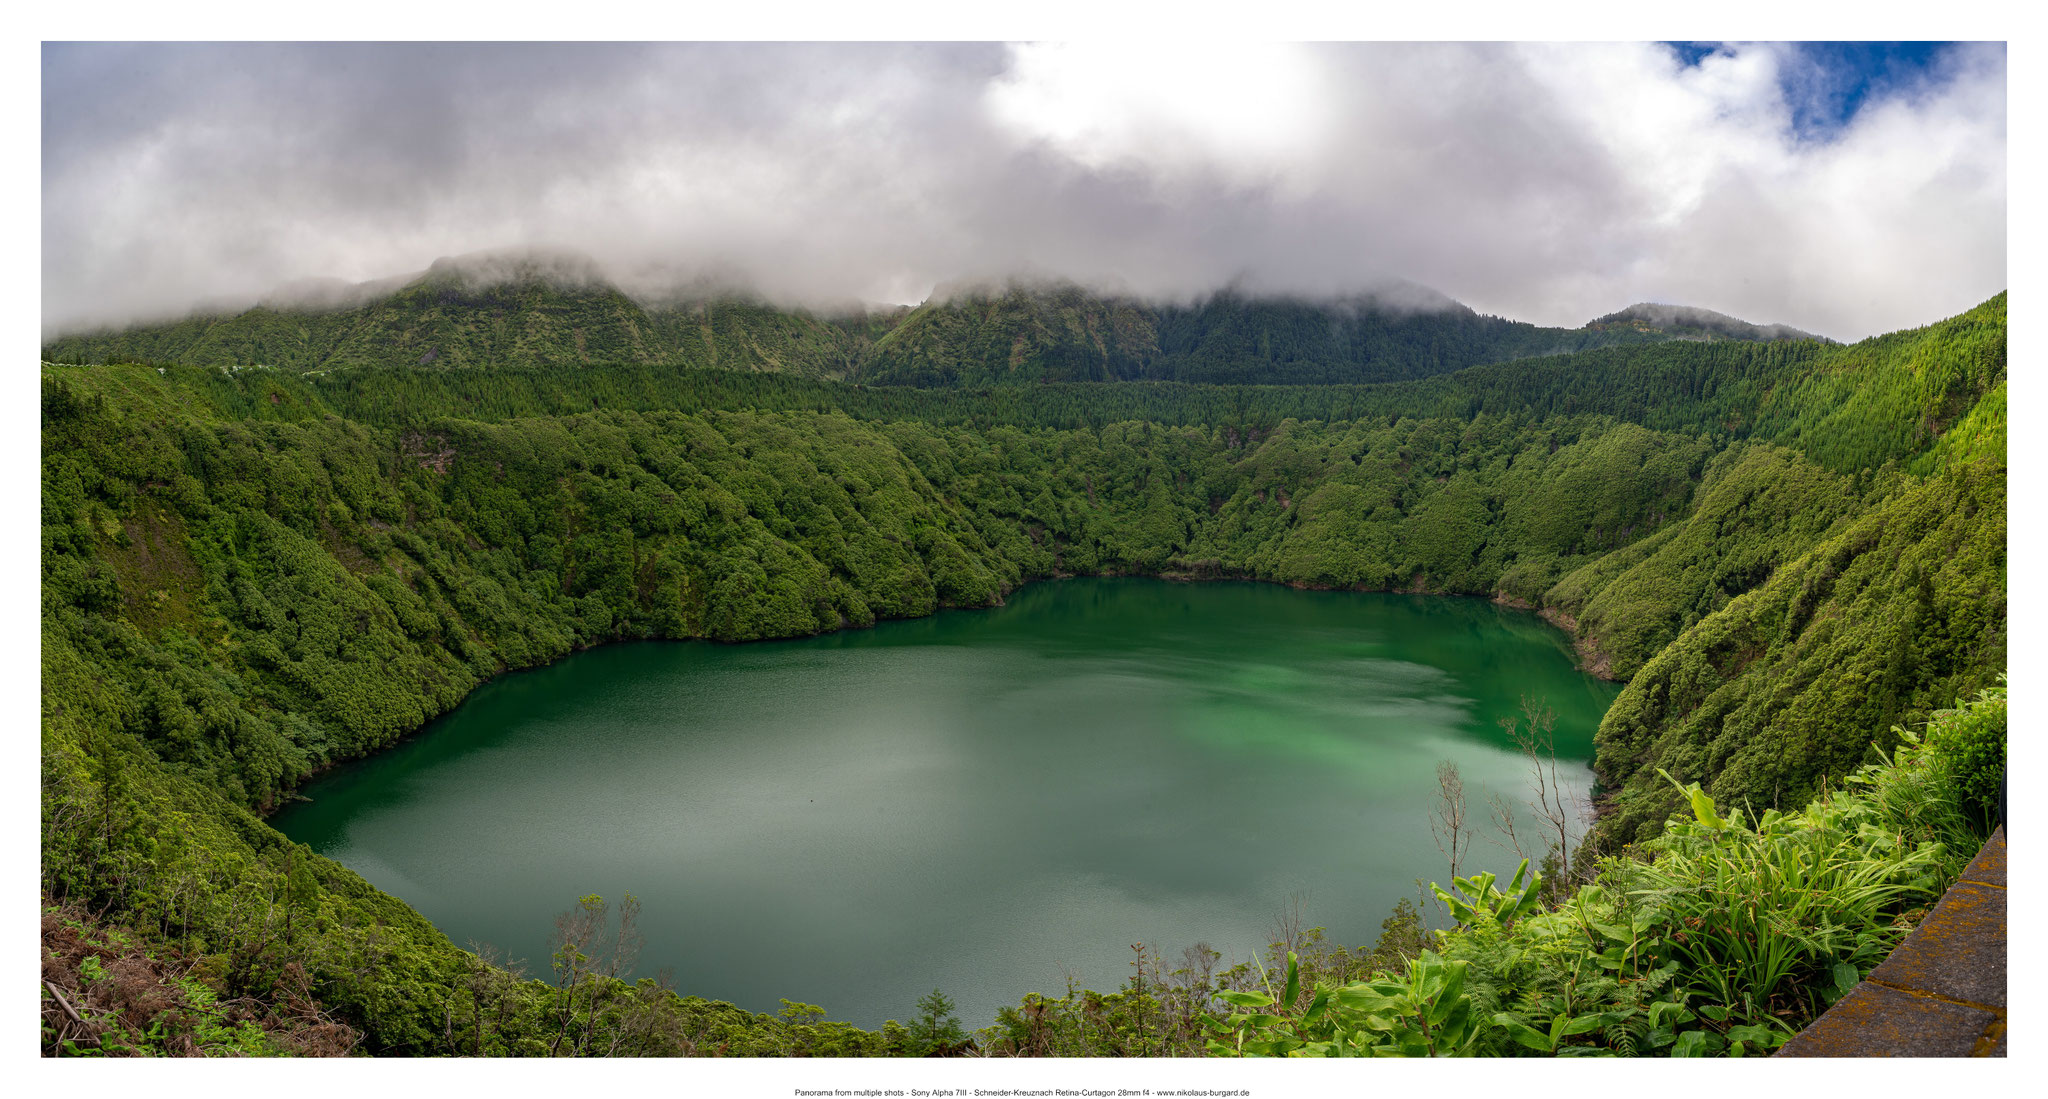
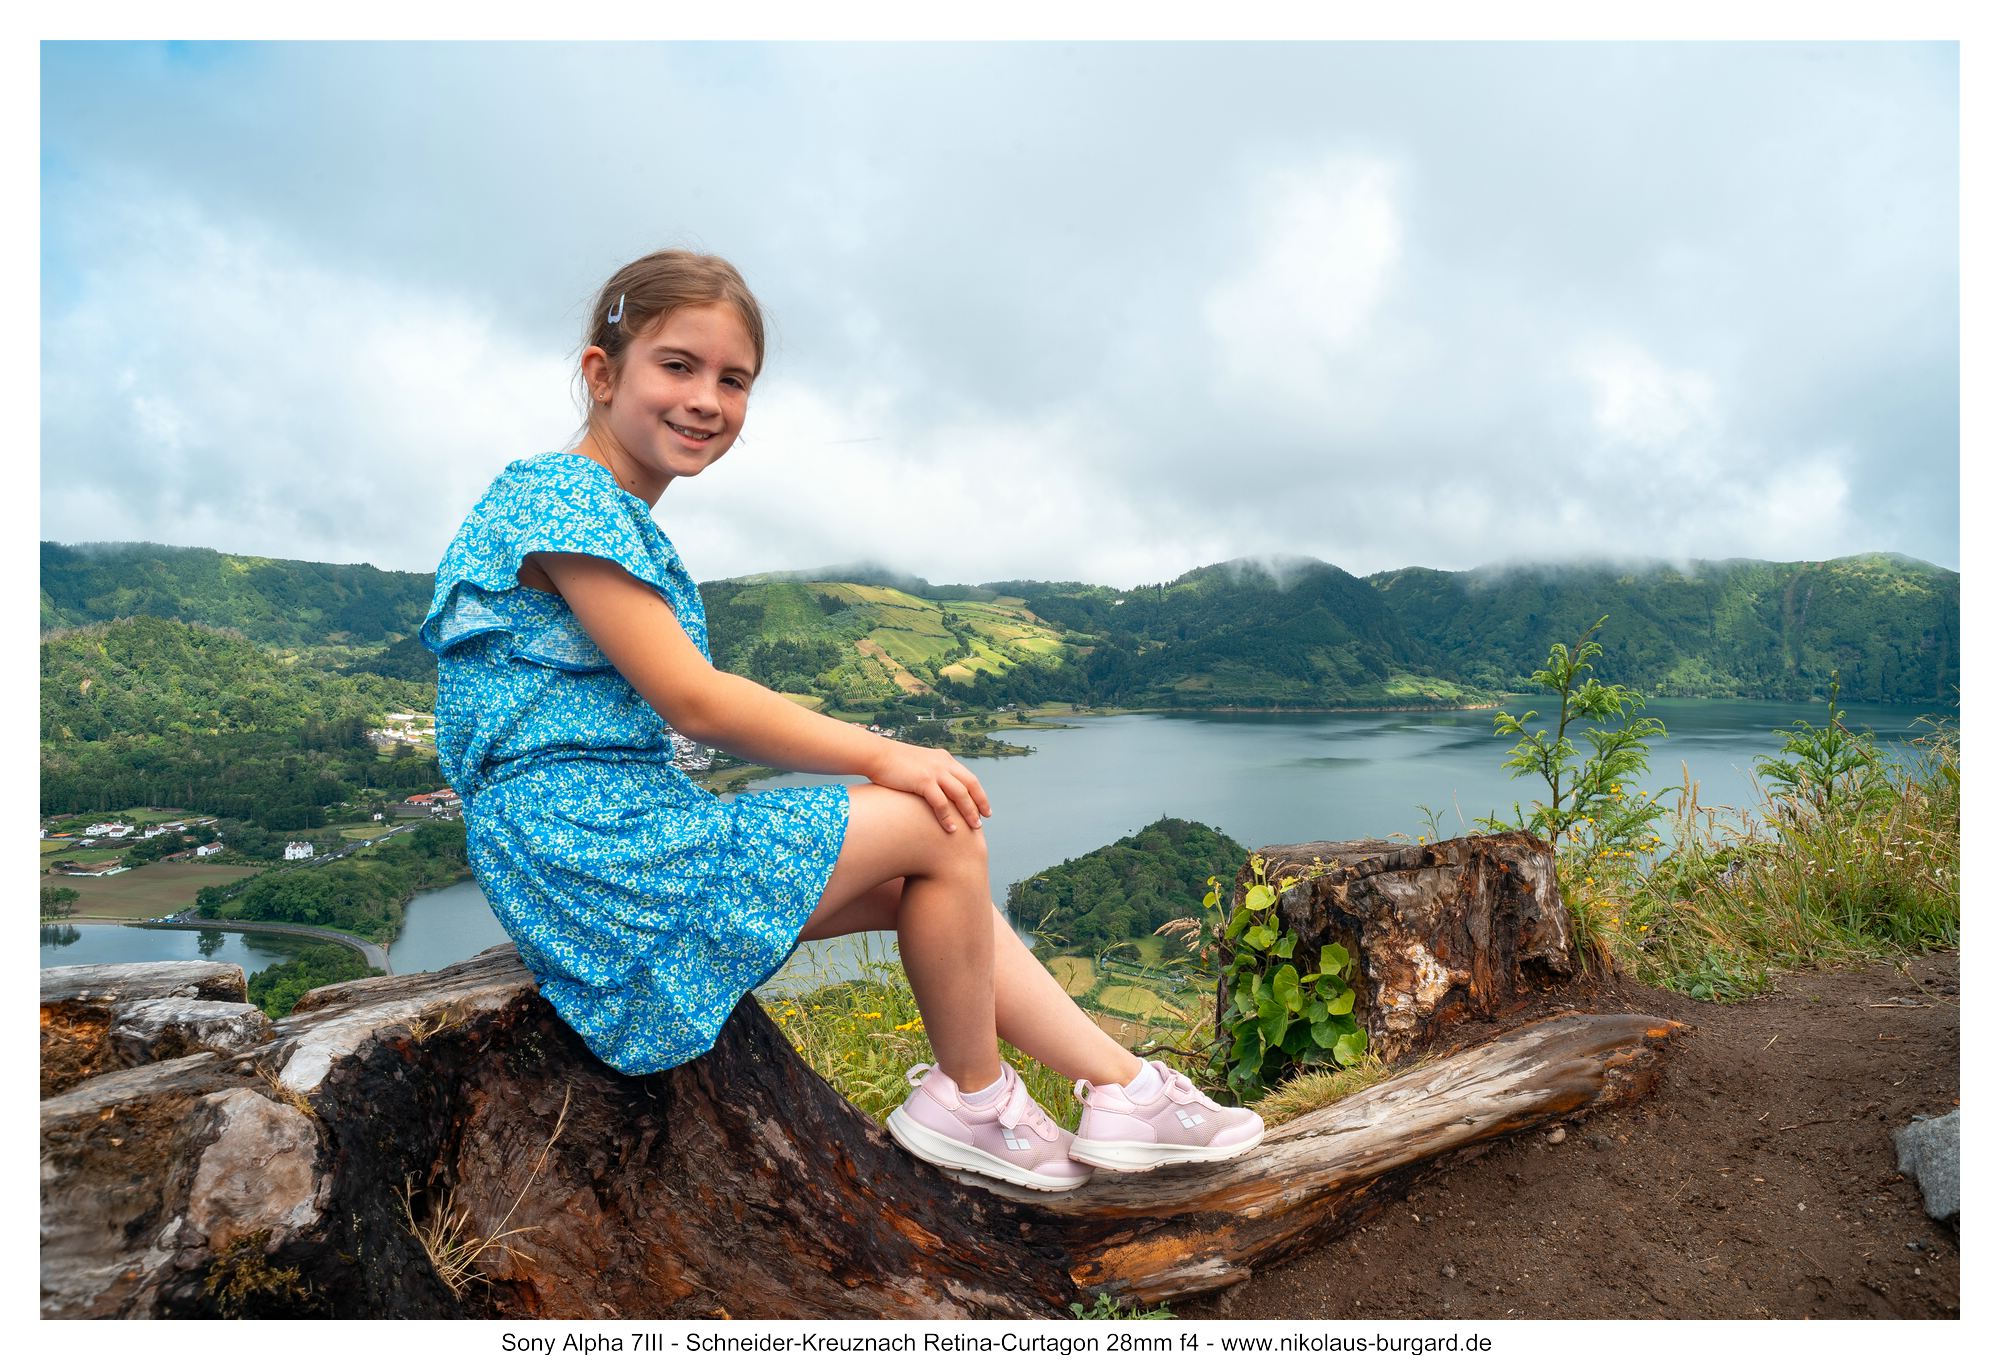
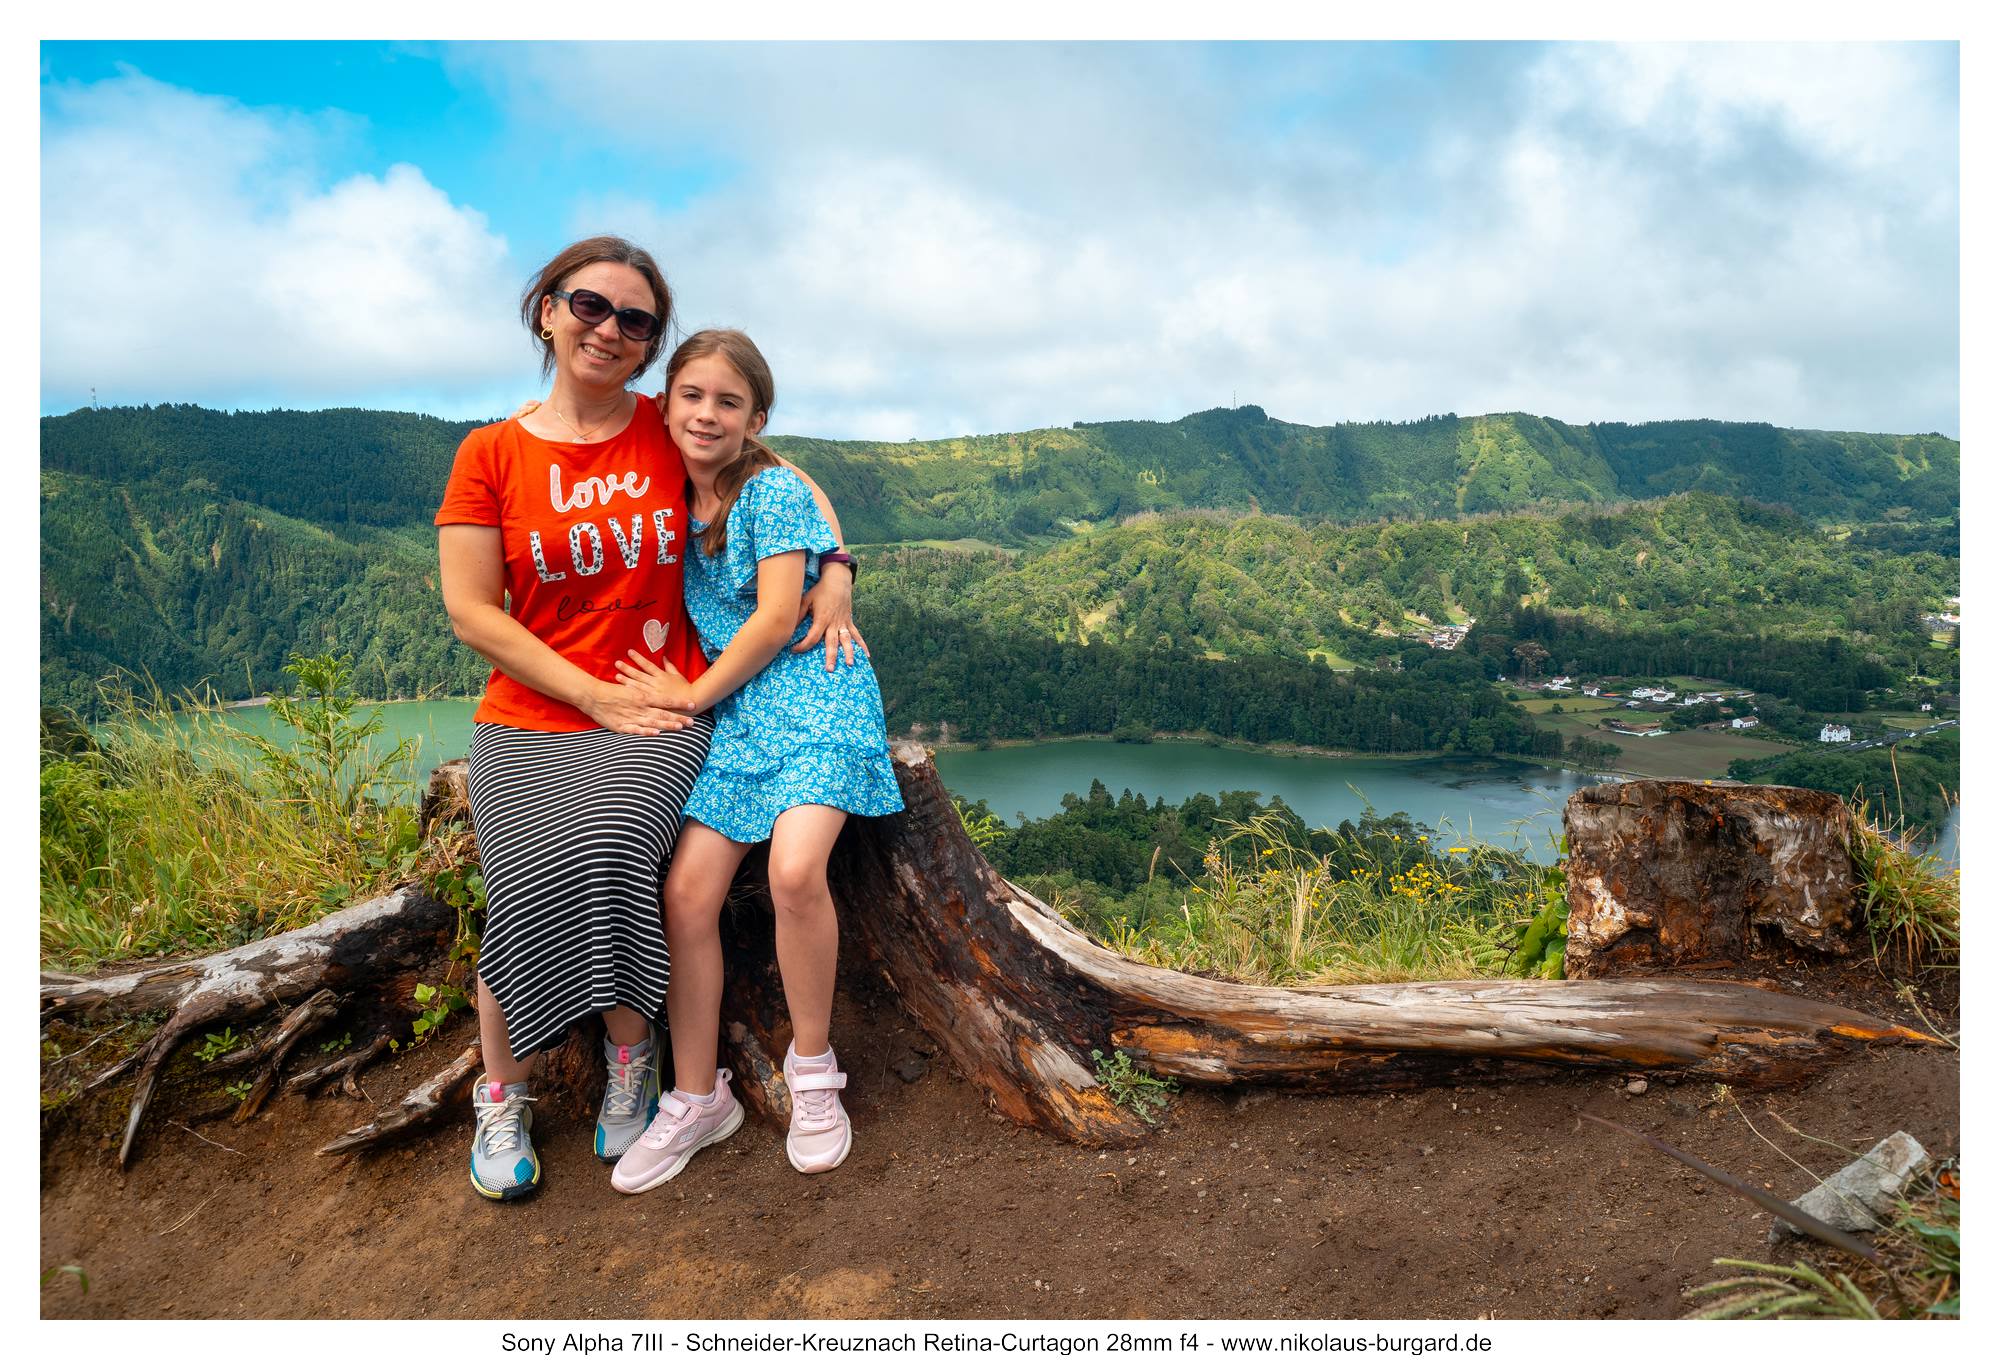
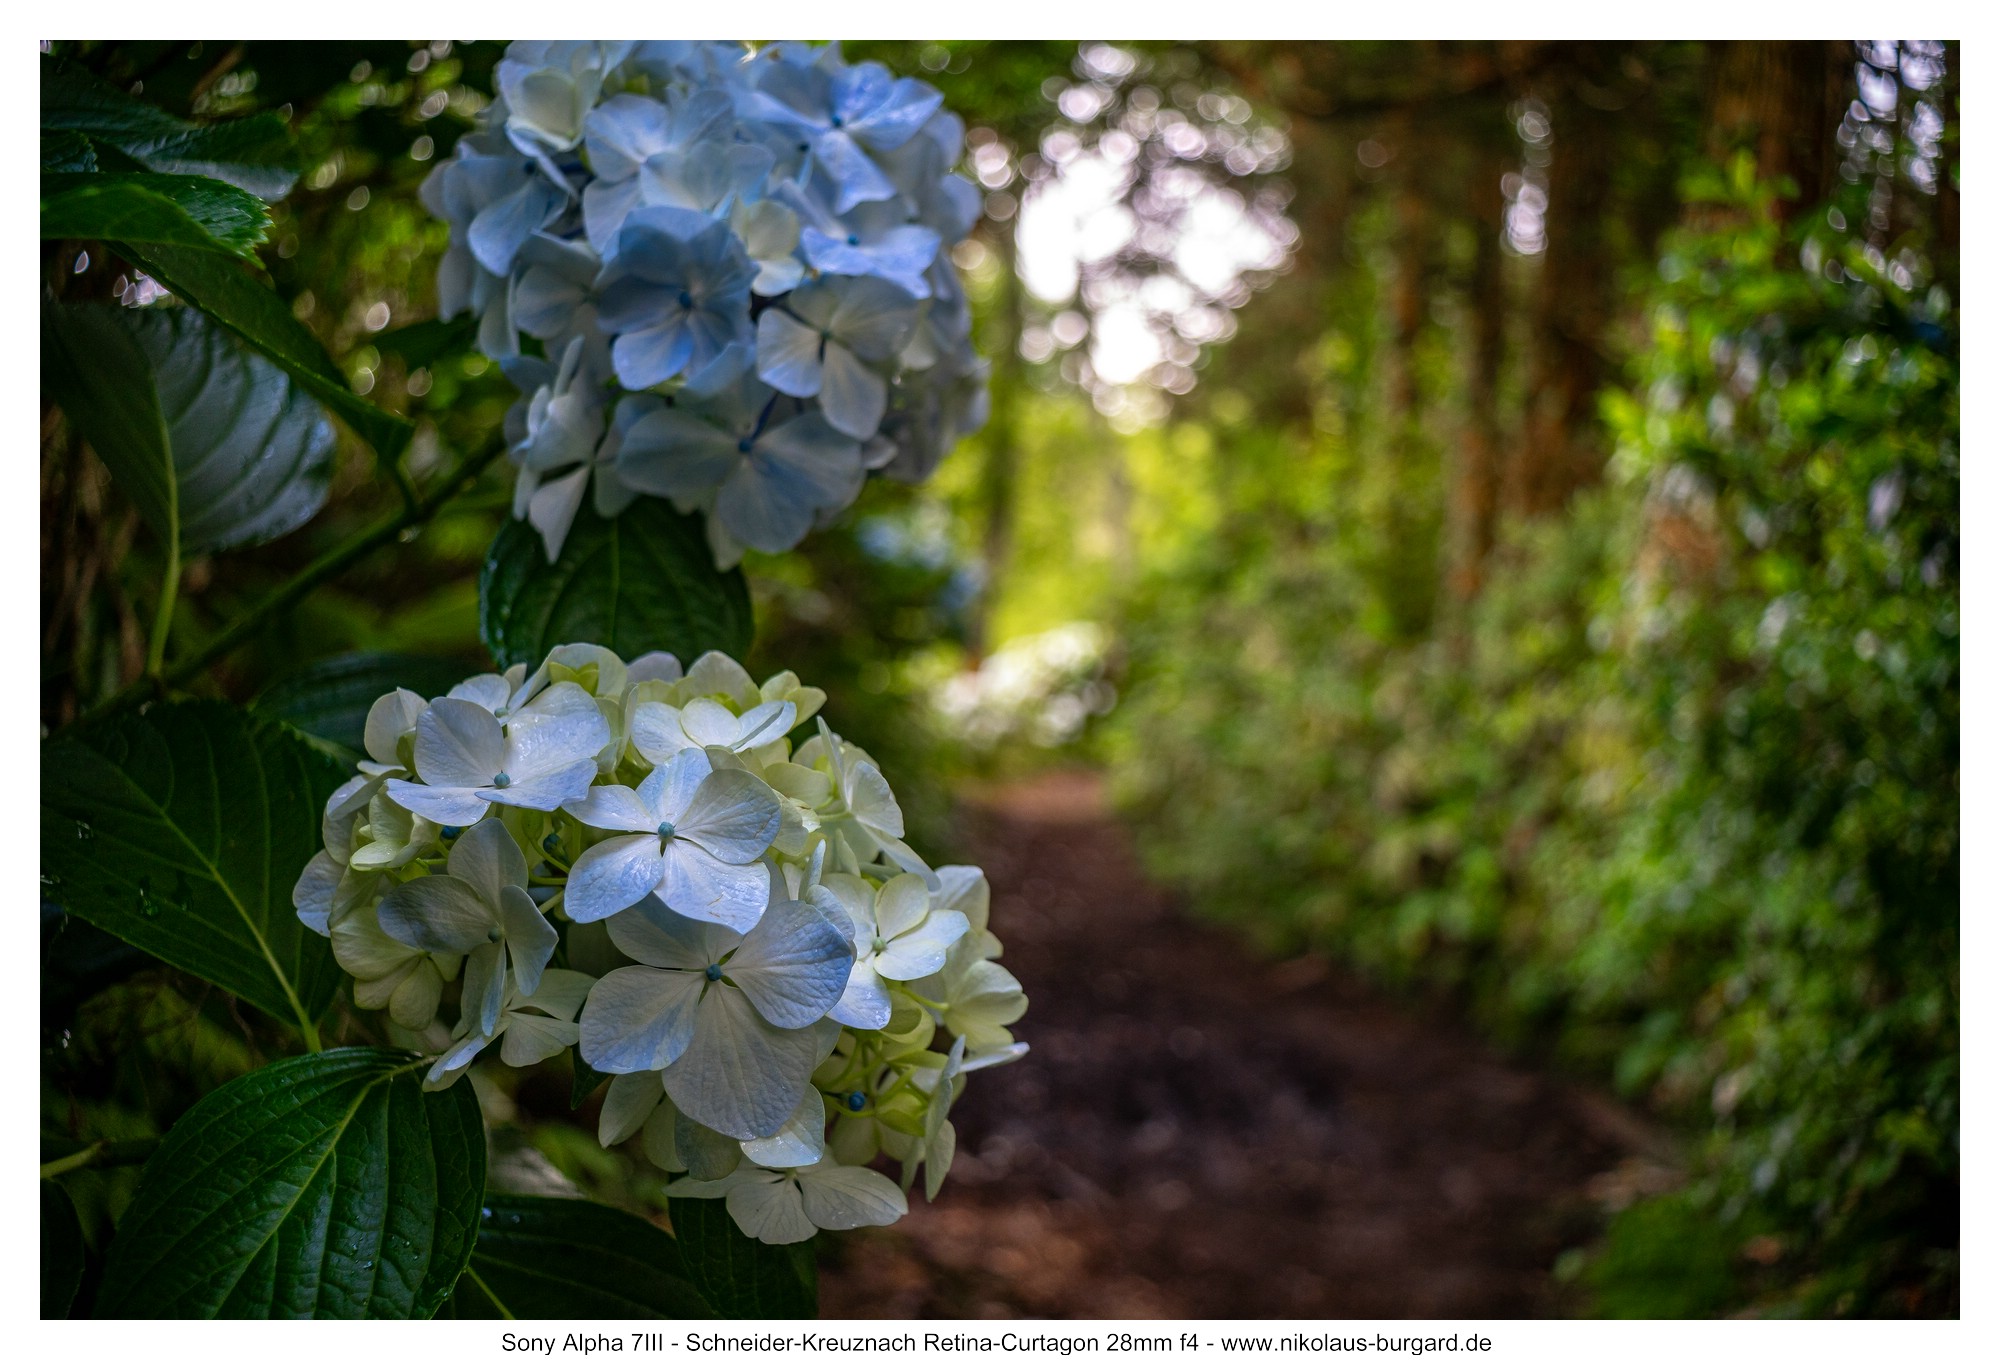
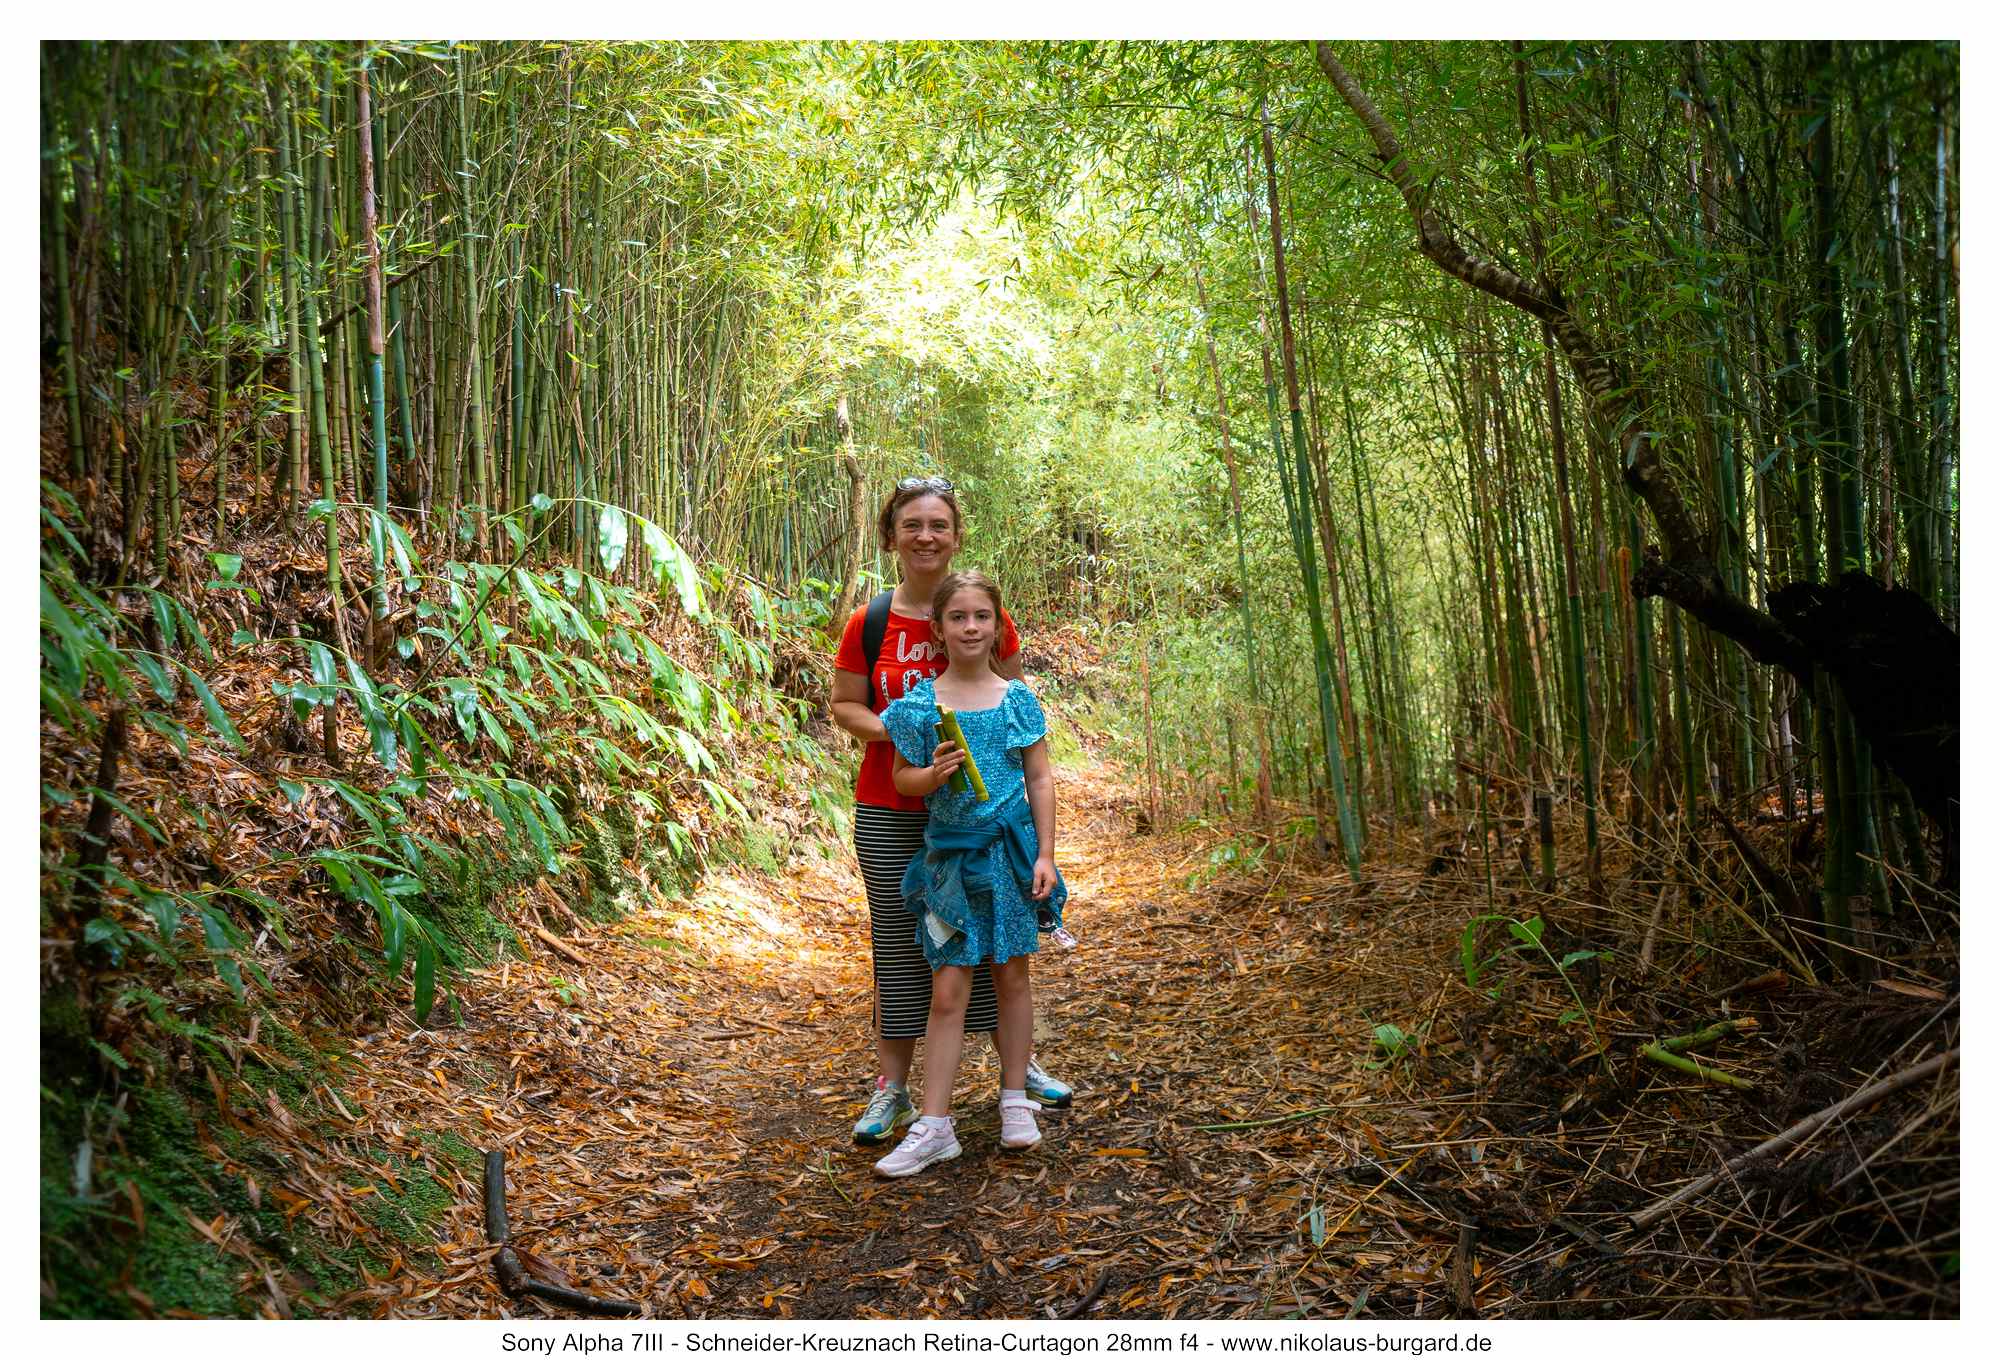
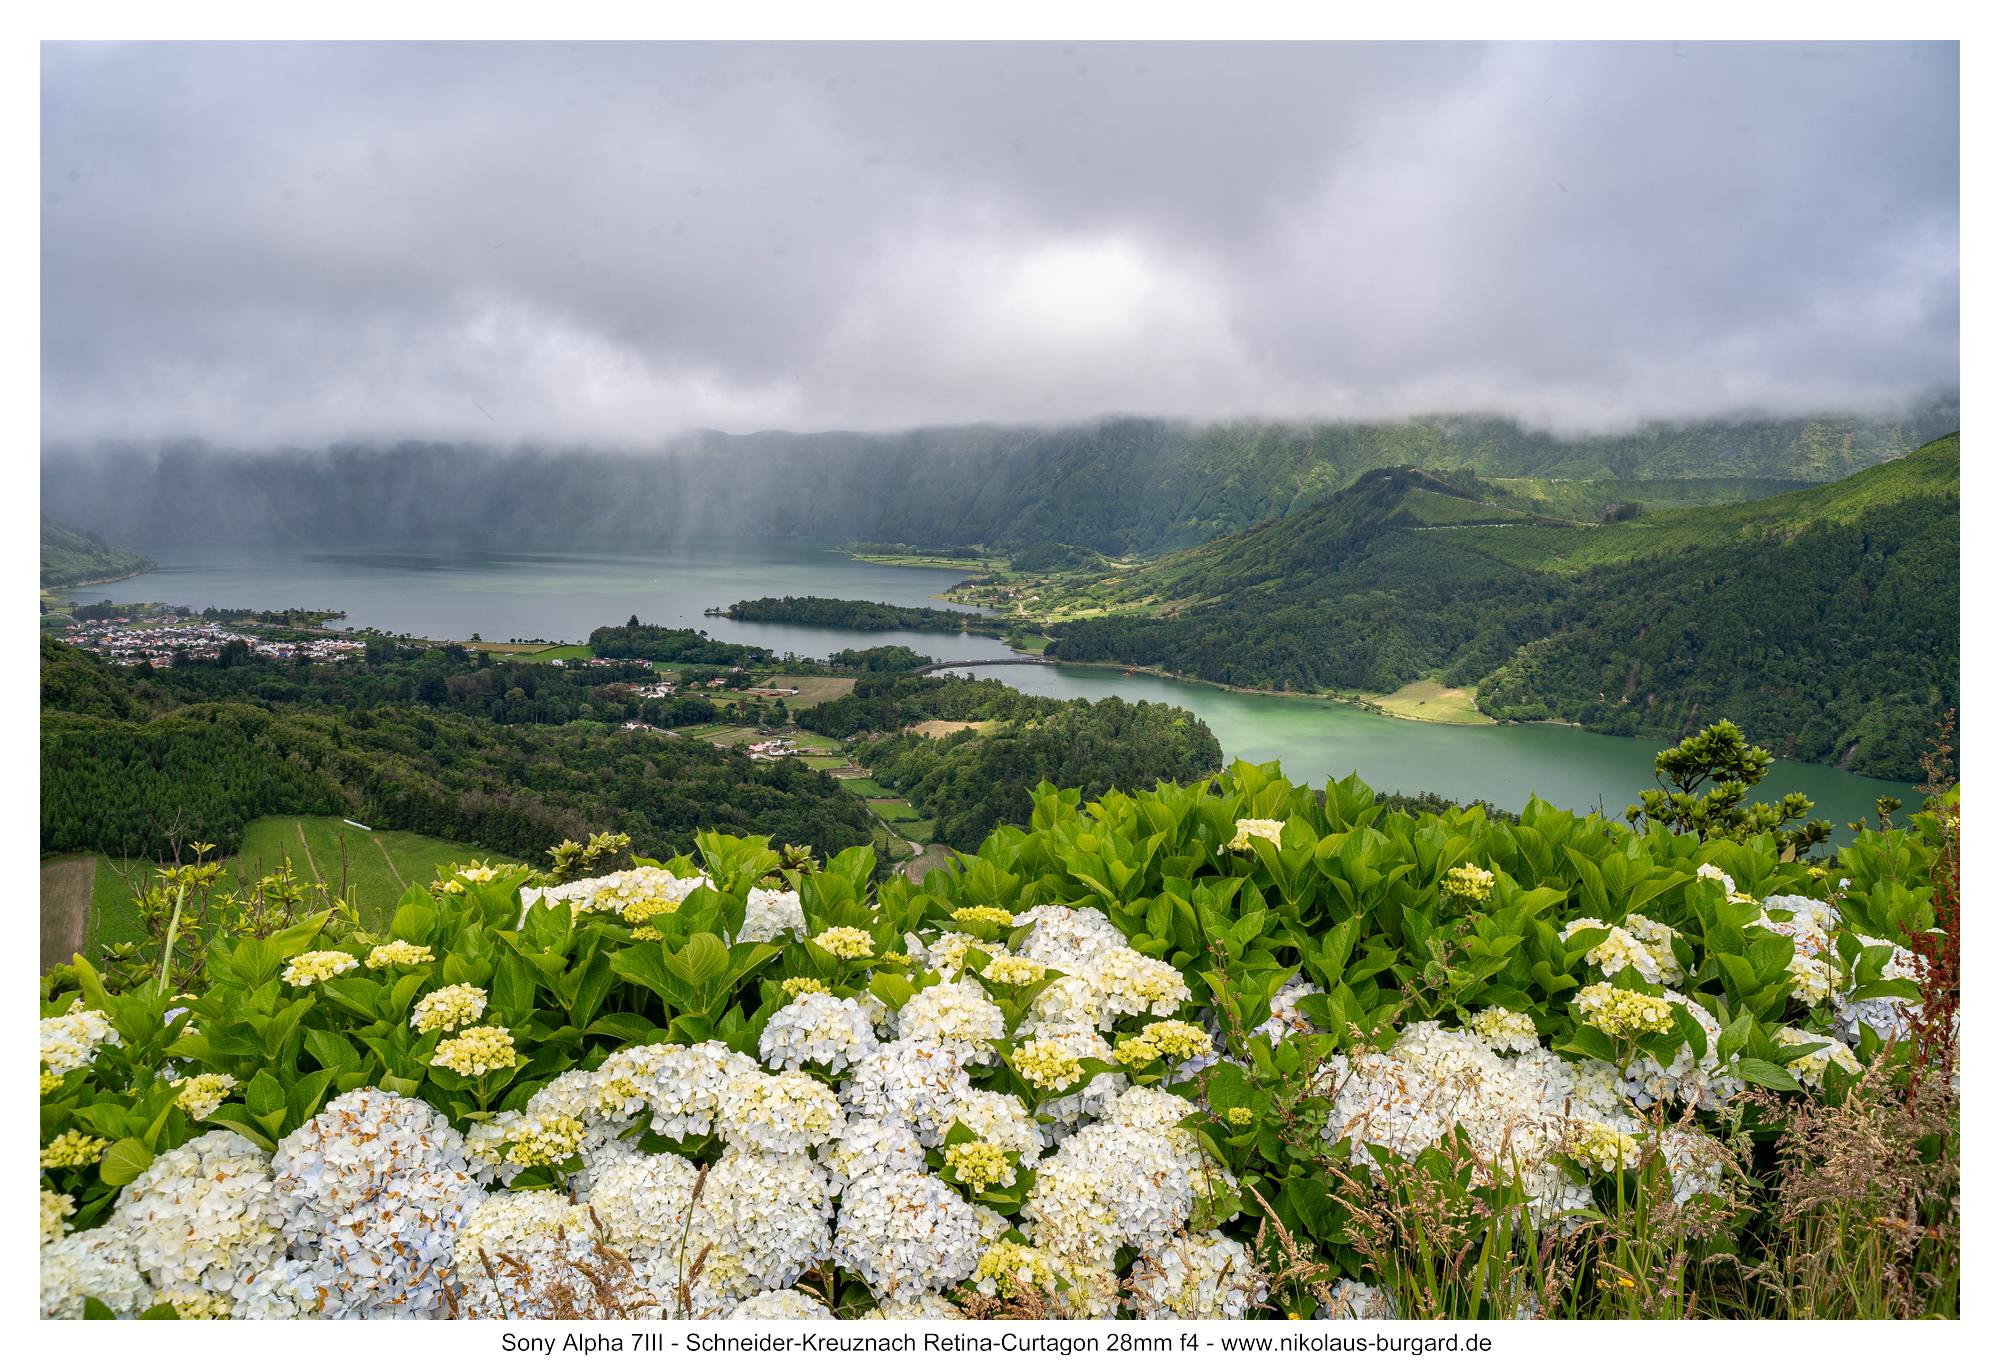
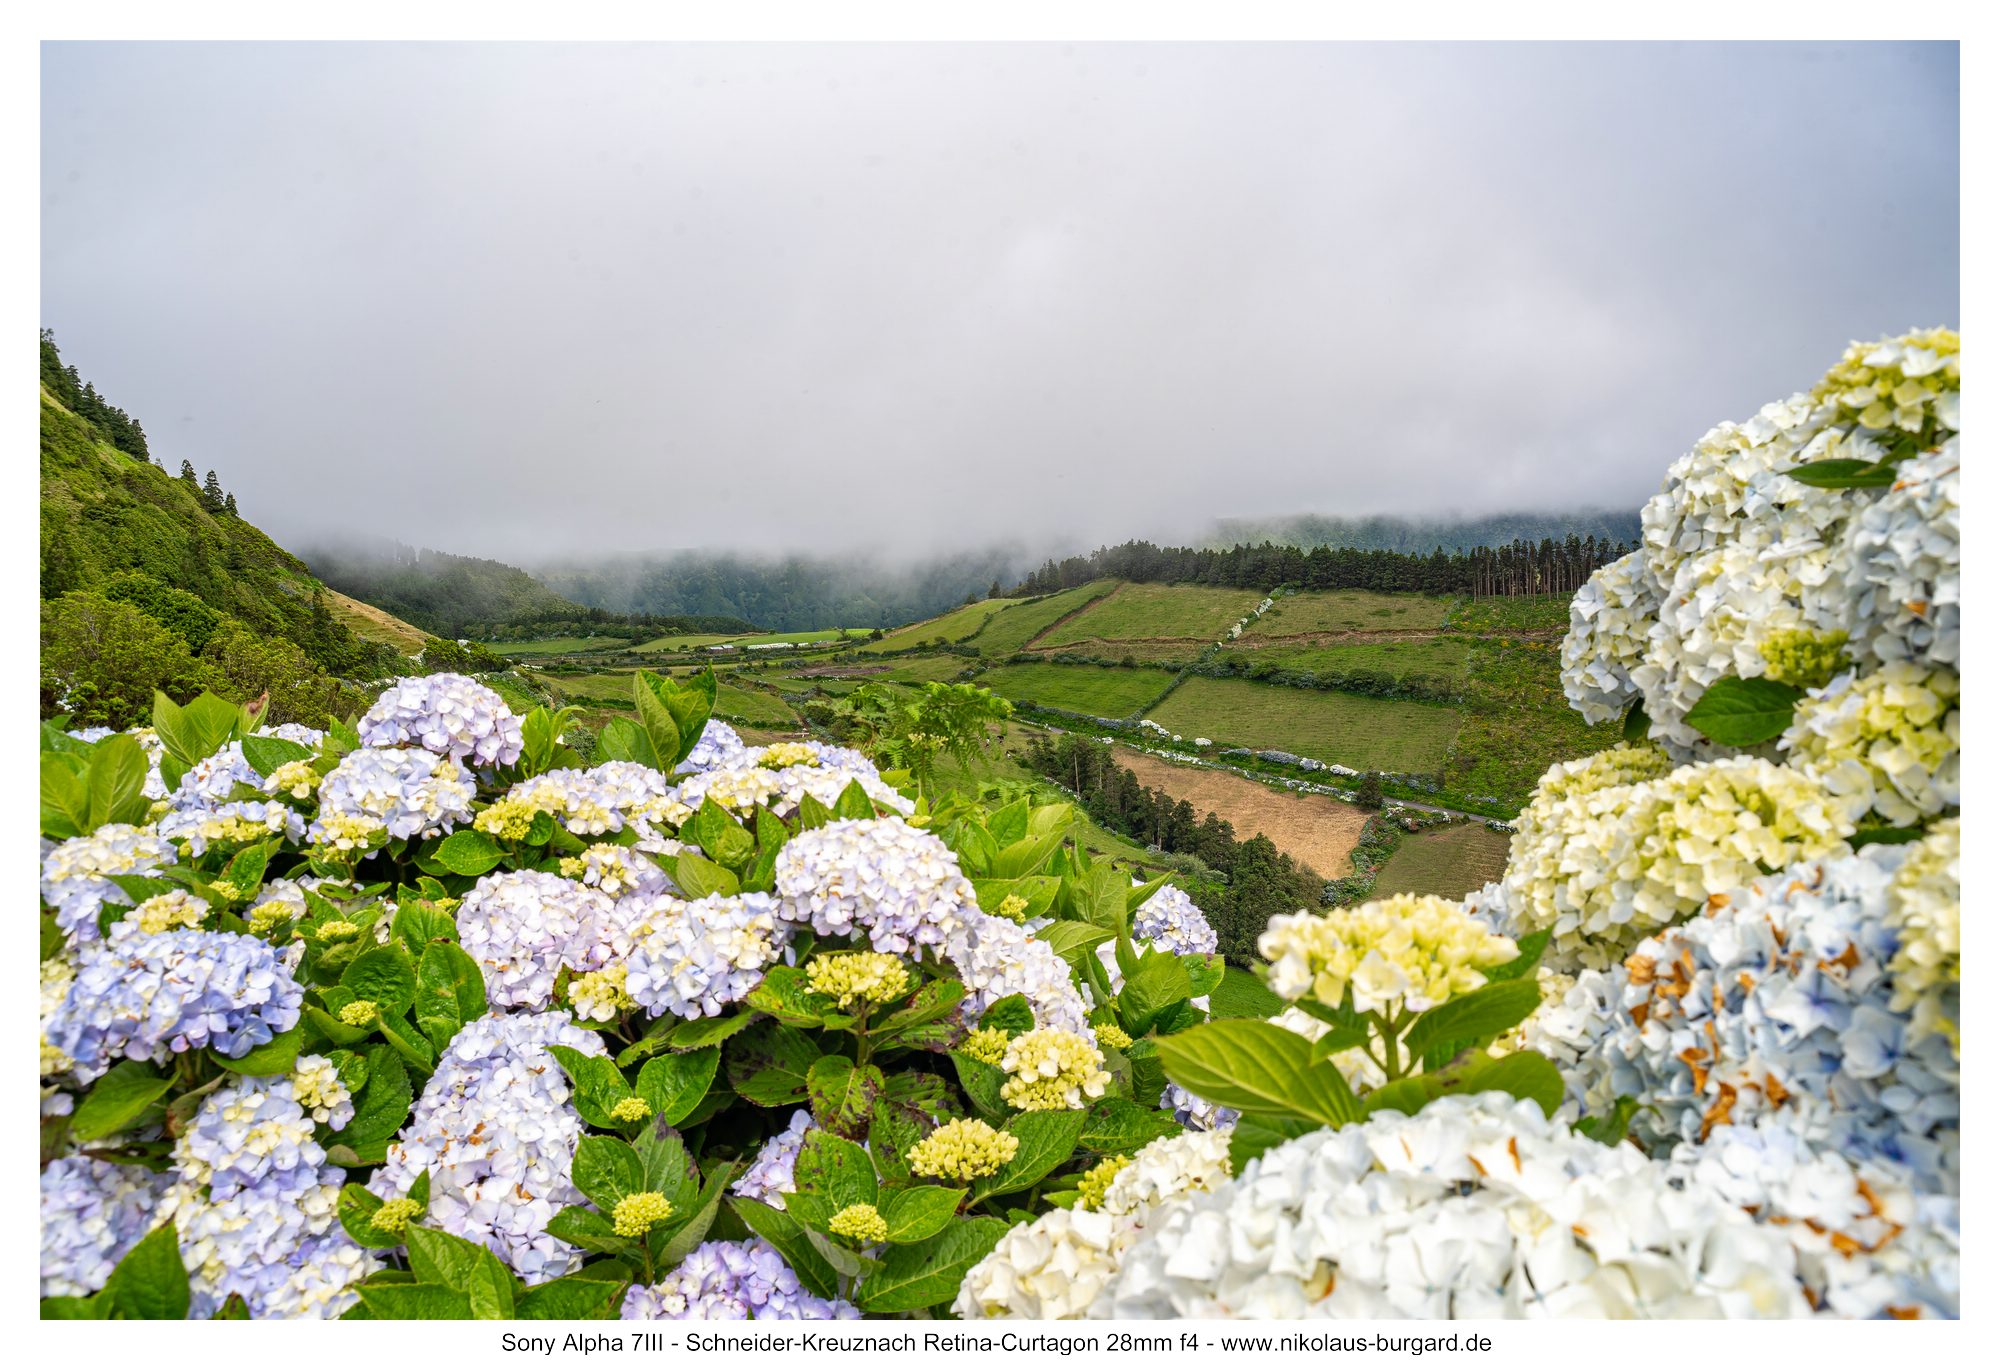
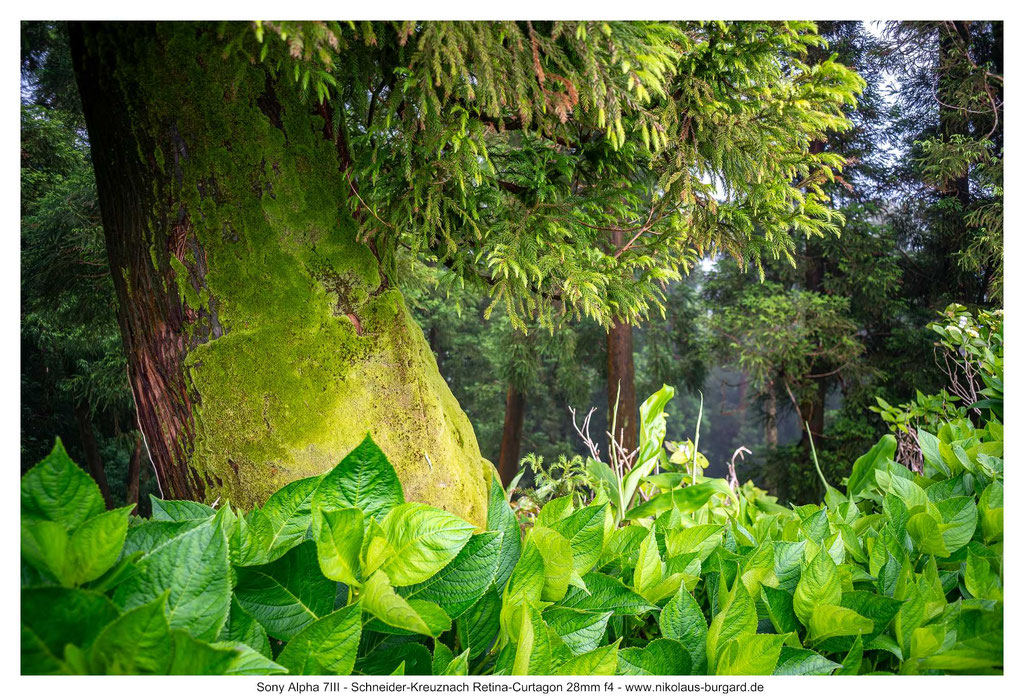
Bildserie: Azoren 1 - Rund um den Sete Citades / Picture Series: Azores pt. 1 - Around Sete Citades
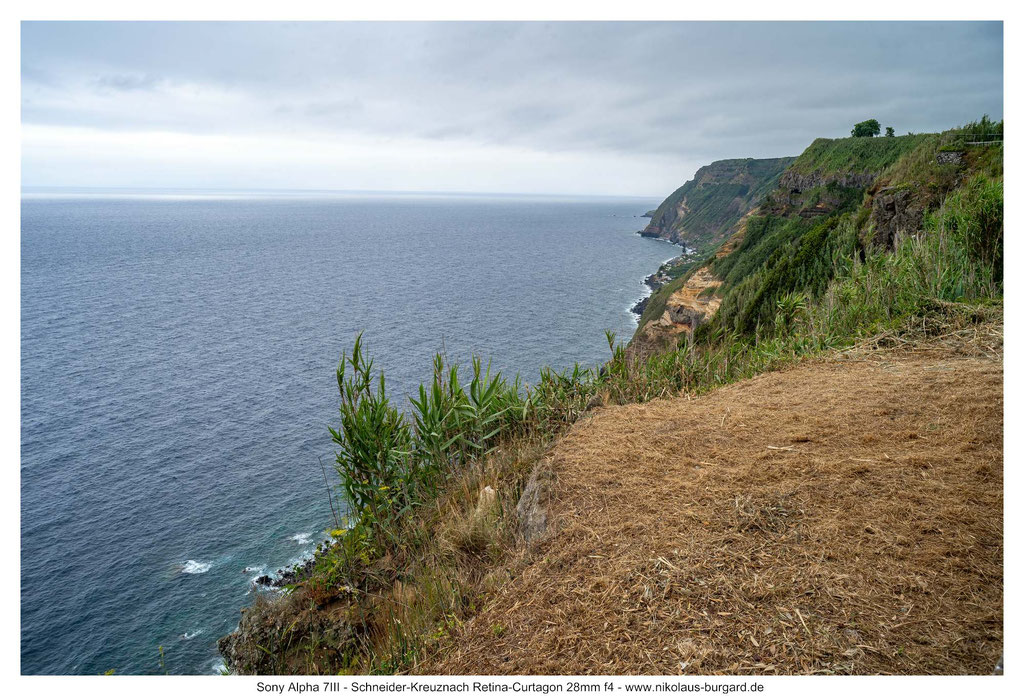
Unseren letzten Sommerurlaub verbrachten wir auf Sao Miguel, der Hauptinsel der Azoren sowie in Lissabon.
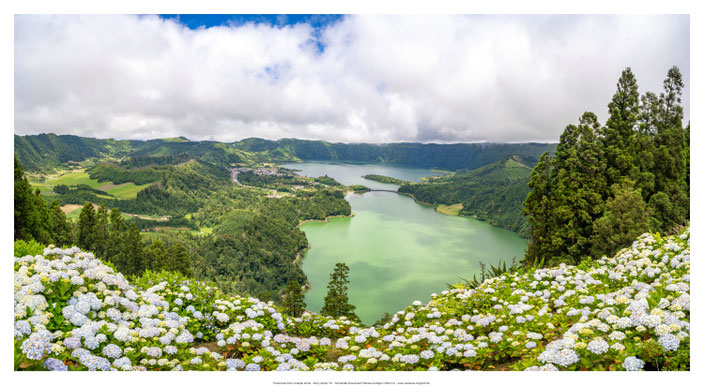
Gerade Sao Miguel hat uns unglaubliche Natureindrücke beschert. Besonders beeindruckend war für uns die Gegend um Sete Citades. Diese Vulkanseen sind berühmt für ihre unterschiedlichen Wasserfarben (blau und grün) sowie der dortigen "Wetterwand" an der die Wolken hängenbleiben und sich das Wetter plötzlich ändern kann. Die beiden folgenden Bilder sind Panoramaaufnahmen aus jeweils mehreren Hochformat-Bildern mit dem Curtagon, zusammen gerechnet in Adobe Lightroom:
We spent our last summer vacation on São Miguel, the main island of the Azores, and in Lisbon.
São Miguel treated us to incredible natural scenery. We were particularly impressed by the area around Sete Cidades. These volcanic lakes are famous for their varying water colors (blue and green) as well as the local “weather wall” where clouds get caught and the weather can suddenly change. The following two images are panoramas each composed of several portrait-oriented photos taken with the Curtagon, stitched together in Adobe Lightroom:
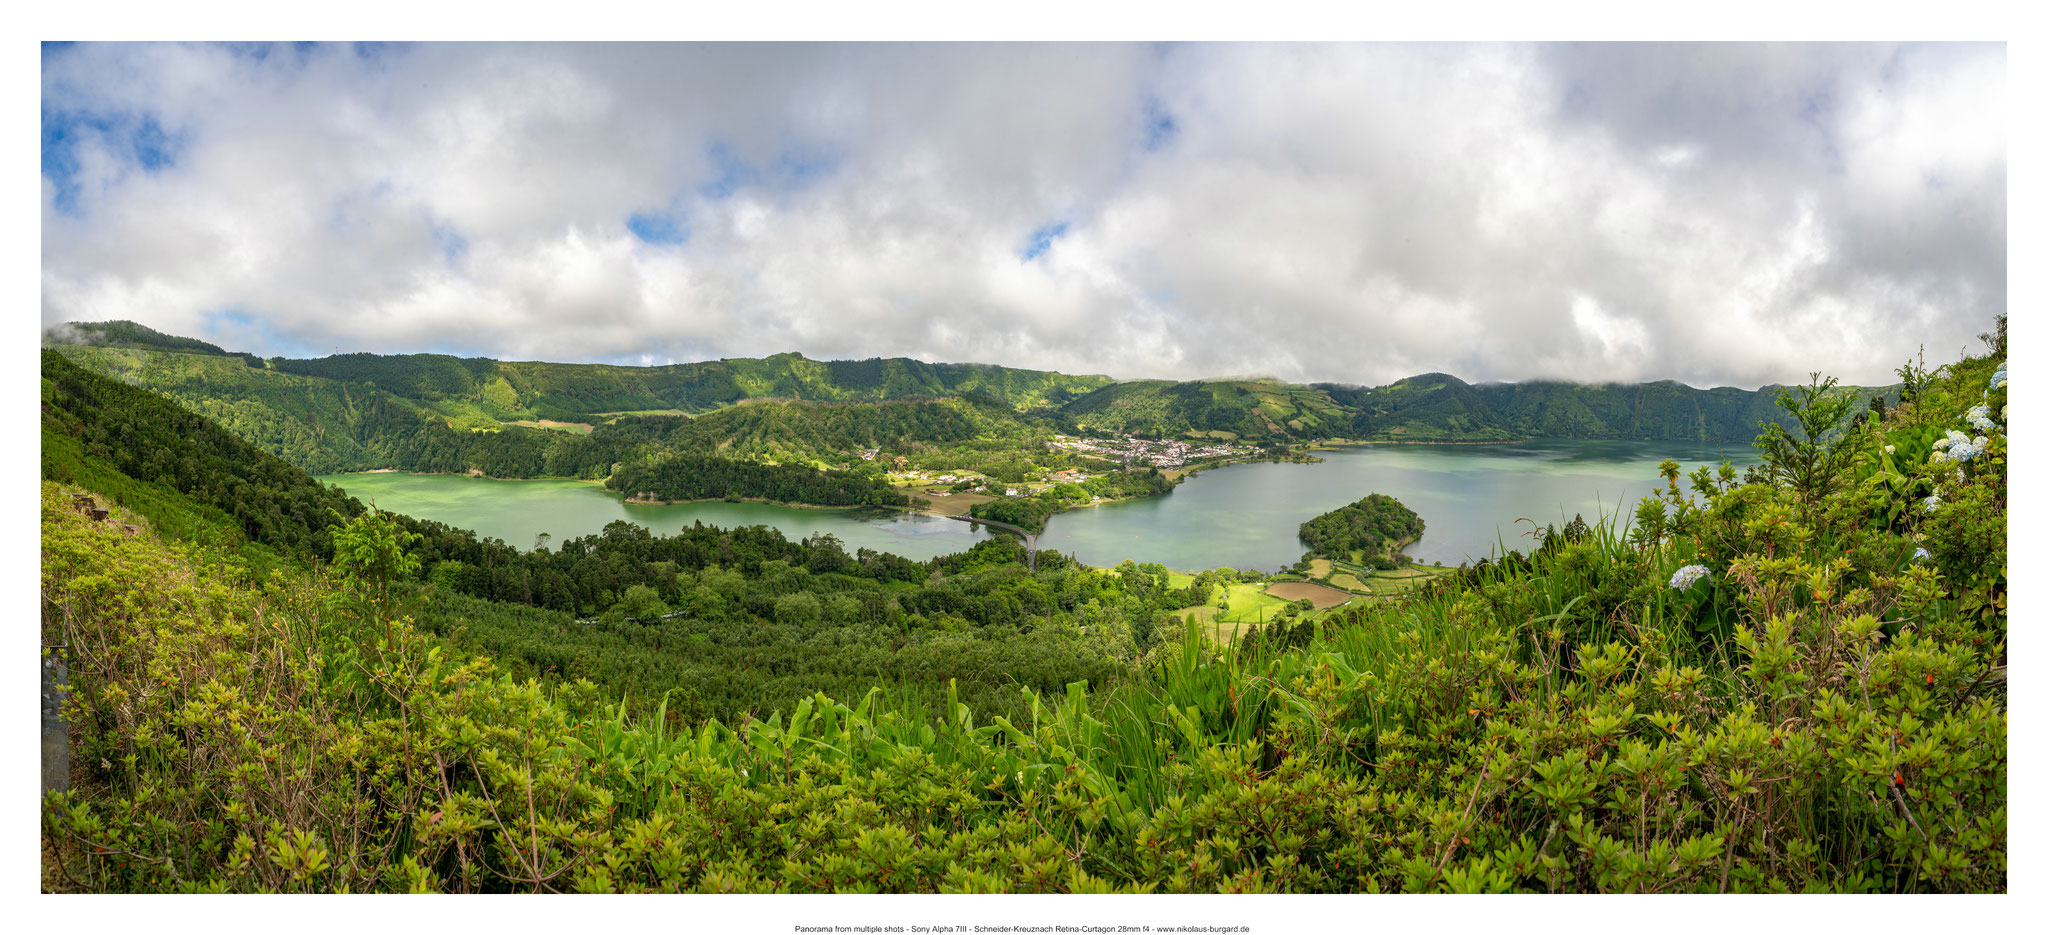
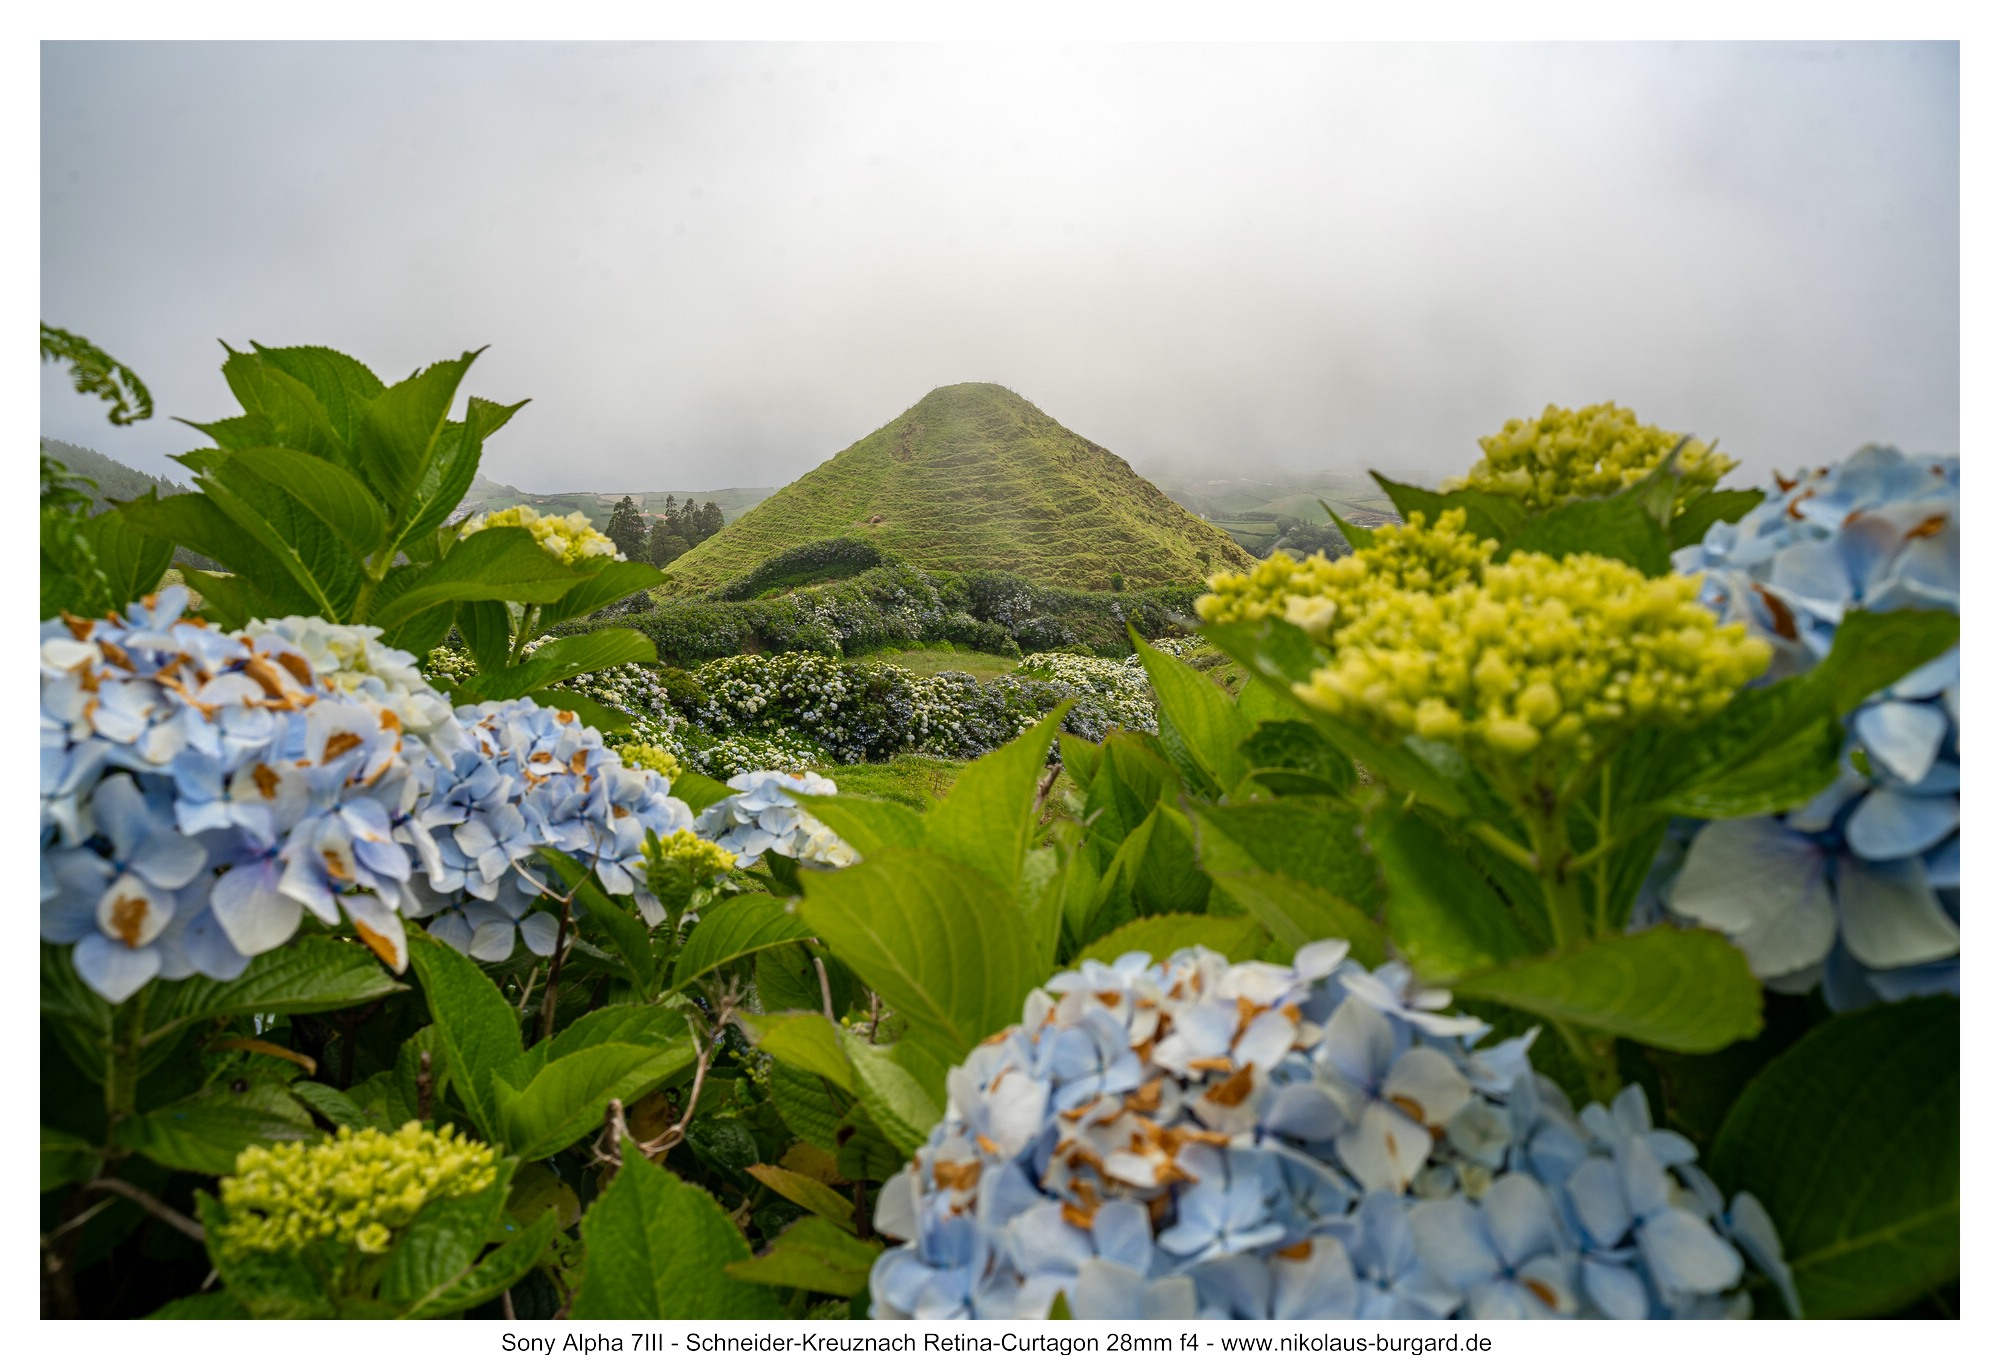
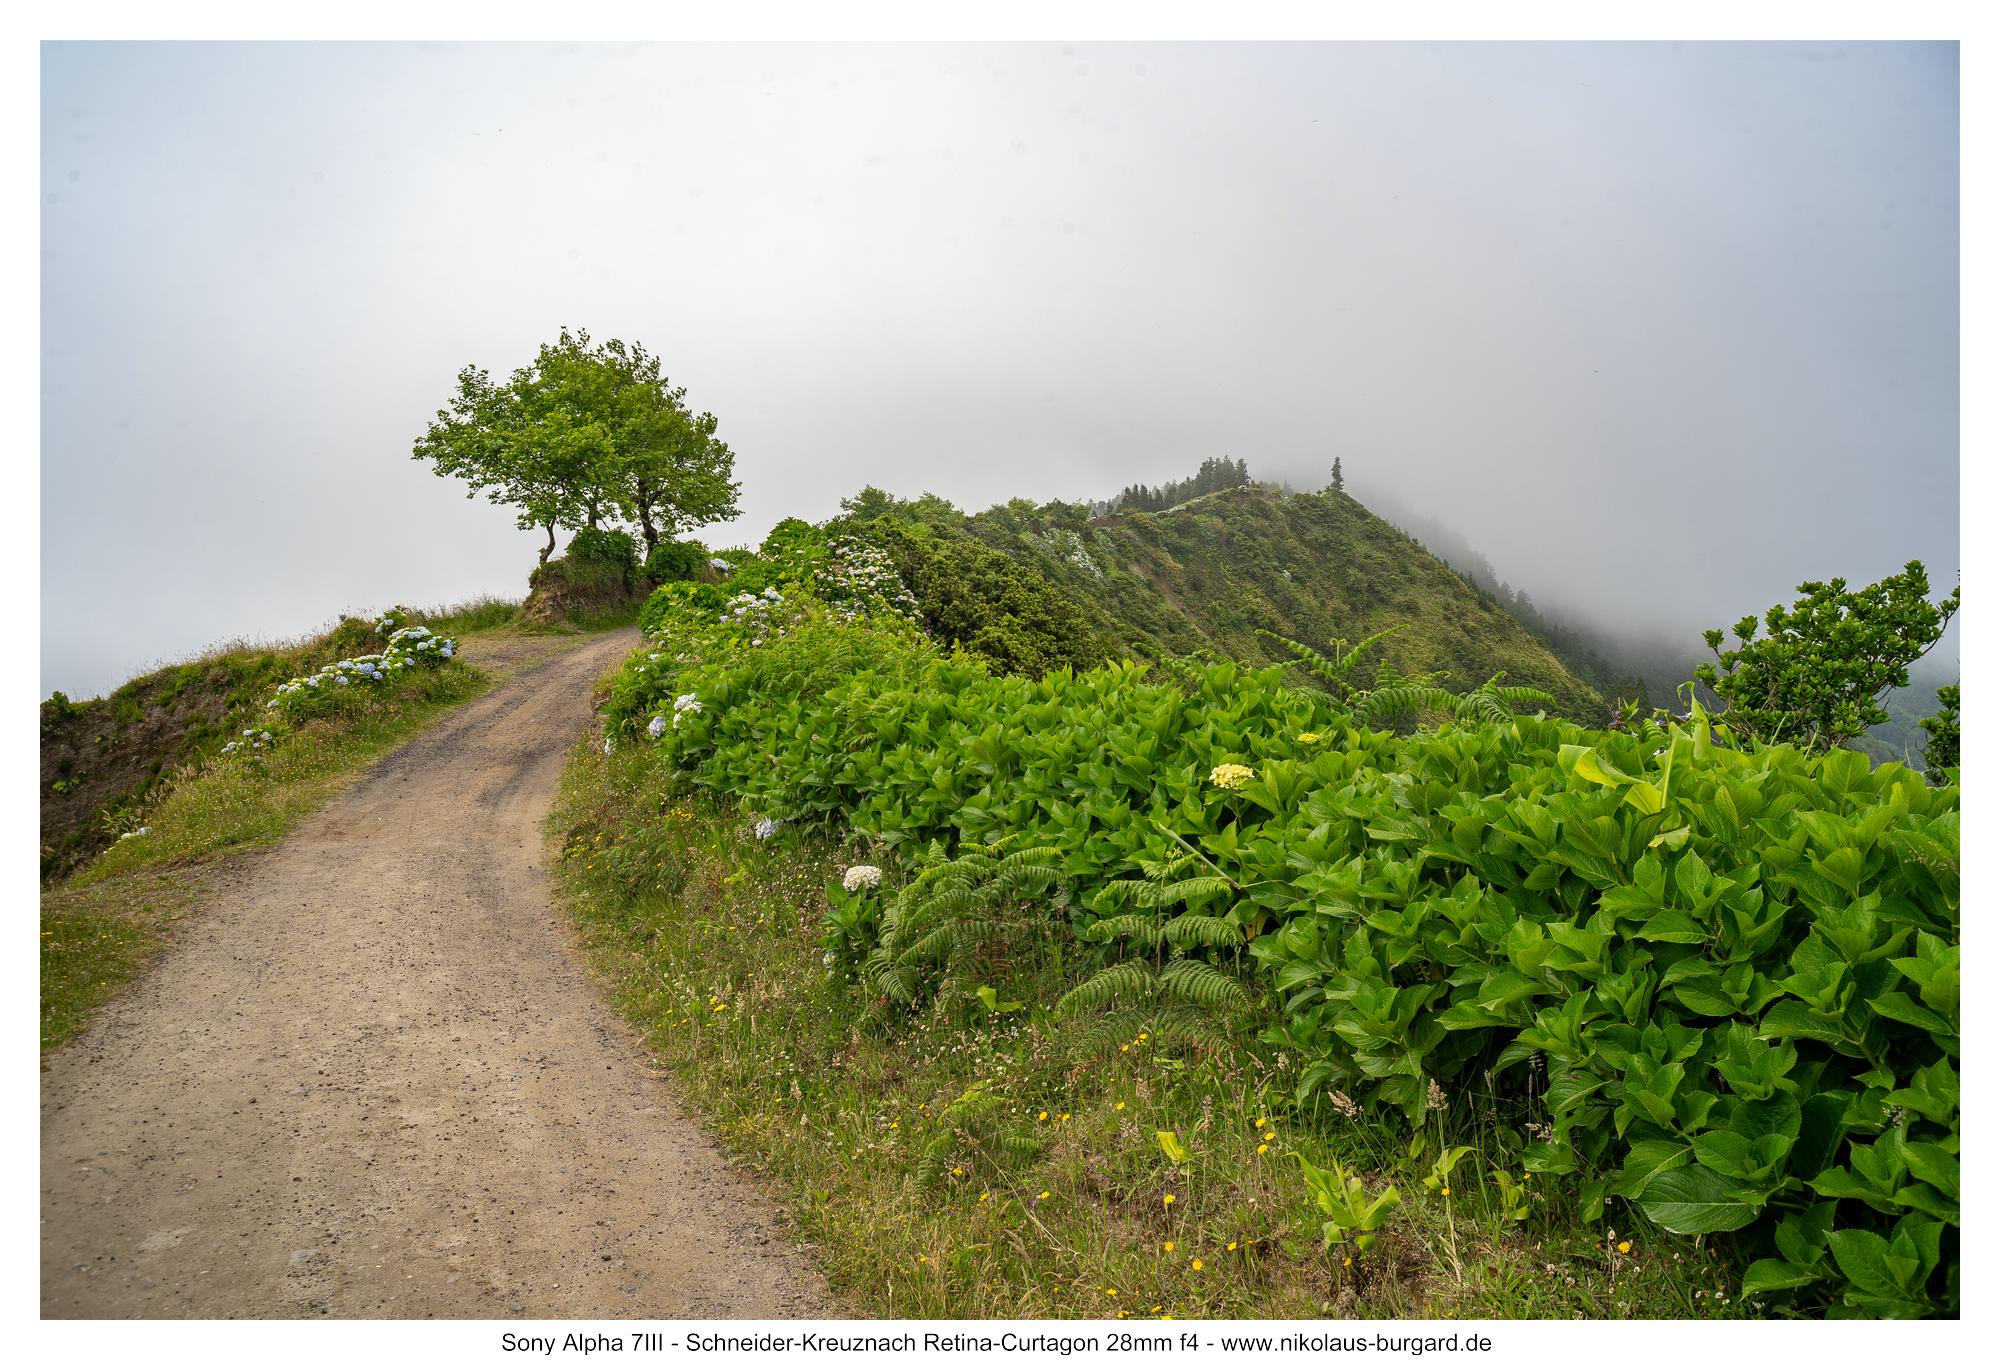
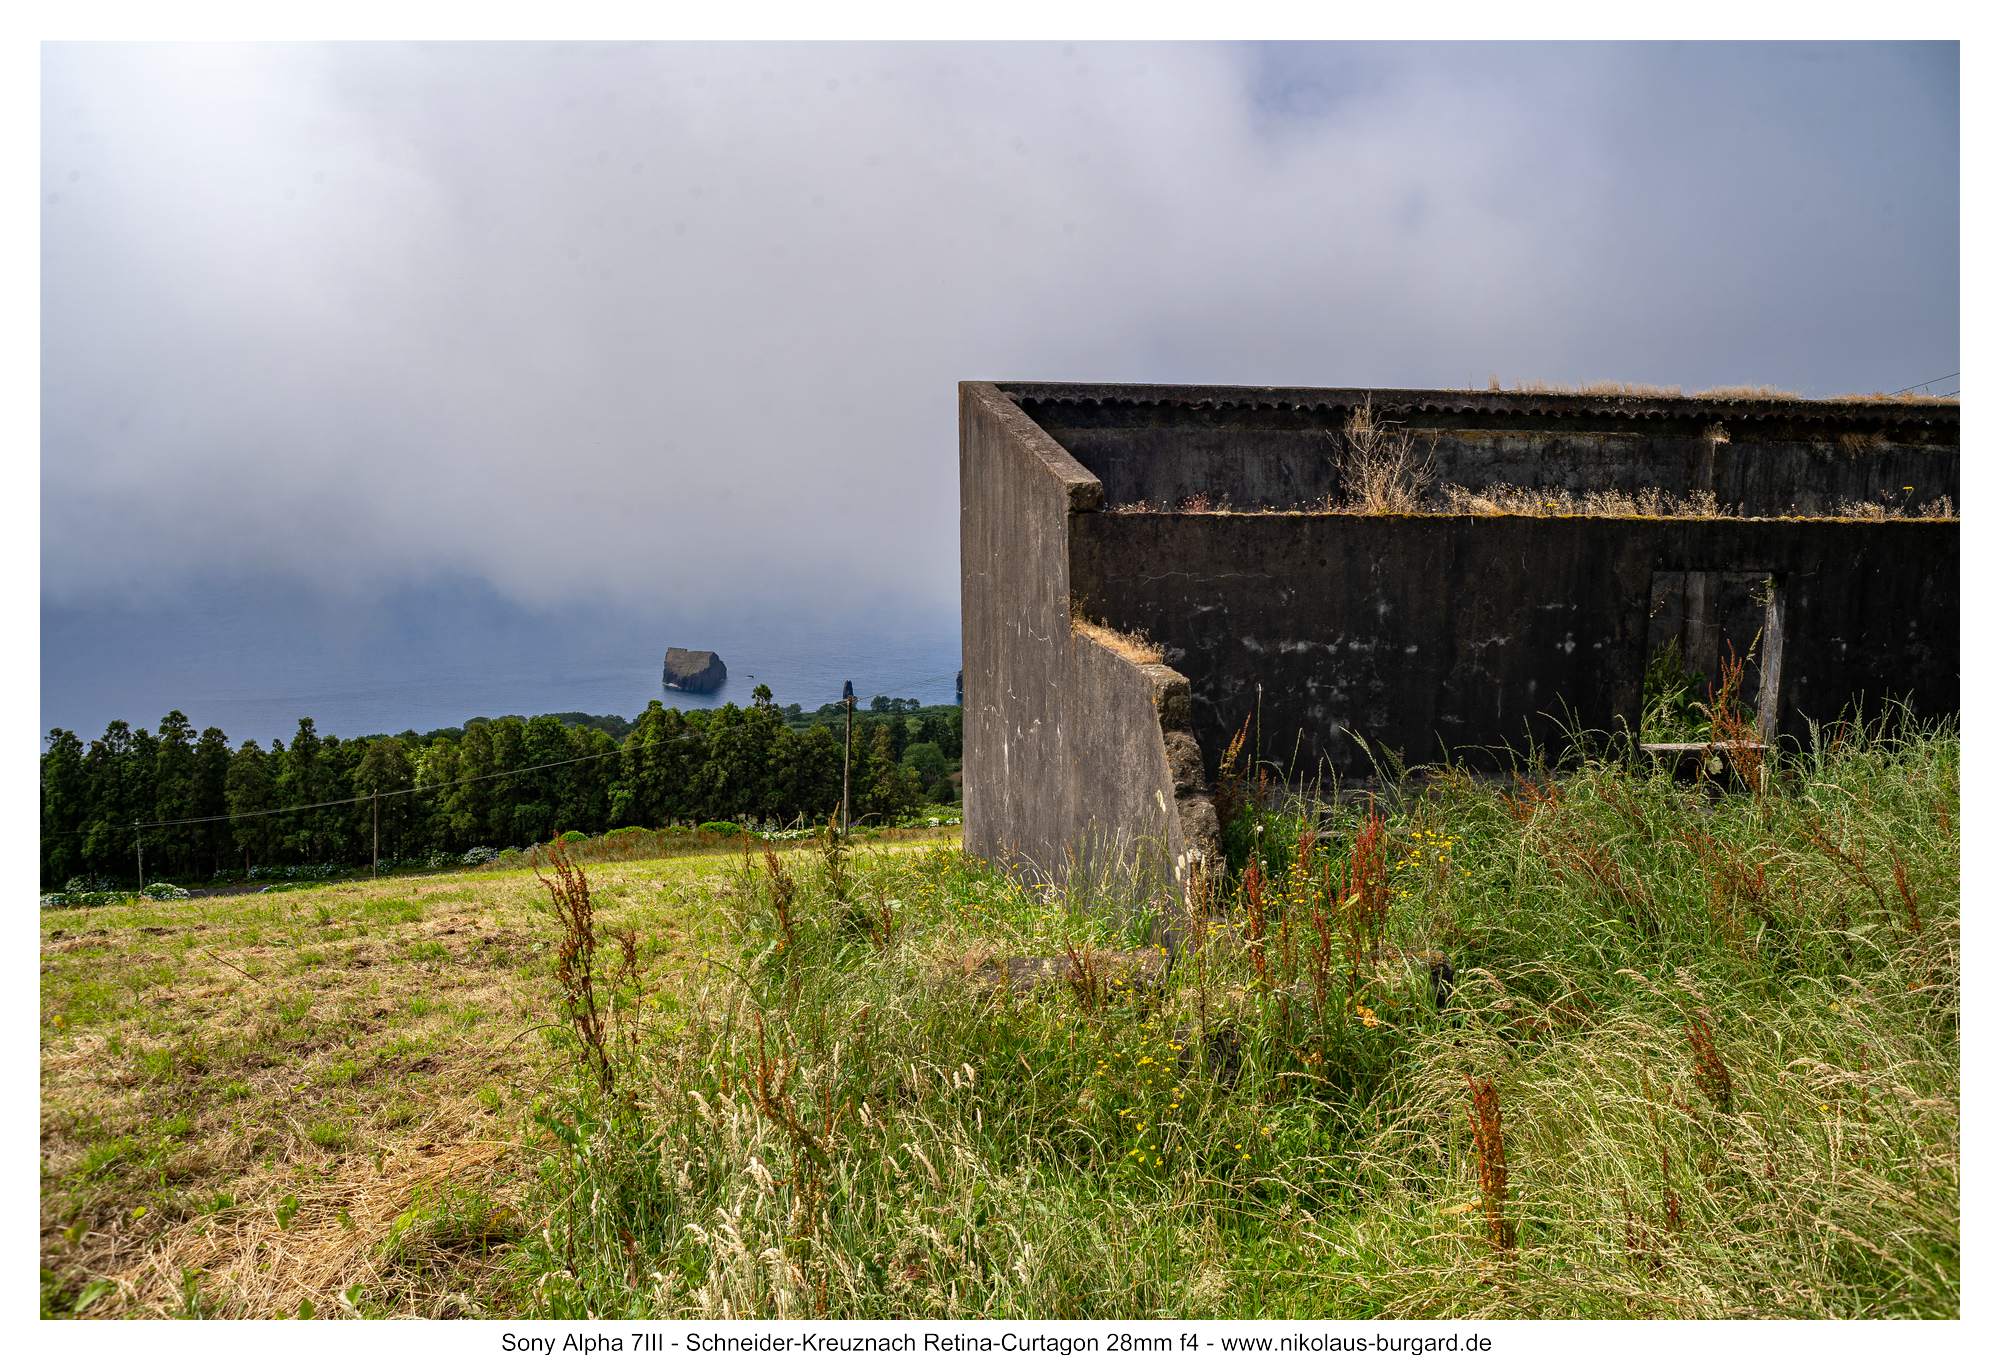
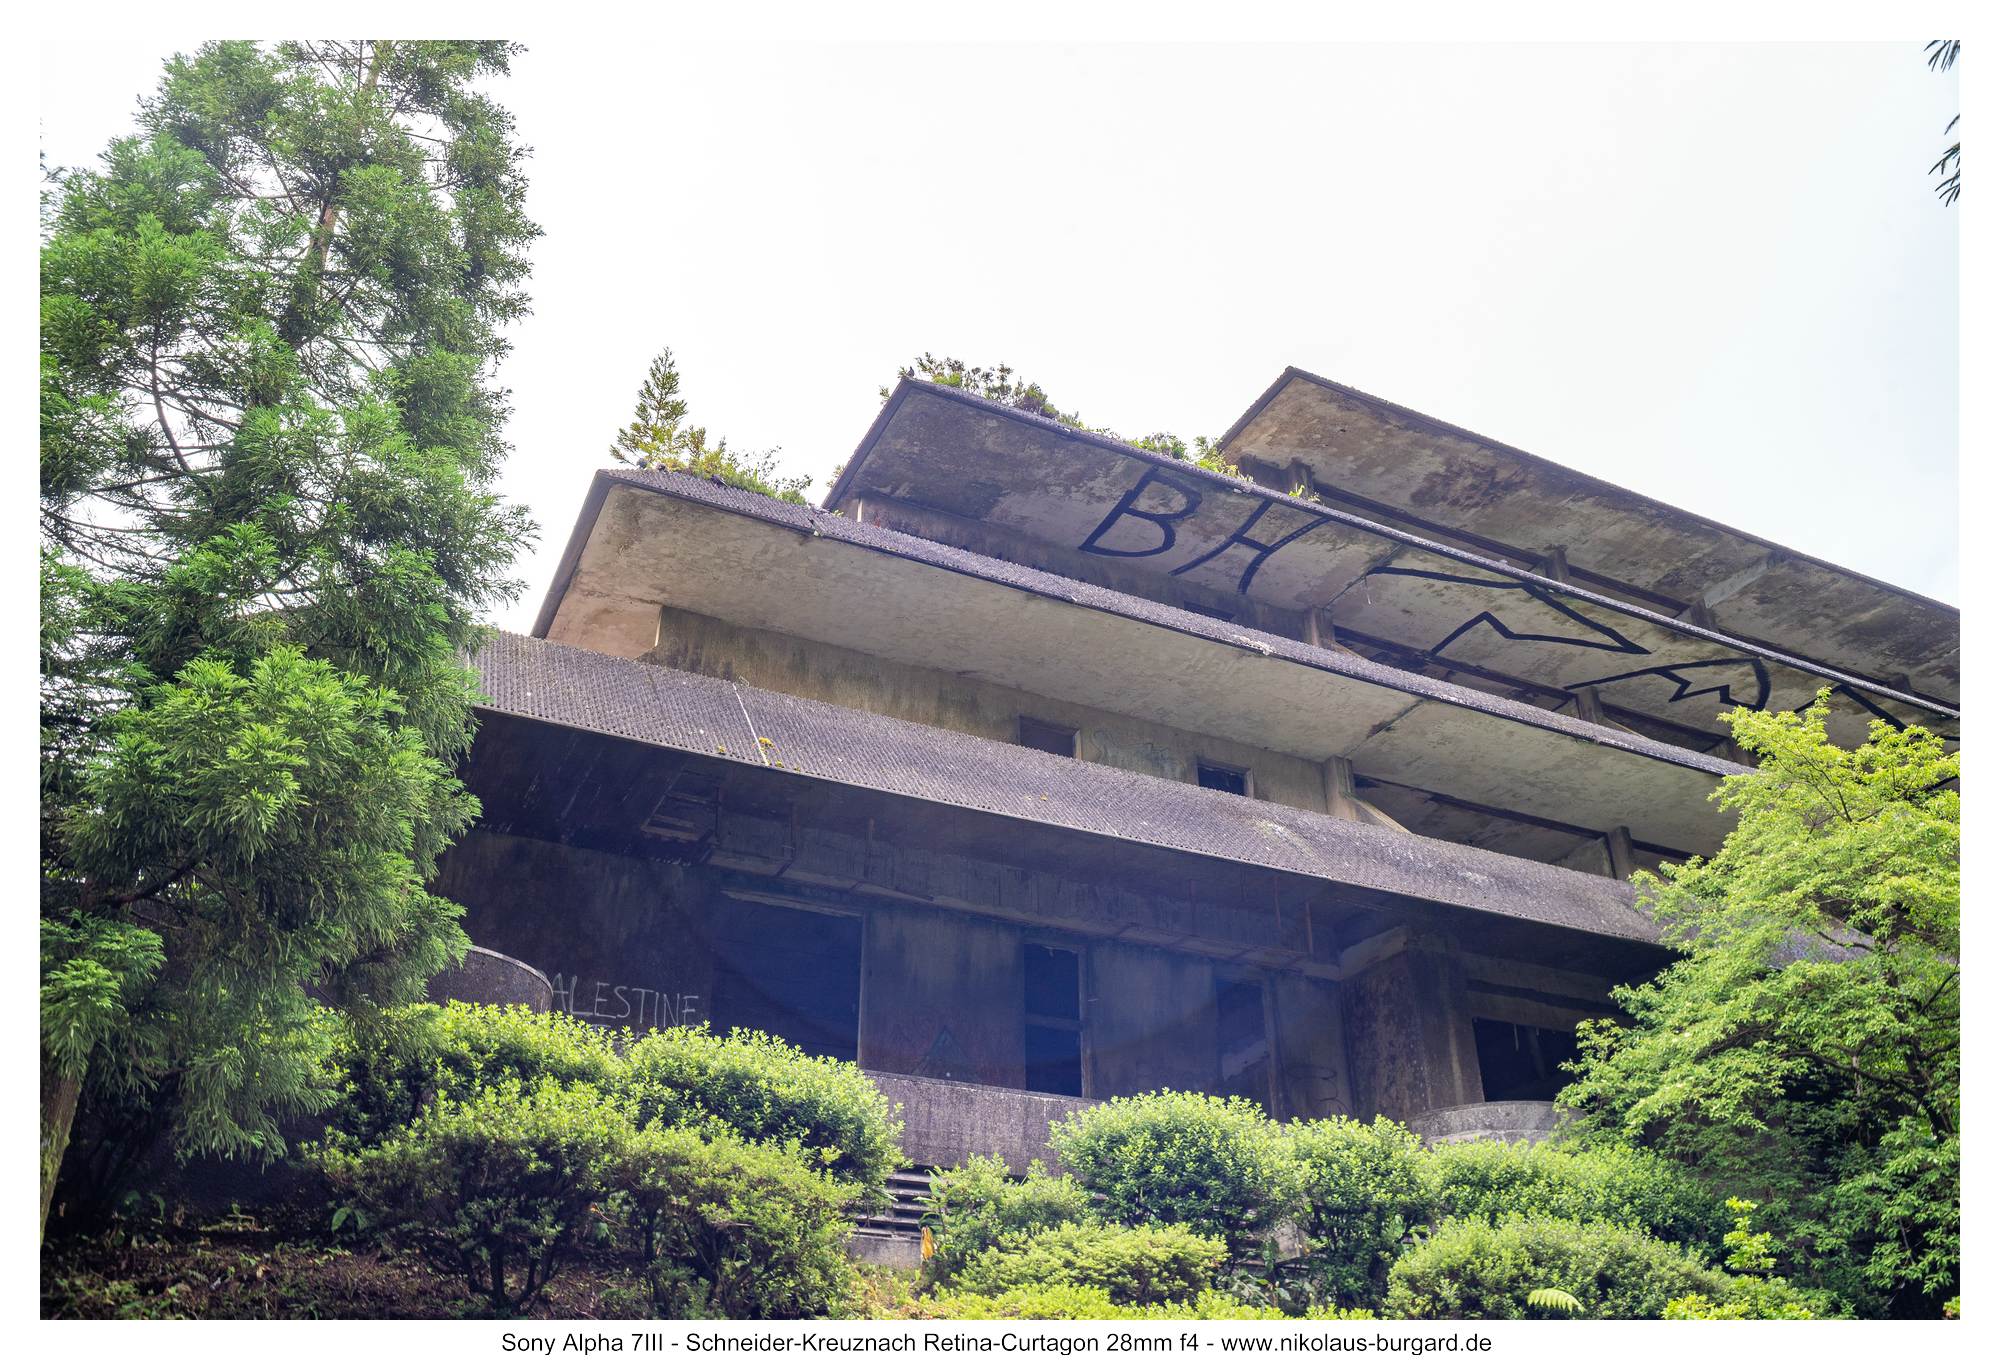
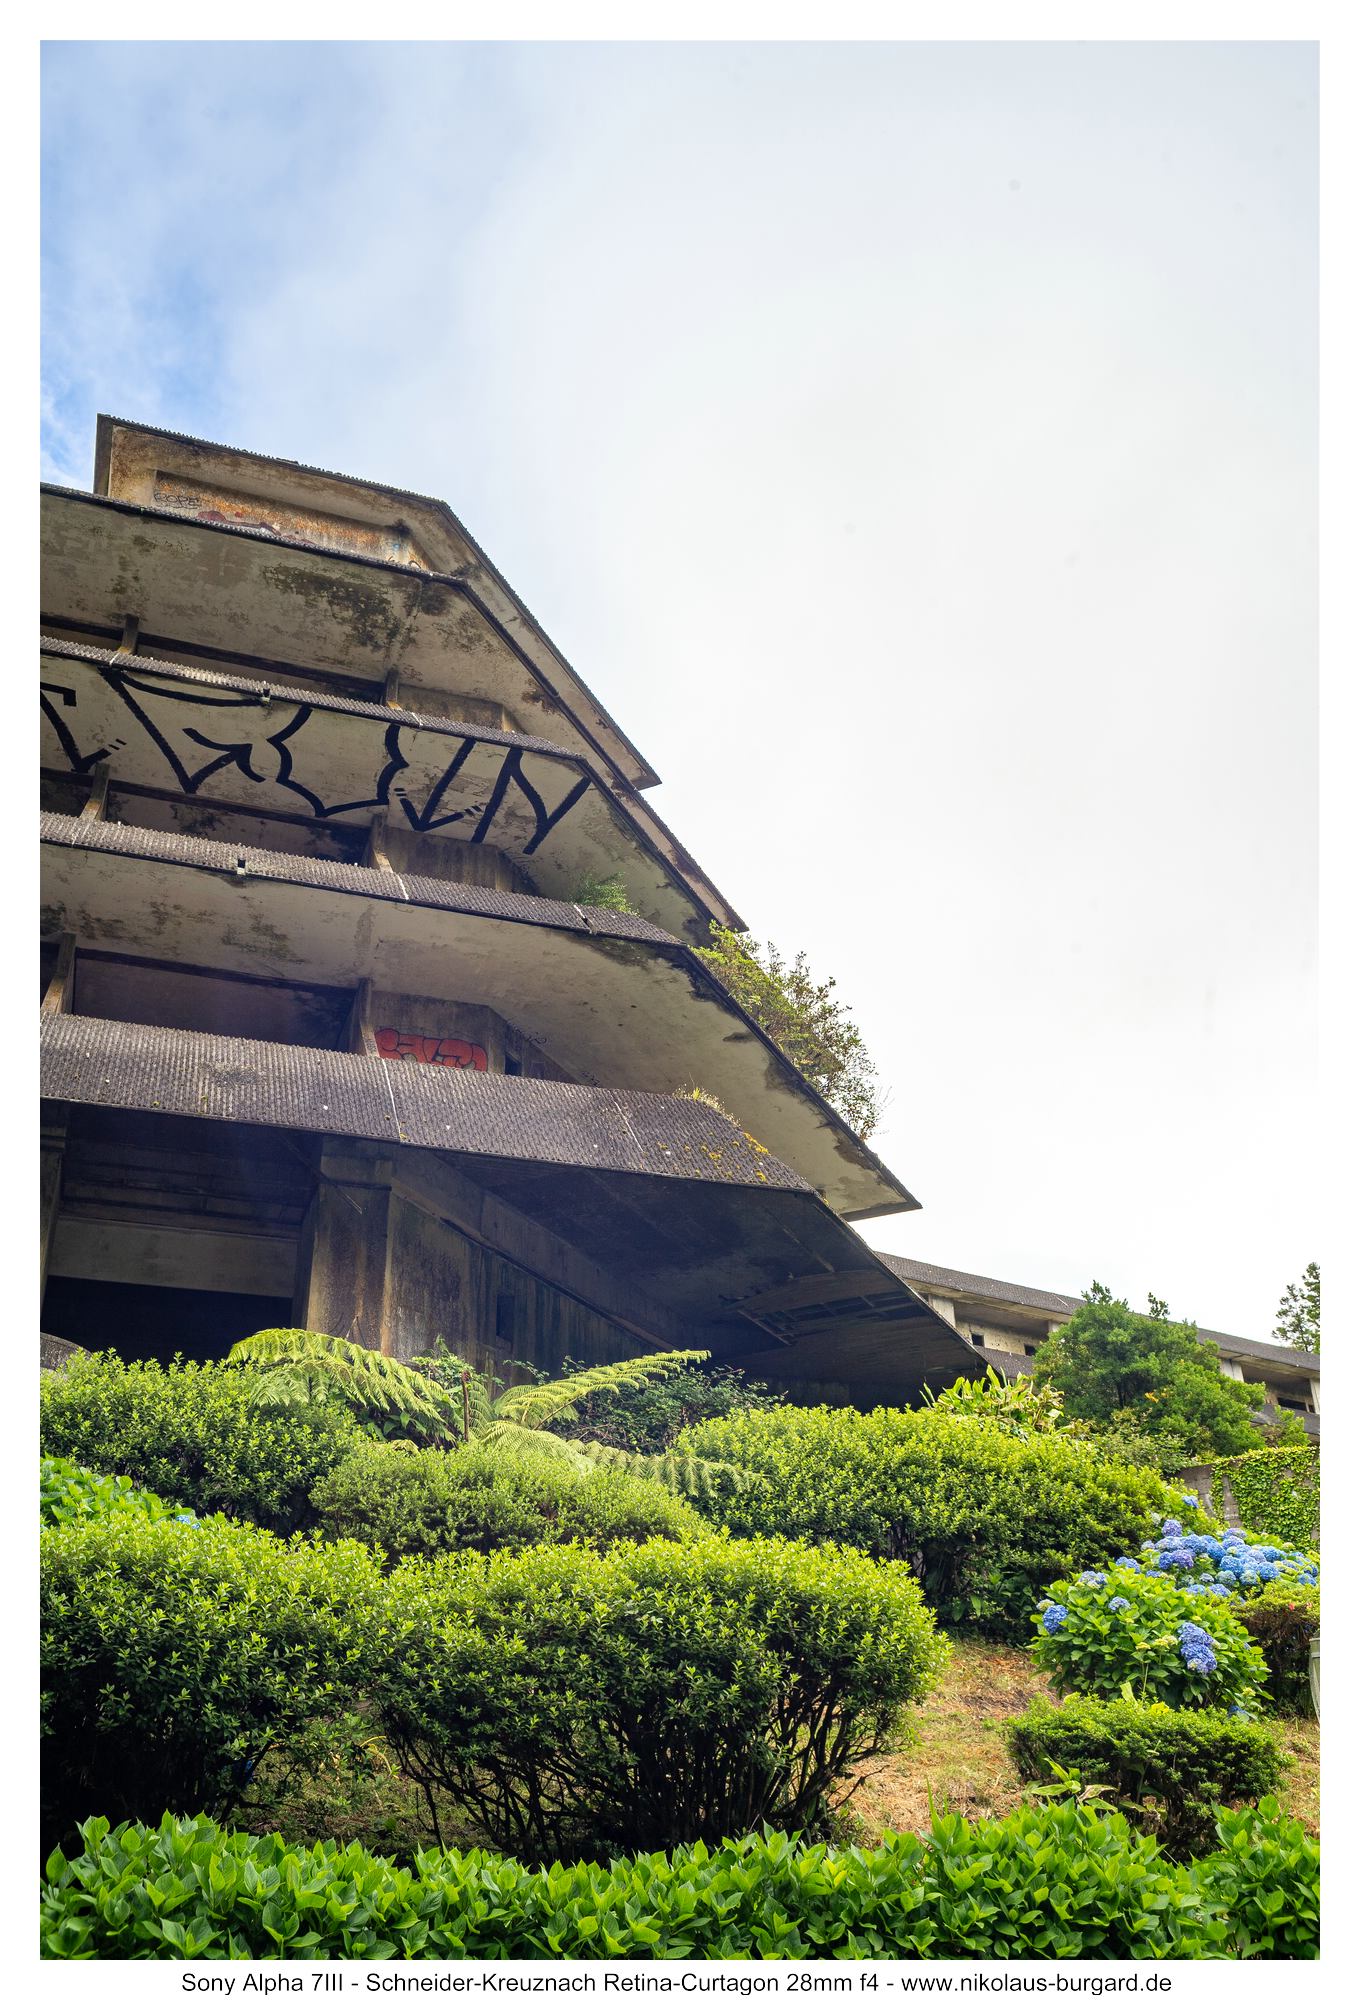
Auch die beiden folgenden Portraits sind noch von einem Aussichtspunkt am Straßenrand oberhalb der Seen entstanden wie die beiden Panoramaaufnahmen.
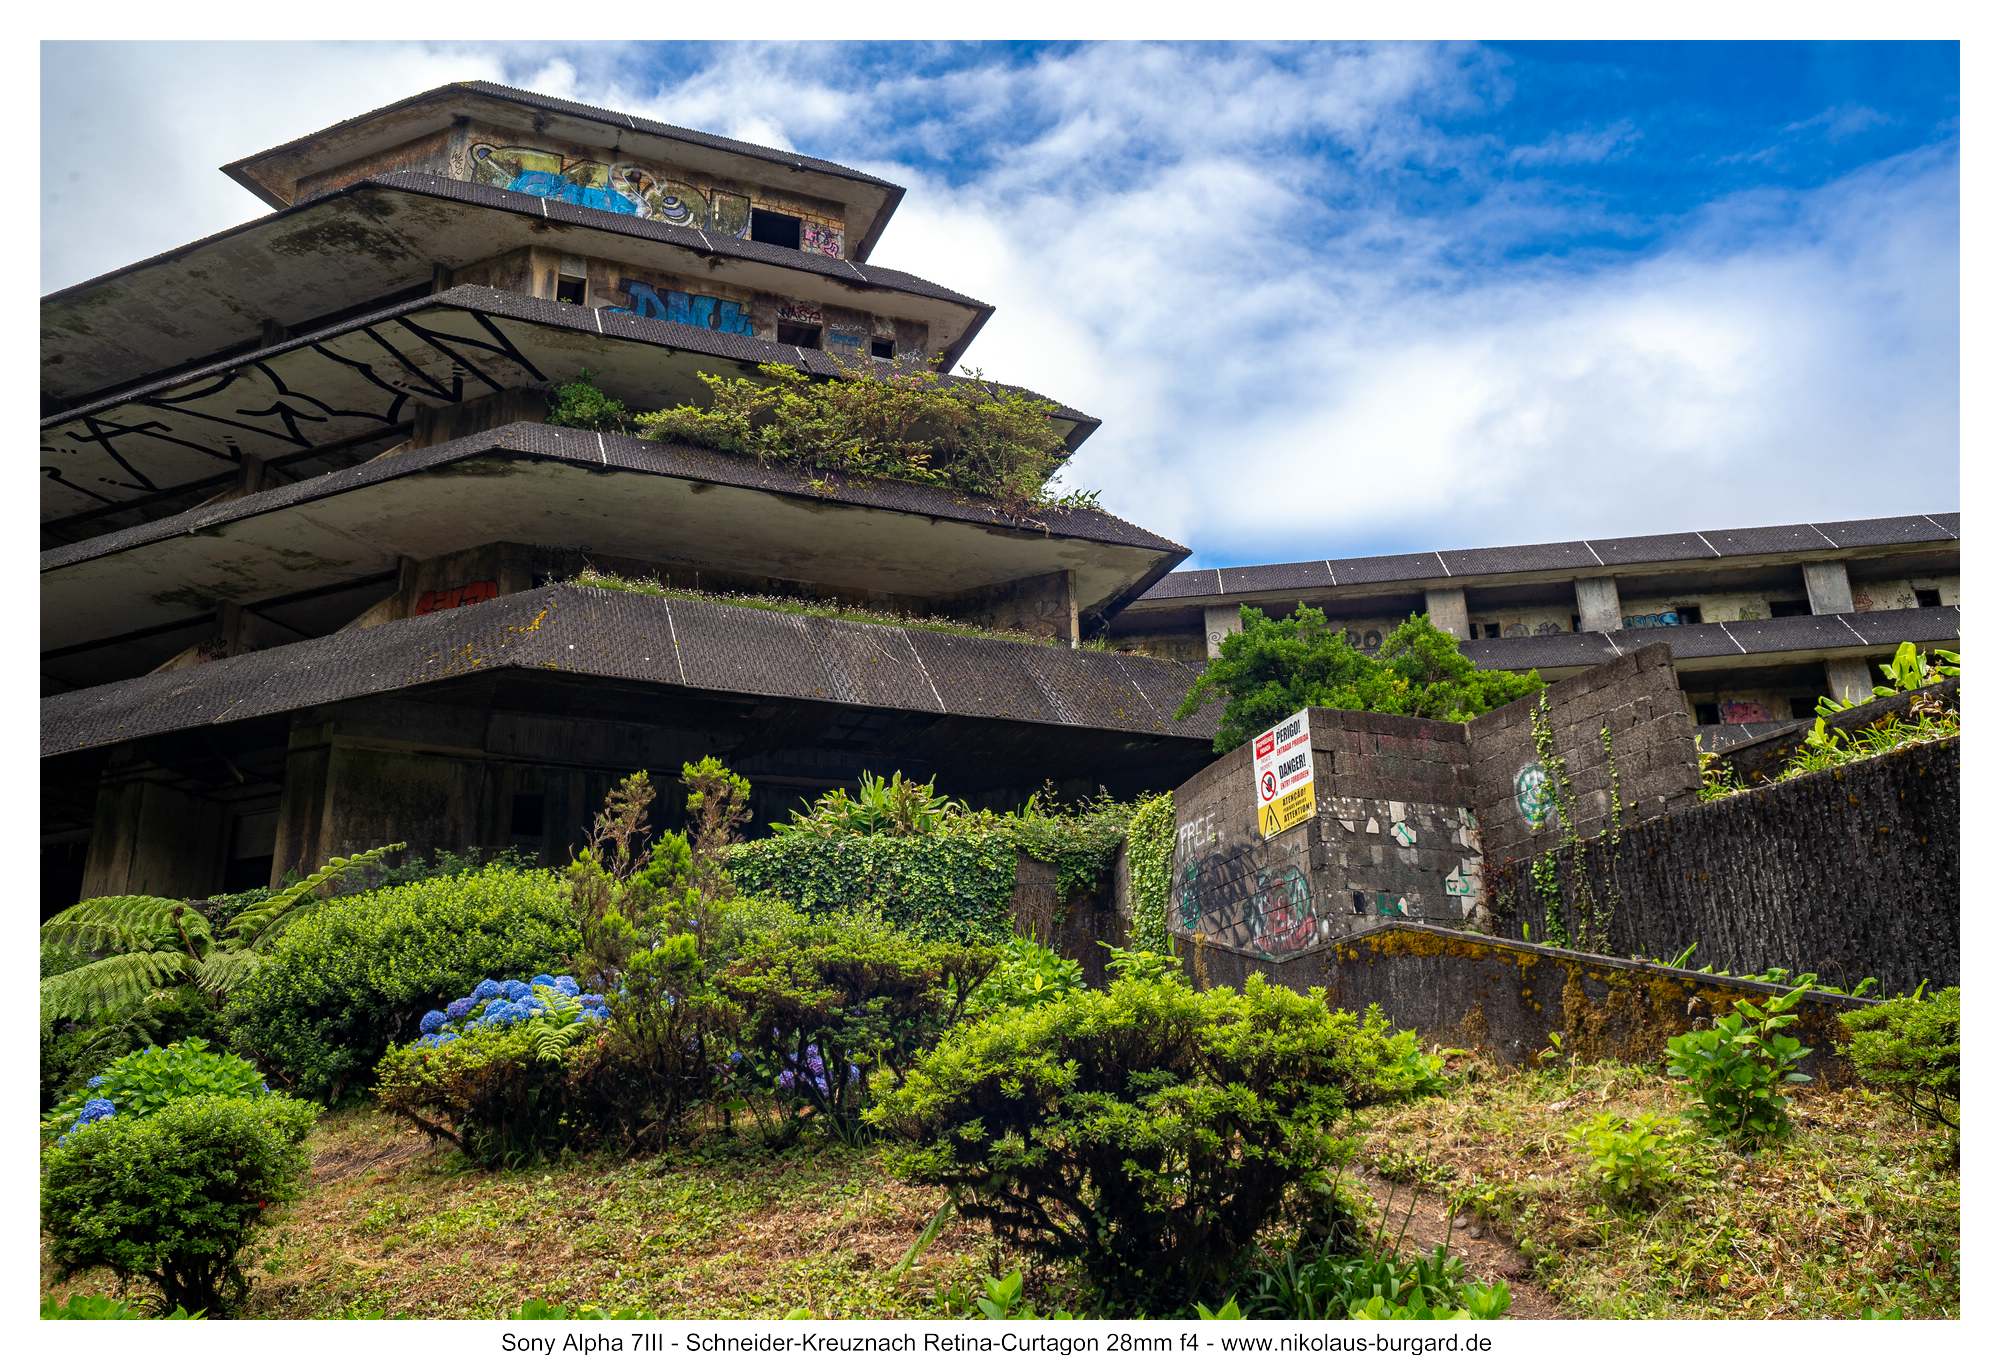
Dann begann für uns eine spannende und schweißtreibende Wanderung von der Halbinsel in der Seemitte bis auf den Kraterrand und auf diesem entlang mit Blick auf die Seen zu unserer Rechten und Blick aufs Meer zu unserer Linken. Zwischenstation war natürlich die berühmte Hotelruine am schönsten Aussichtspunkt auf die Seen. Unglaubliche Eindrücke und Aussichten, geprägt von ständigen Wetterwechseln - ein herrliches Erlebnis!
Like the two panoramic shots, the following two portraits were also taken from a roadside viewpoint above the lakes.
Then began an exciting and strenuous hike for us, from the peninsula in the middle of the lakes up to the crater rim and along it, with a view of the lakes to our right and the sea to our left. Our stop along the way was, of course, the famous hotel ruins at the most beautiful viewpoint overlooking the lakes. Incredible sights and views, shaped by constantly changing weather—a wonderful experience!


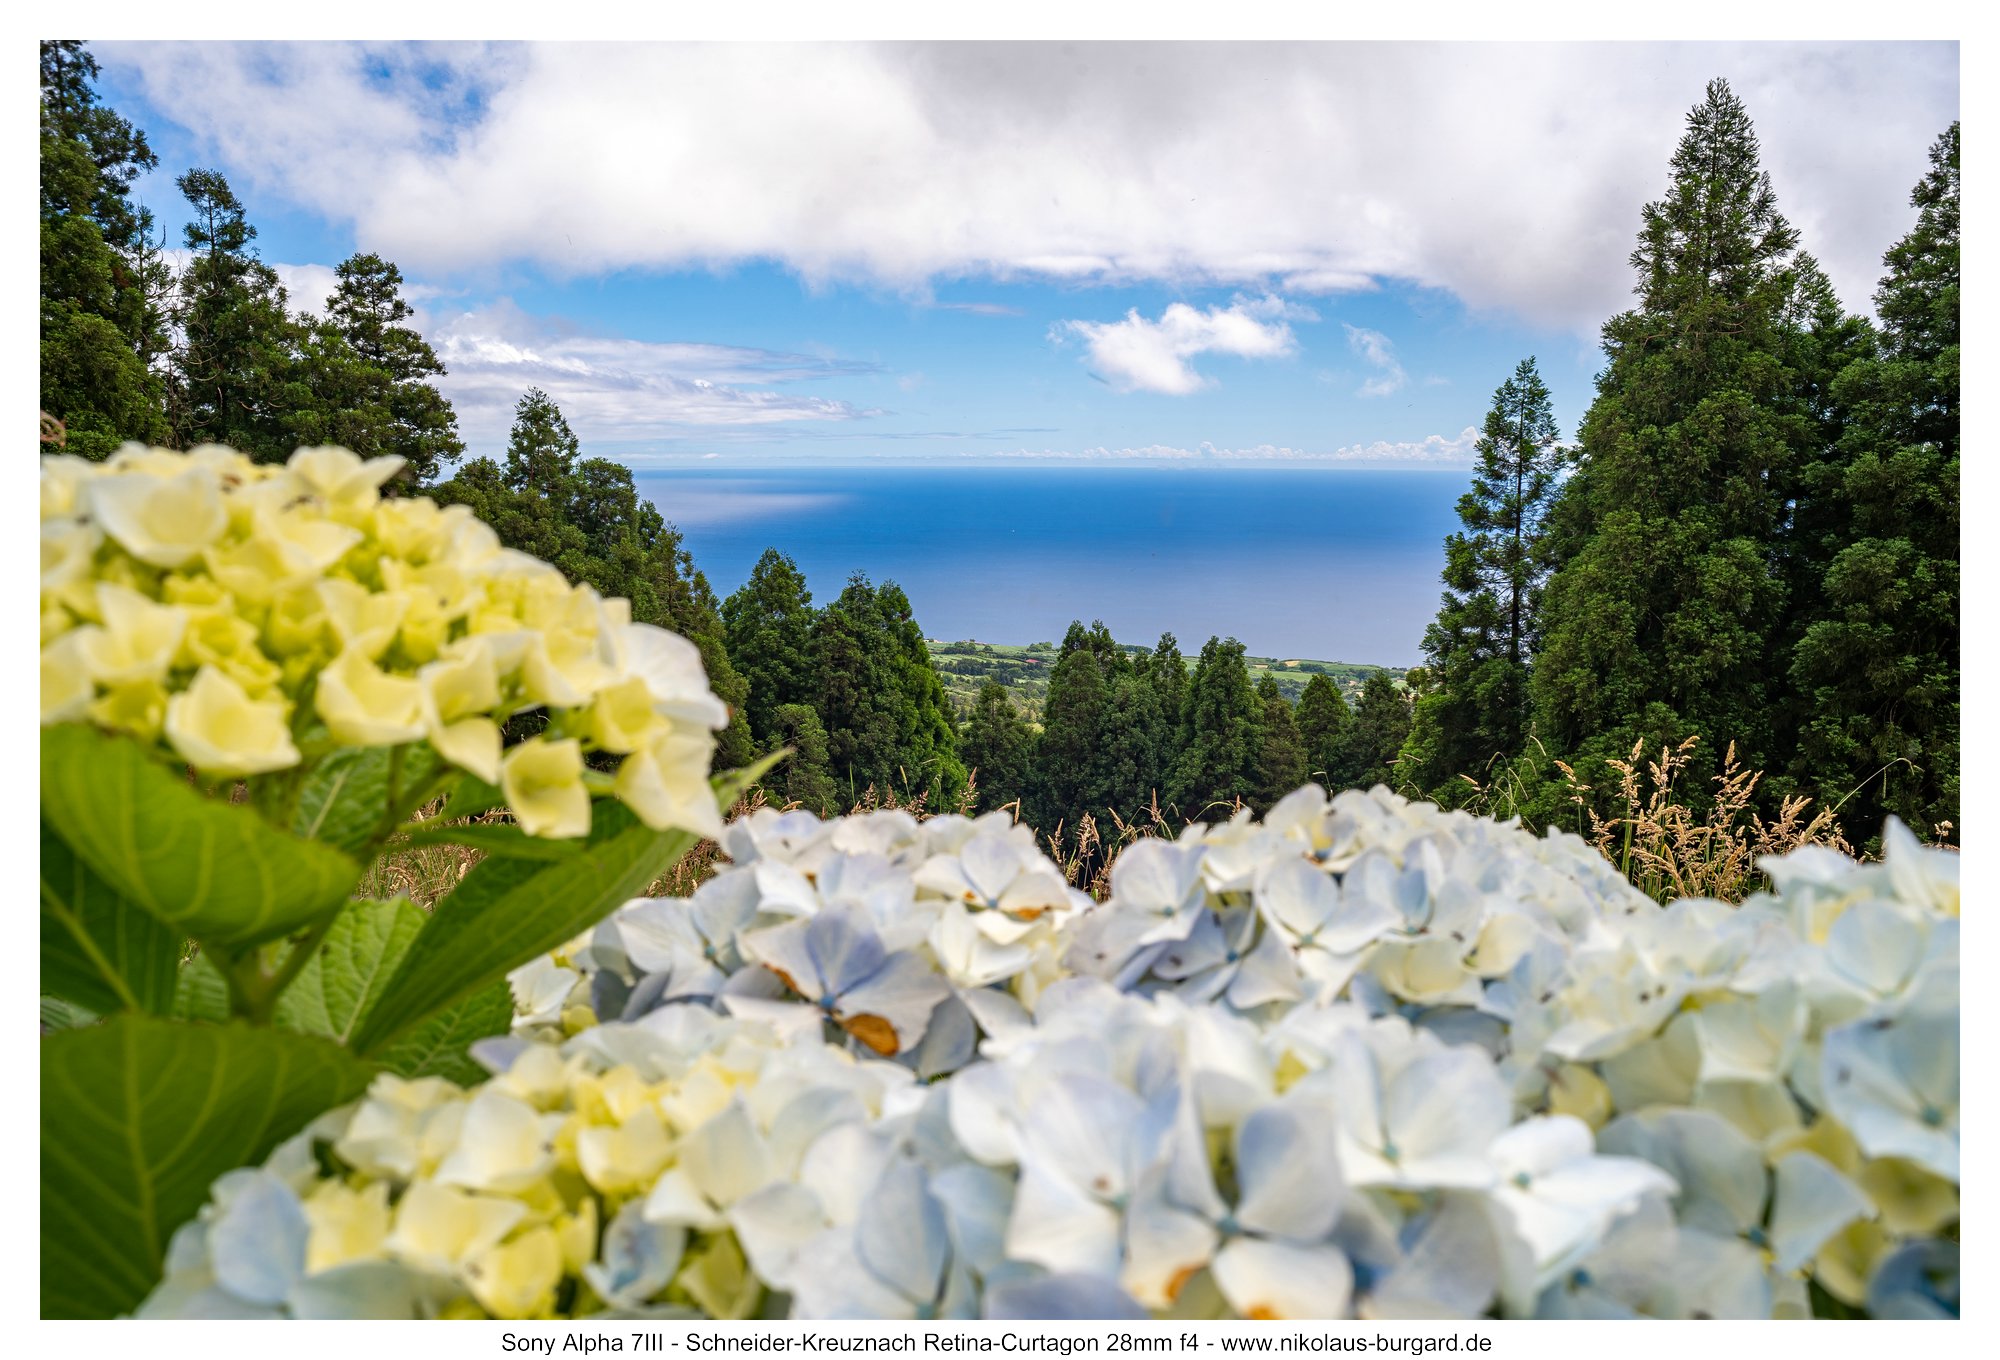


Die folgende Panorama-Aufnahme aus mehreren Hochformat-Bildern zeigt noch einmal eindrucksvoll die Zweifarbigkeit des Sees, umrahmt von den auf Sao Miguel allgegenwertigen Rhododendren:
The following panoramic image, composed of several vertical shots, once again impressively showcases the lake’s two-tone coloration, framed by the rhododendrons that are ubiquitous on São Miguel:
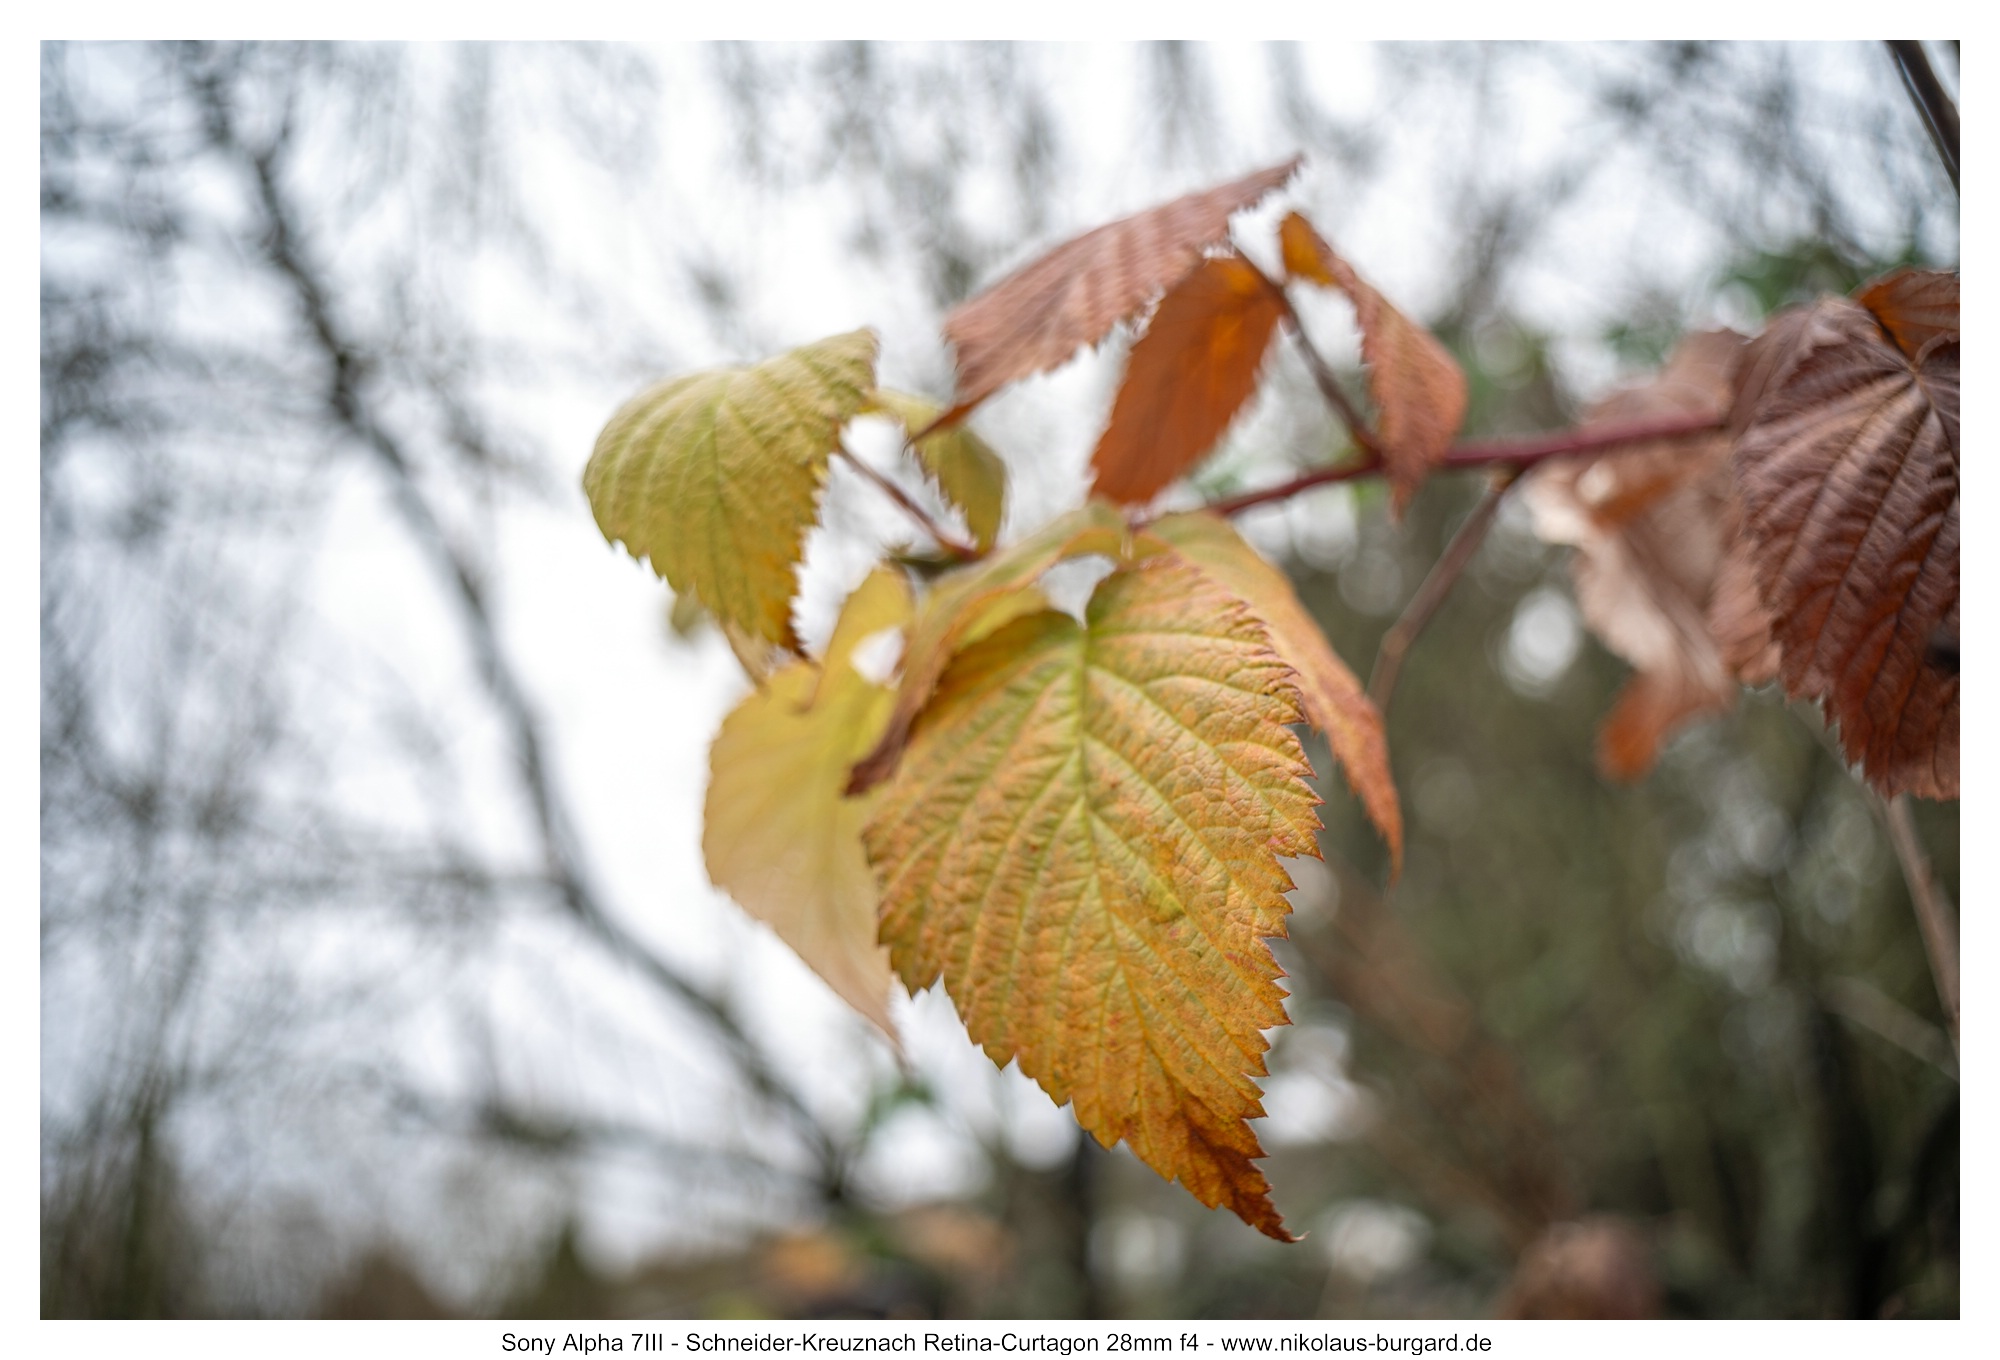
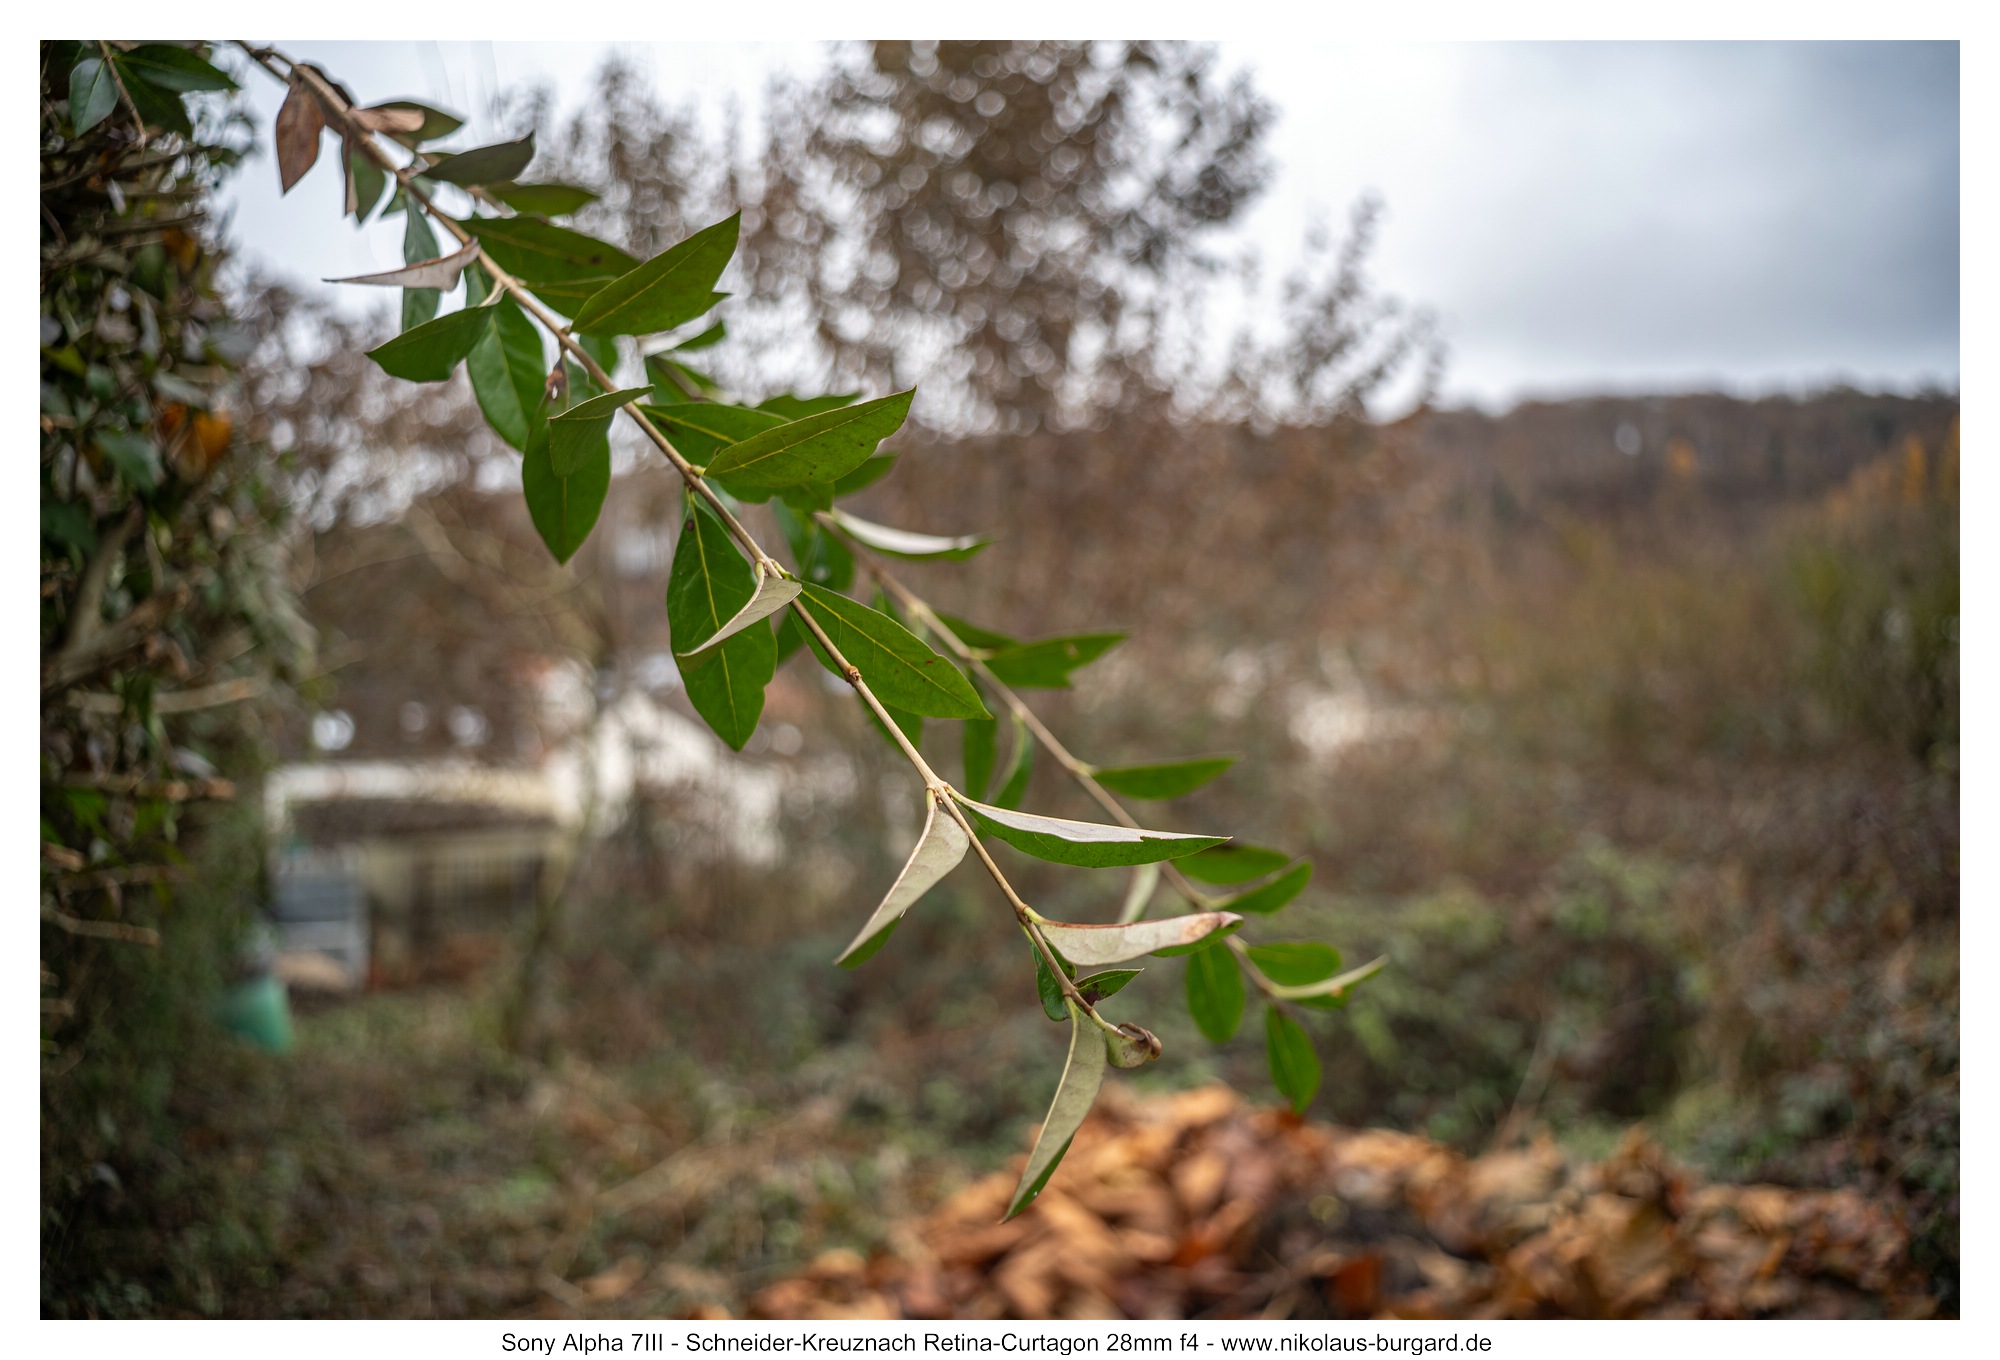
Rendering & Bokeh
Wenn es um das Hintergrundrendering geht, gibt es immer viele gegensätzliche Meinungen.
Denn ob einem die Hintergrunddarstellung eines Objektives gefällt oder nicht, ist einfach Geschmackssache.
Der Eine möchte alles butterweich aufgelöst haben, der Andere mag es busy mit viel Outlining und Strukturen und/oder Swirl (und natürlich gibt es ganz viel zwischen diesen Extremen in der Mitte)...
Das Schneider-Kreuznach Retina-Curtagon 28mm f4 ist mit seinen gemäßigten Grunddaten per se mit Sicherheit kein "Bokehmonster". Die Hintergründe werden meist nicht sonderlich weich gerendert, es gibt immer sichtbare Reststrukturen und Outlining.
Das Objektiv stammt halt von 1959 und gehört somit zur ersten Generation der Retrofokusobjektive und unter diesen zu den "wirklich weiten" Vertretern. Damals standen mit Sicherheit andere Leistungskriterien bei einem Weitwinkelobjektiv im Lastenheft.
Die folgende Reihe zeigt die Entwicklung der Hintergrundunschärfe beim Abblenden.
Der Fokus lag auf der 2. Schraube von oben rechts im Bild, Distanz zu dieser war etwa 1m.
Die Blendenwerte sind f4 - f5.6 - f8 - f11:
When it comes to background rendering, there are always many conflicting opinions.
After all, whether or not you like a lens’s background rendering is simply a matter of taste.
Some people want everything rendered with buttery-smooth resolution, while others prefer a busier look with lots of outlines, textures, and/or swirls (and of course, there’s a whole spectrum of options in between these extremes)...
With its moderate specs, the Schneider-Kreuznach Retina-Curtagon 28mm f/4 is certainly not a “bokeh monster” per se. Backgrounds are usually not rendered particularly softly; there are always visible residual textures and outlines.
The lens dates back to 1959 and thus belongs to the first generation of retrofocus lenses, and among these, to the “truly wide” models. Back then, the specifications for a wide-angle lens certainly included different performance criteria.
The following series shows the development of background blur as the aperture is stopped down.
The focus was on the second screw from the top right in the image; the distance to it was about 1 m.
The aperture values are f/4 – f/5.6 – f/8 – f/11:


Gerade bei Offenblende ist das Rendering in der Unschärfe nie ganz weich.
Es gibt auf diese Distanz auch etwas Outlining und bei diesem Motiv keinen Swirl.
Der Übergang von Schärfe zu Unschärfe ist weich und fließend.
Beim Abblenden beruhigt sich das Rendering bei steigender Schärfentiefe schnell.
An meinem zweiten häufig gezeigten Bokehtestmotiv ist das grundsätzlich weiche und flächige Hintergrundrendering mit Reststrukturen vor allem zu den Ecken hin gut zu sehen.
Um überhaupt so nah heranzukommen, muss man einen Zwischenring oder wie ich einen Helicoid-Adapter benutzen.
Especially at wide-open aperture, the rendering in the out-of-focus areas is never completely smooth.
At this distance, there is also some outlining, and no swirl in this subject.
The transition from sharpness to blur is smooth and seamless.
When stopping down, the rendering stabilizes quickly as the depth of field increases.
In my second frequently shown bokeh test subject, the generally soft and flat background rendering with residual textures is clearly visible, especially toward the corners.
To get this close at all, you need to use an extension tube or, as I do, a helicoid adapter.

An der objektiveigenen Naheinstellgrenze von 90cm ist selbst bei f4 nur wenig Hintergrundunschärfe zu sehen, die dann beim Abblenden auch noch schnell verschwindet:
At the lens's minimum focusing distance of 90 cm, there is very little background blur even at f/4, and this quickly disappears when stopping down:


Das Hintergrundrendering im Nahbereich ist nervös und "plättchenhaft".
Viele kleine Reststrukturen verbleiben sichtbar und führen zu krisseligen Hintergründen:
The background rendering at close range is jagged and “pixelated.”
Many small residual structures remain visible, resulting in a jagged background:


Beispielhaft seht ihr (bei Offenblende f4) 3 Bildreihen mit jeweils immer weiterer Annäherung ans Motiv,
anhand derer man die Veränderung des Hintergrundrenderings gut sehen kann:
As an example, here are (at f/4) three sets of images, each showing a closer approach to the subject,
which clearly illustrate the change in how the background is rendered:


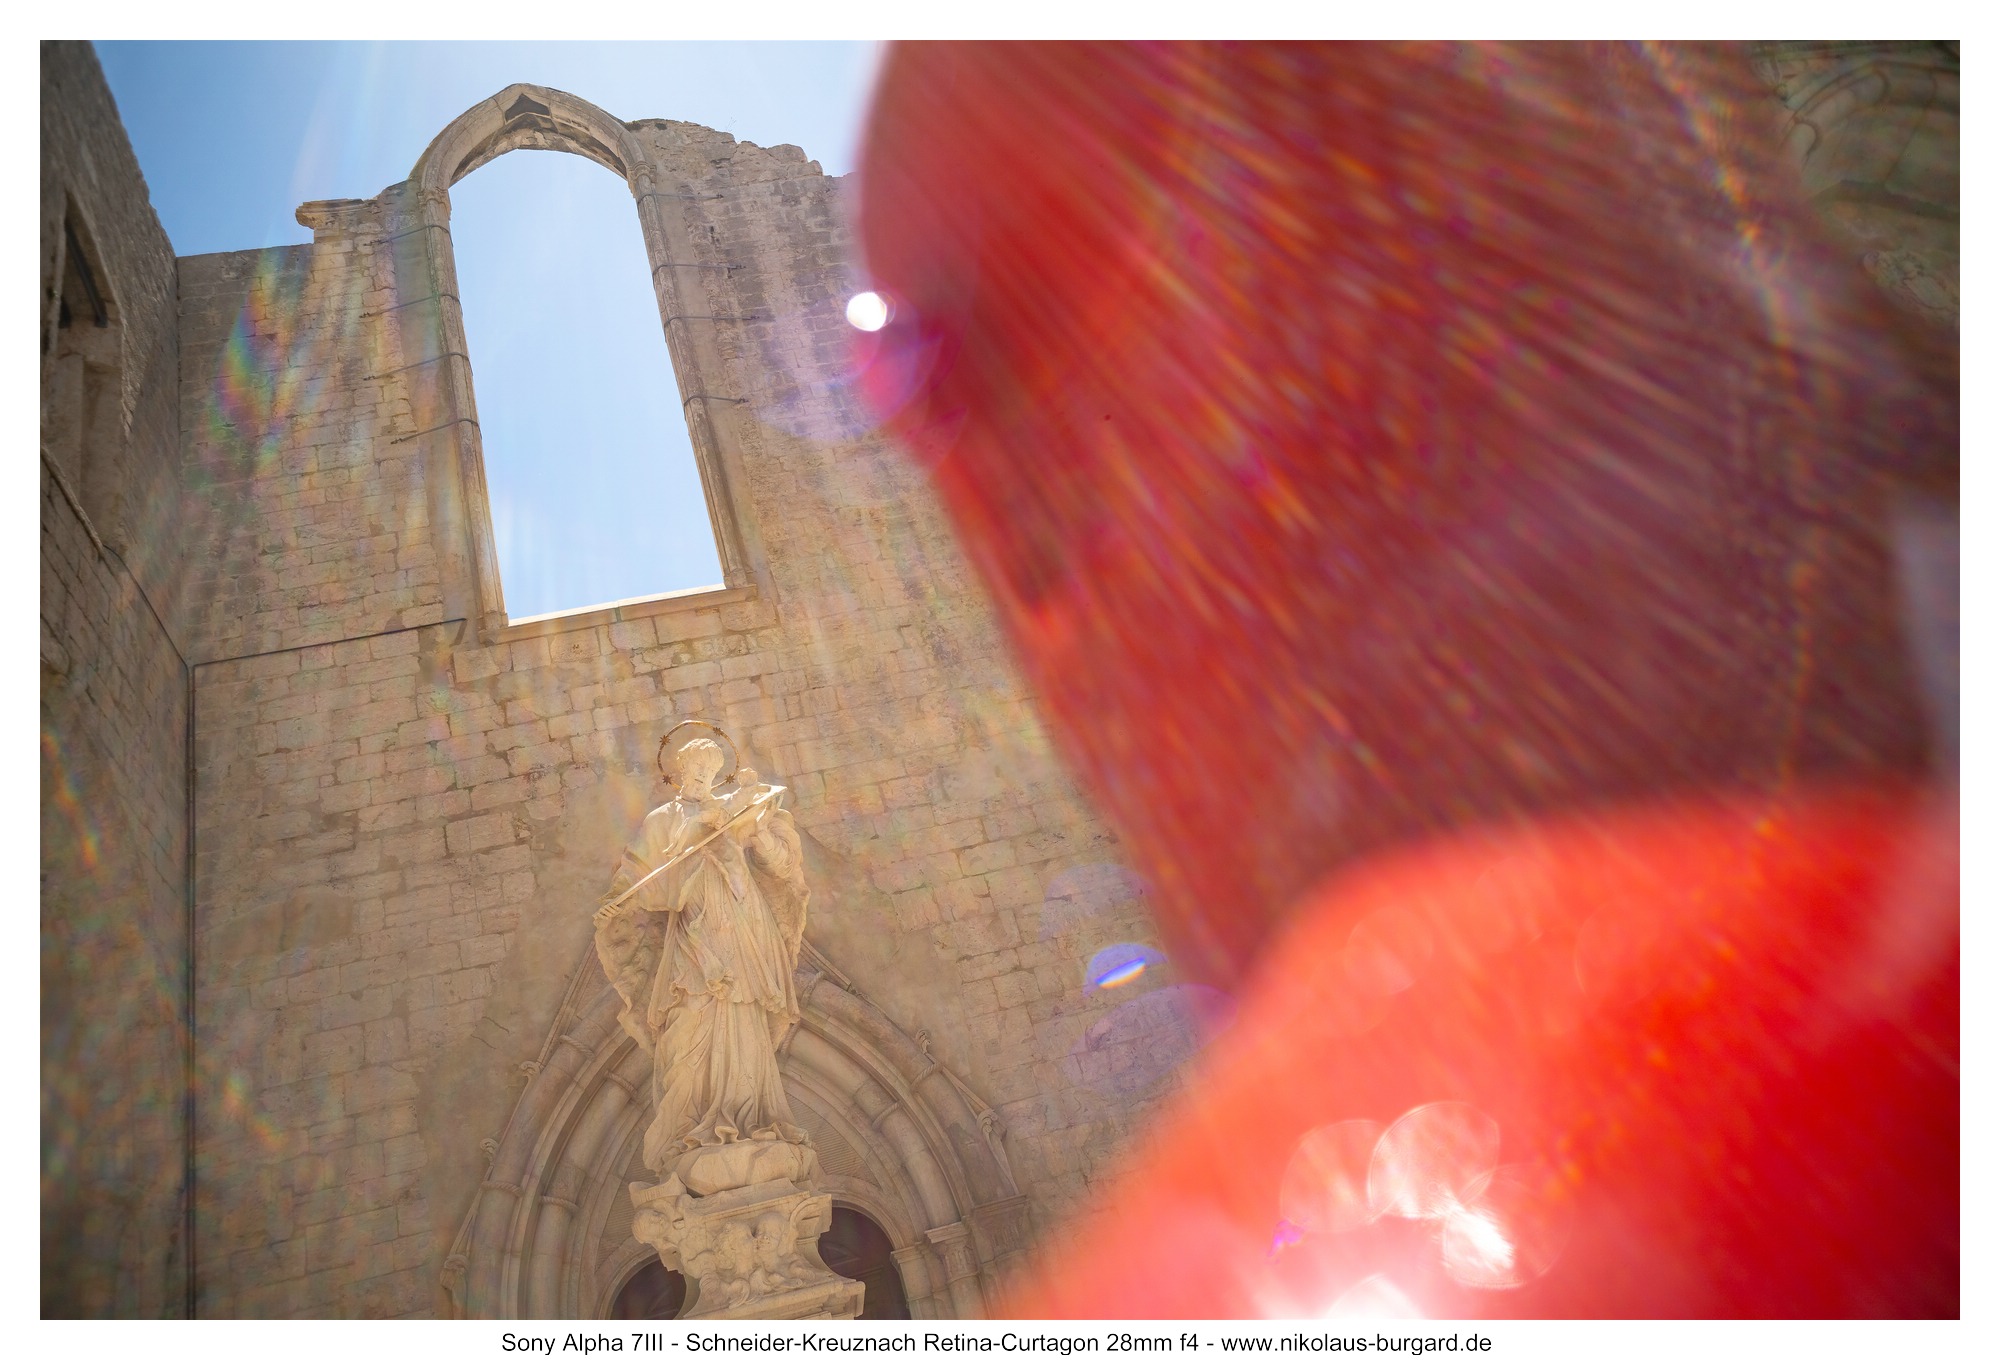
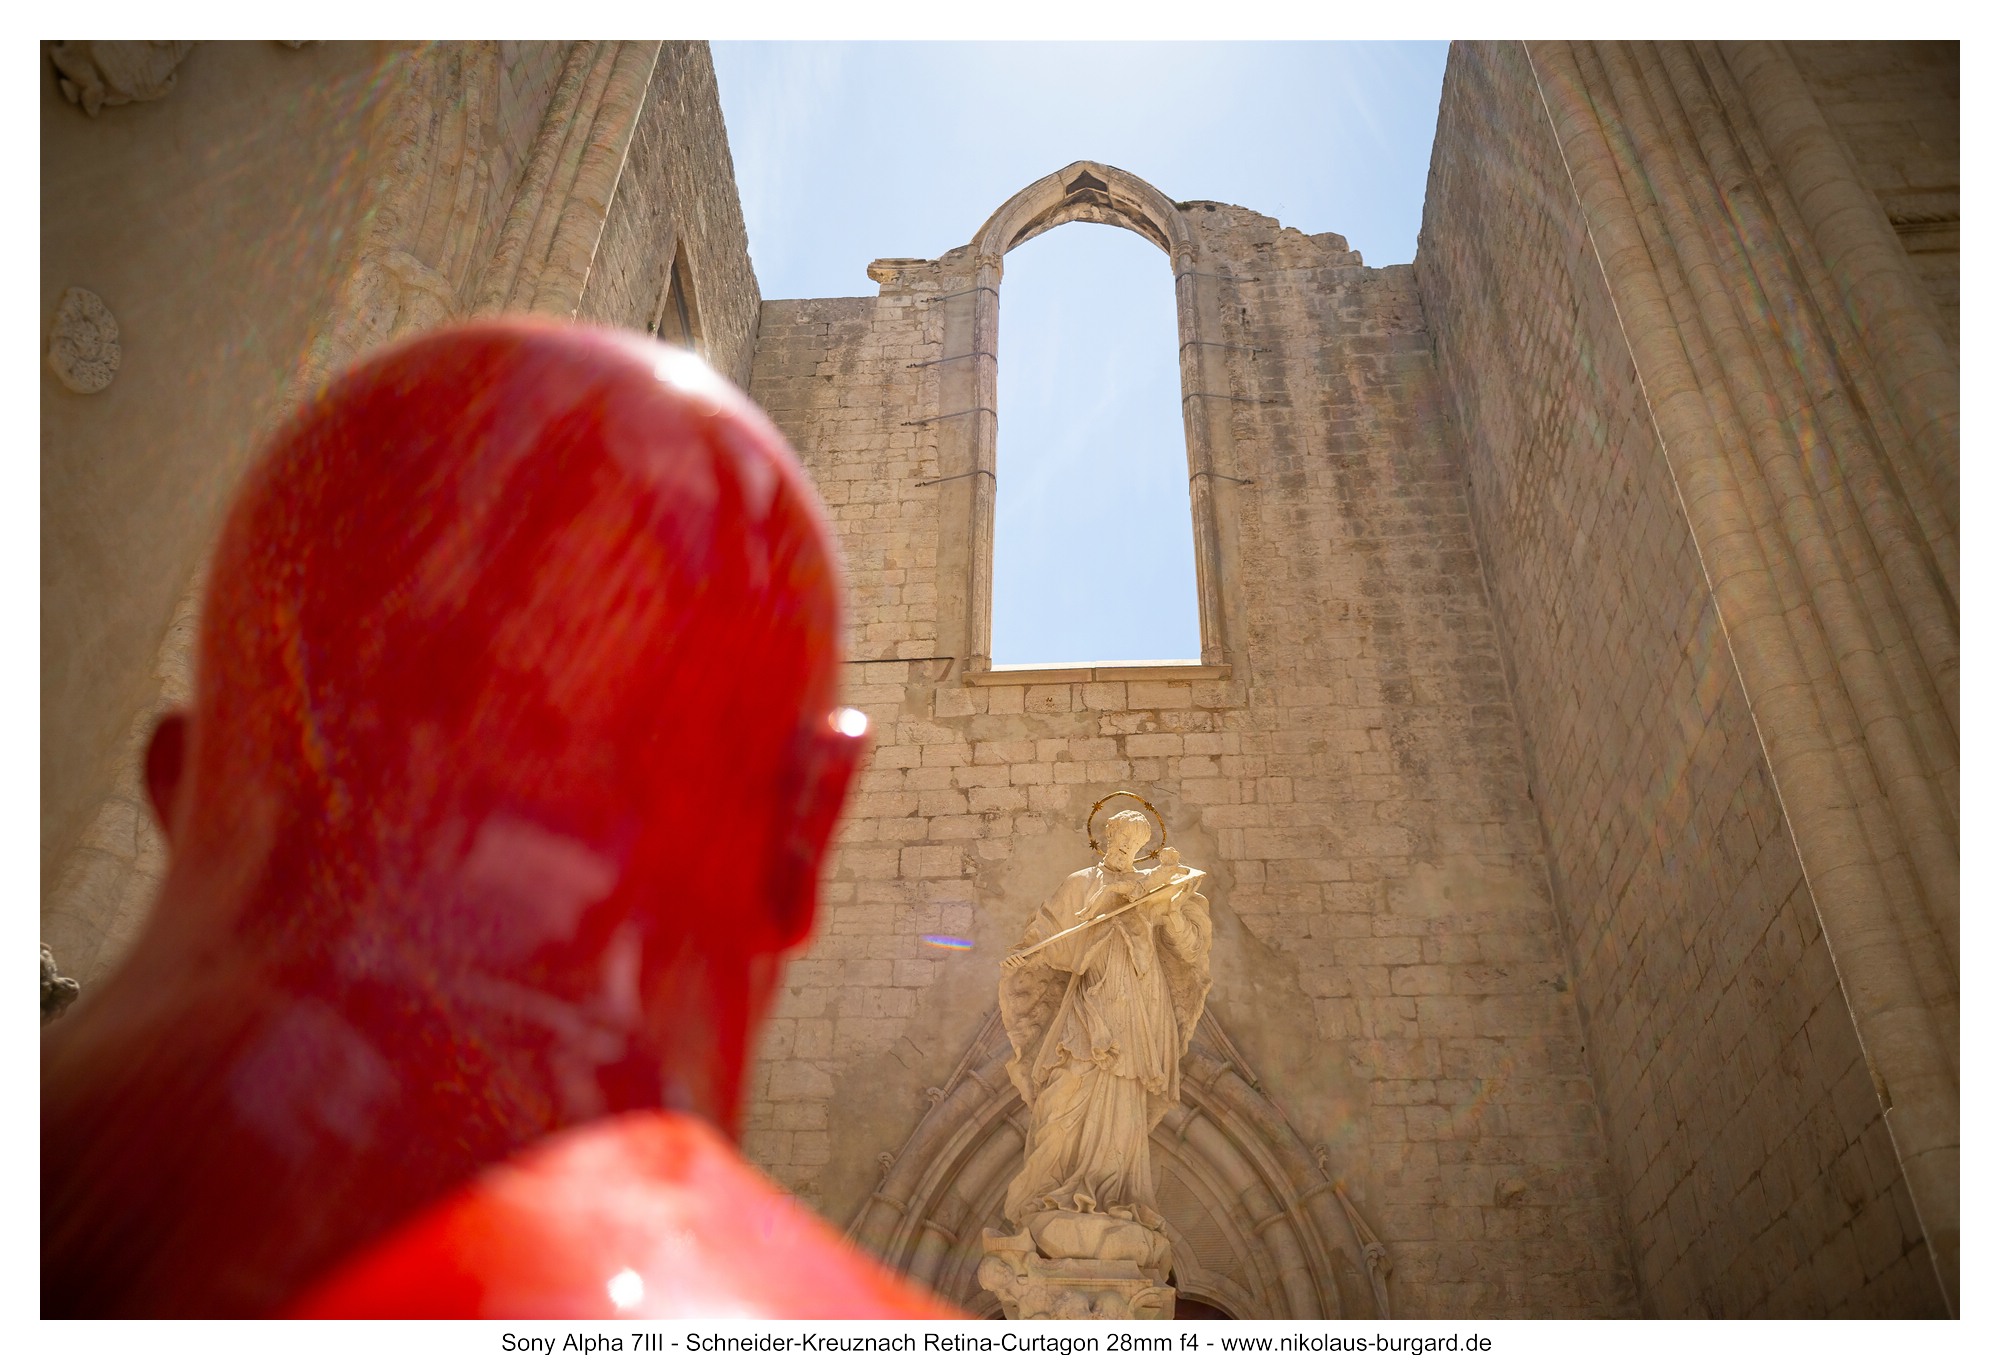
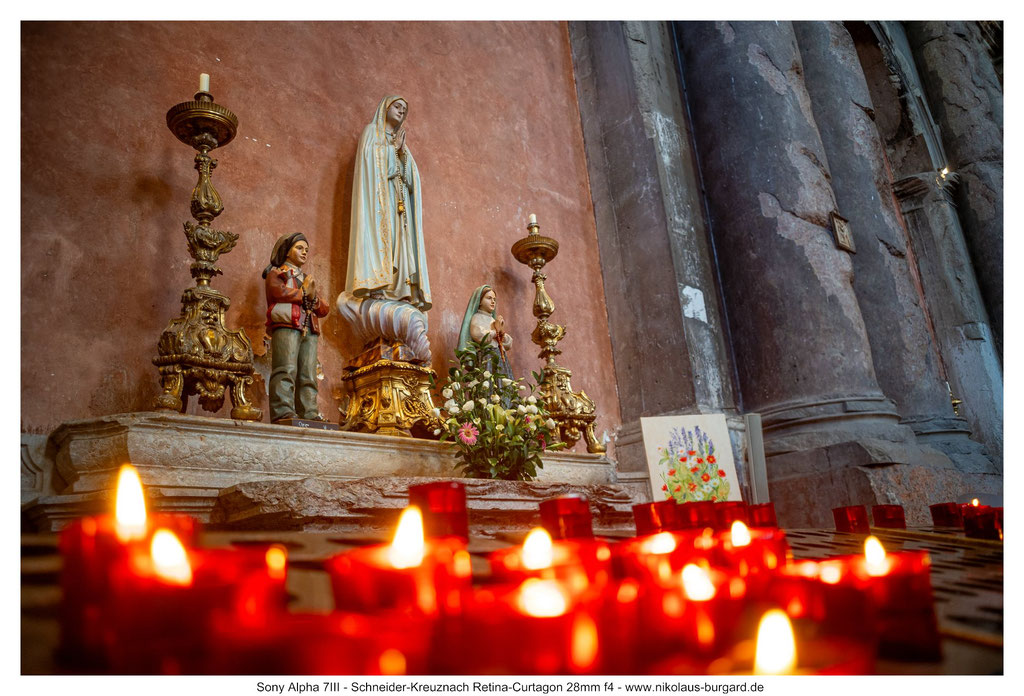
Und auch ein Fokuspaar, einmal mit Fokussierung auf den "Kopf" und einmal mit Fokus auf die Heiligenfigur, habe ich vorbereitet:
I’ve also prepared a pair of shots, one focusing on the “head” and the other on the figure of the saint:


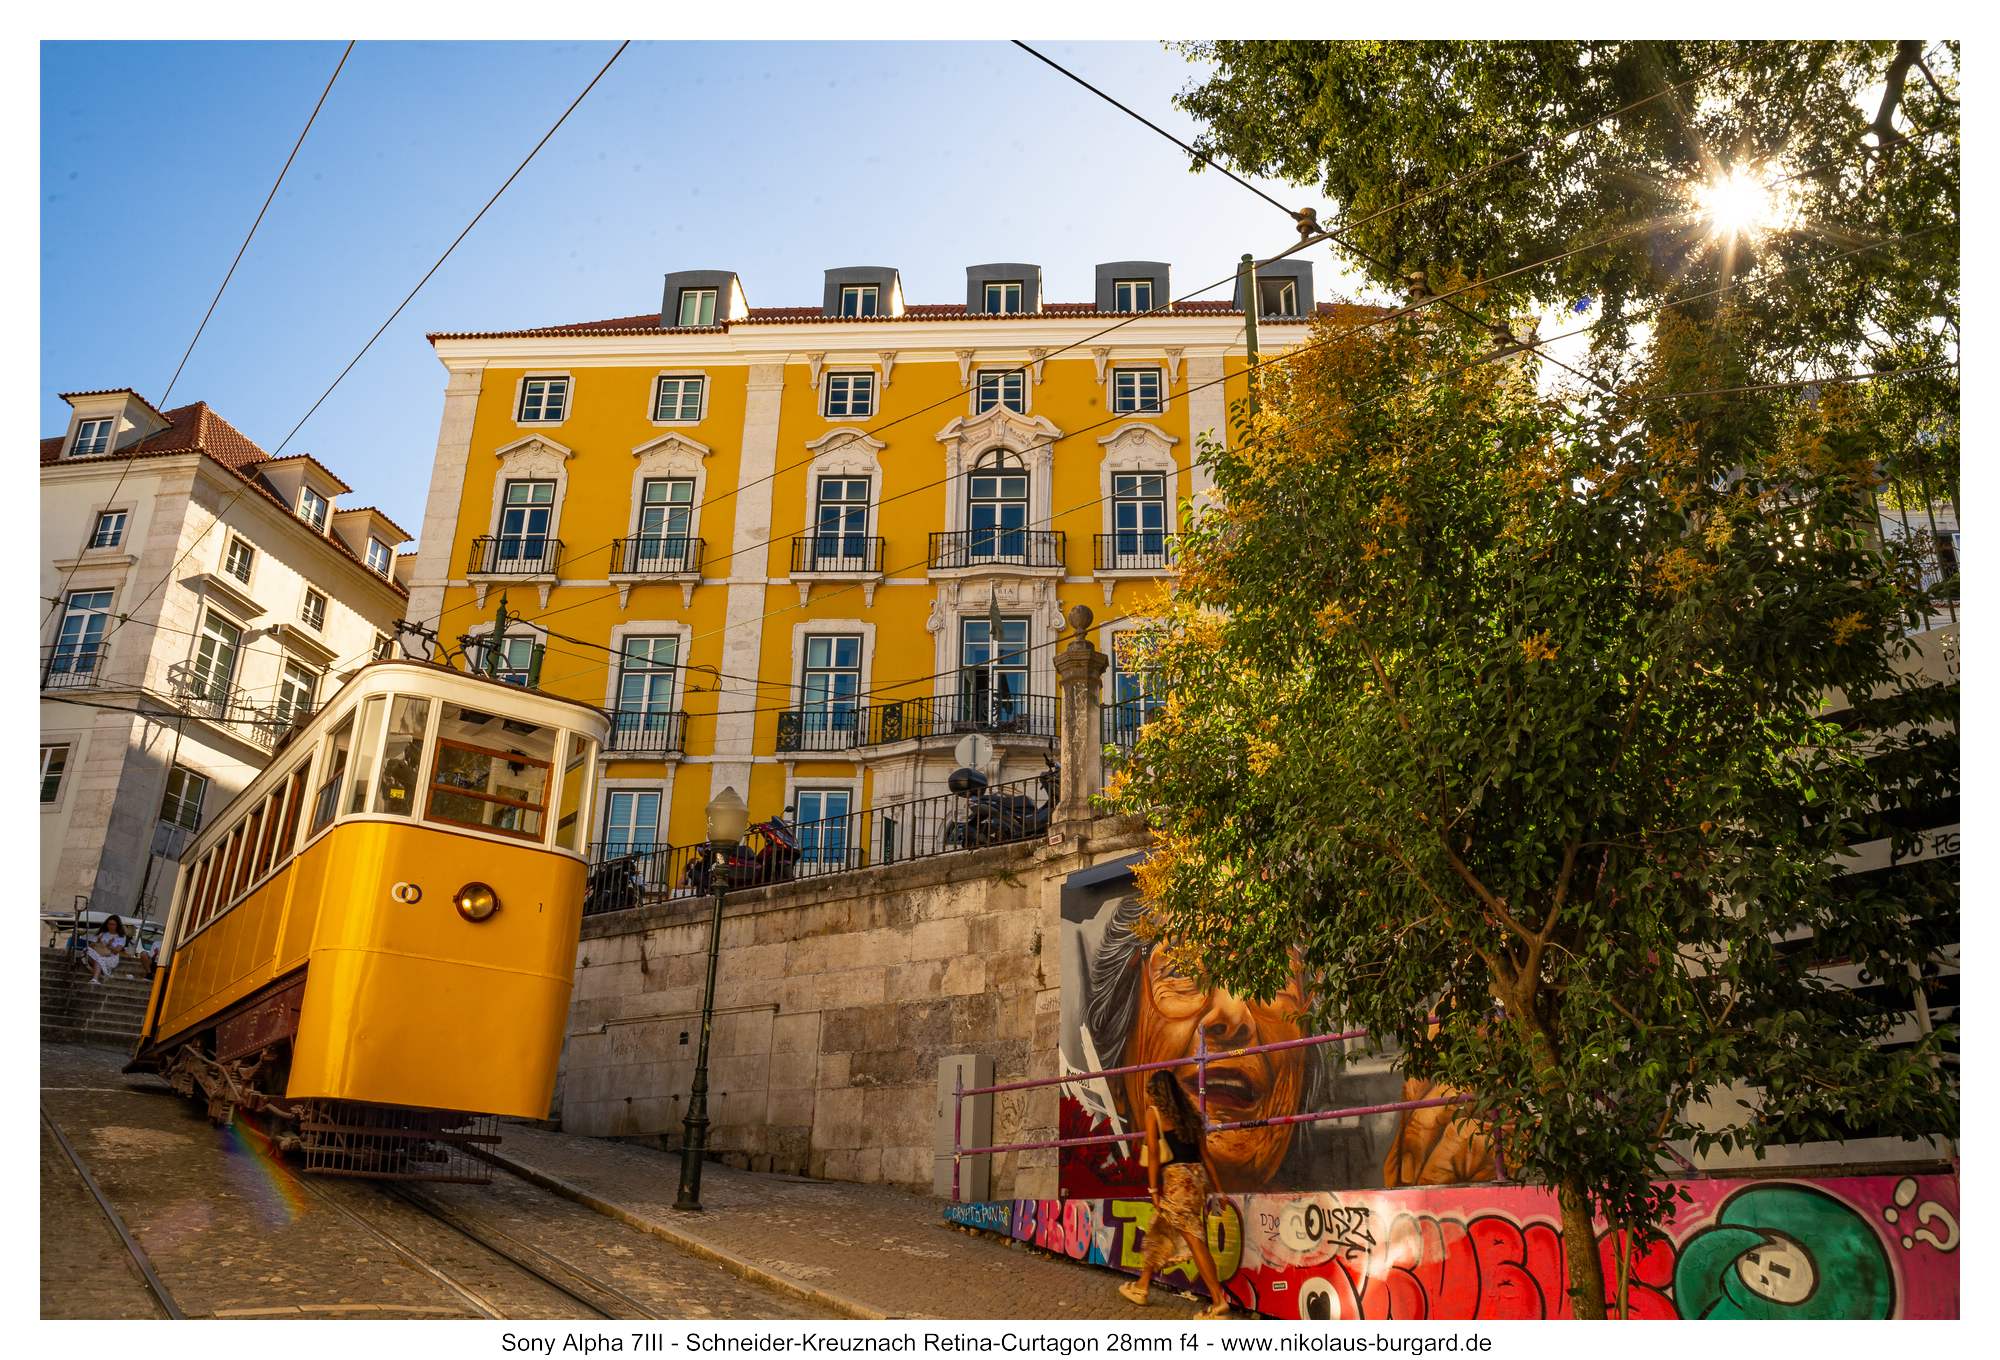
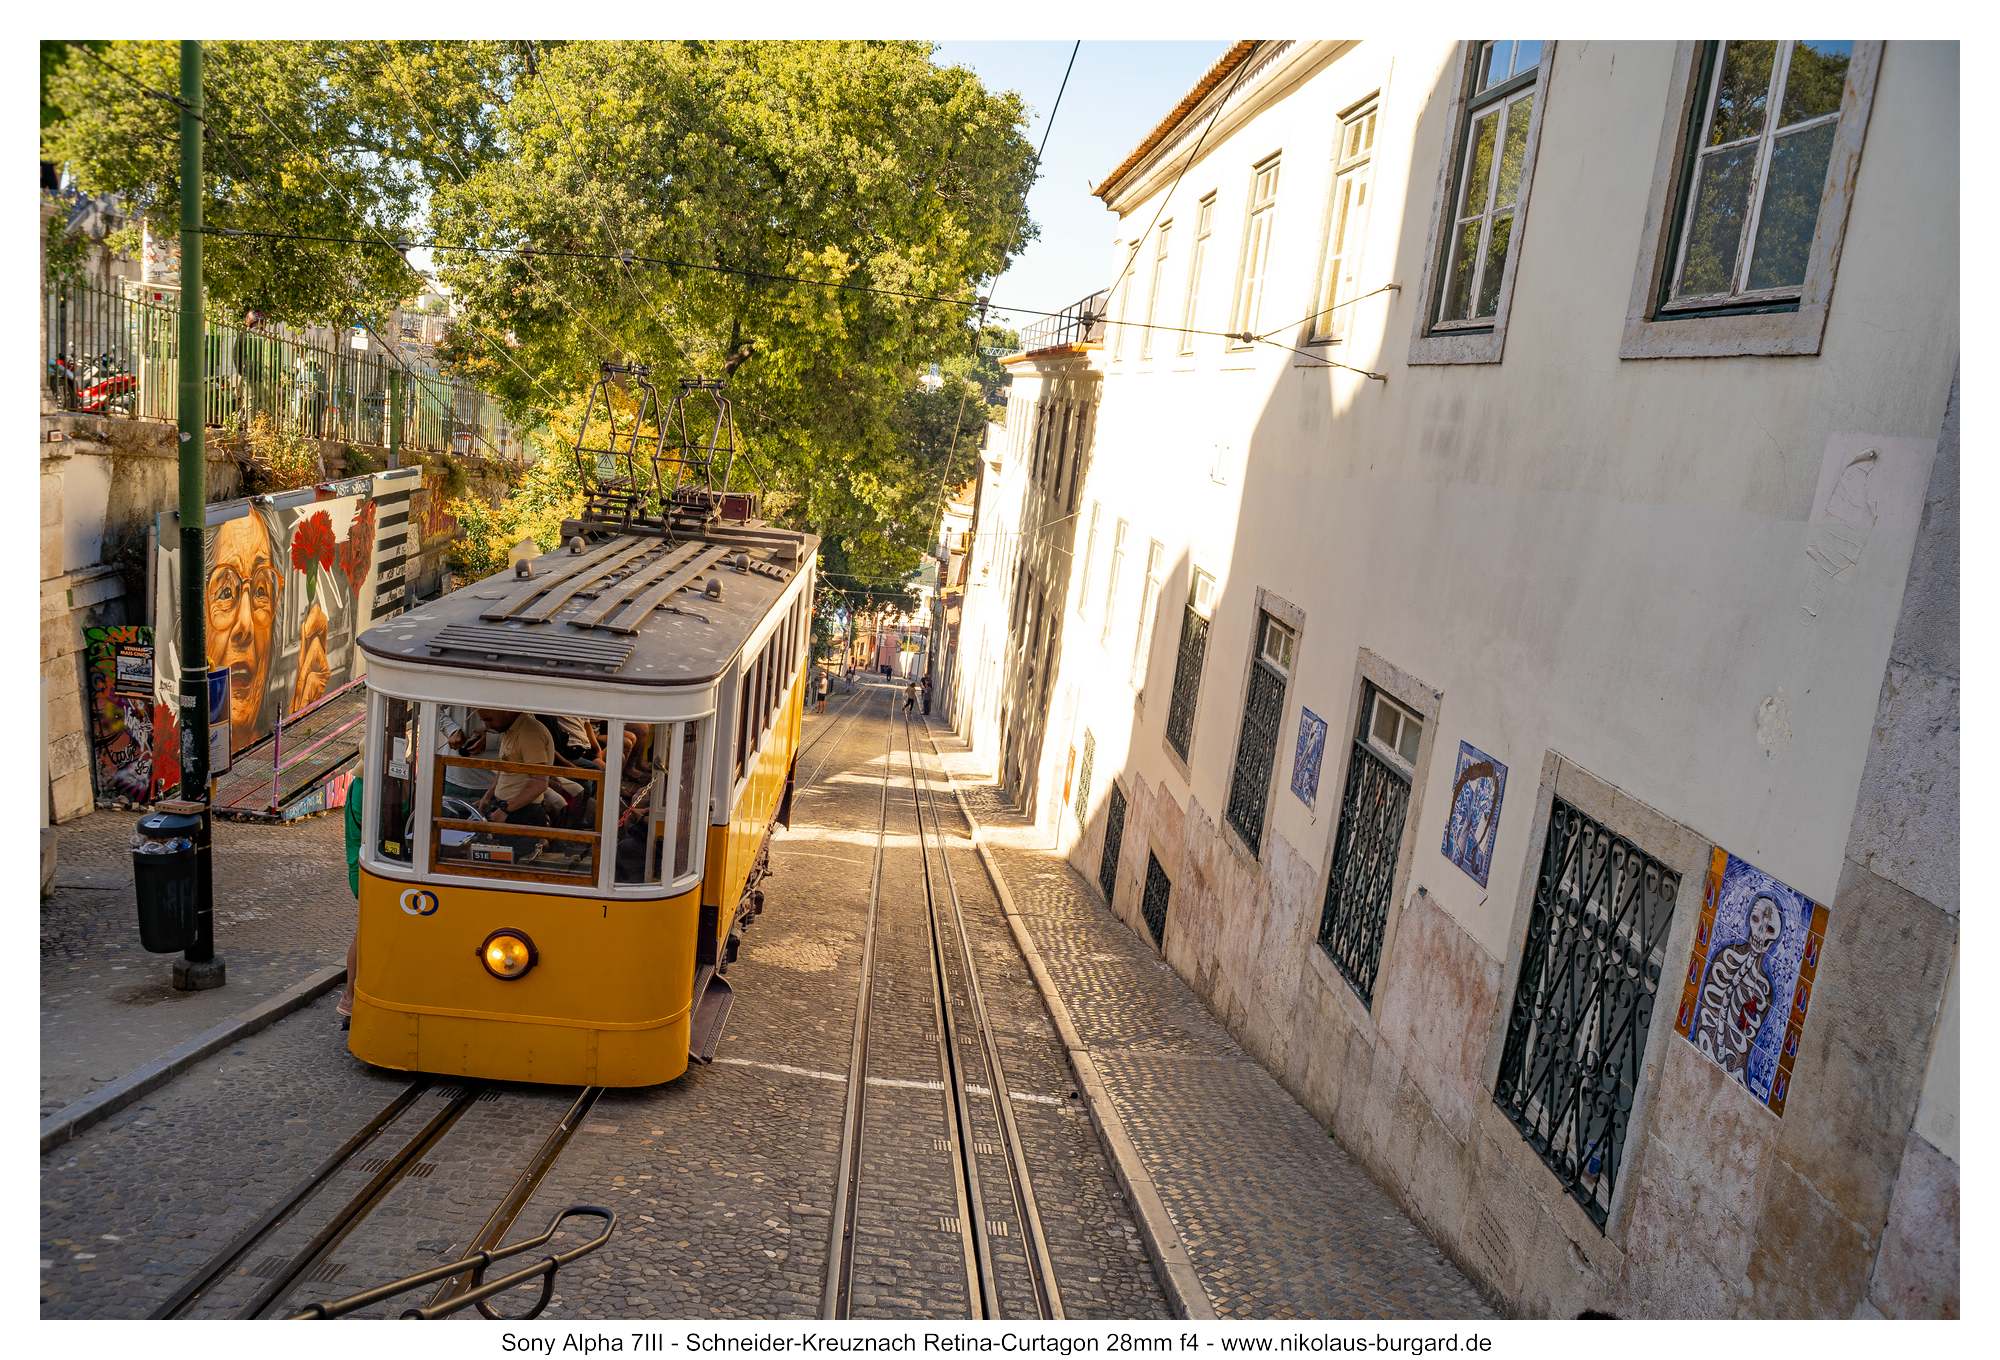
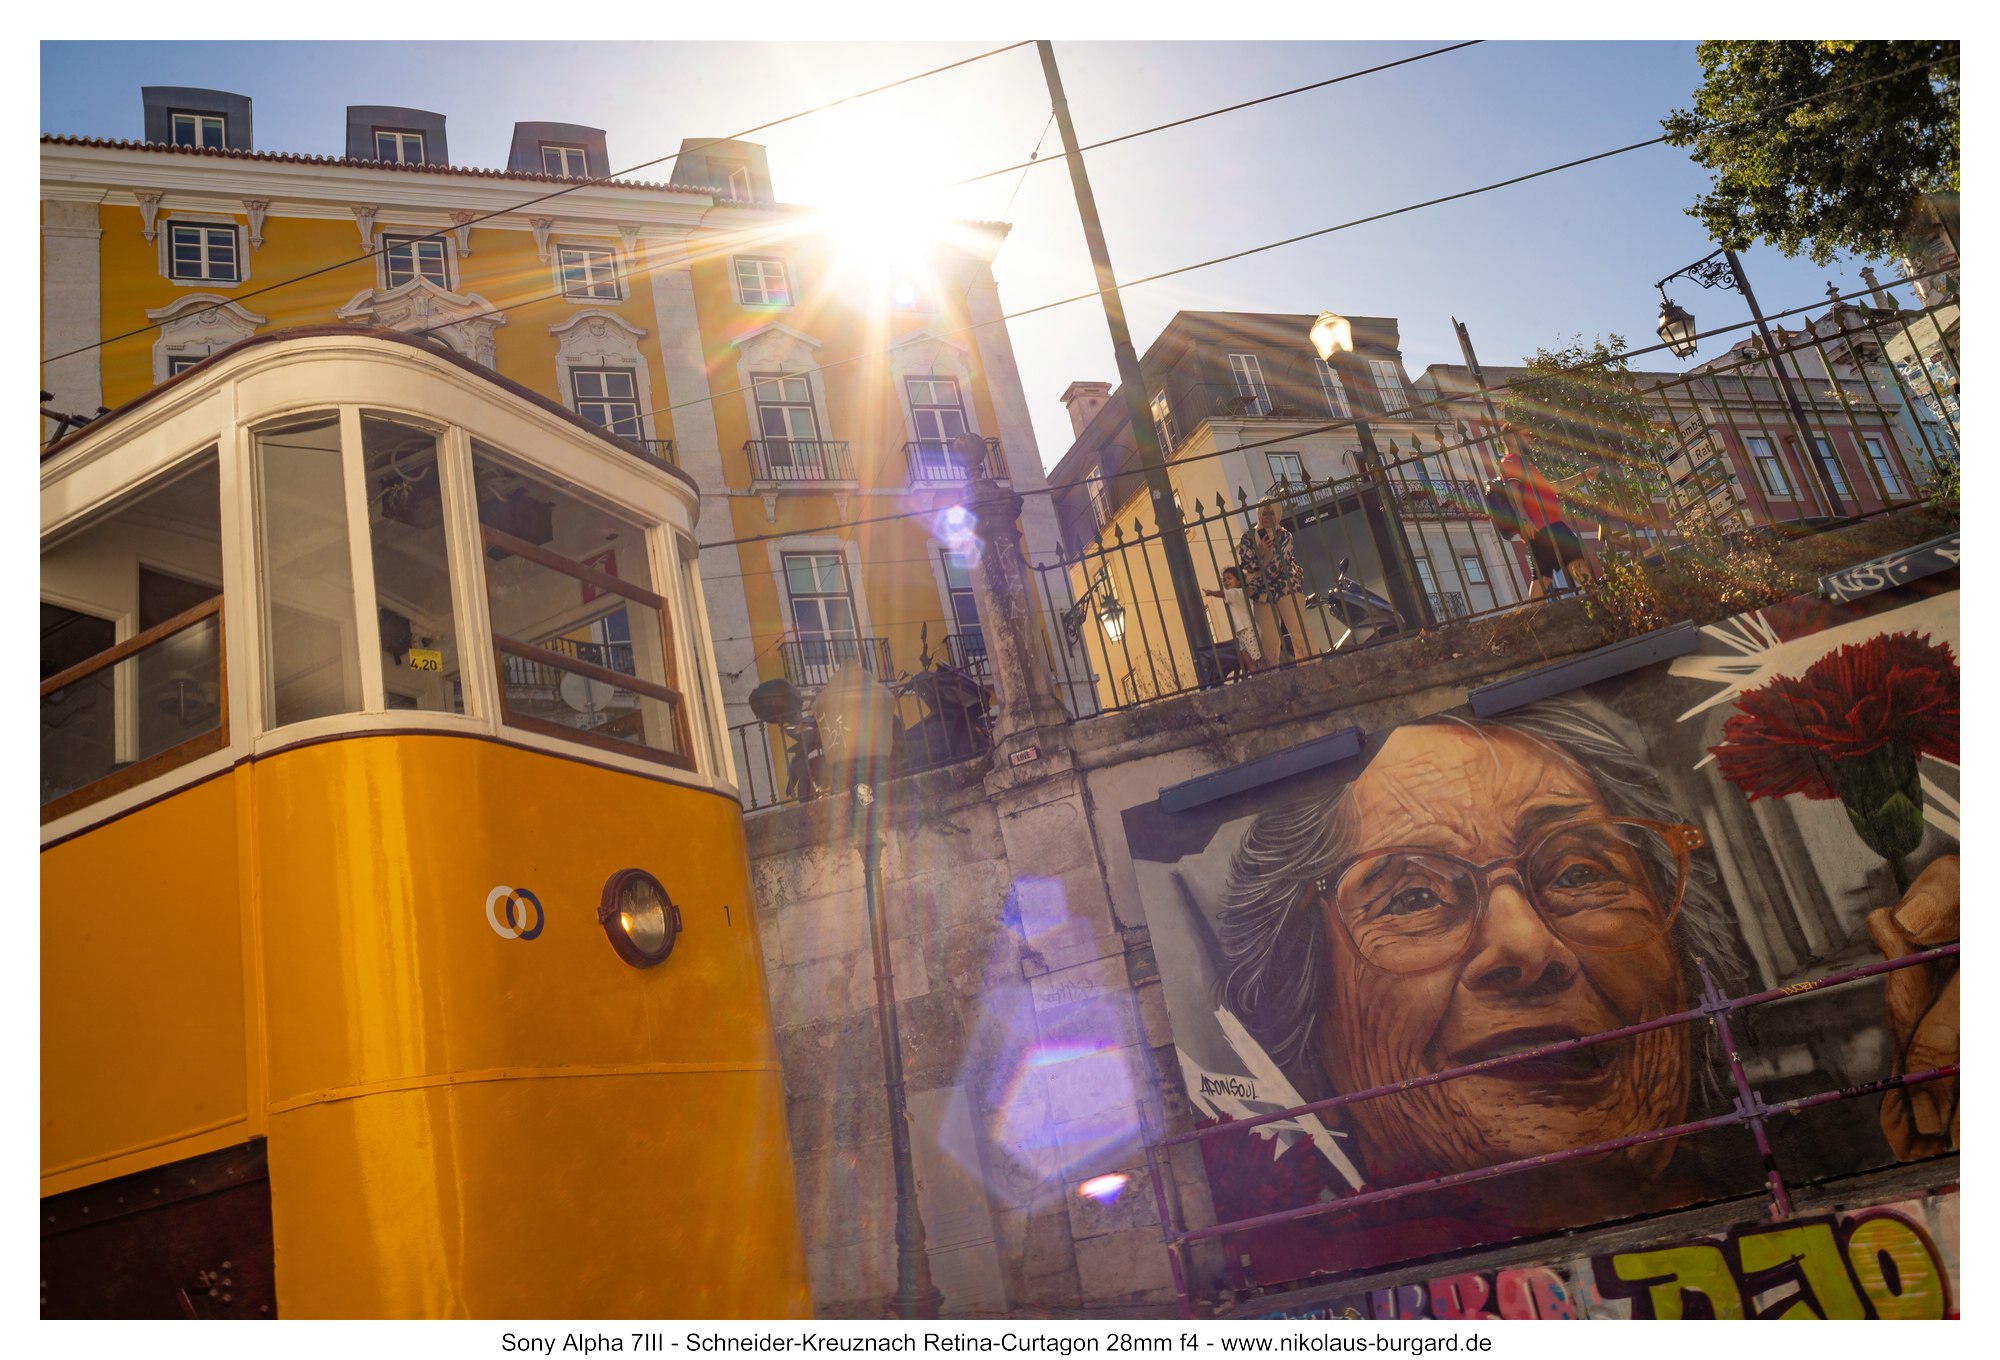
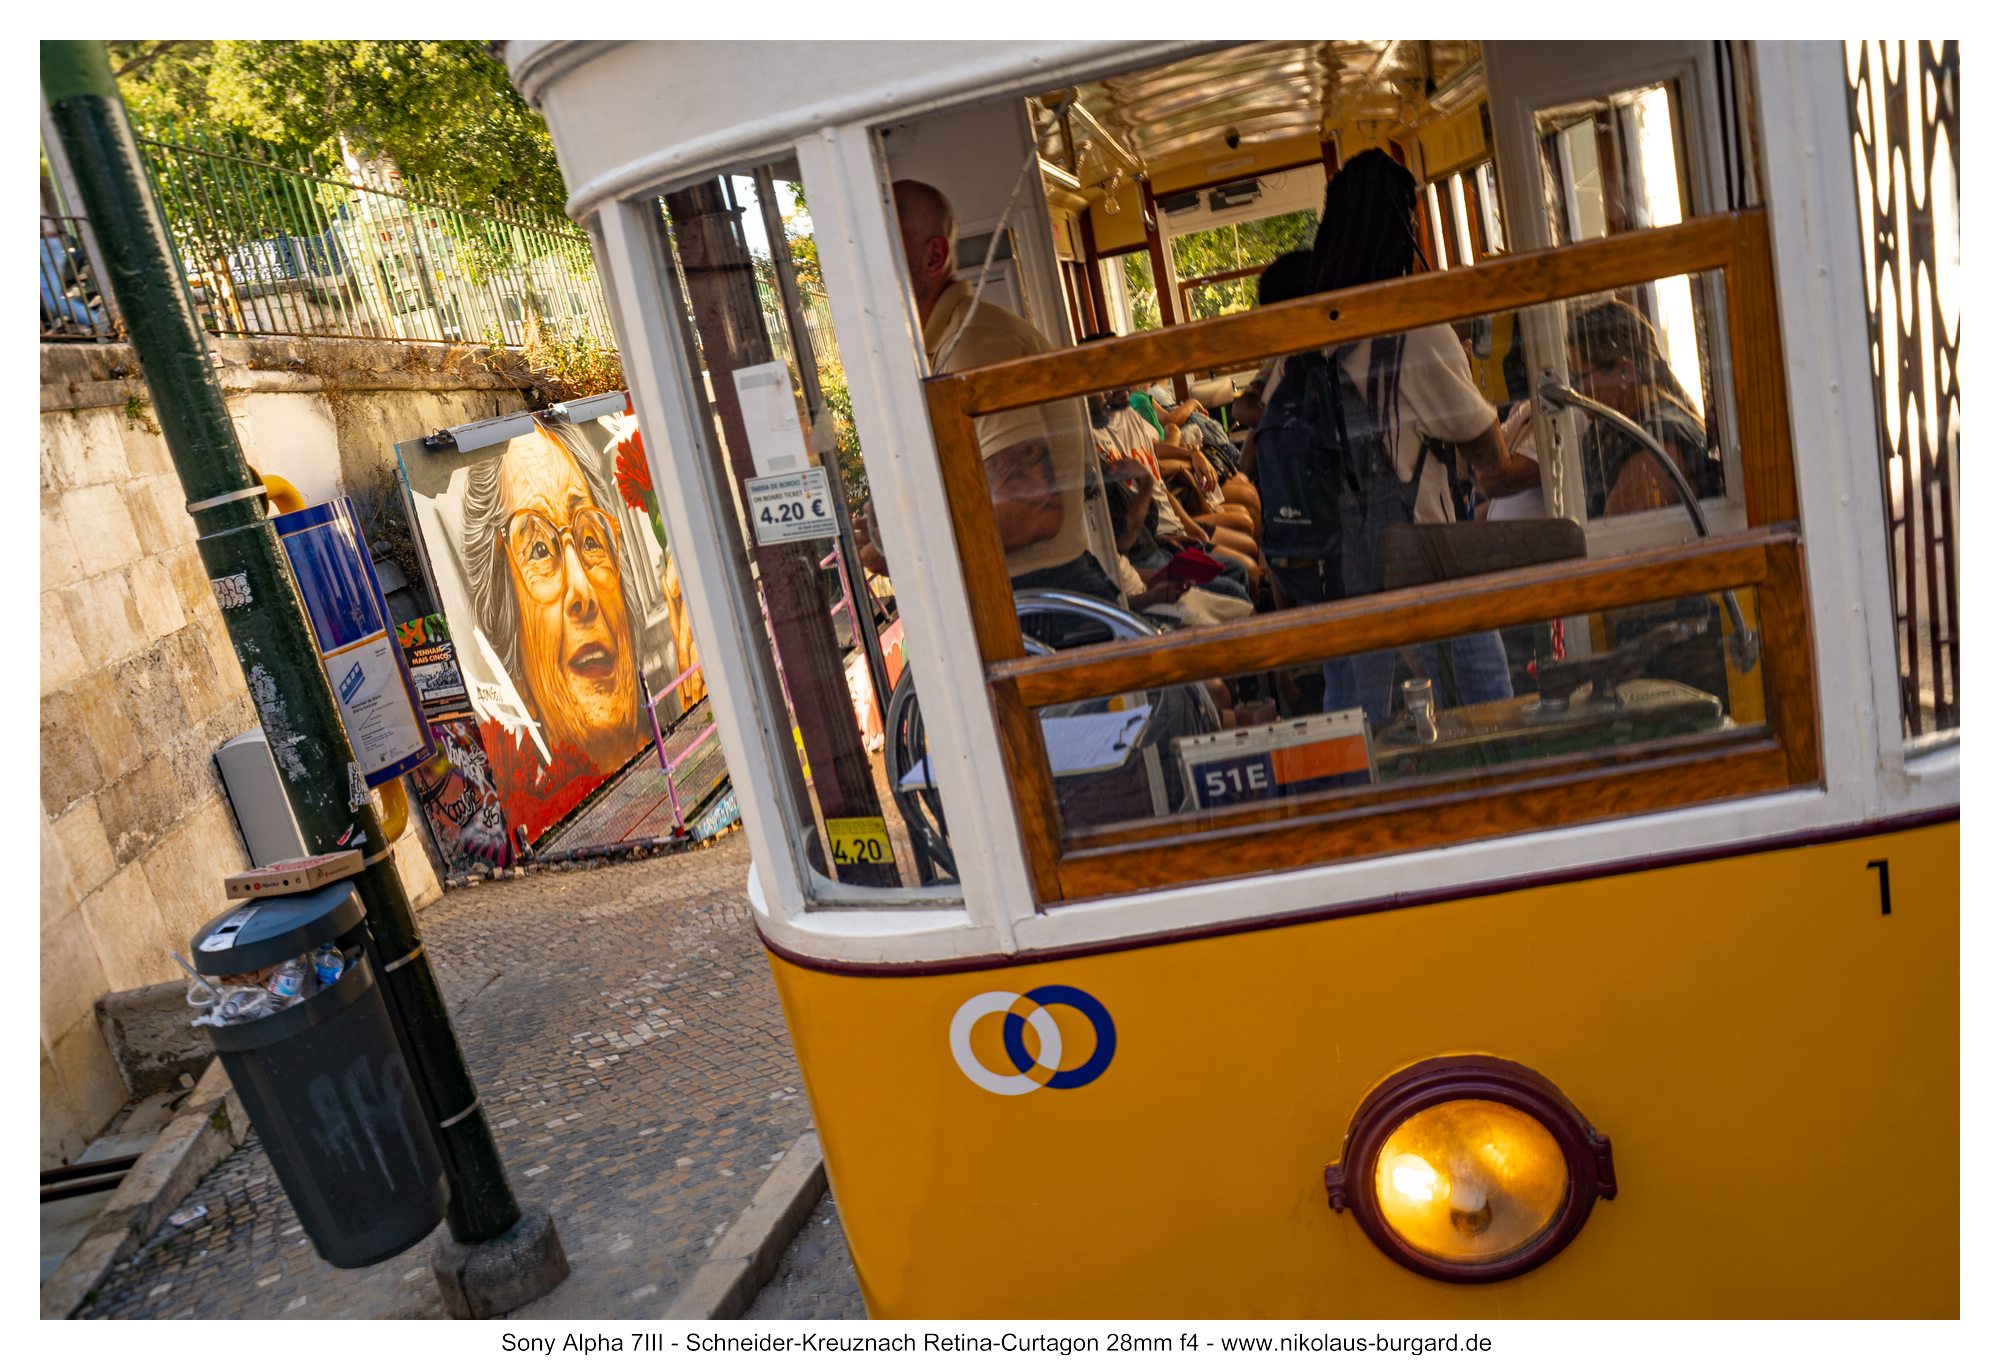
Bildserie: Vor dem großen Unglück / Picture Series: Before the disaster
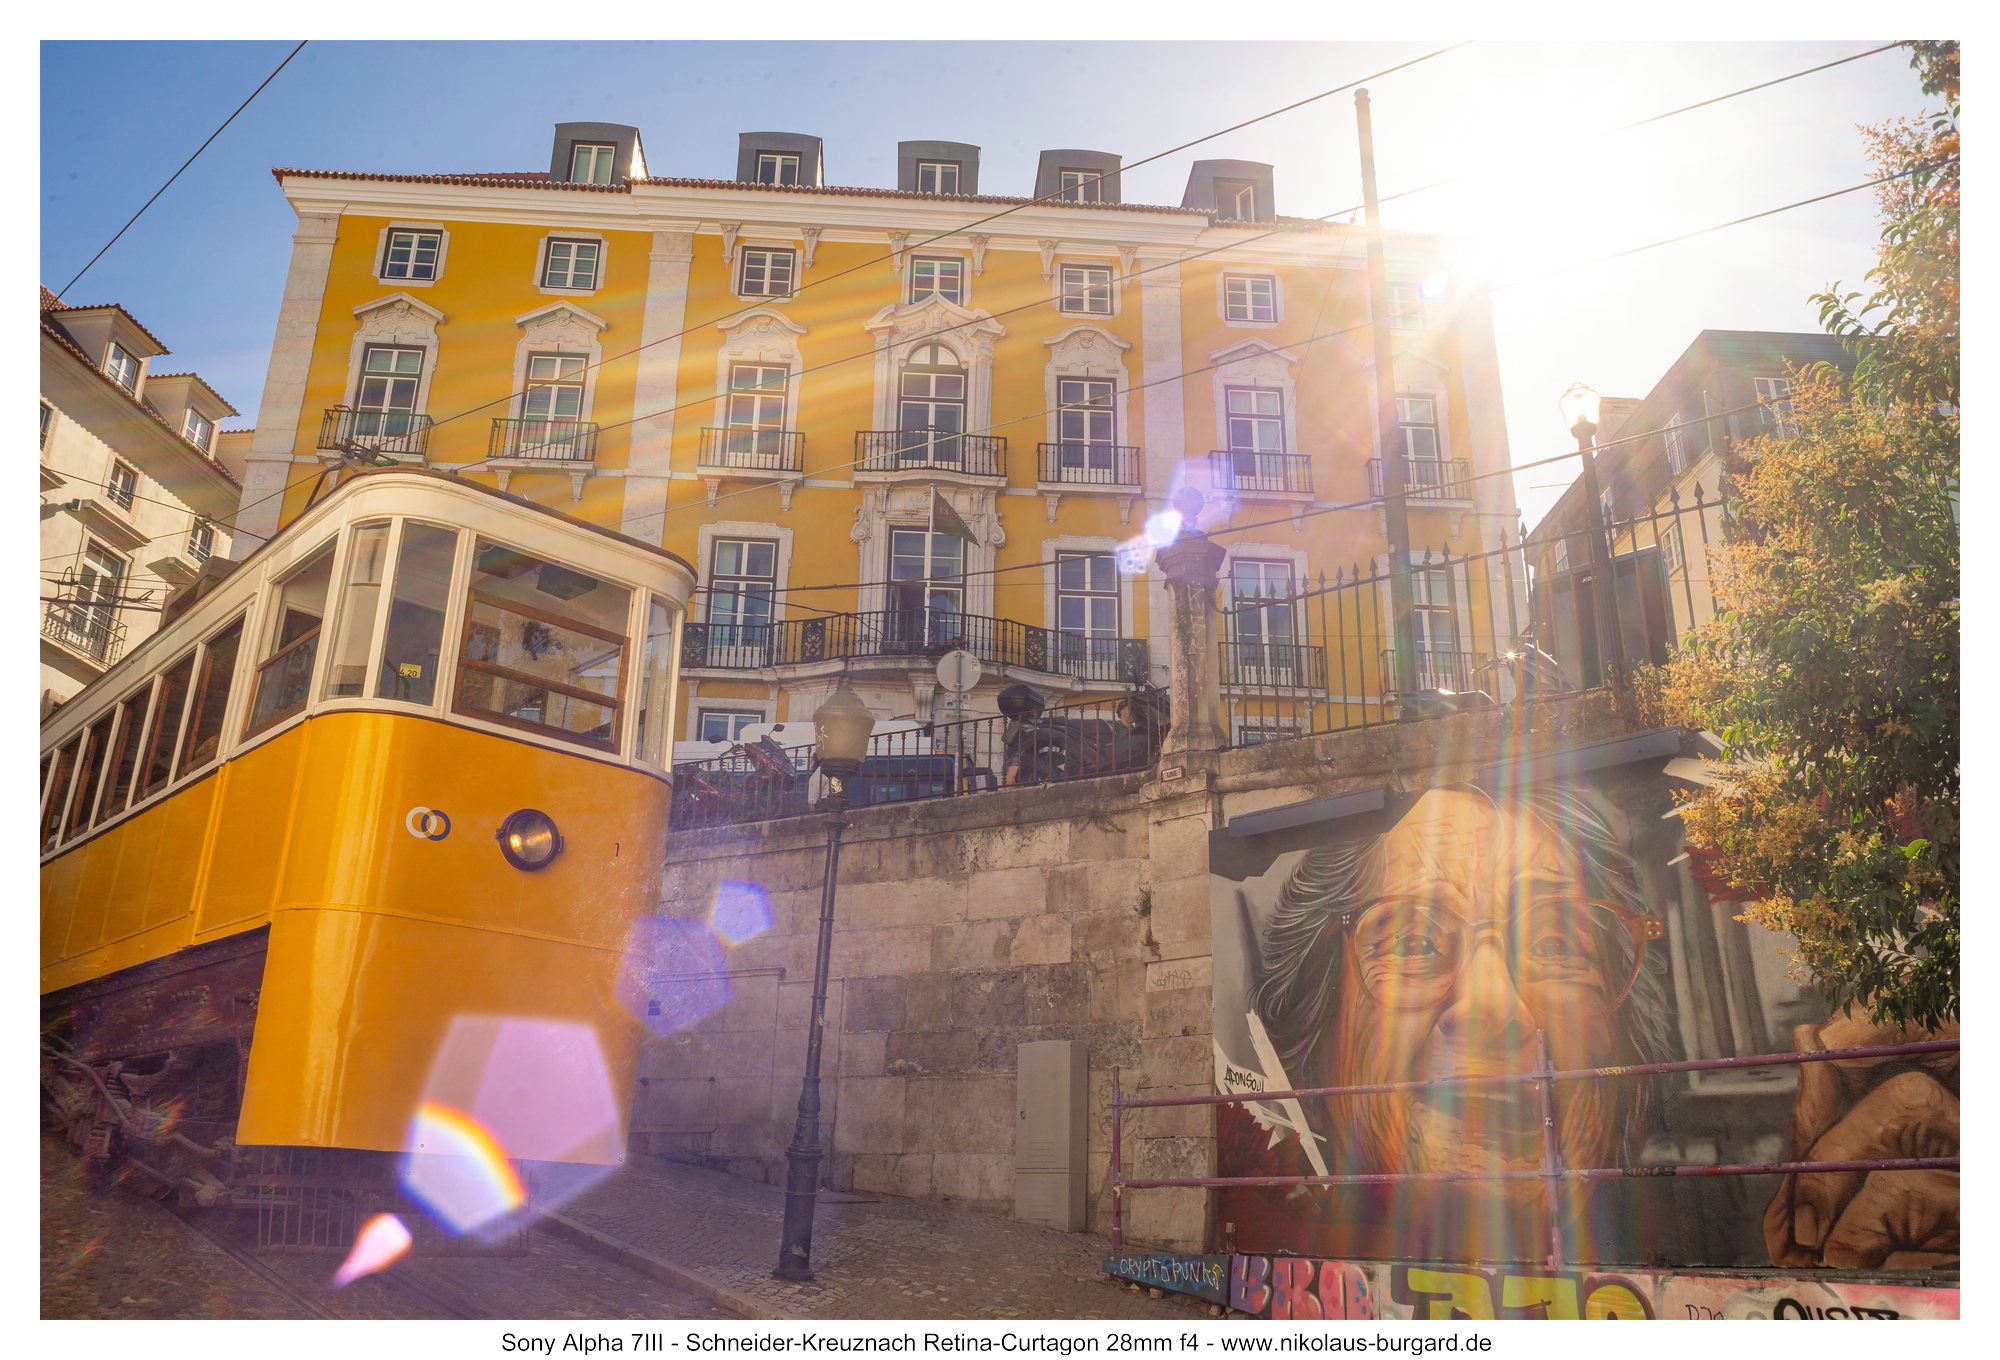
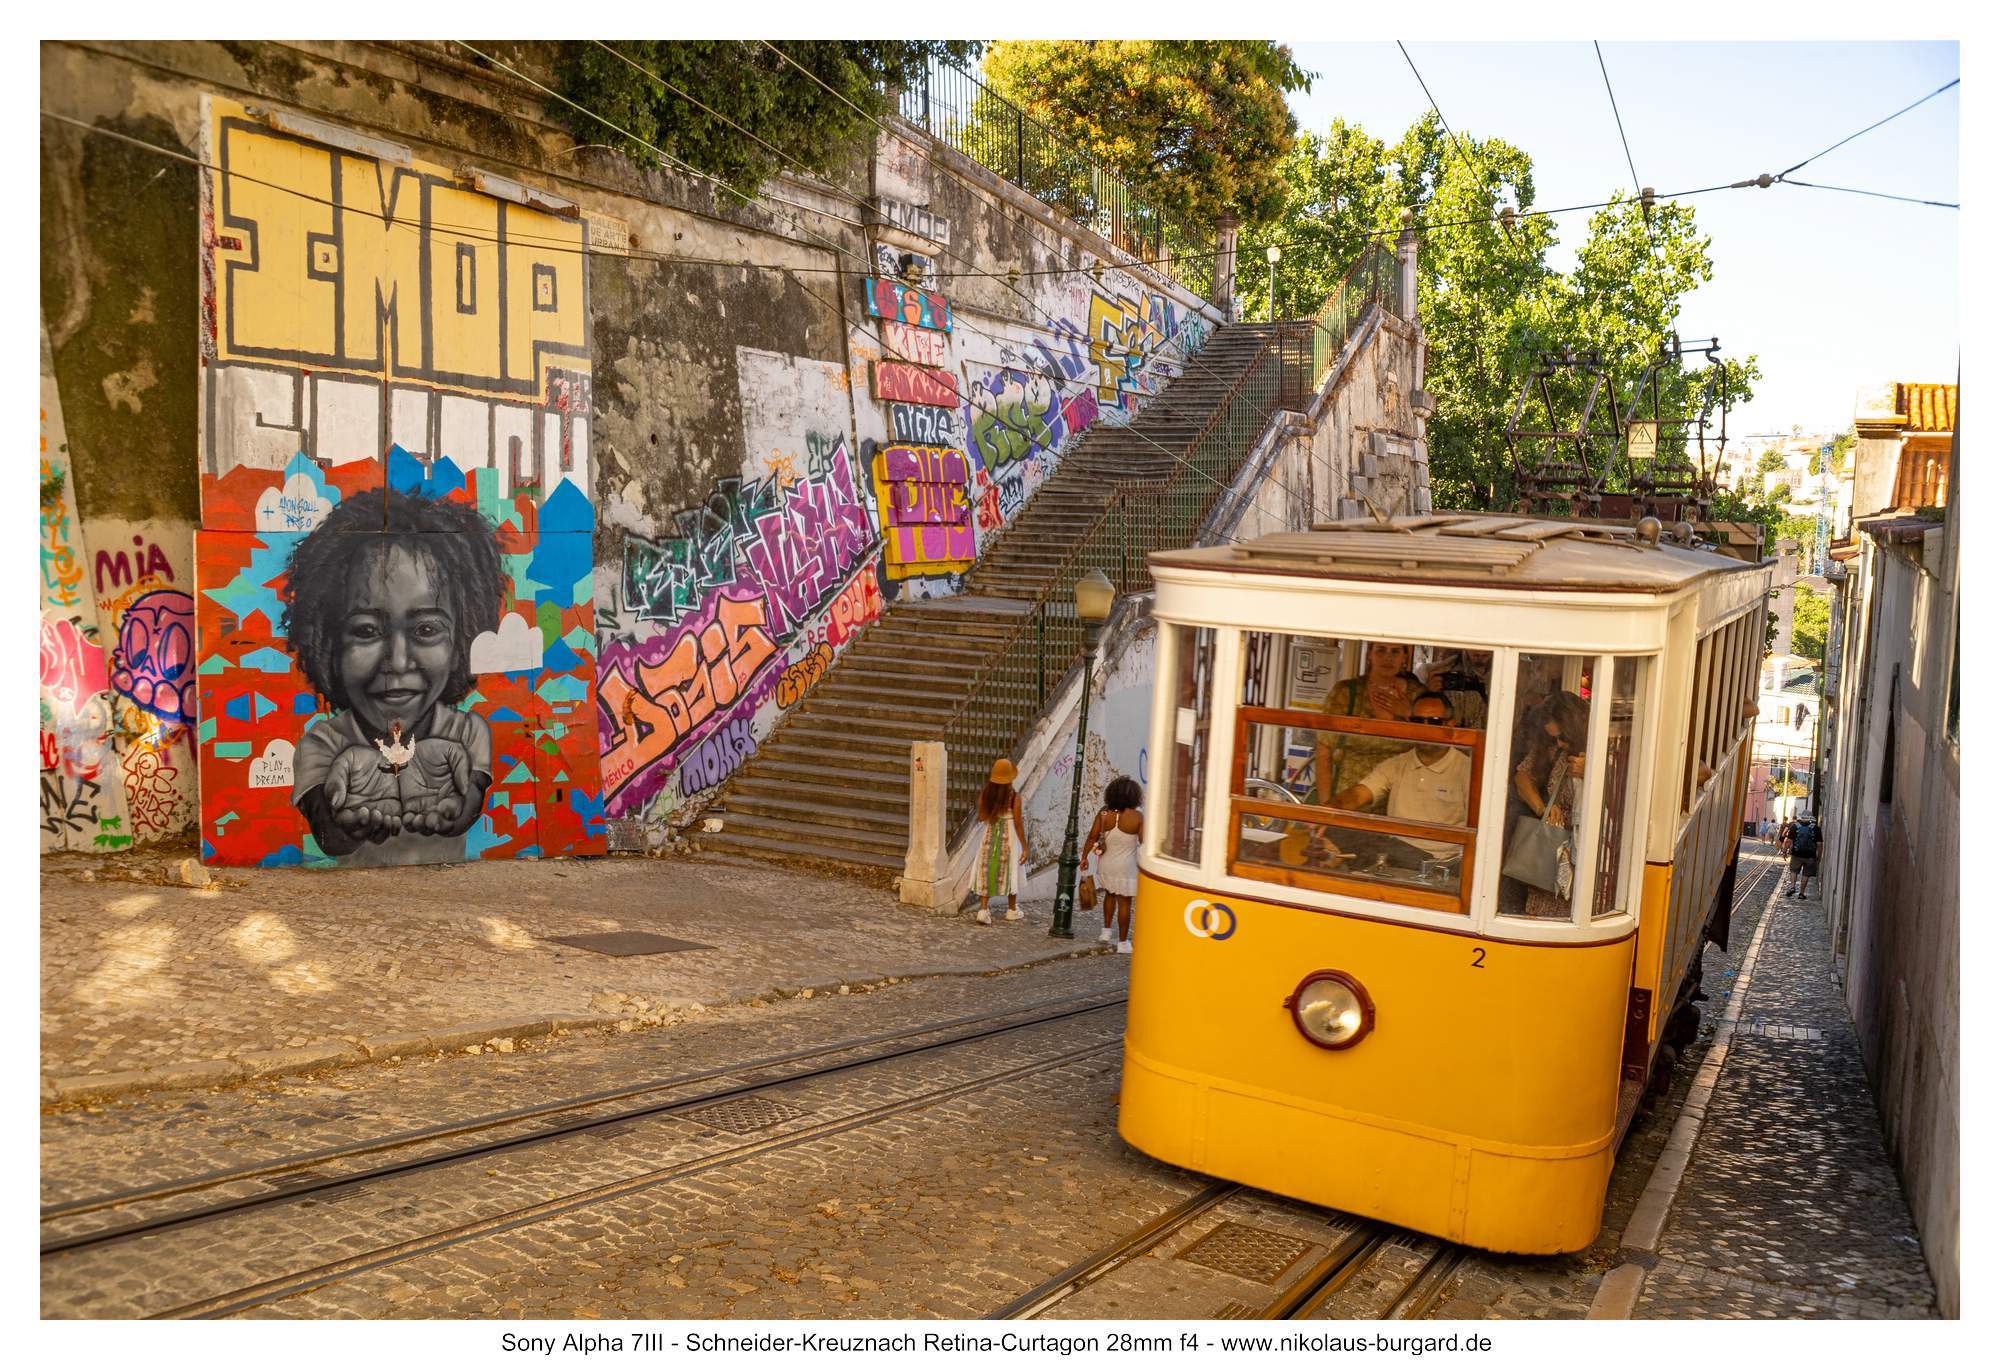
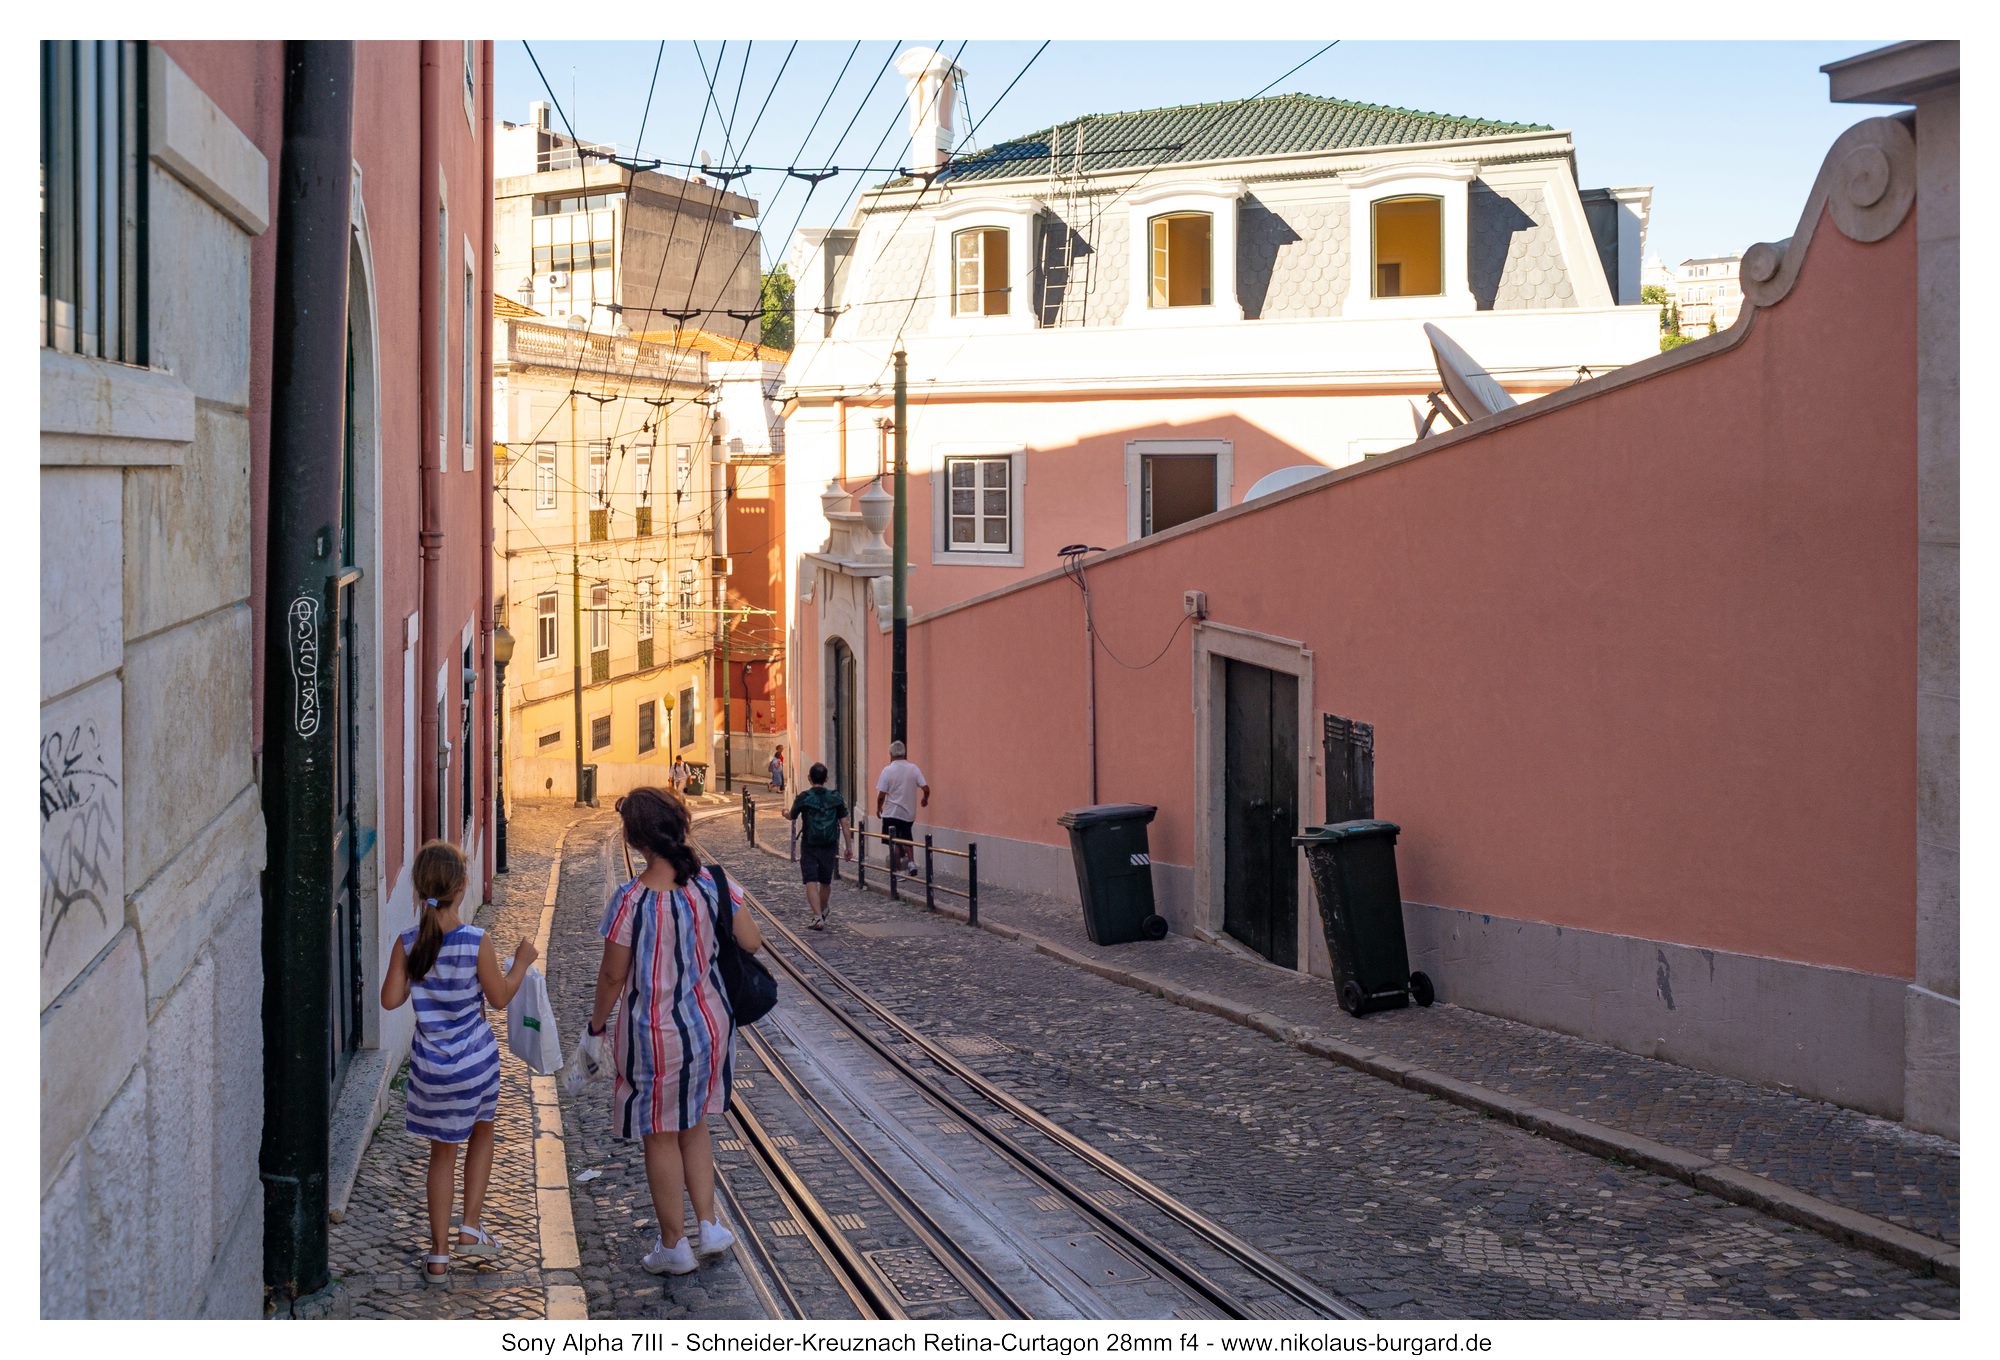
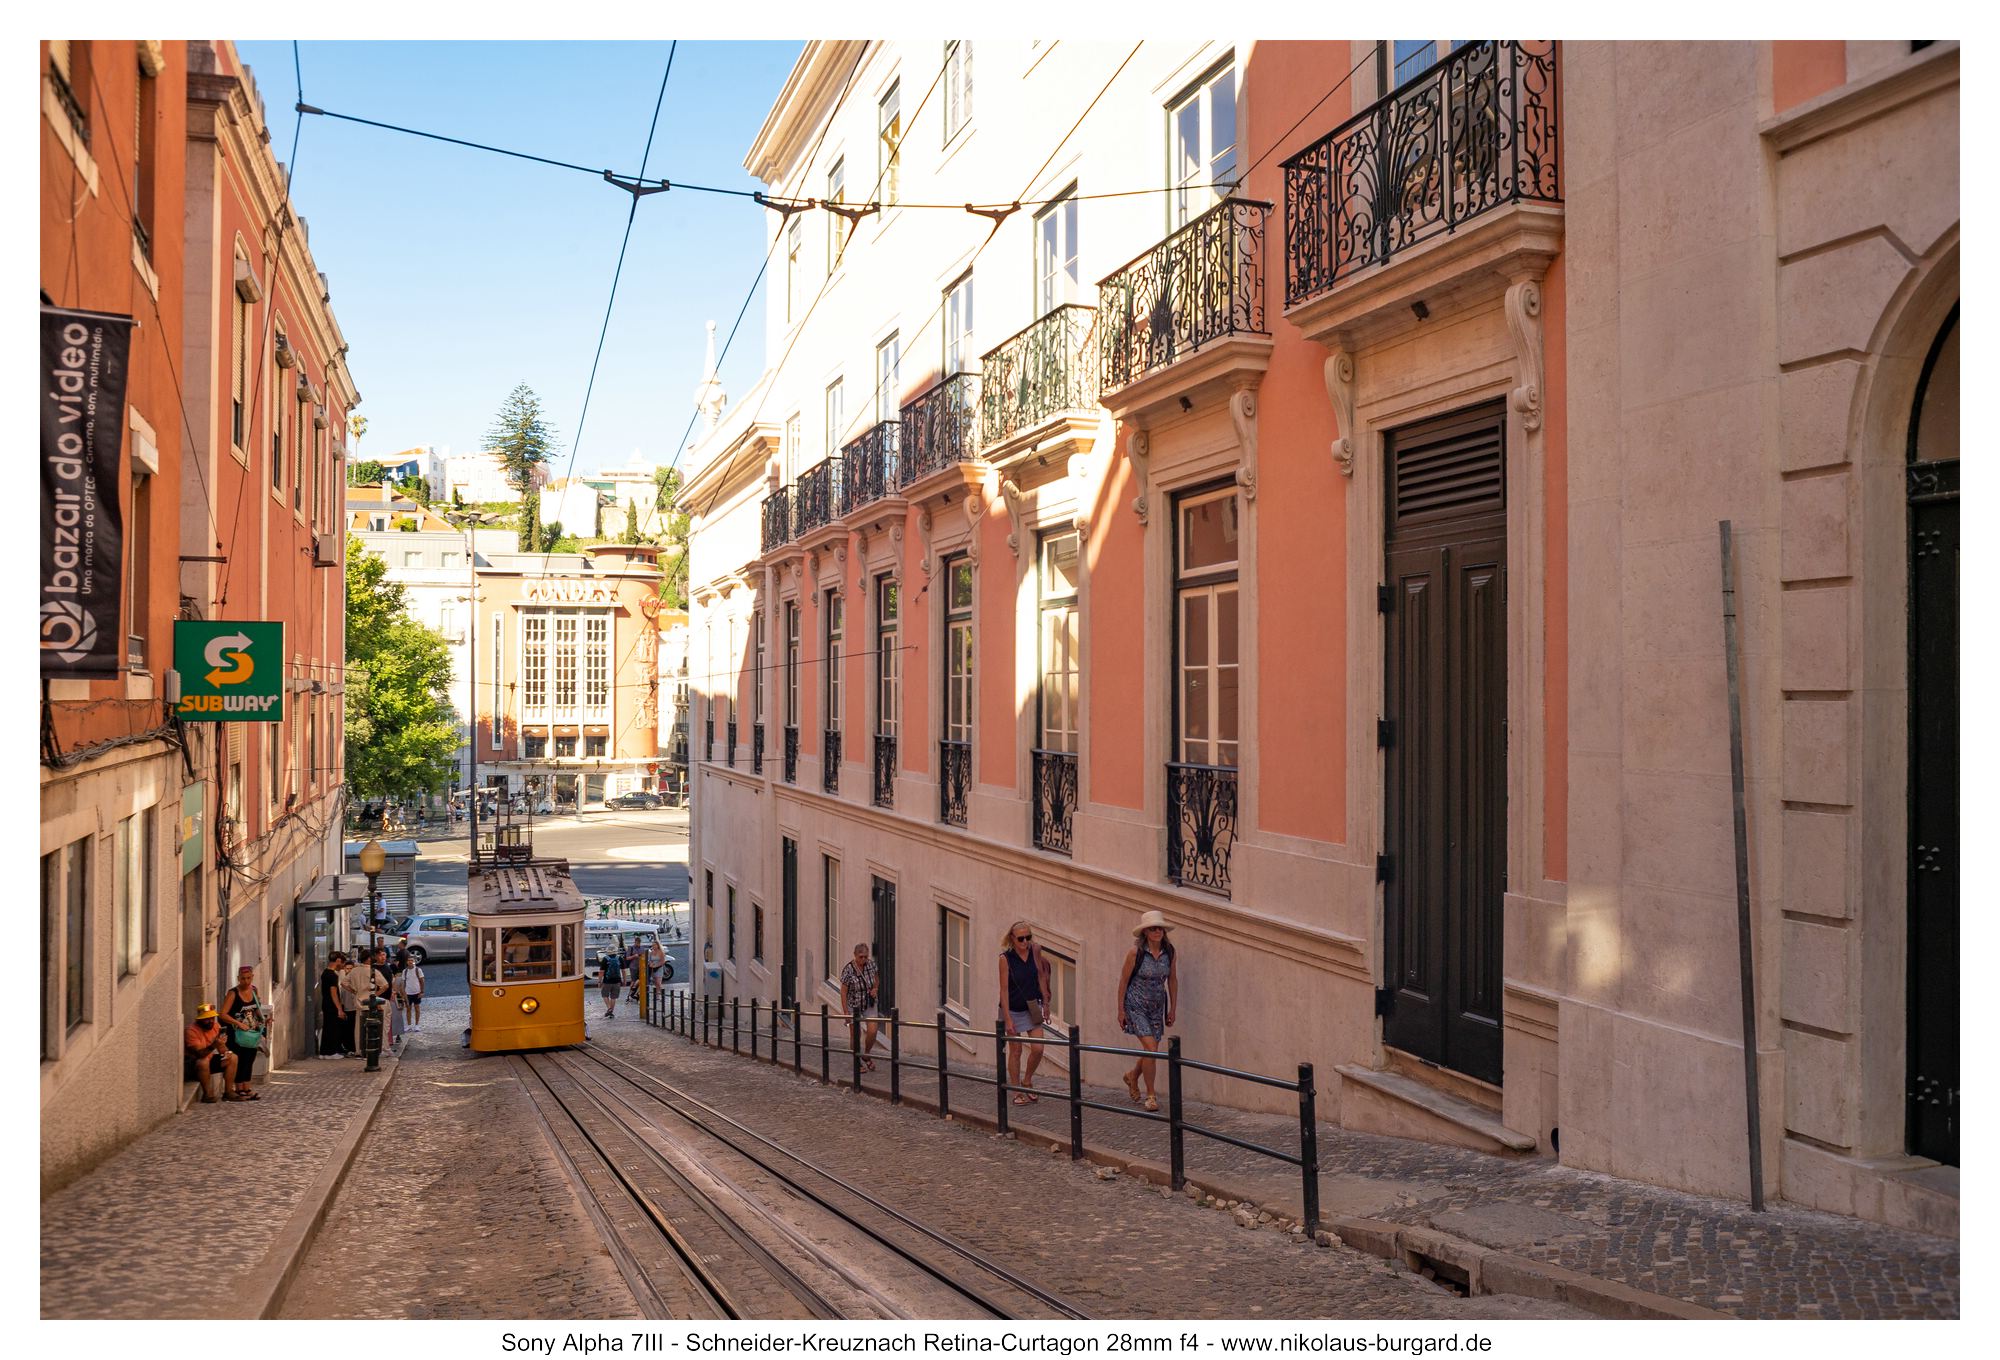
Das schreckliche Standseilbahnunglück in Lissabon im letzten September hat uns unglaublich betroffen gemacht.
Erst wenige Wochen zuvor waren wir an gleicher Stelle und sind den Weg des Unglücks hinabgelaufen - das Kopfkino malt sich dann sofort die entsprechenden Szenarien aus.
The terrible funicular accident in Lisbon last September left us deeply shaken.
Just a few weeks earlier, we had been at the same spot and walked down the path where the accident occurred—and our minds immediately began to imagine the worst-case scenarios.


Verzeichnung / Distortion
Das Schneider-Kreuznach Retina-Curtagon 28mm f4 verzeichnet erstaunlich wenig, es wurde wohl bei der Konstruktion ein großes Augenmerk auf die Verzeichnung gelegt.
Man sieht eine tonnenförmige Wölbung der Mitte mit leichtem Schnurrbart zu den Seiten hin.
Keines der Bilder in dieser Vorstellung wurde auf Verzeichnung korrigiert, es war in meinen Augen nicht nötig.
The Schneider-Kreuznach Retina-Curtagon 28mm f/4 exhibits surprisingly little distortion; it seems that great attention was paid to distortion control during its design.
You can see a barrel-shaped bulge in the center with a slight mustache distortion toward the sides.
None of the images in this review have been corrected for distortion; in my opinion, it wasn’t necessary.

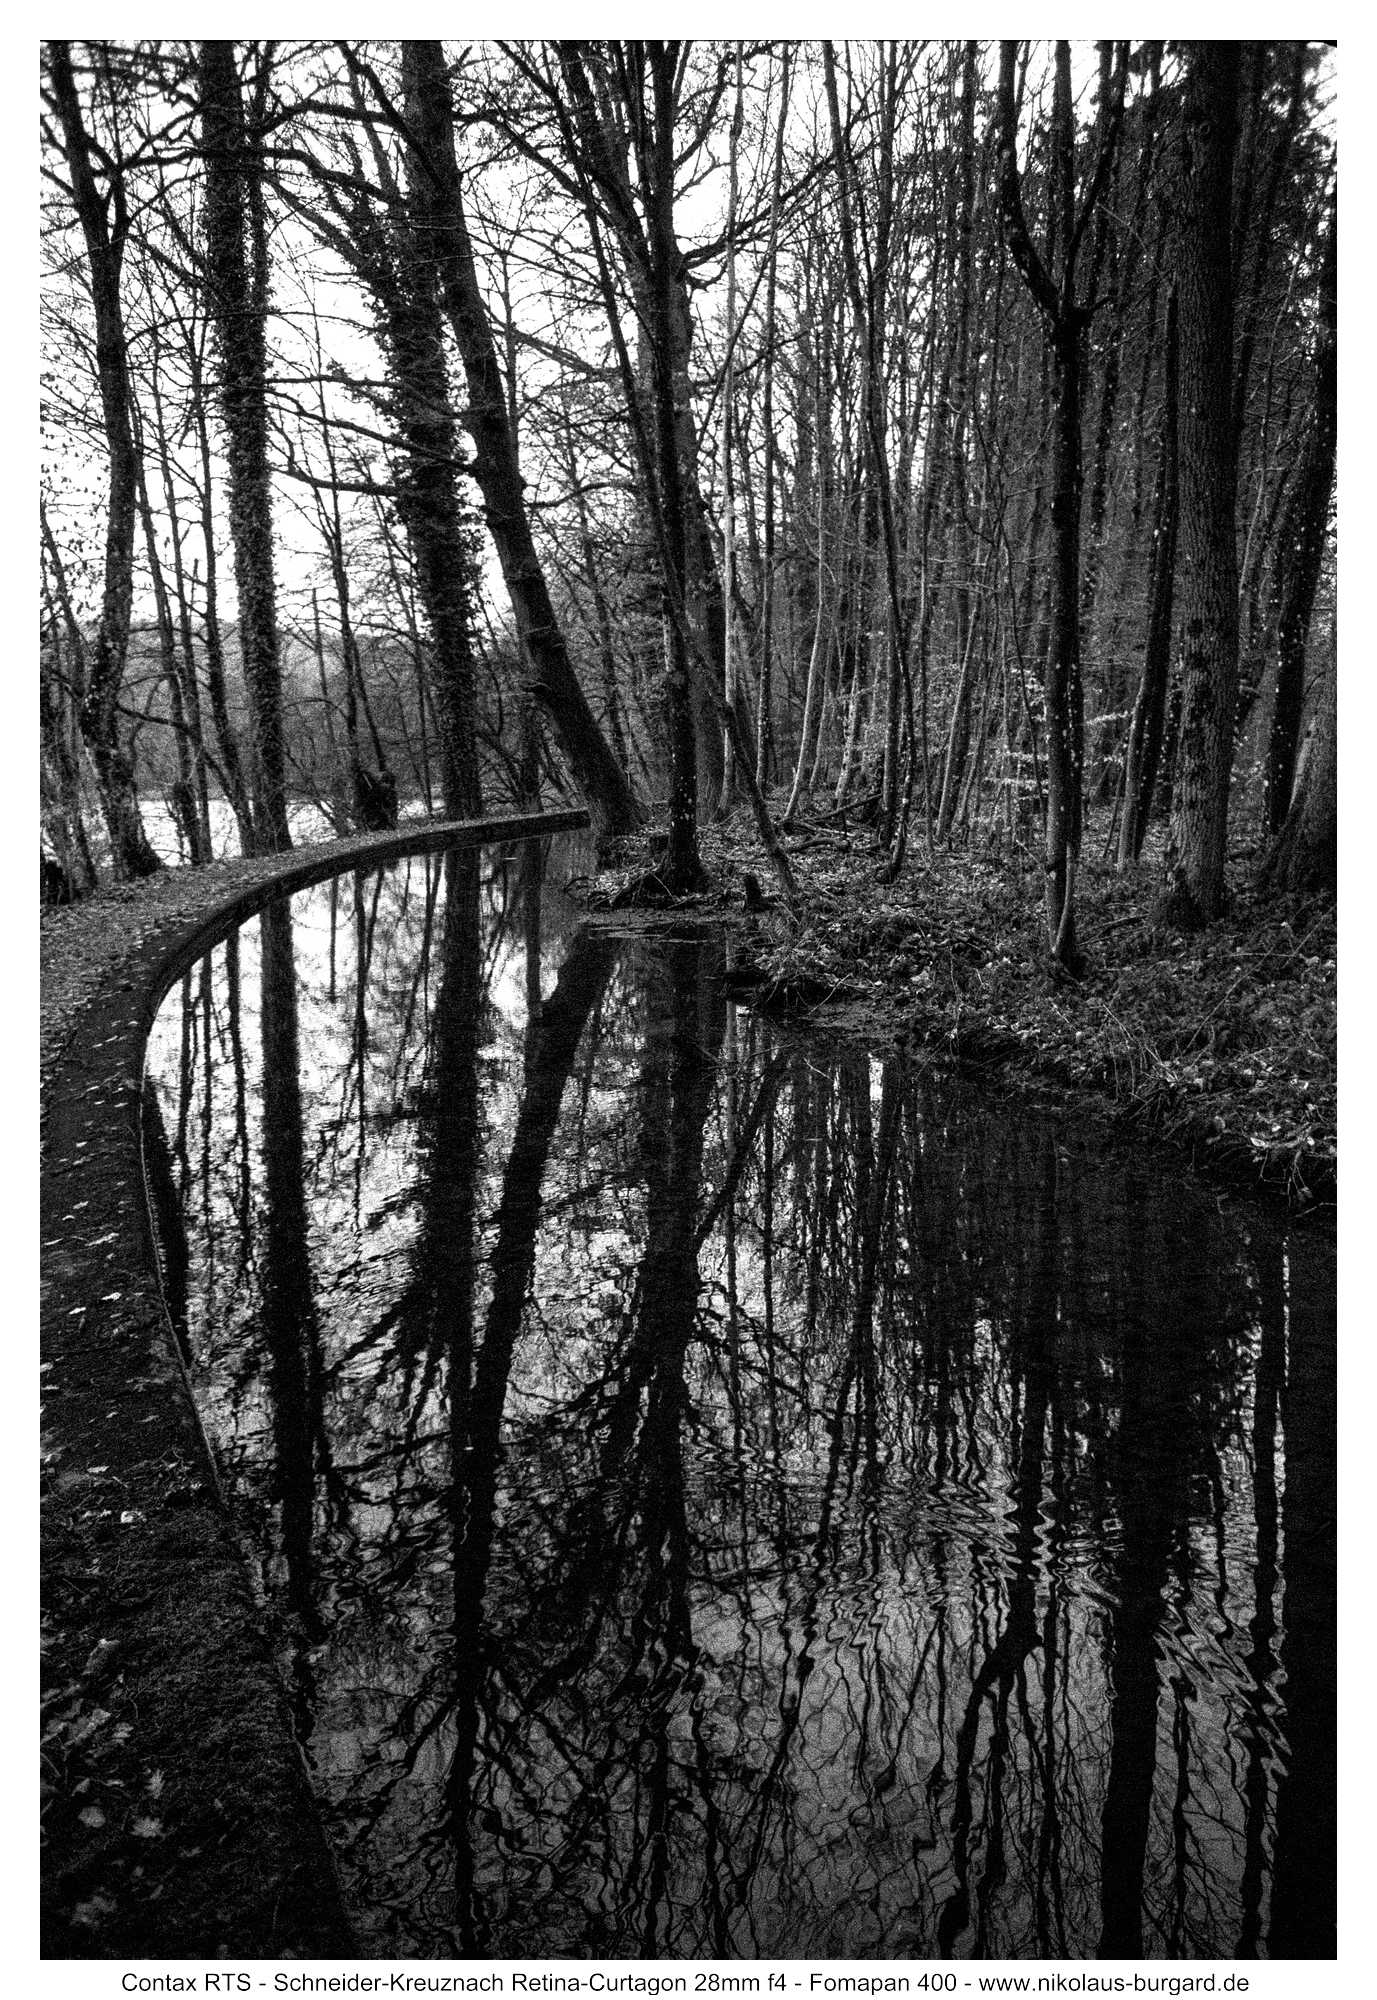
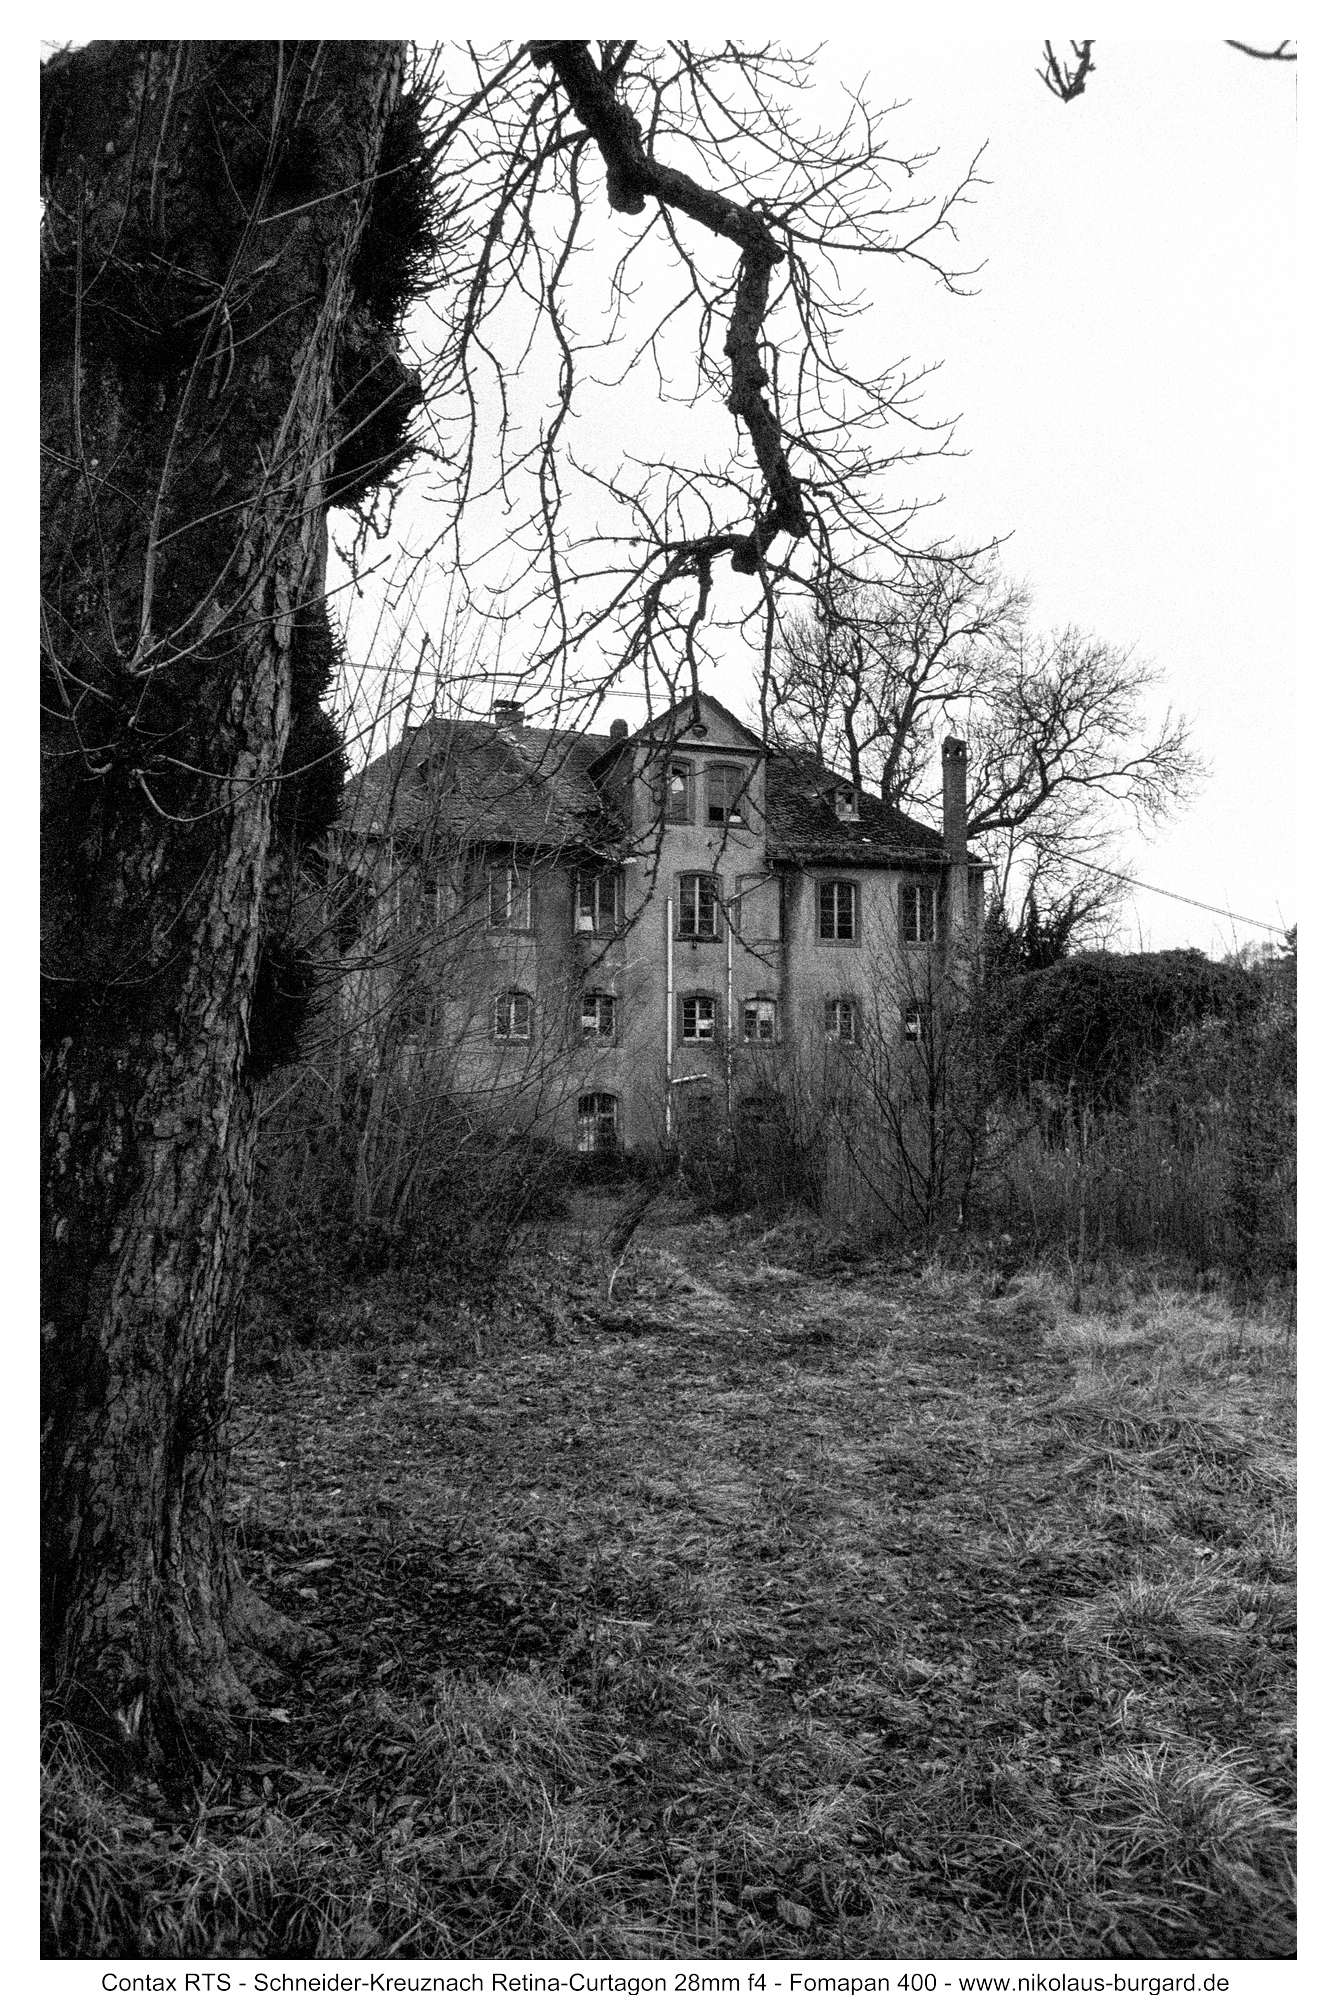
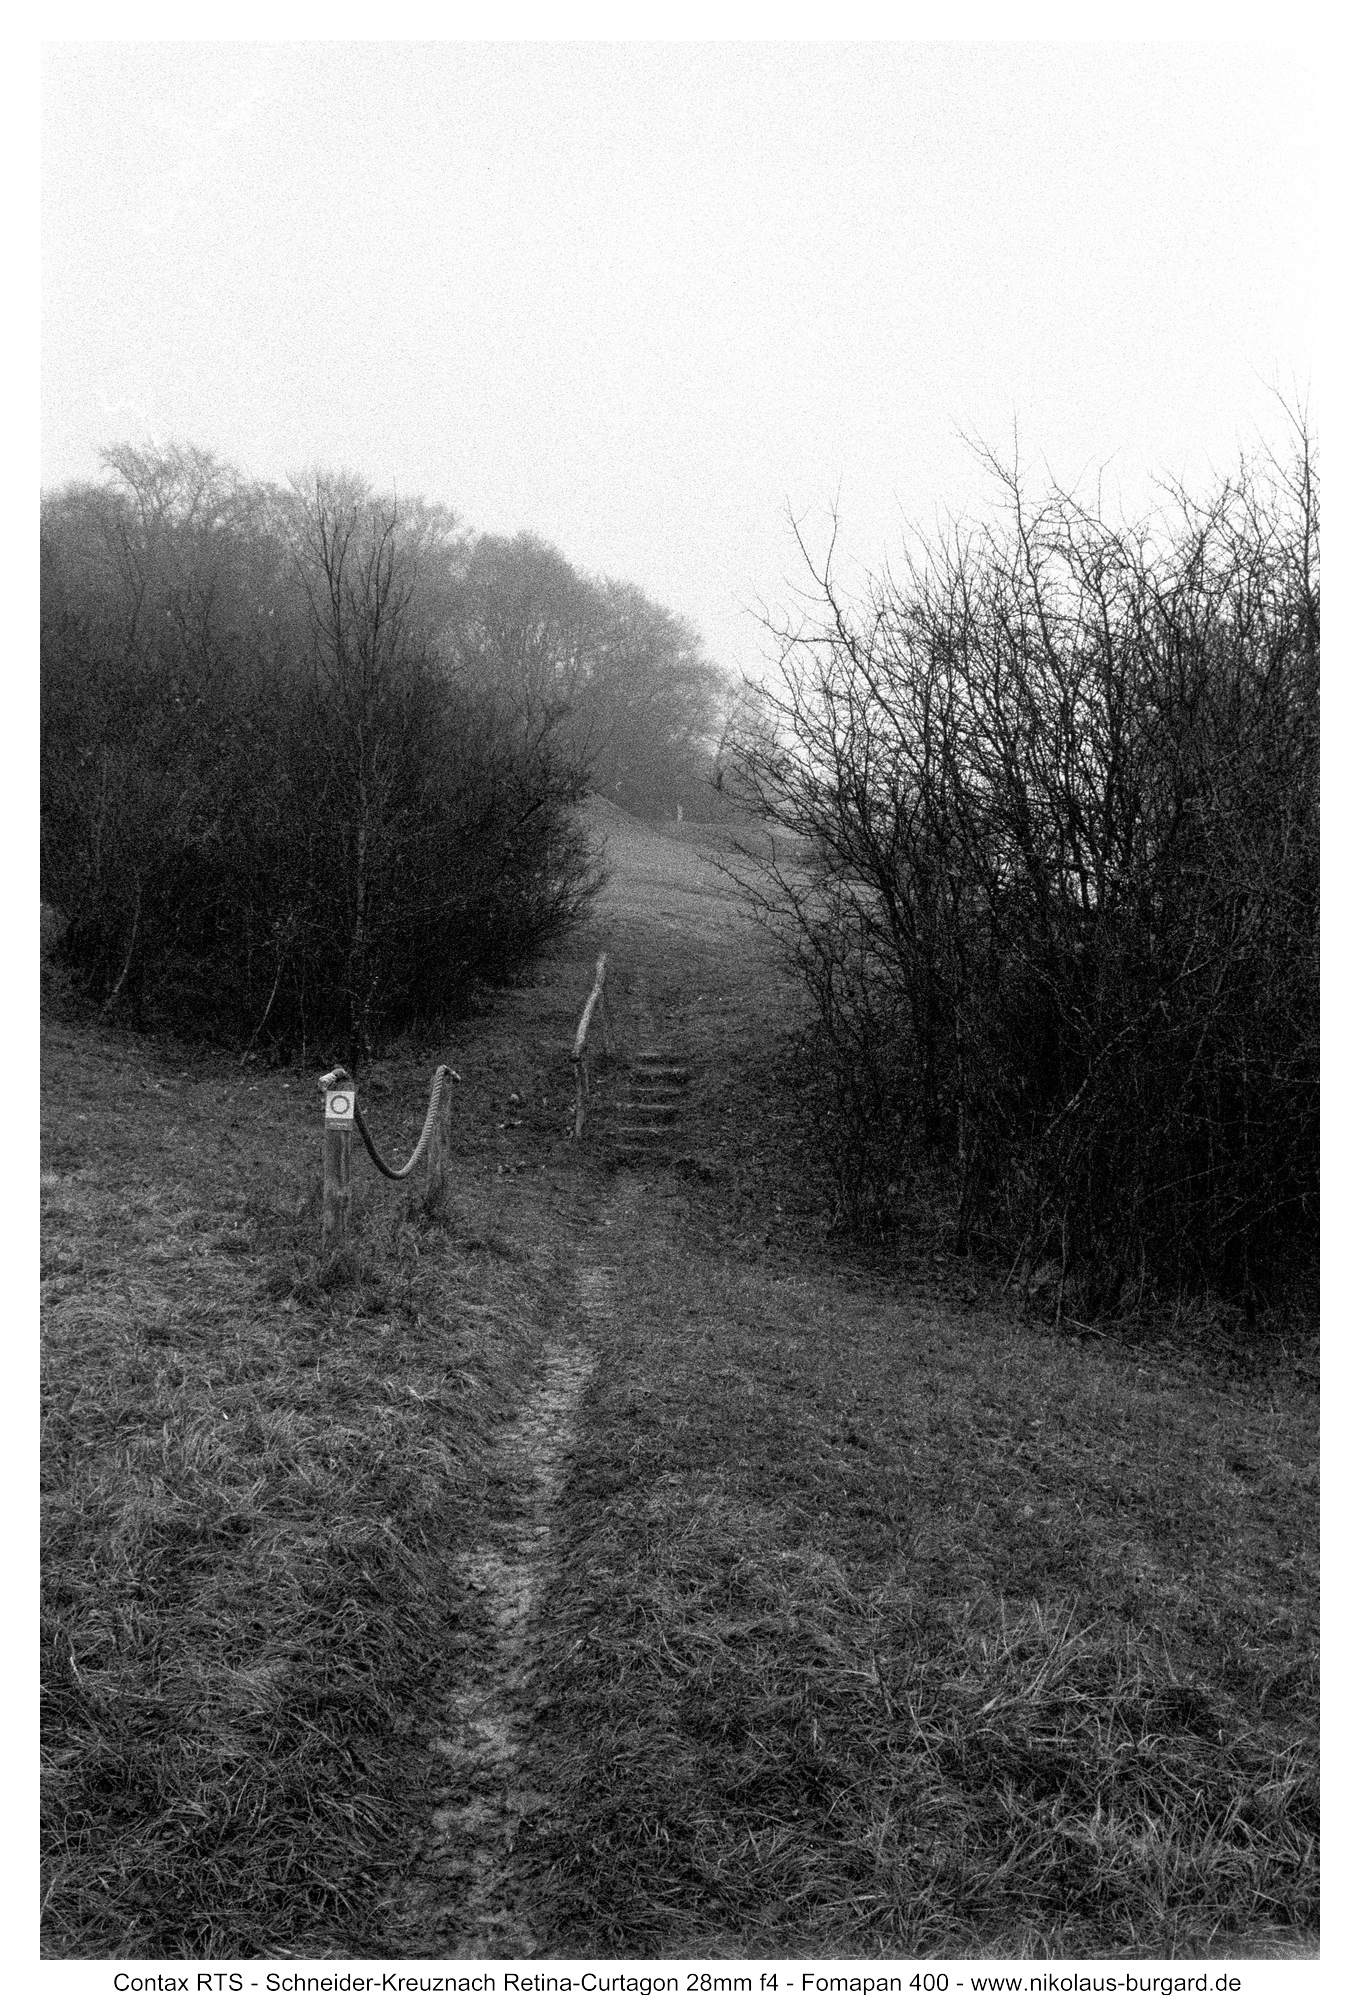
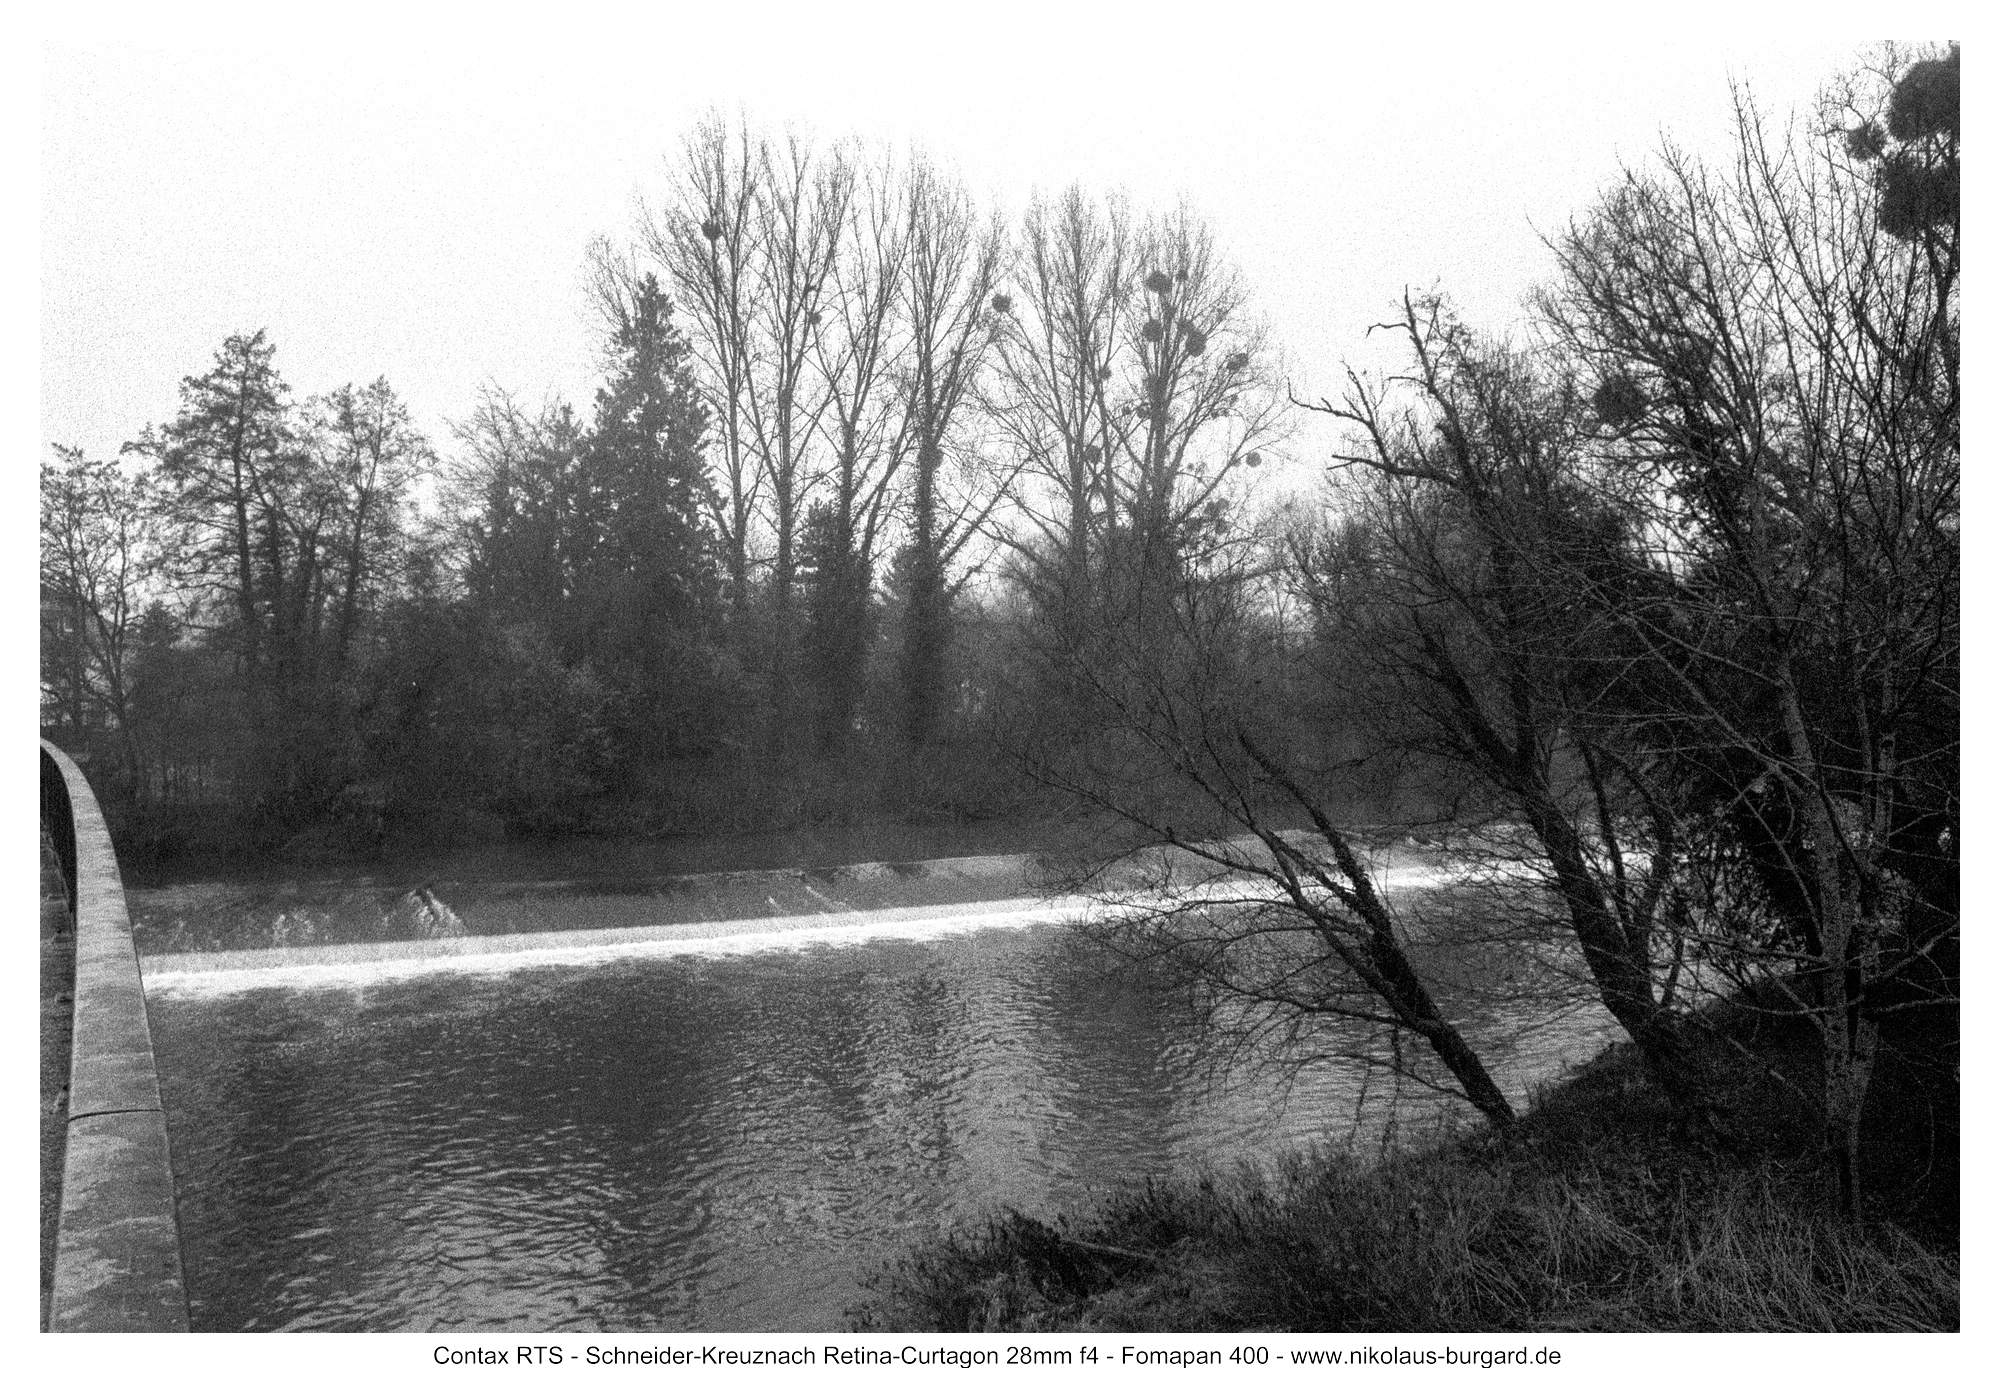
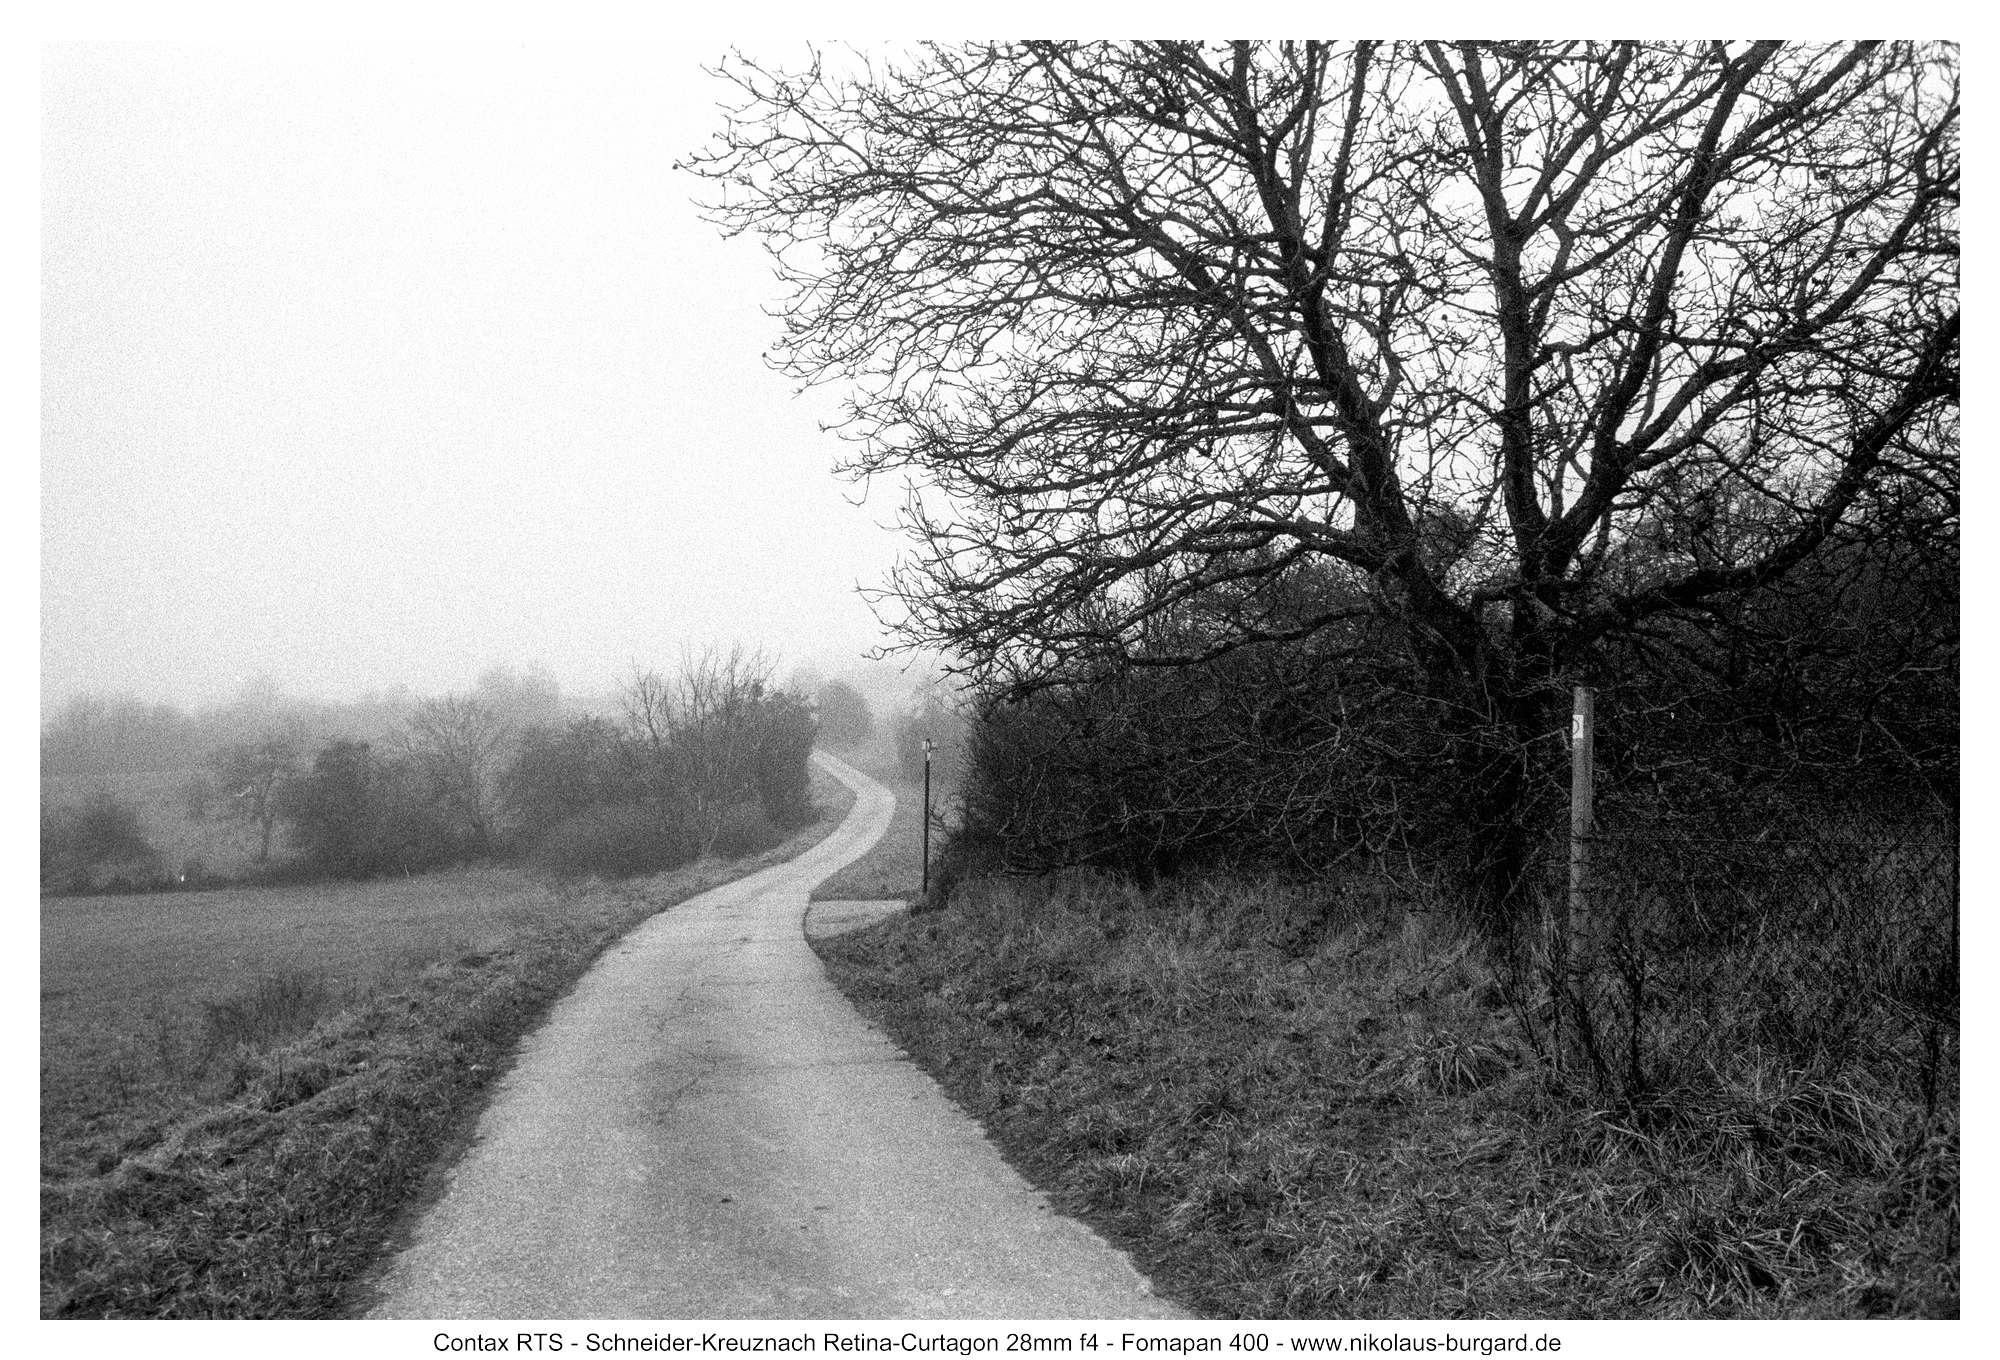
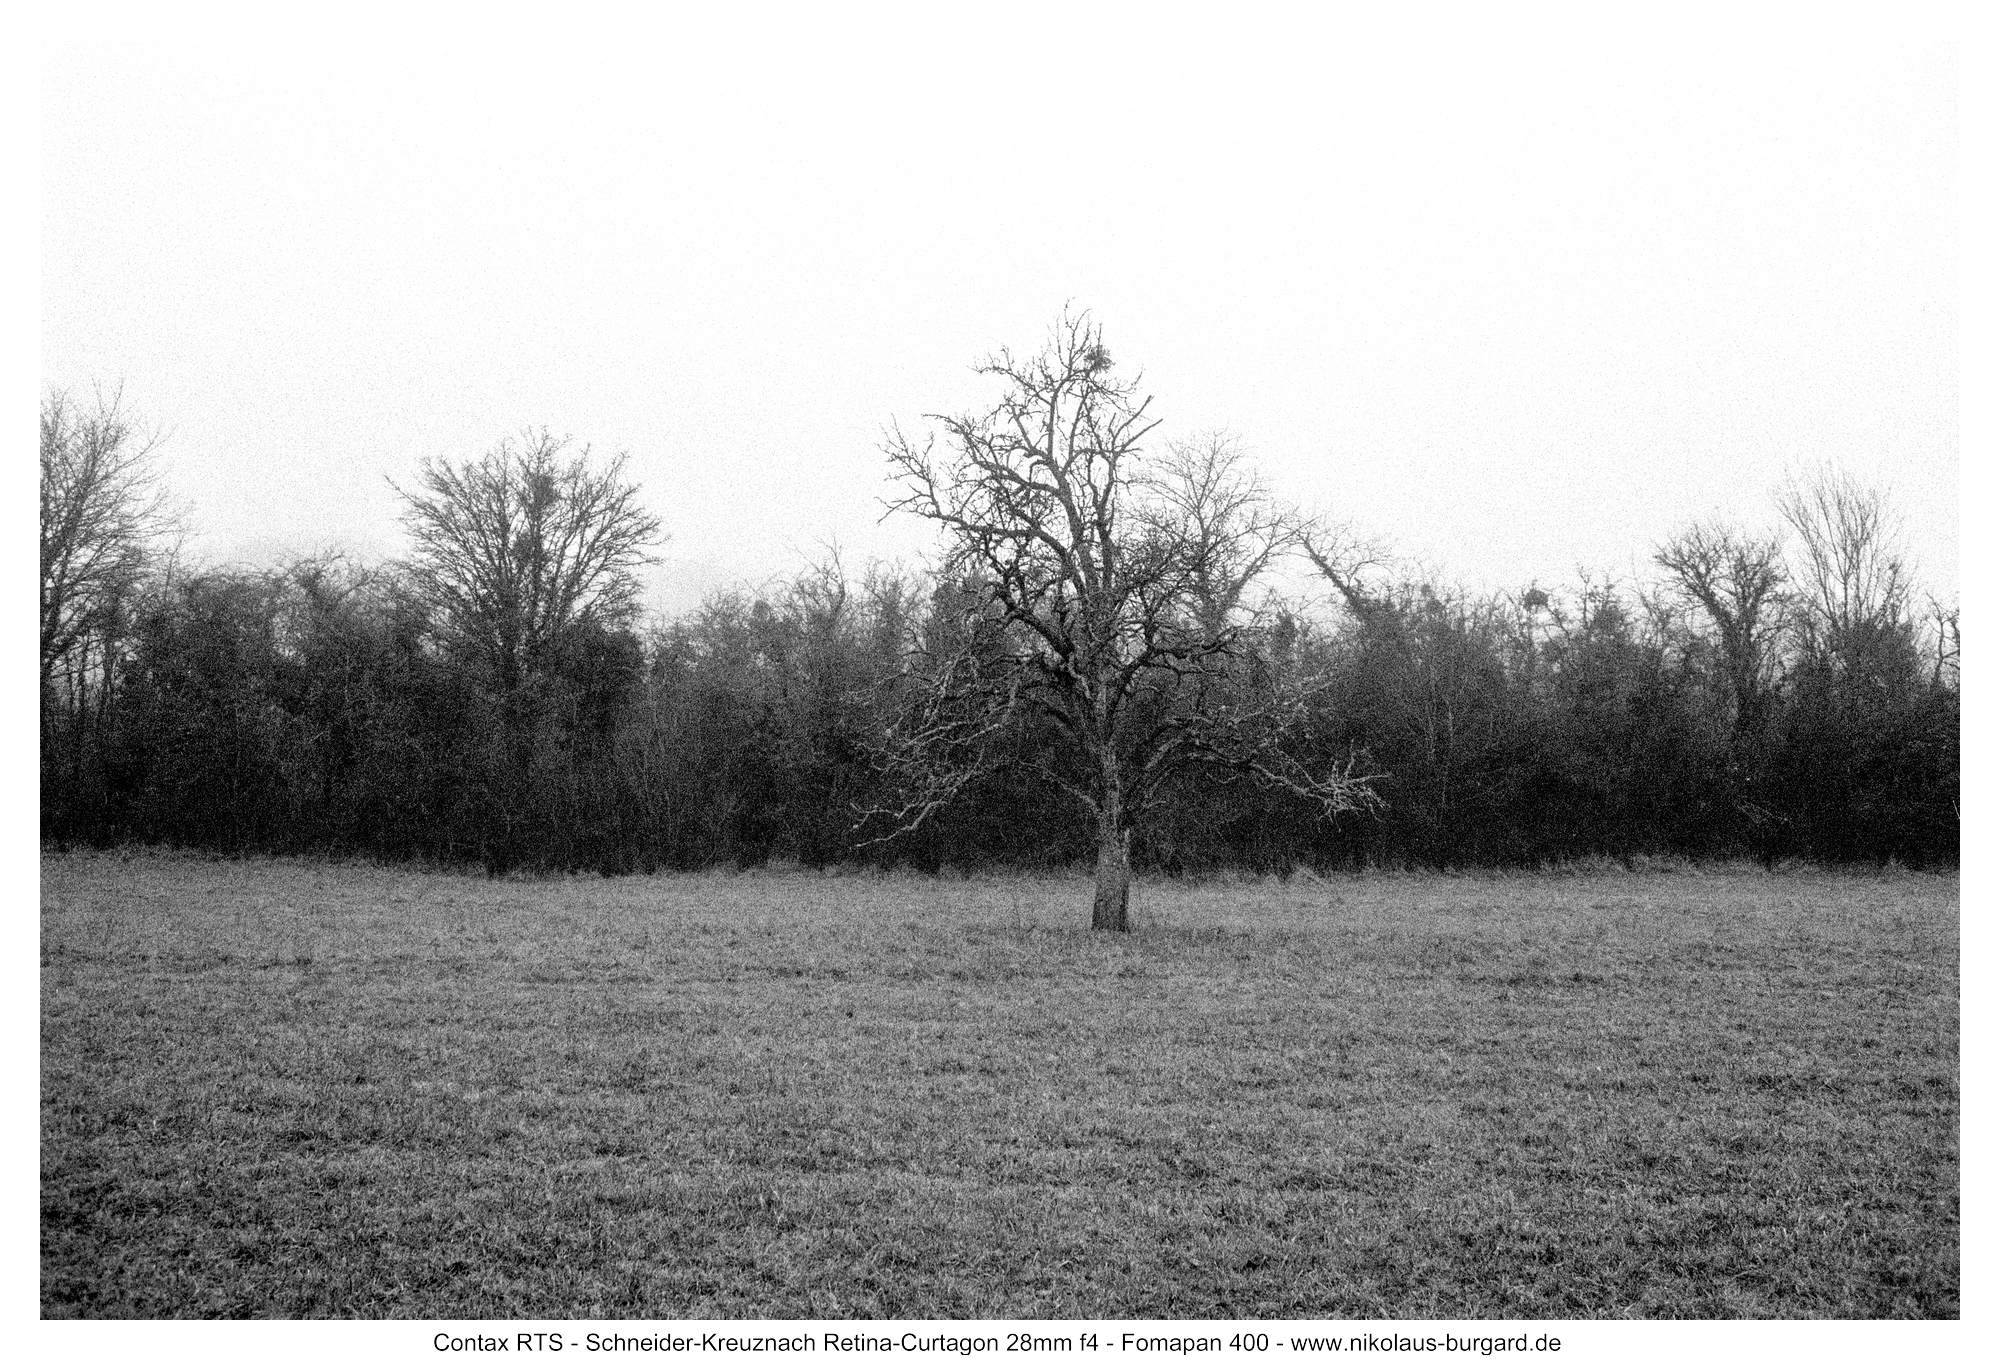
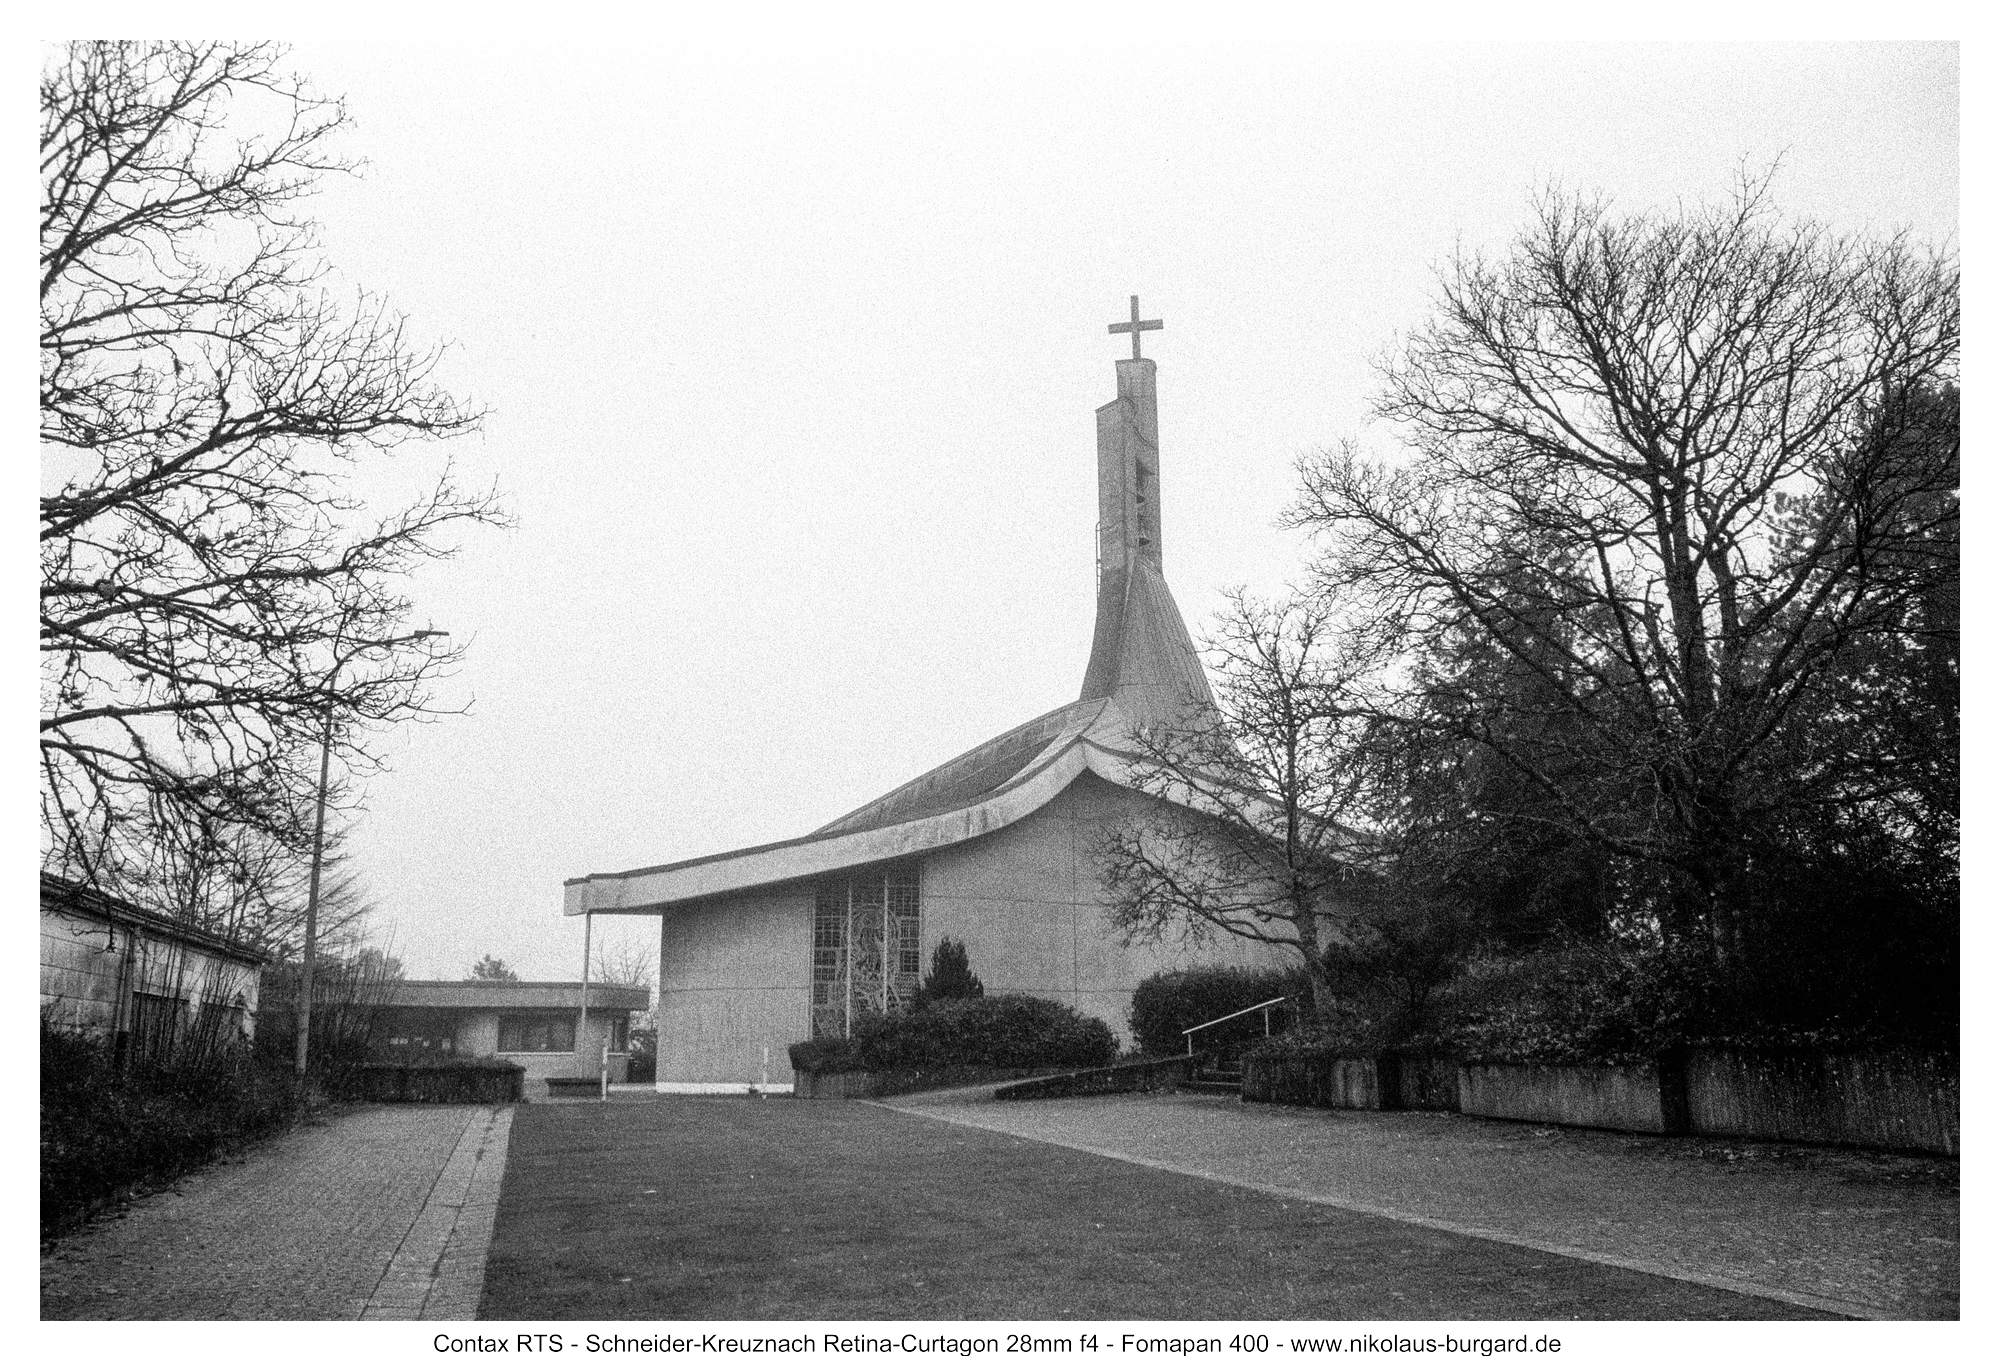
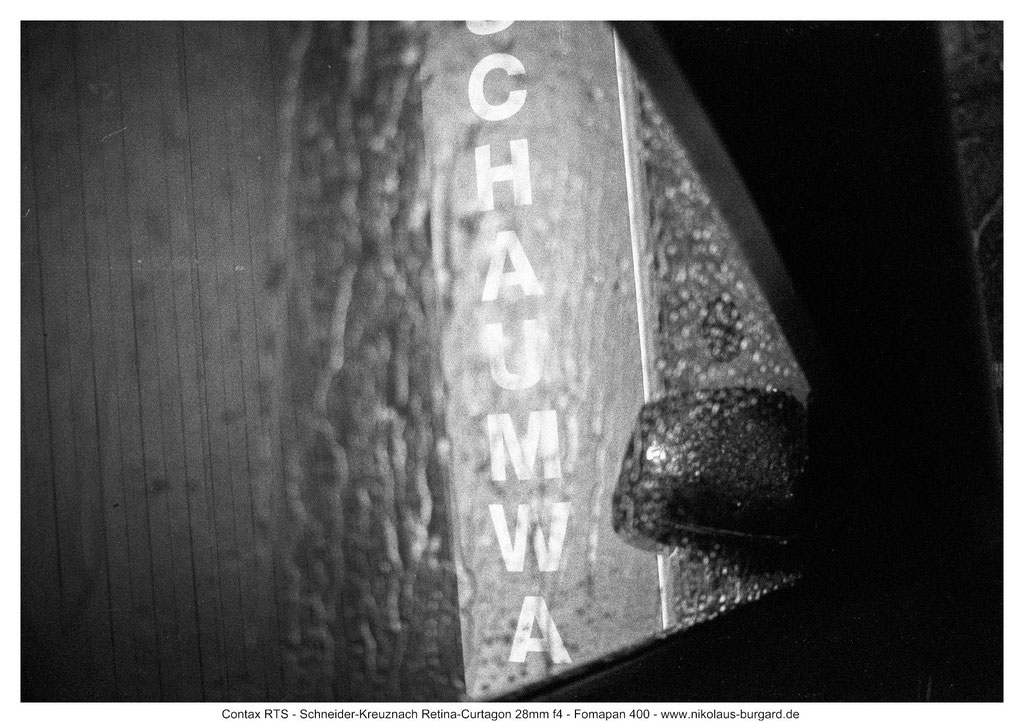
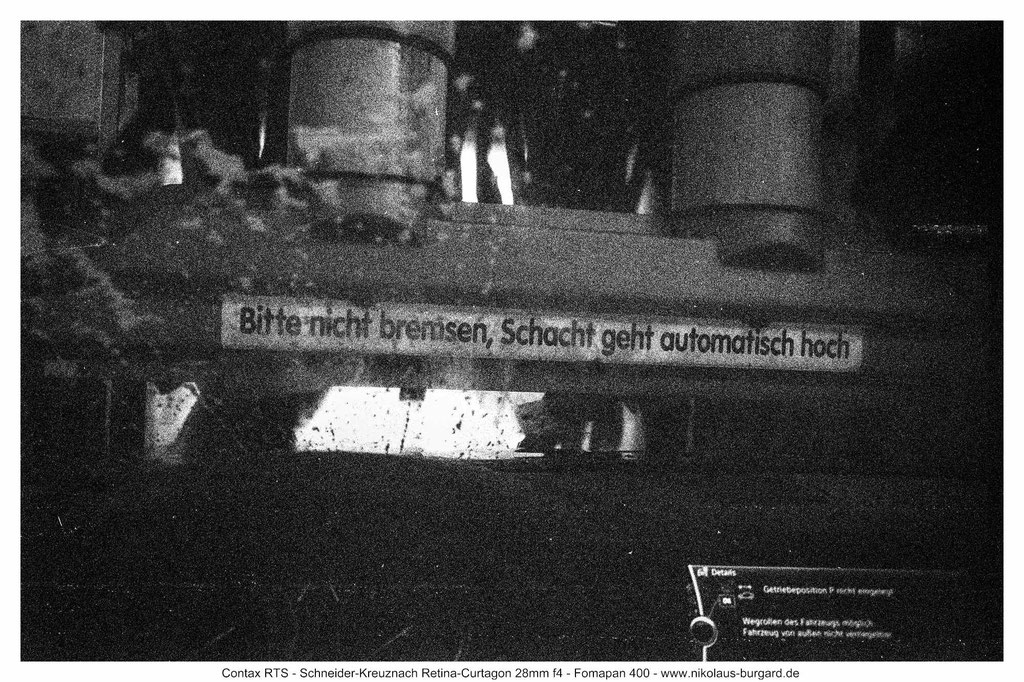
Bildserie analog: / Picture series analog: Mystic Place
Auch ganz klassisch mit Schwarz-Weiss-Negativfilm habe ich das Curtagon verwendet.
Film war der Fomapan 400, und die Kamera die Contax RTS mit passendem Adapter.
Ein wie ich finde herrlich mystischer Ort bot die passende Kulisse für stimmungsvolle Schwarz-Weiss-Aufnahmen:
I also used the Curtagon in a classic setup with black-and-white negative film.
The film was Fomapan 400, and the camera was a Contax RTS with the appropriate adapter.
A place that I found wonderfully mystical provided the perfect backdrop for atmospheric black-and-white shots:


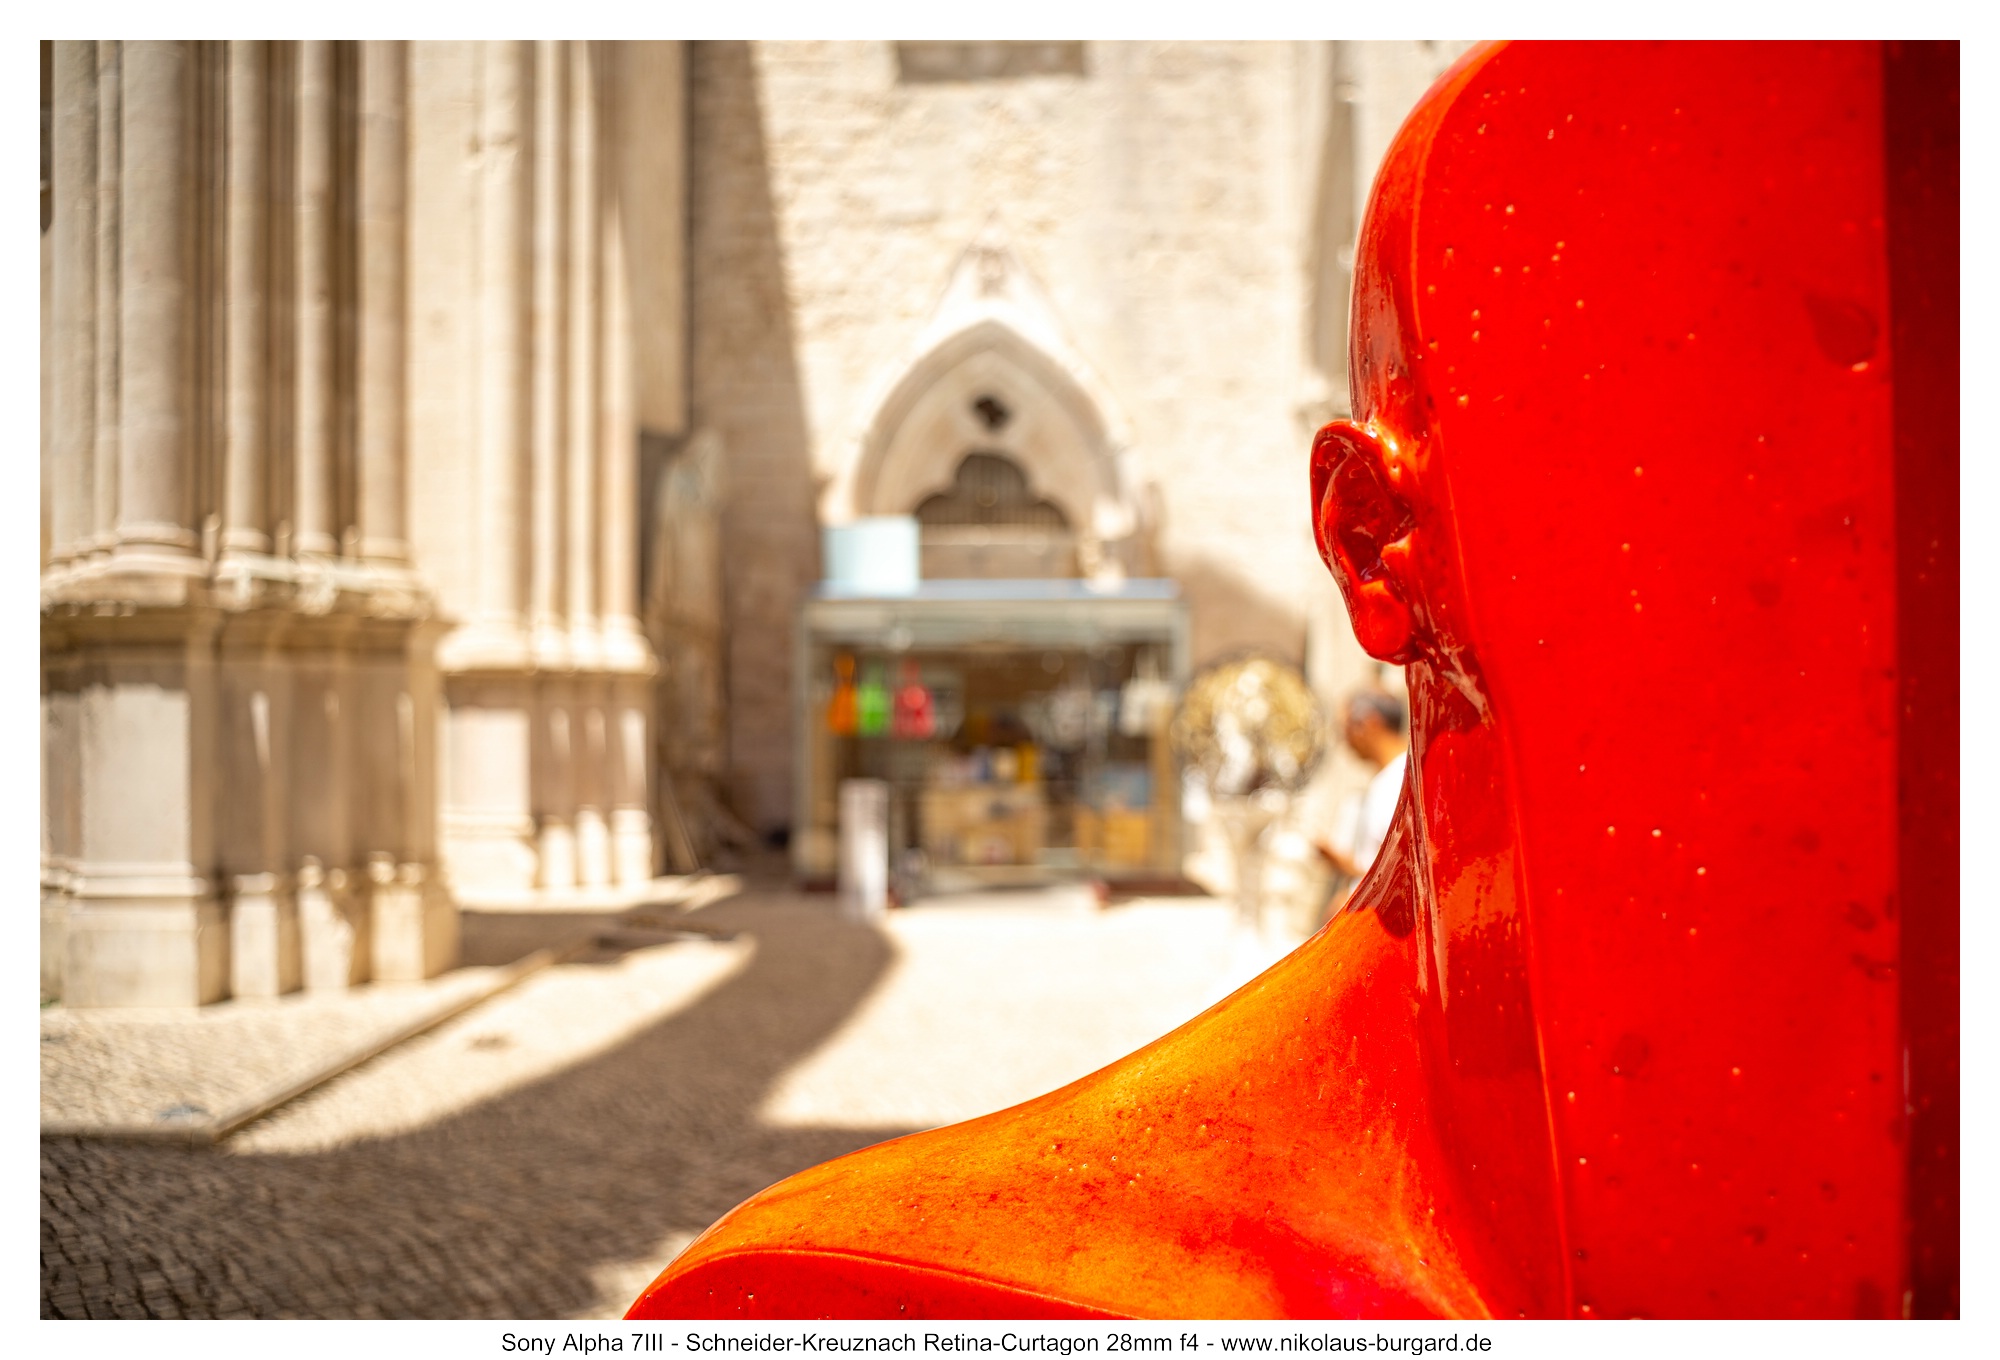
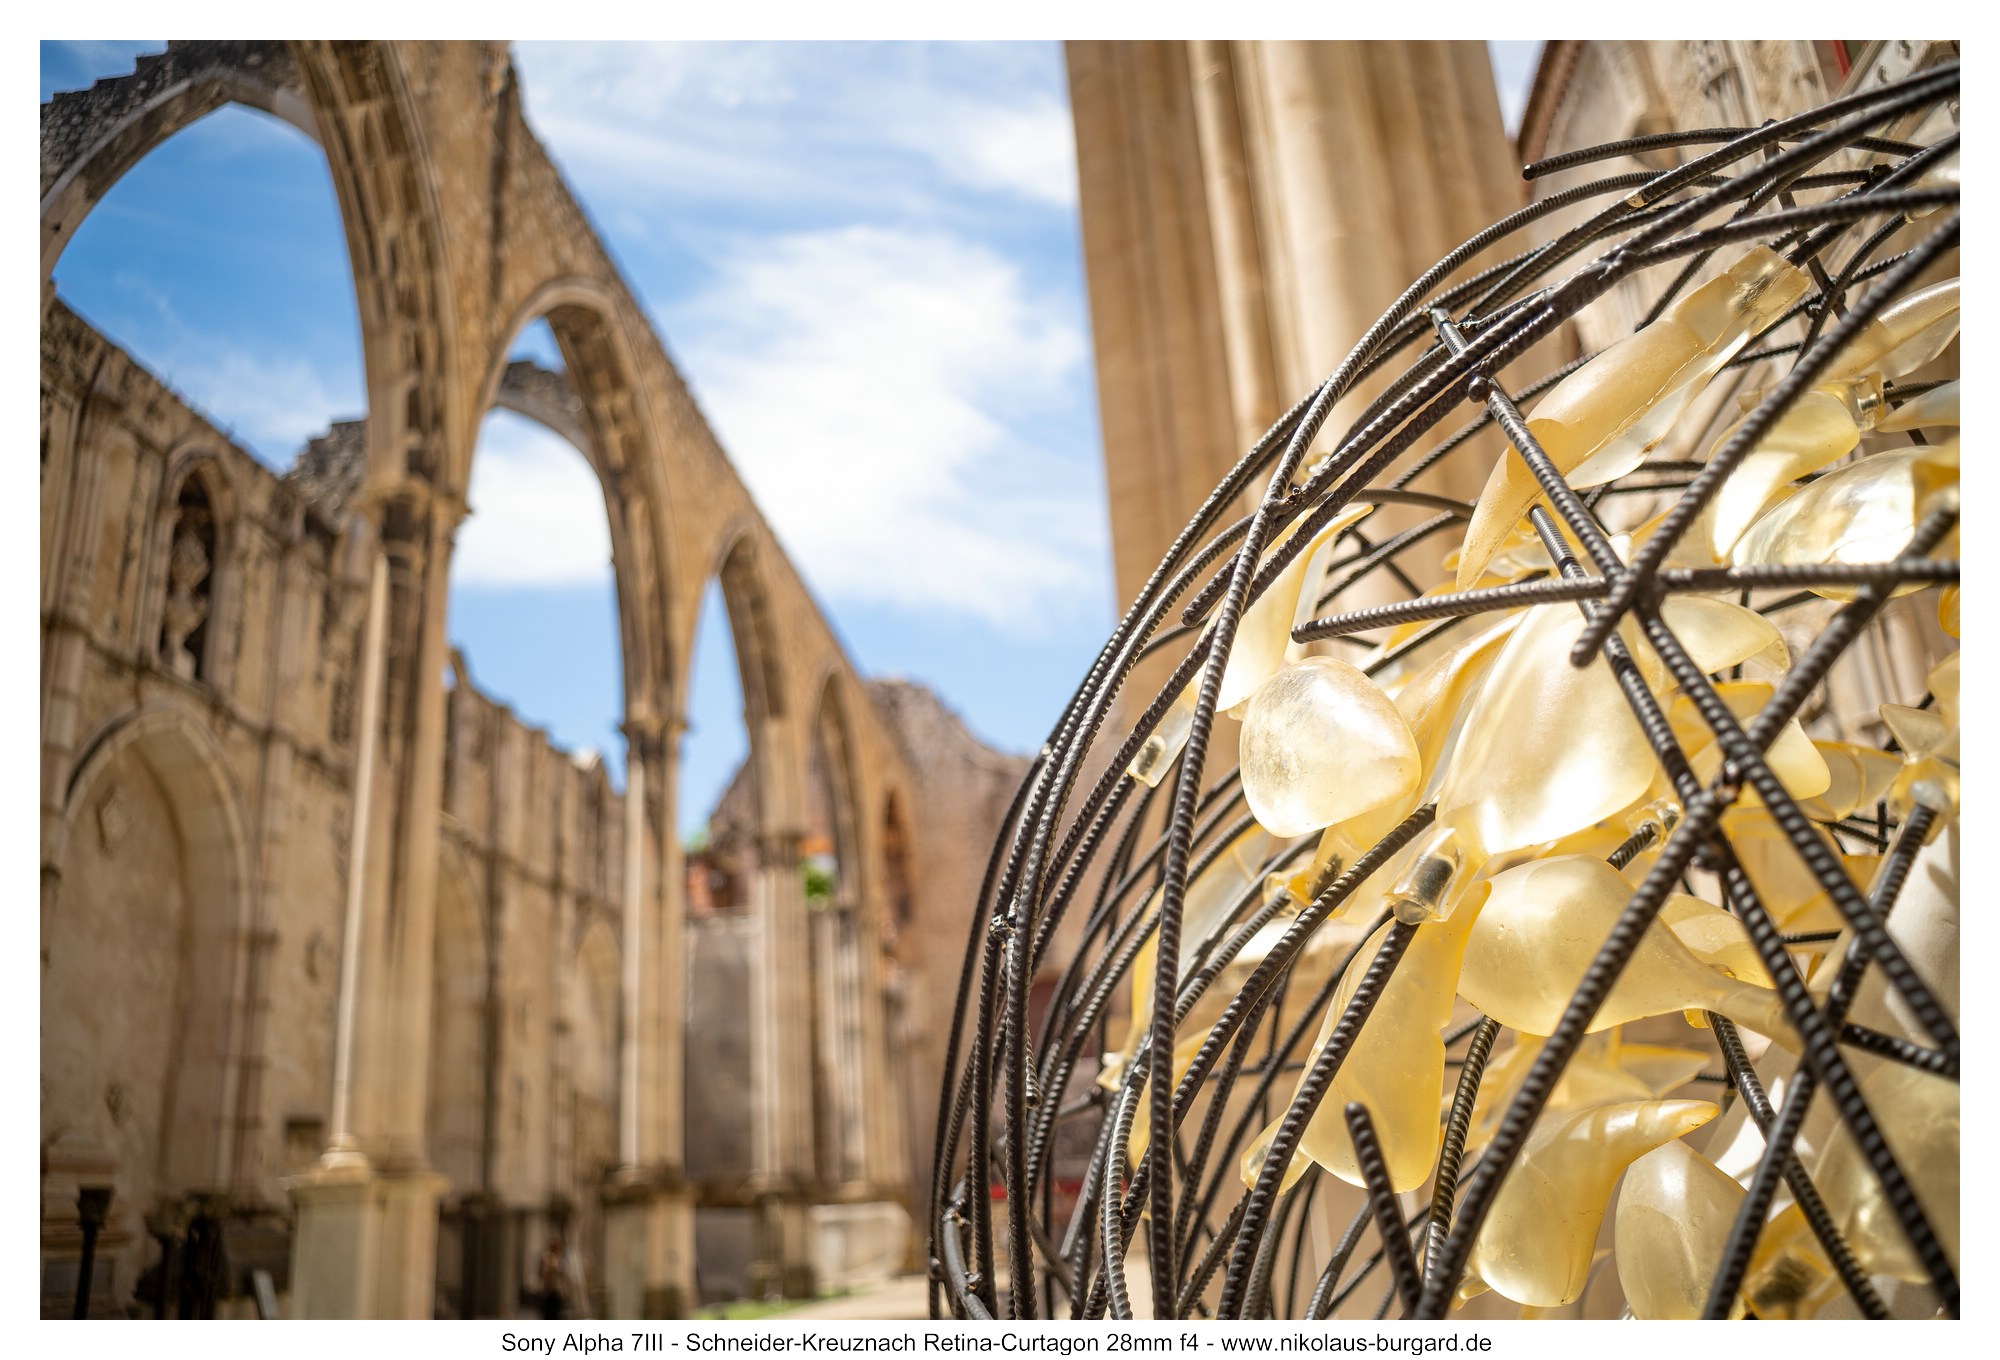
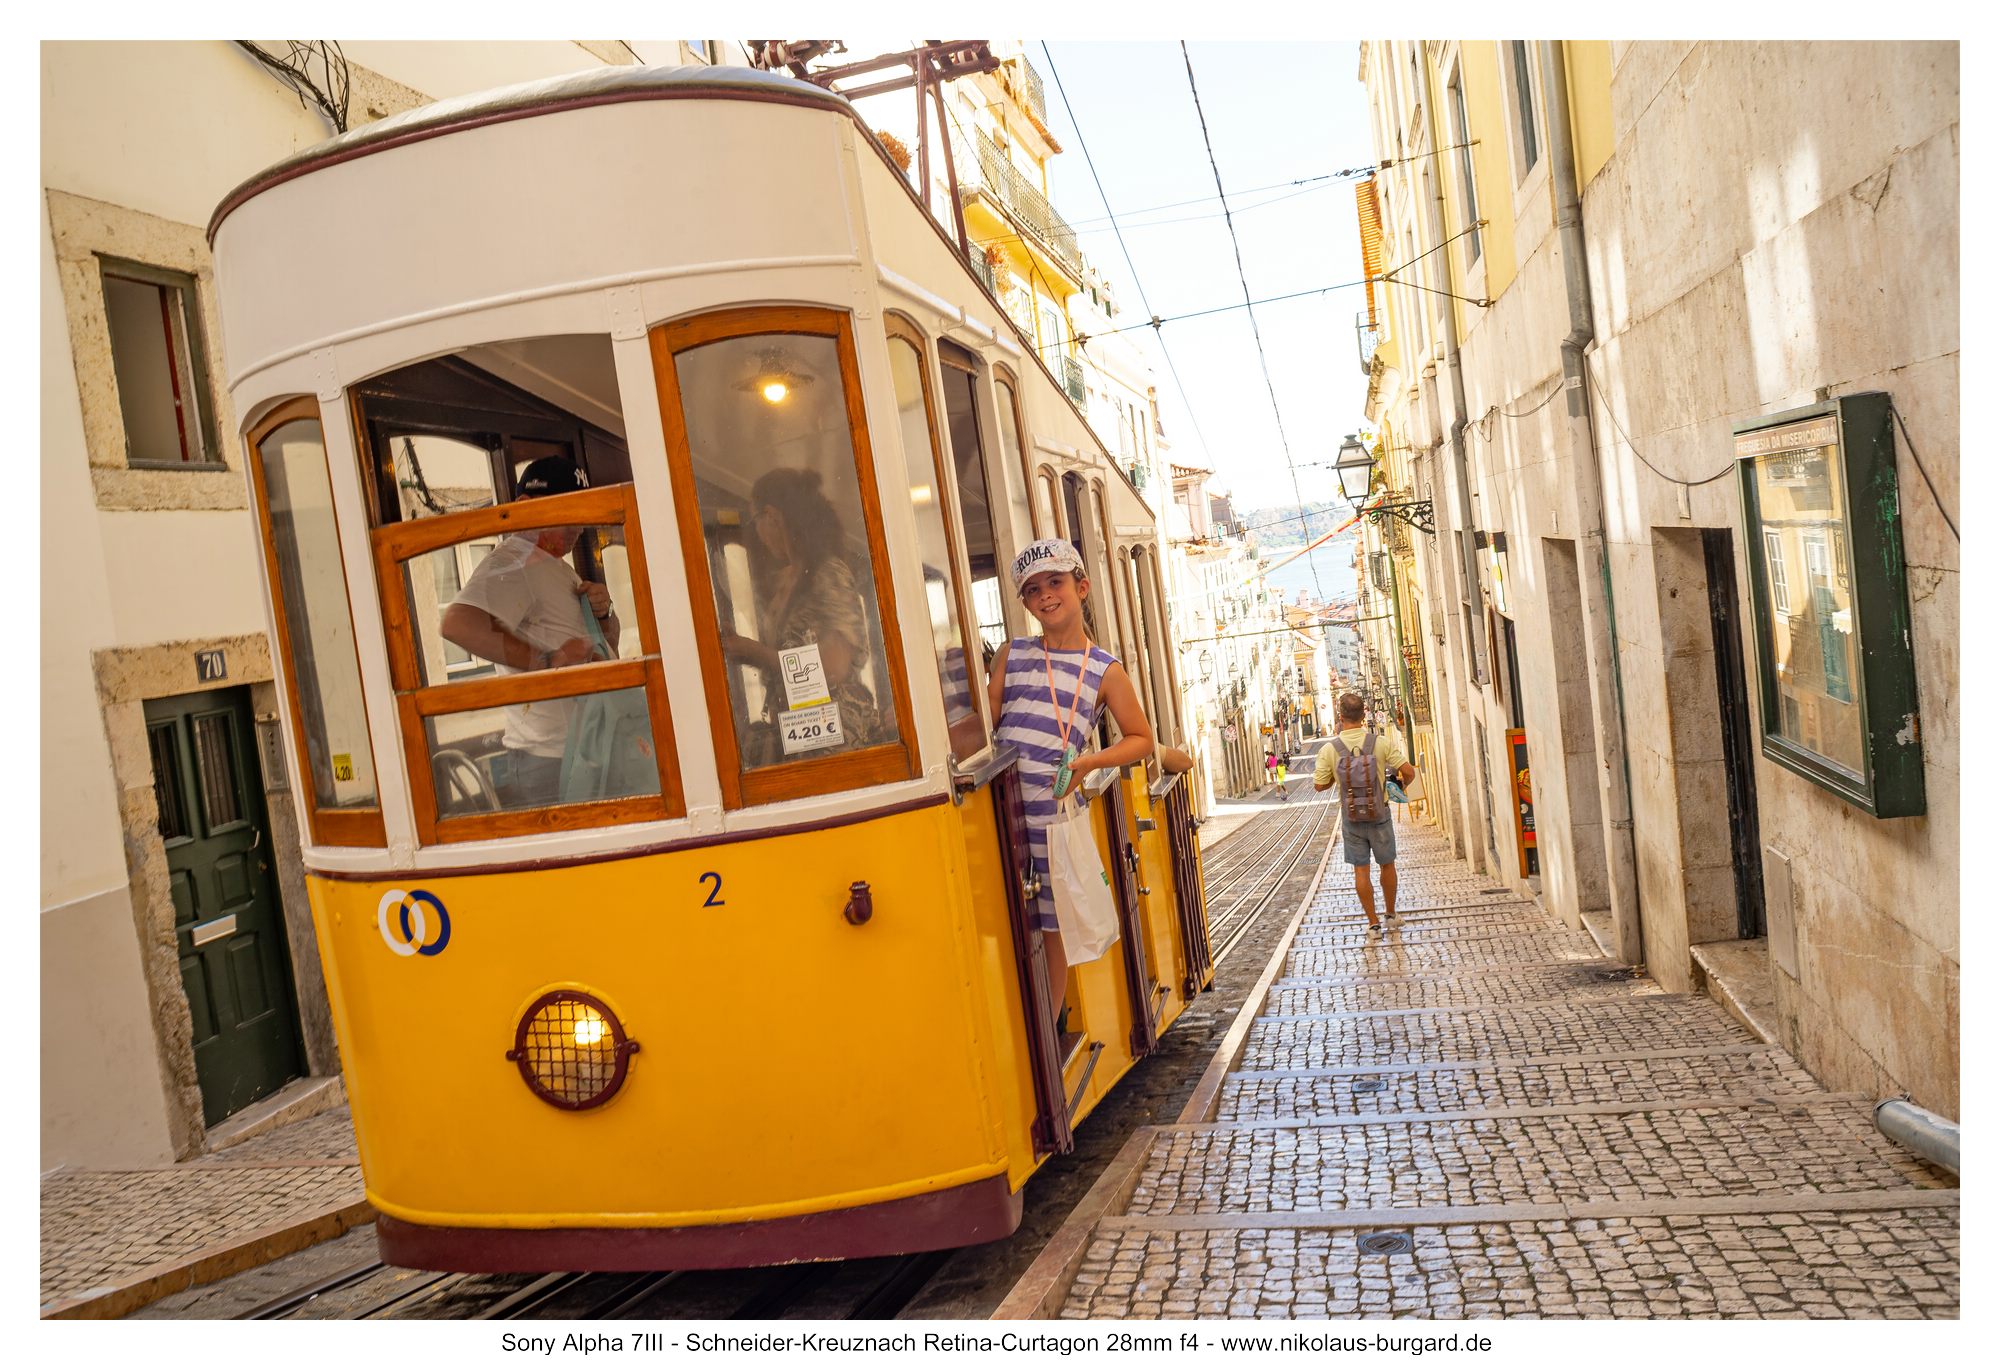
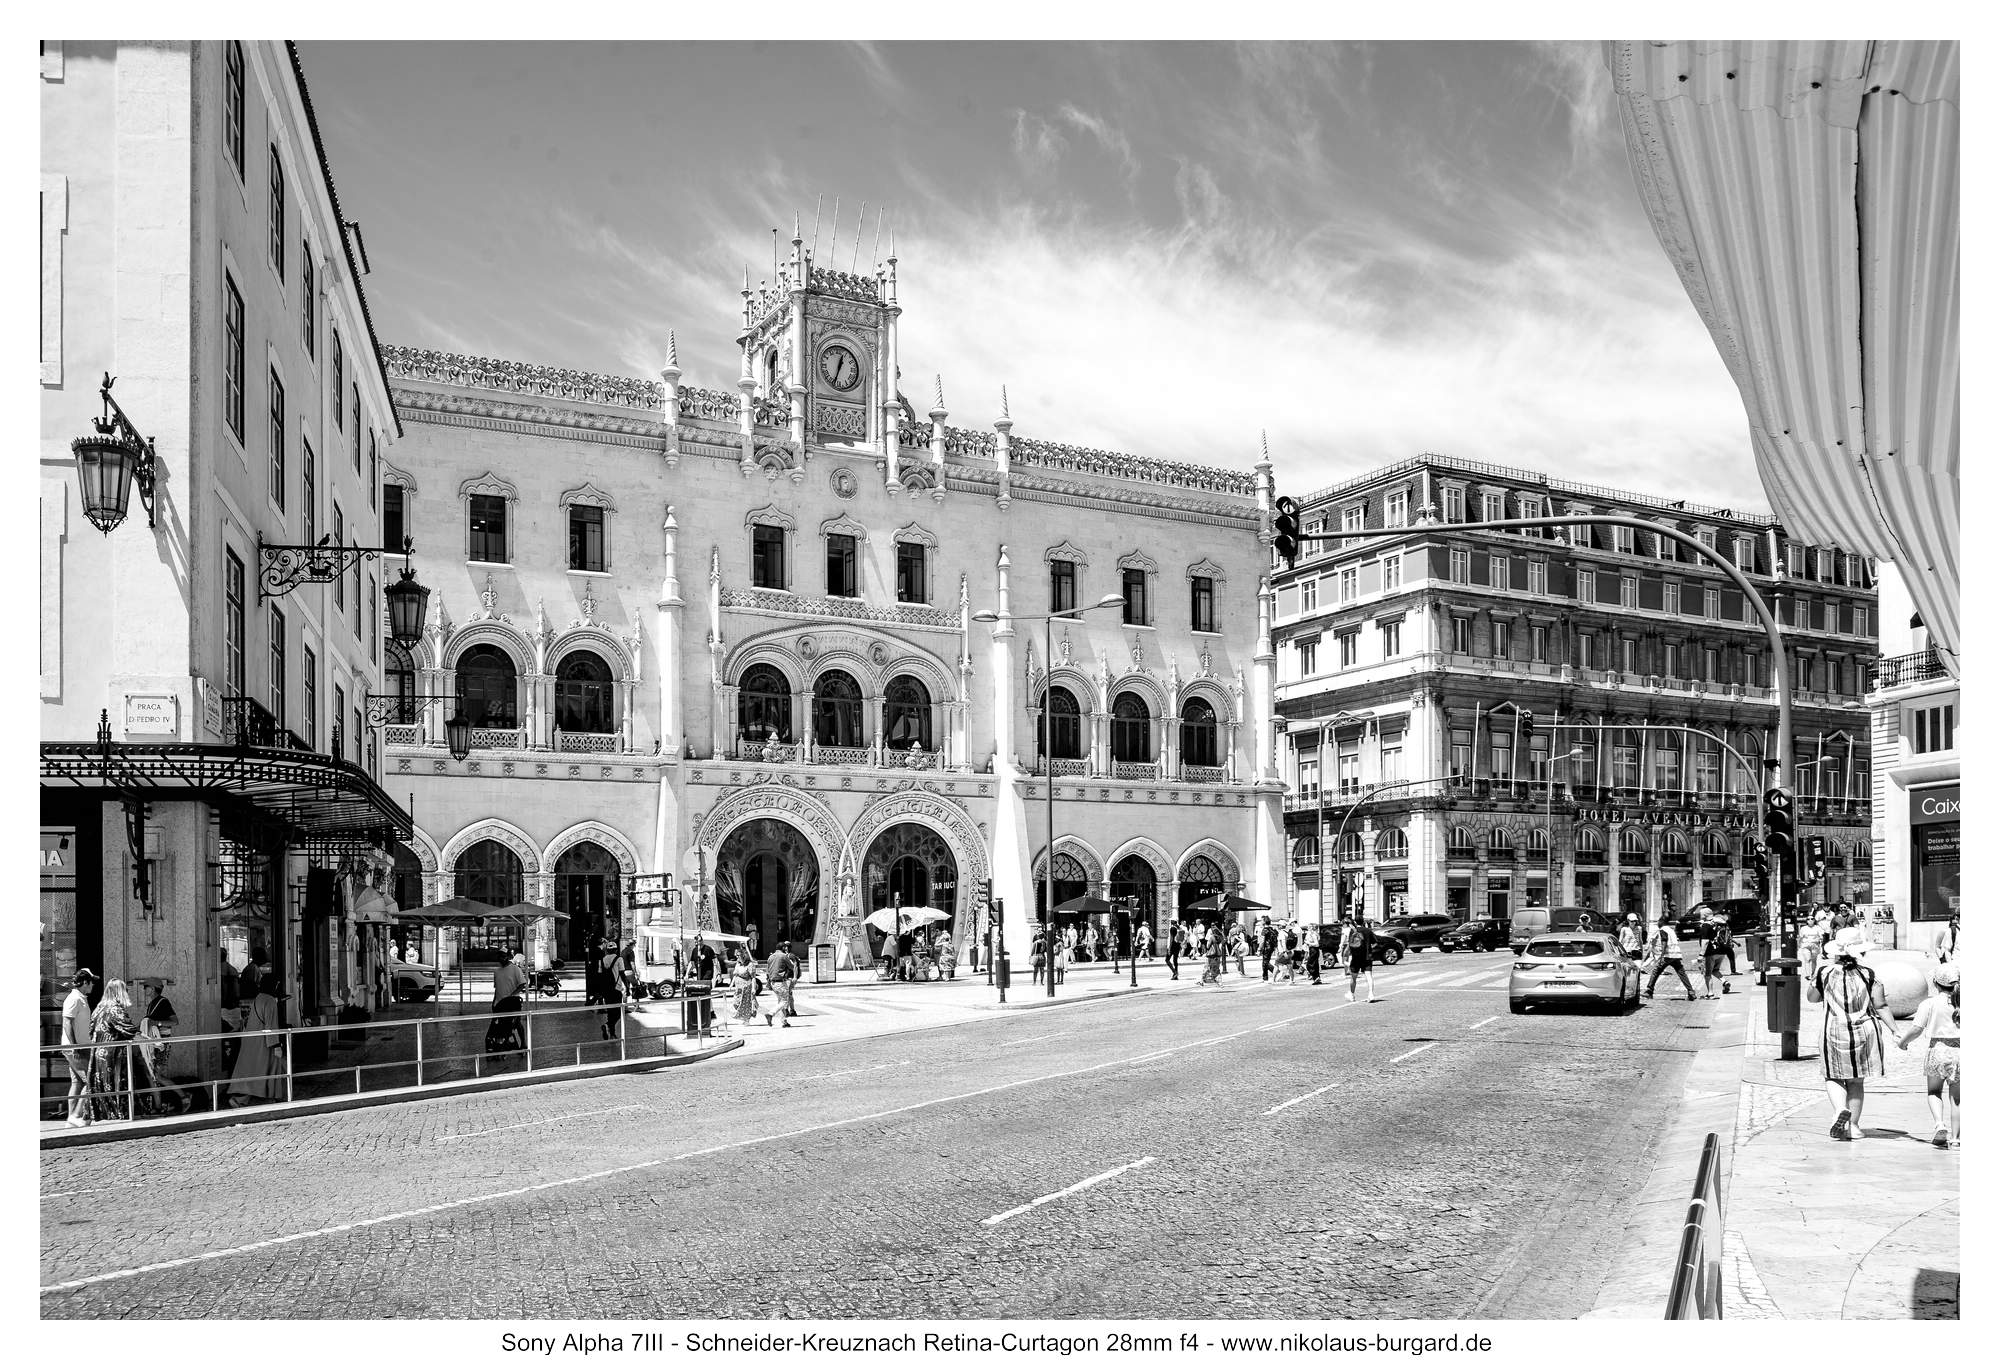
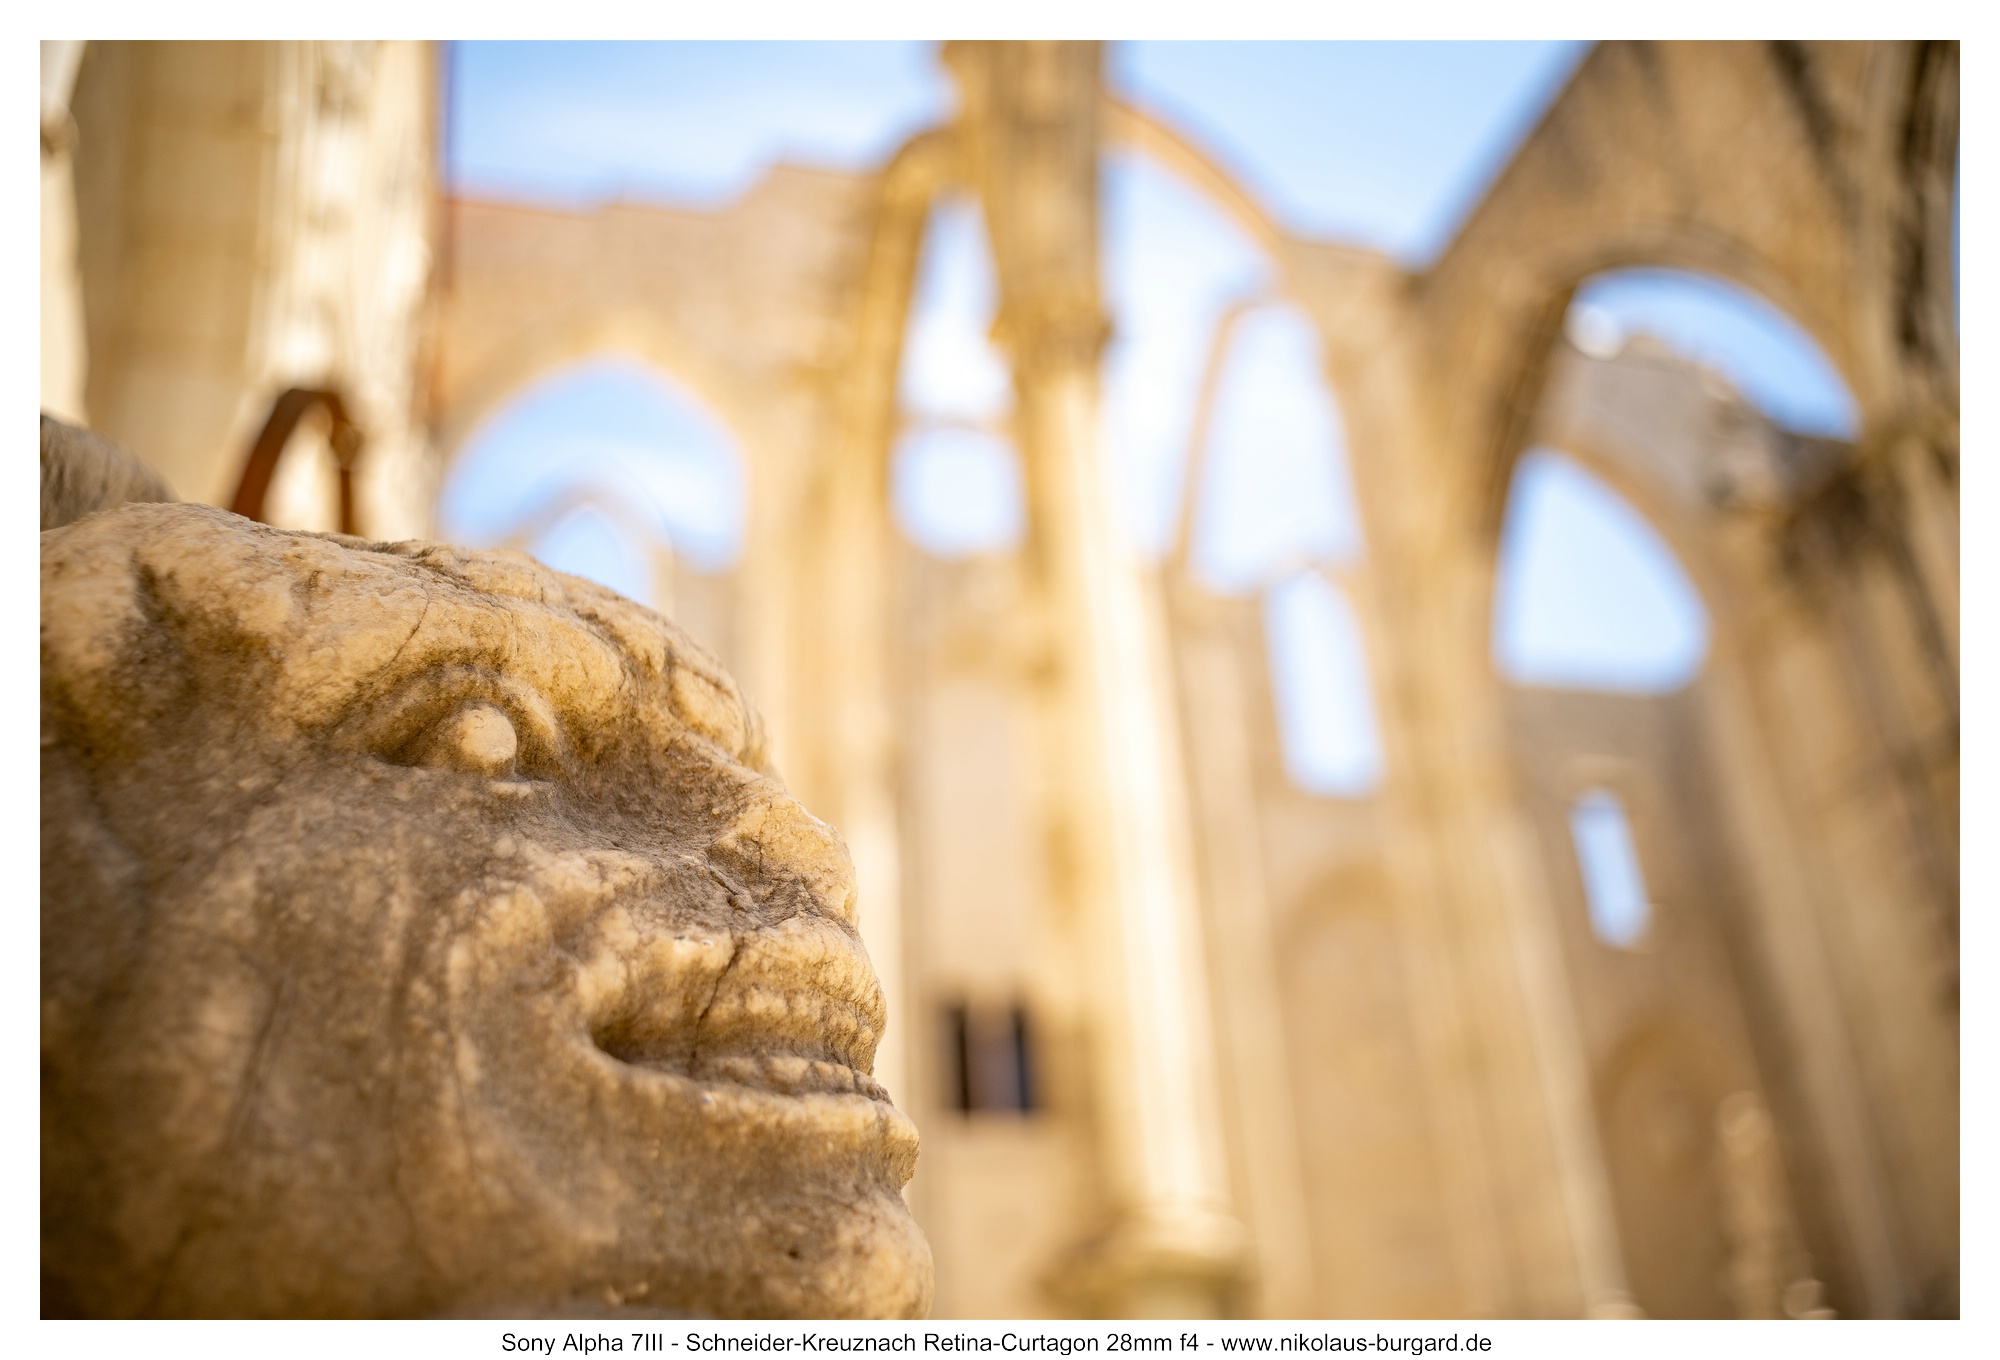
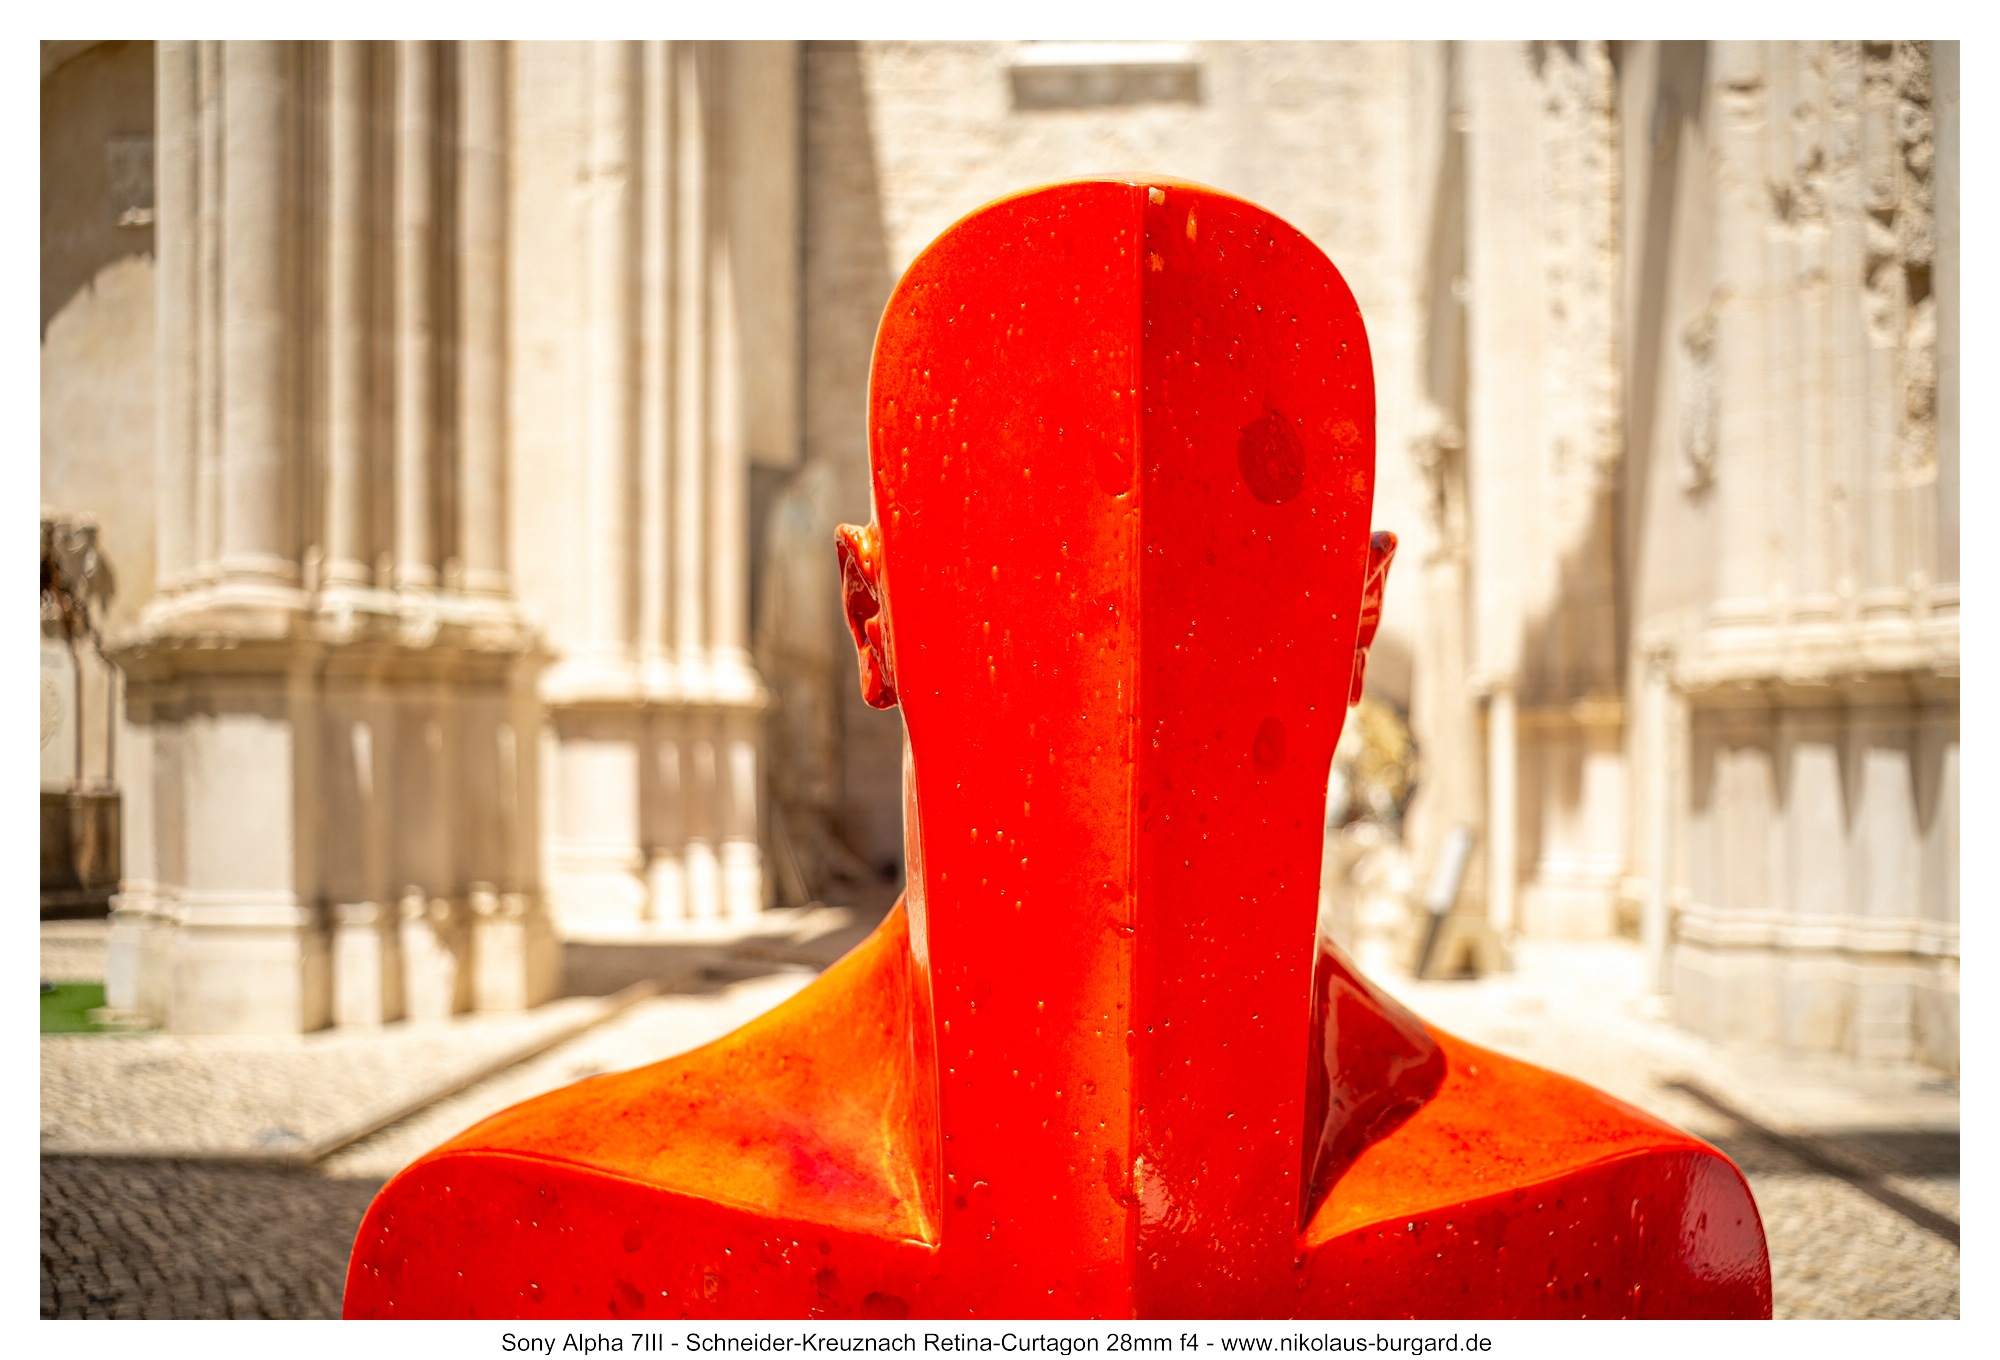
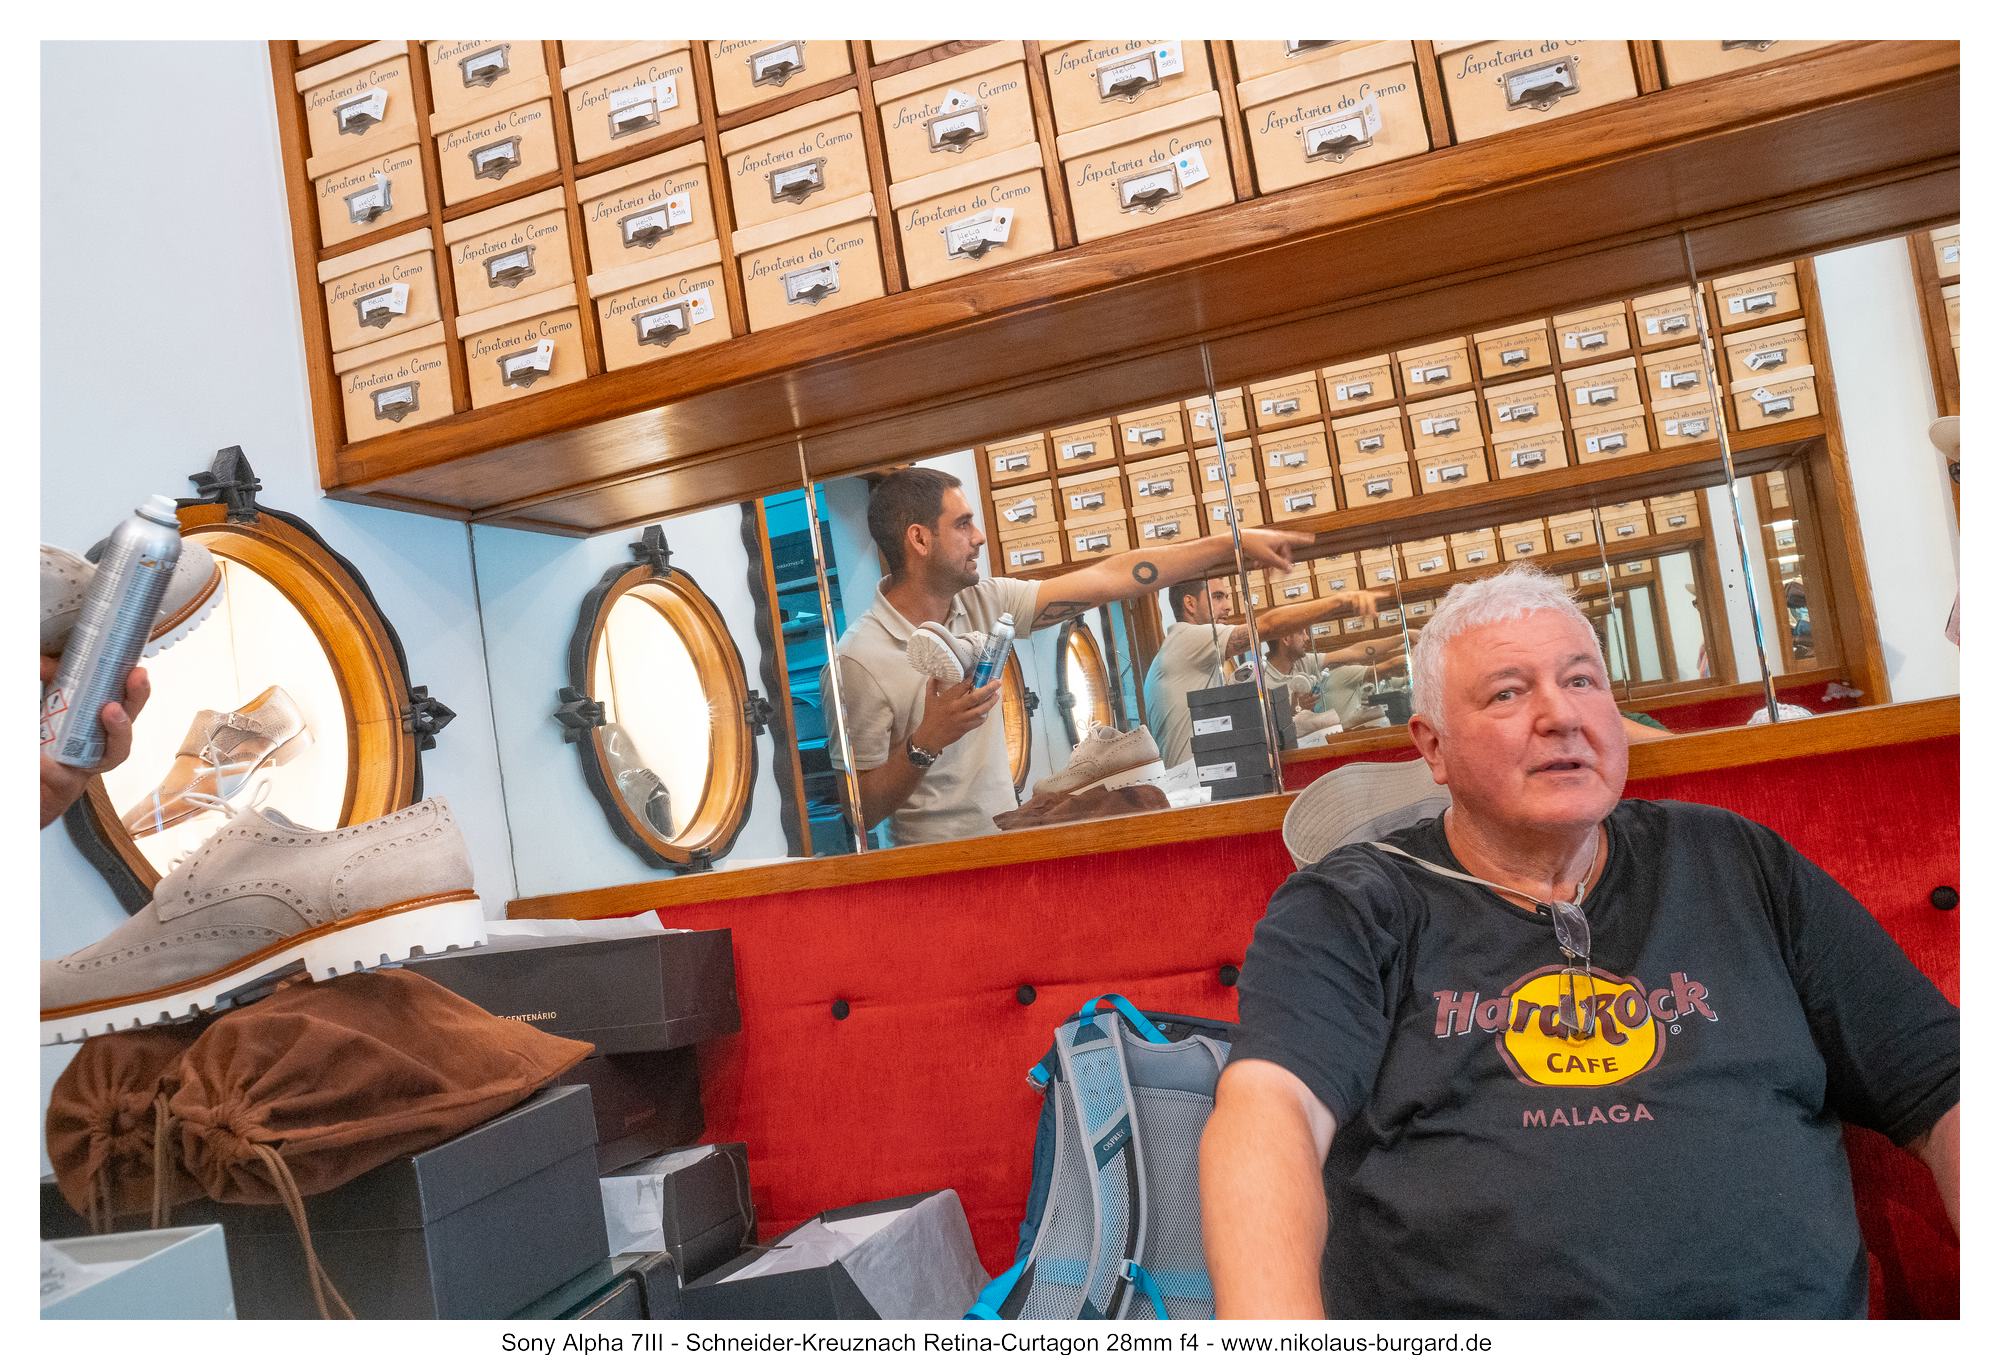
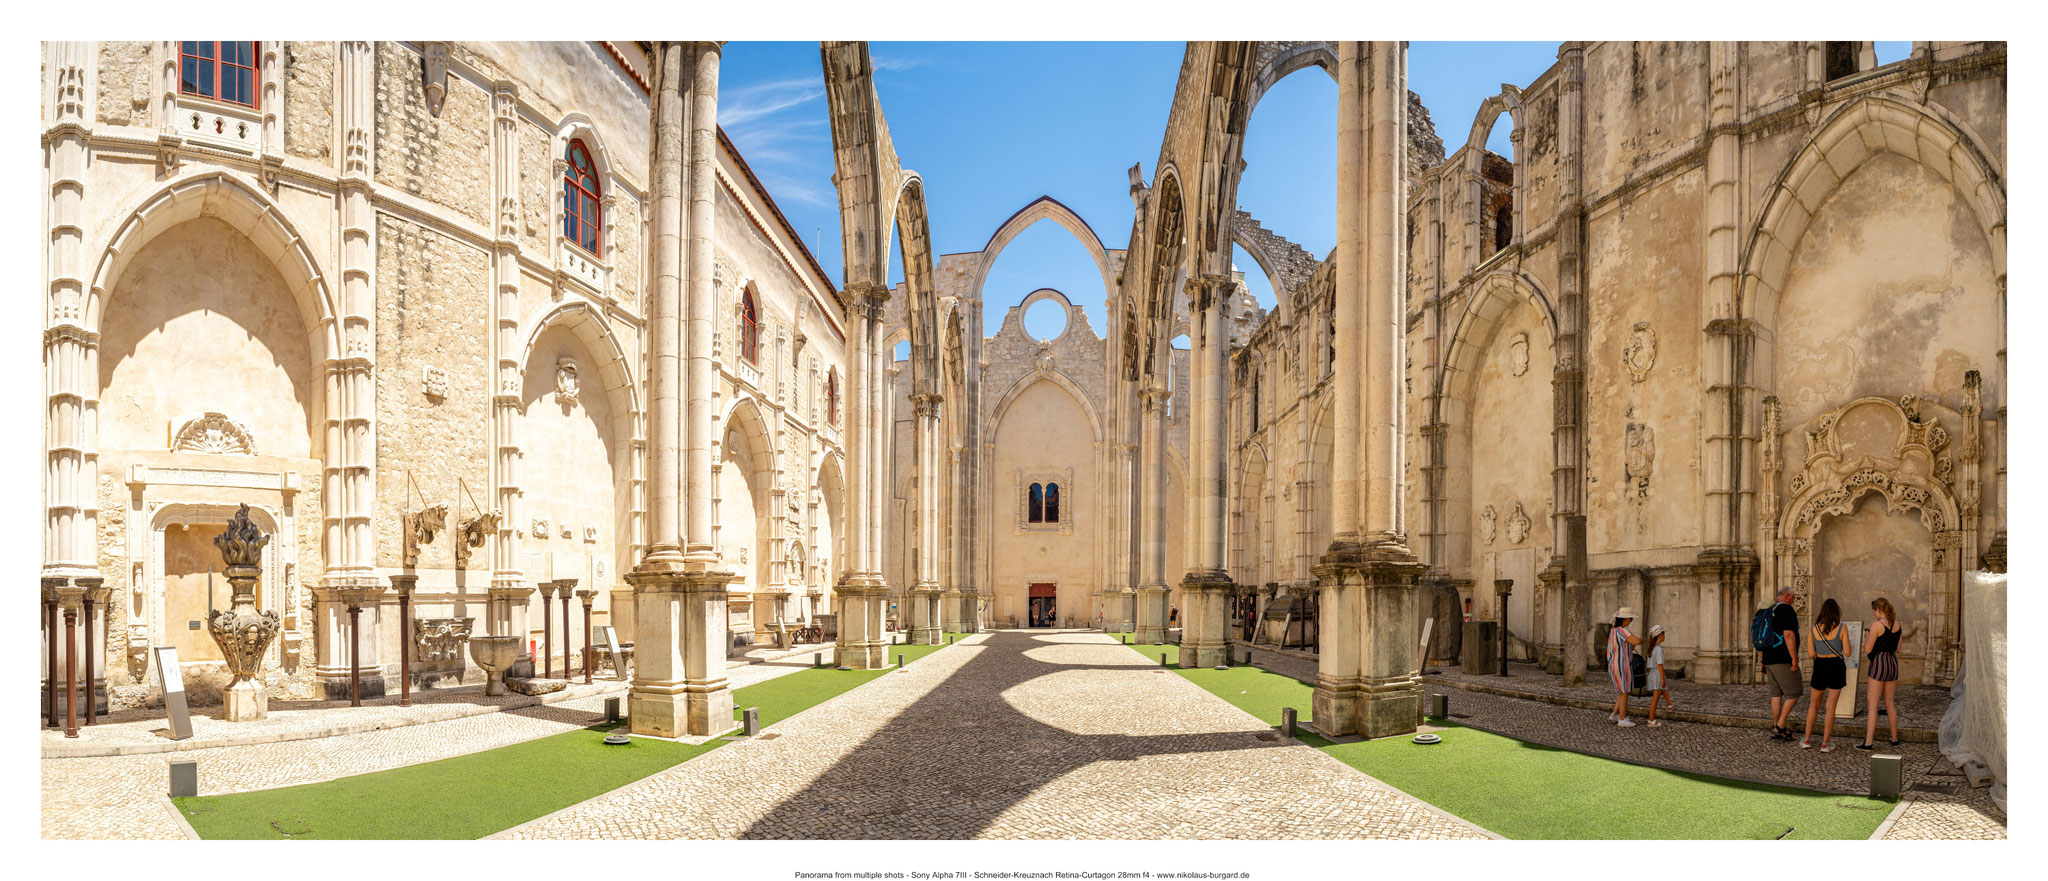
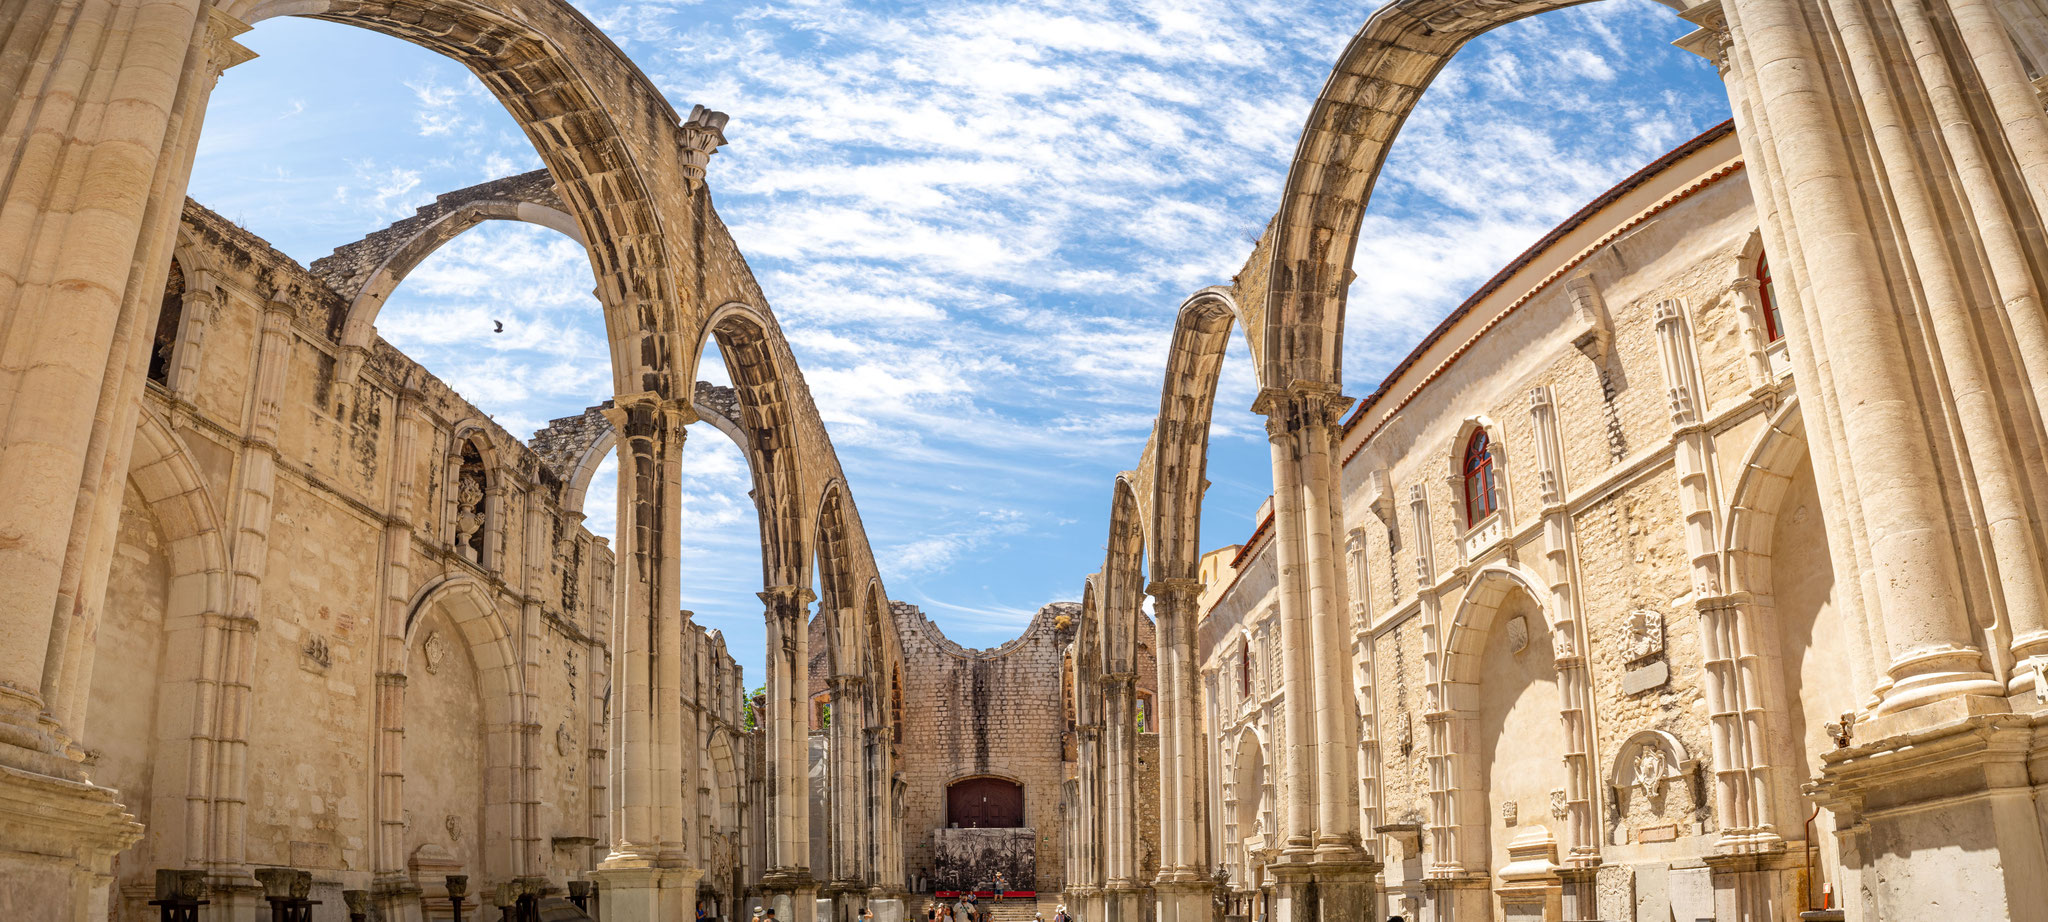
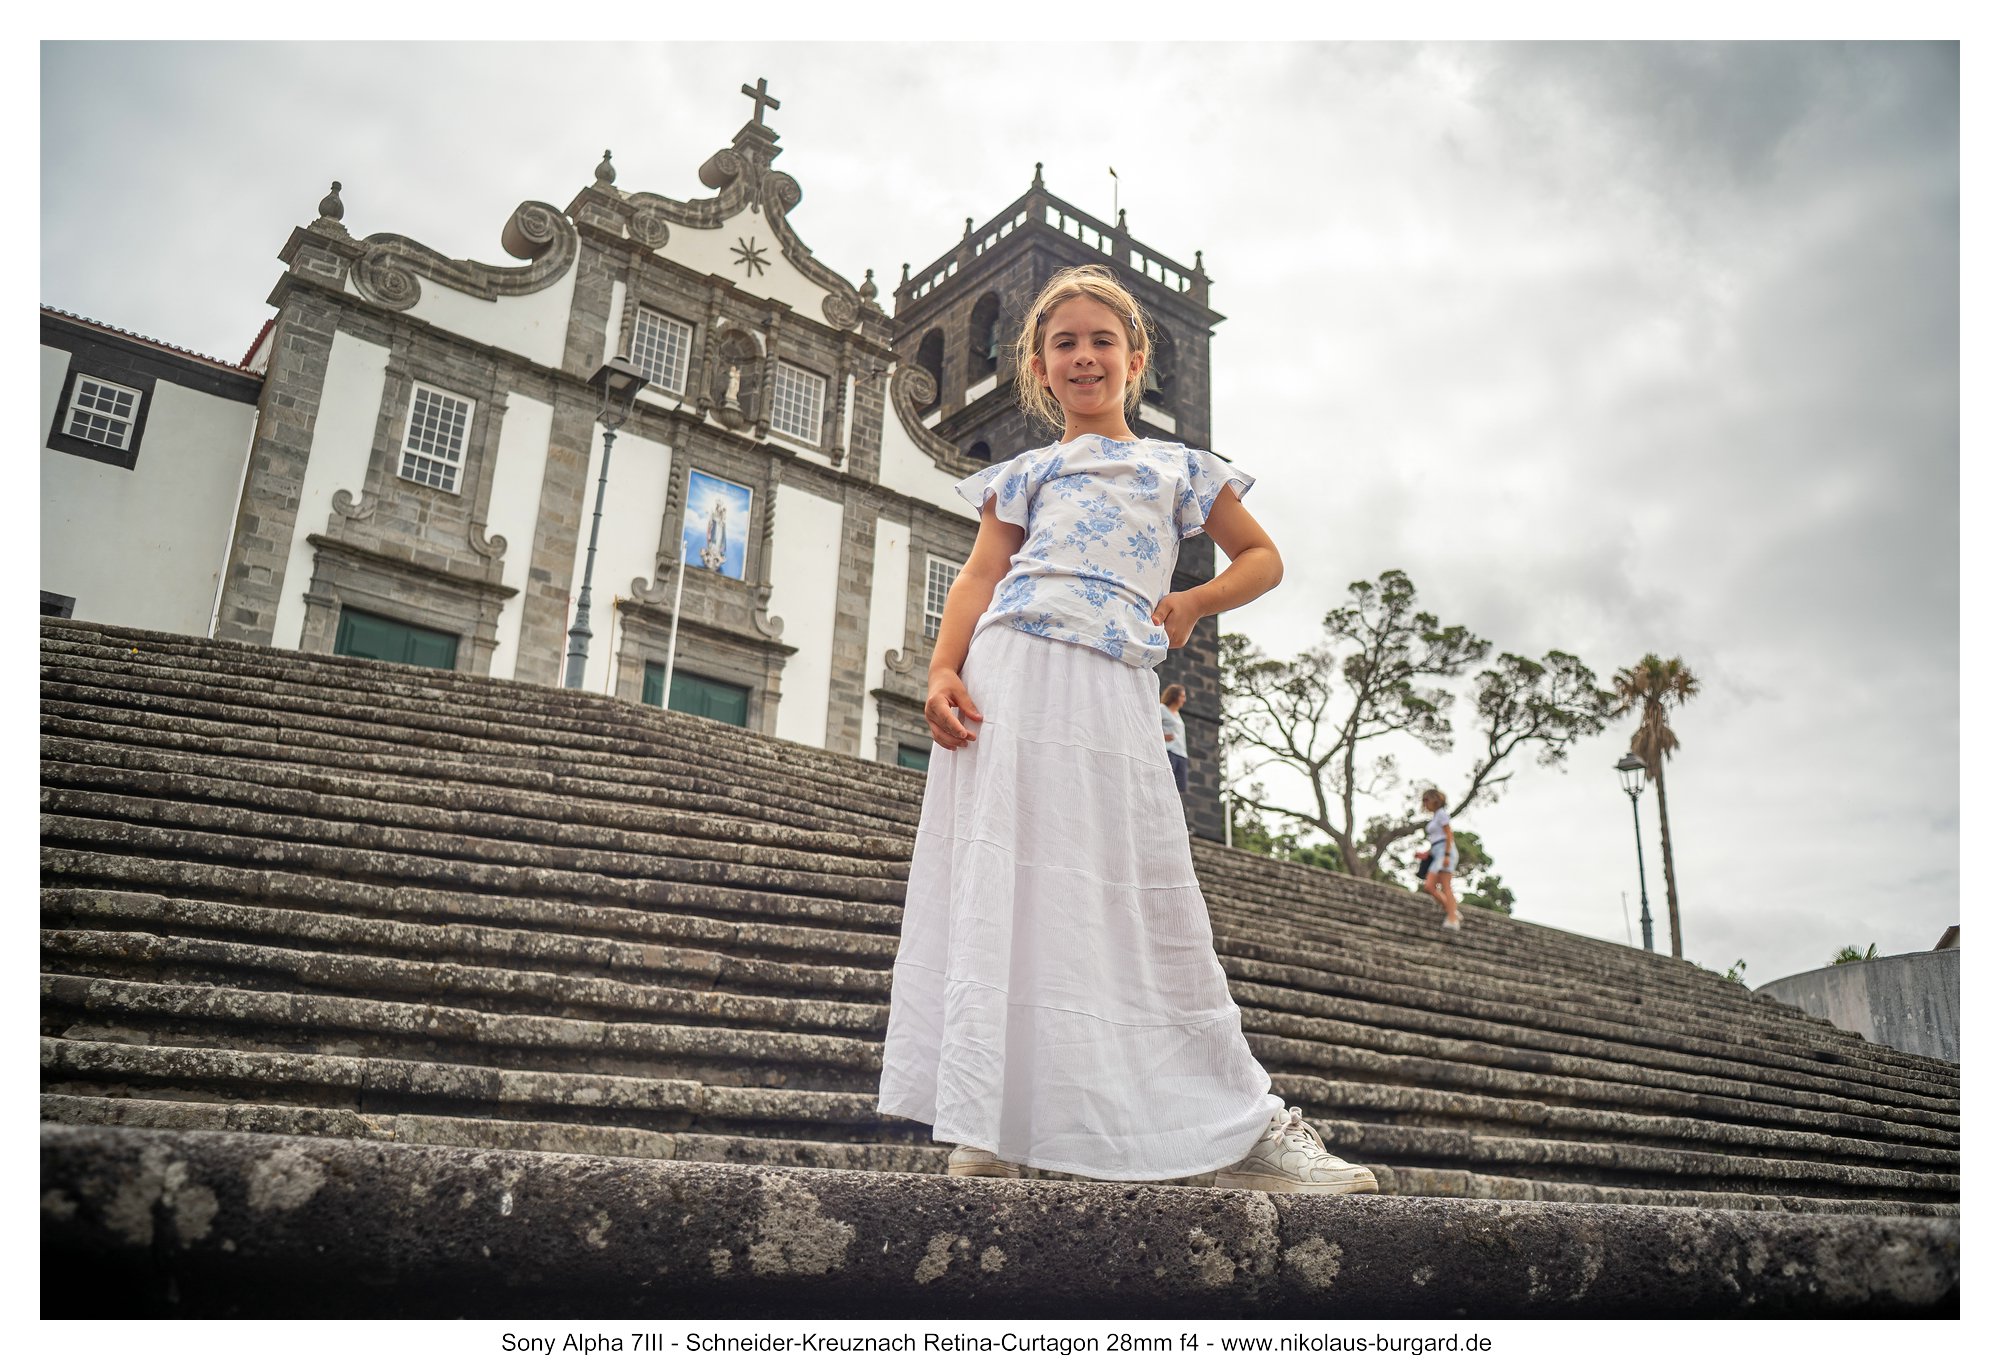
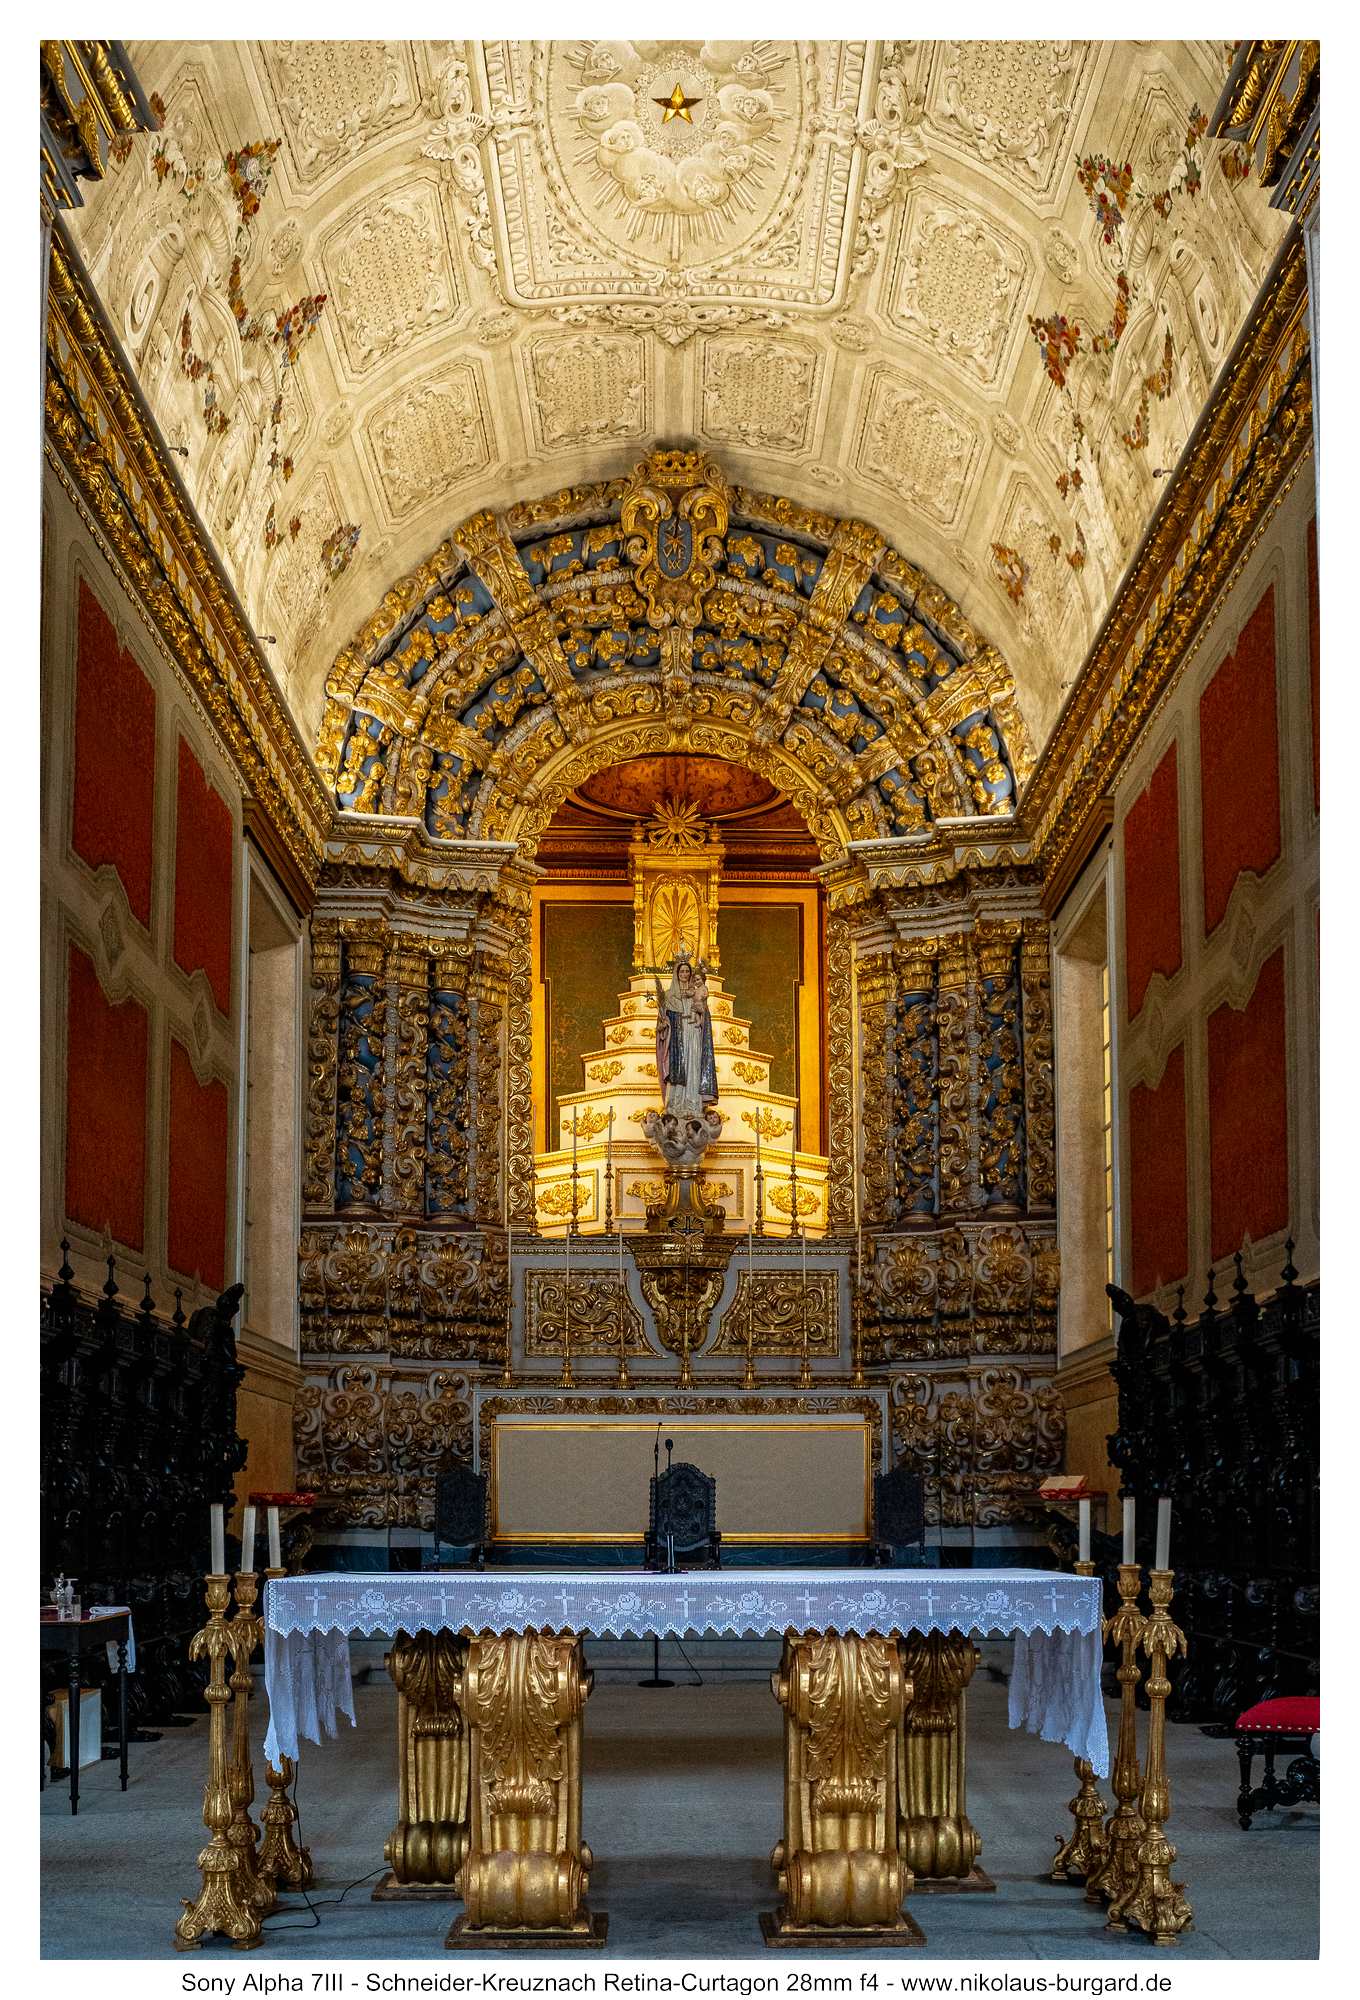
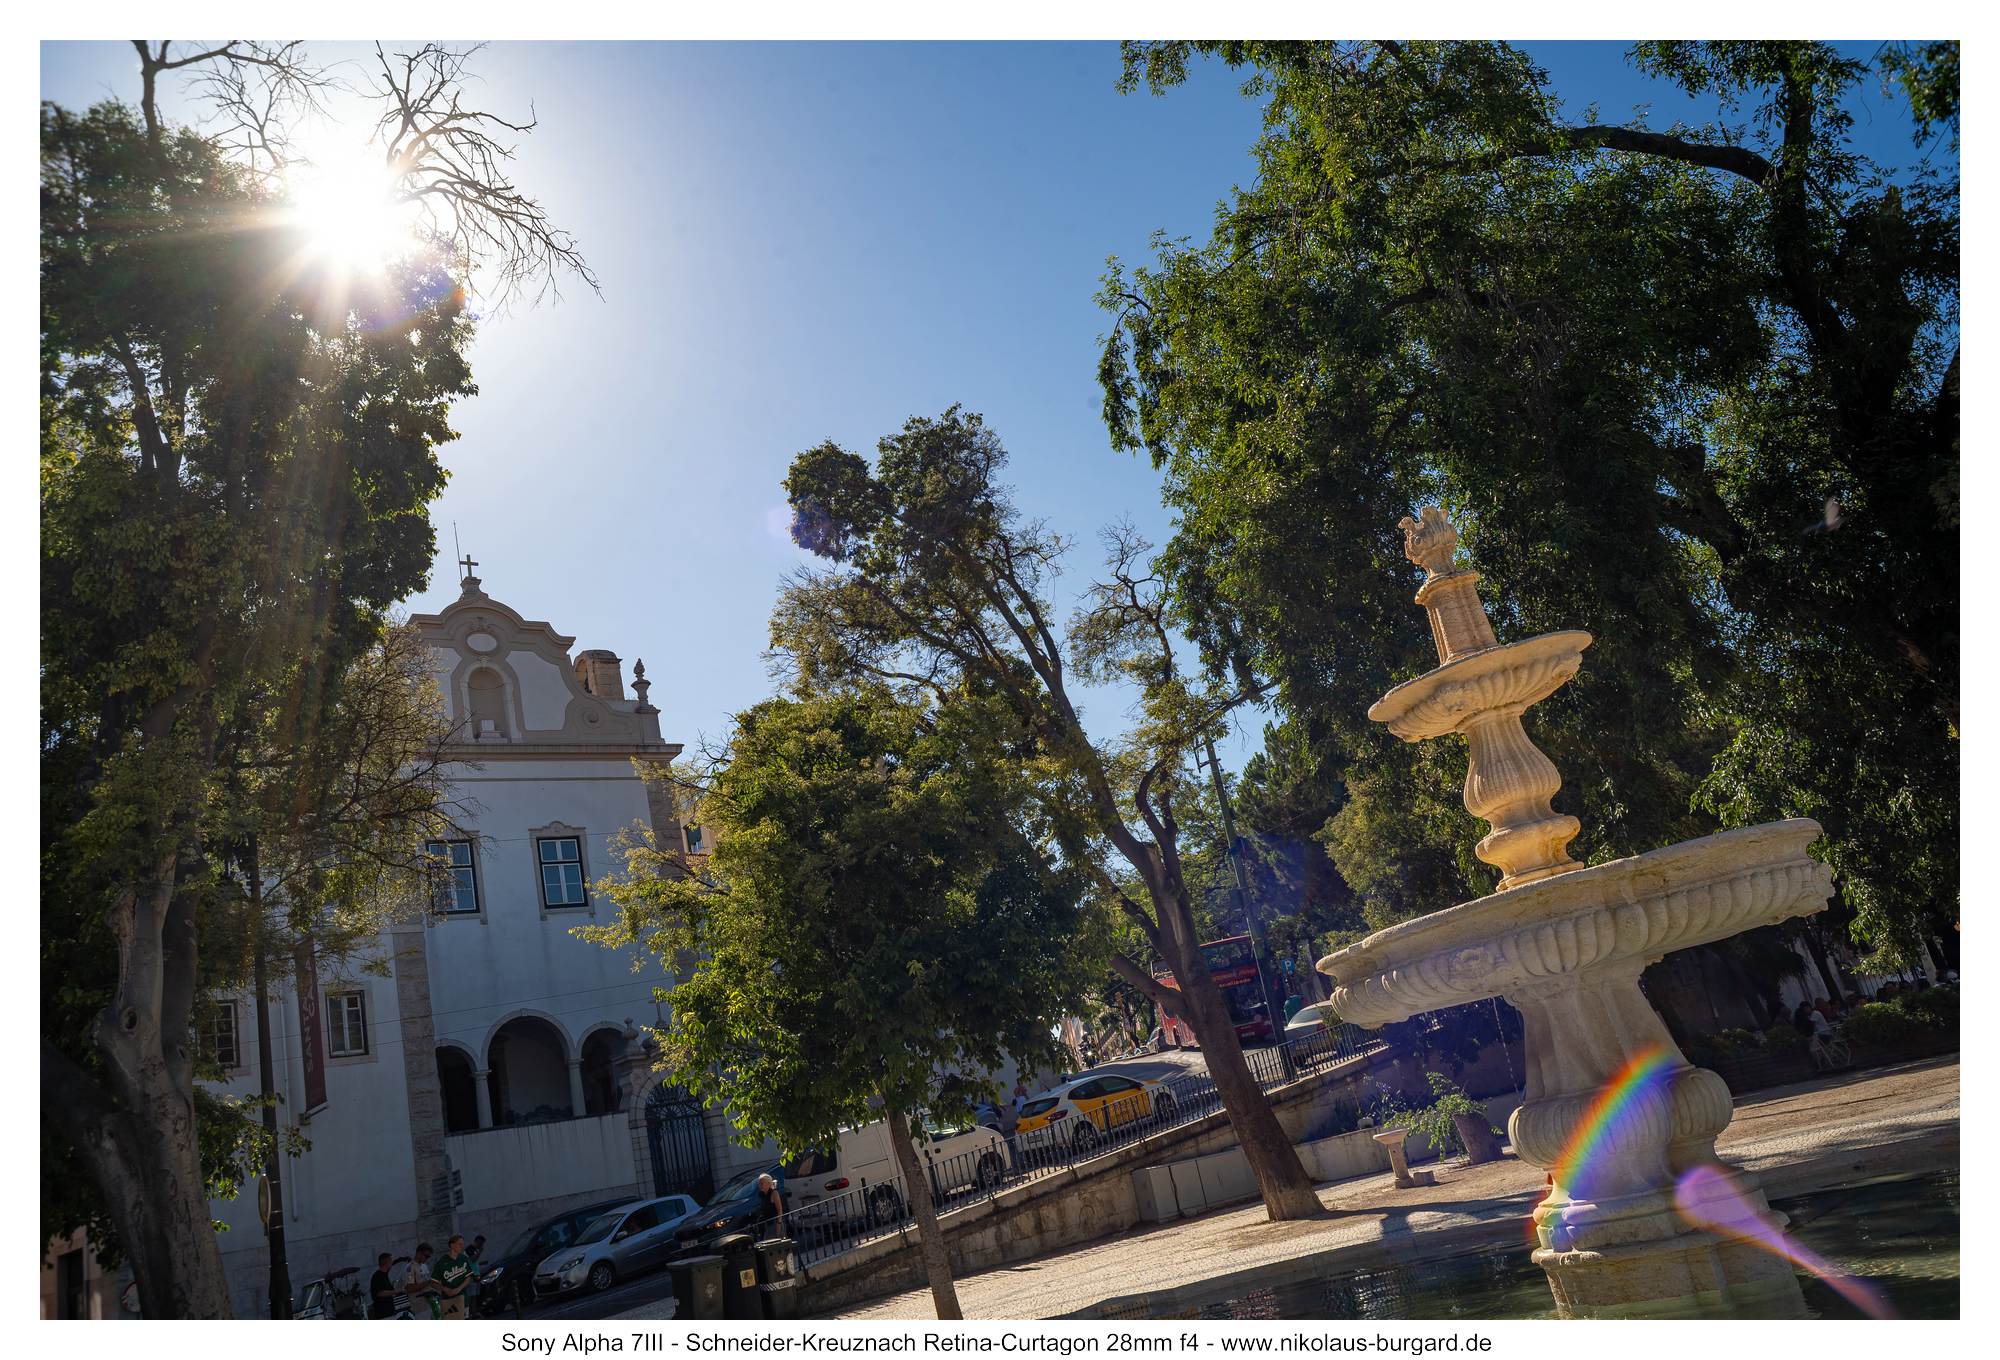
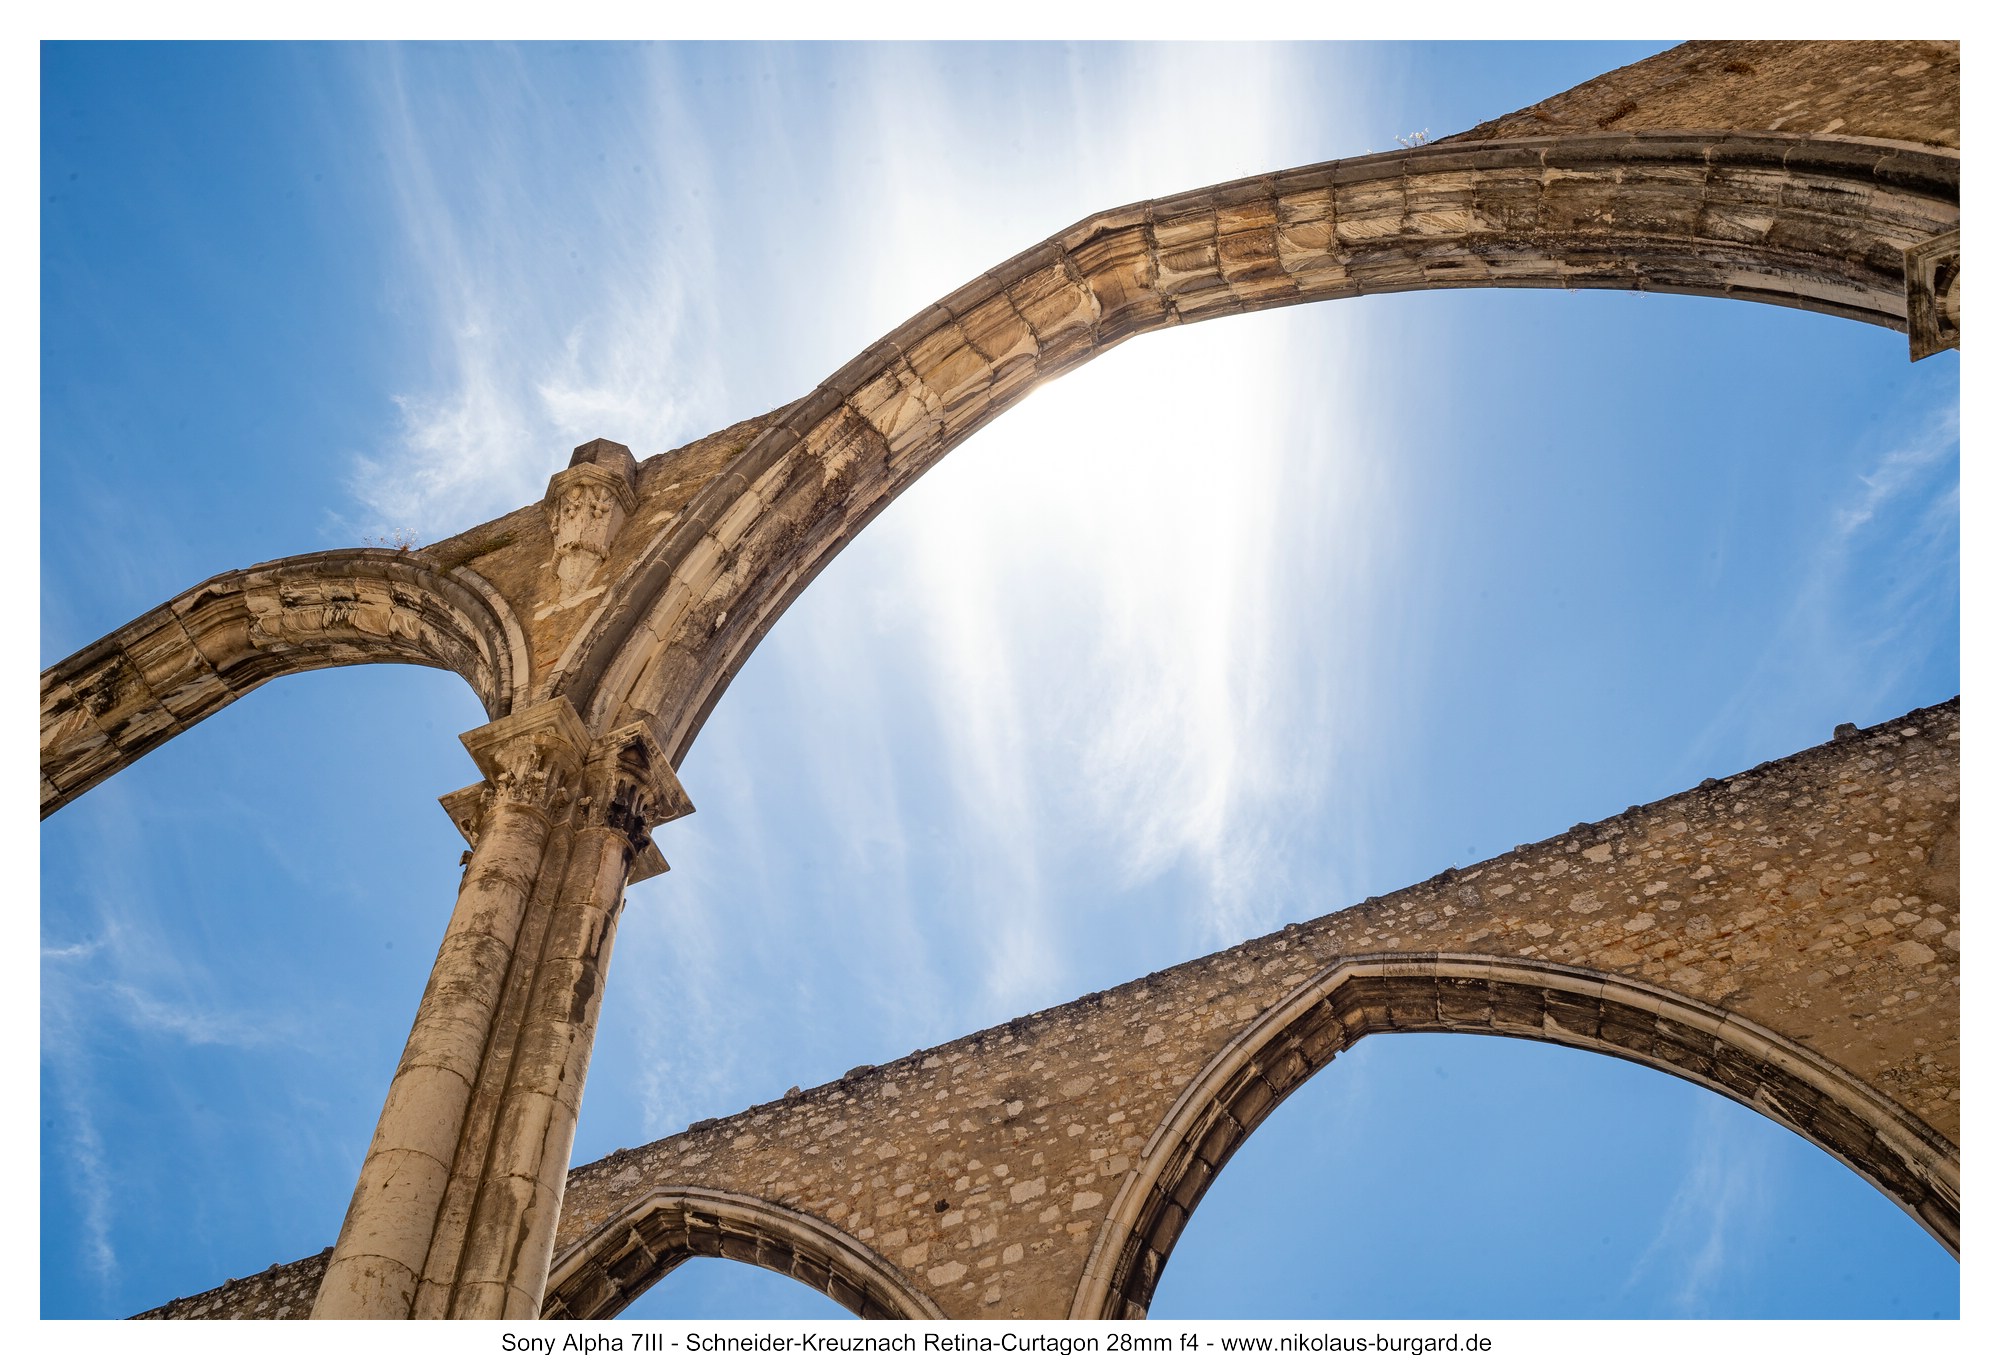
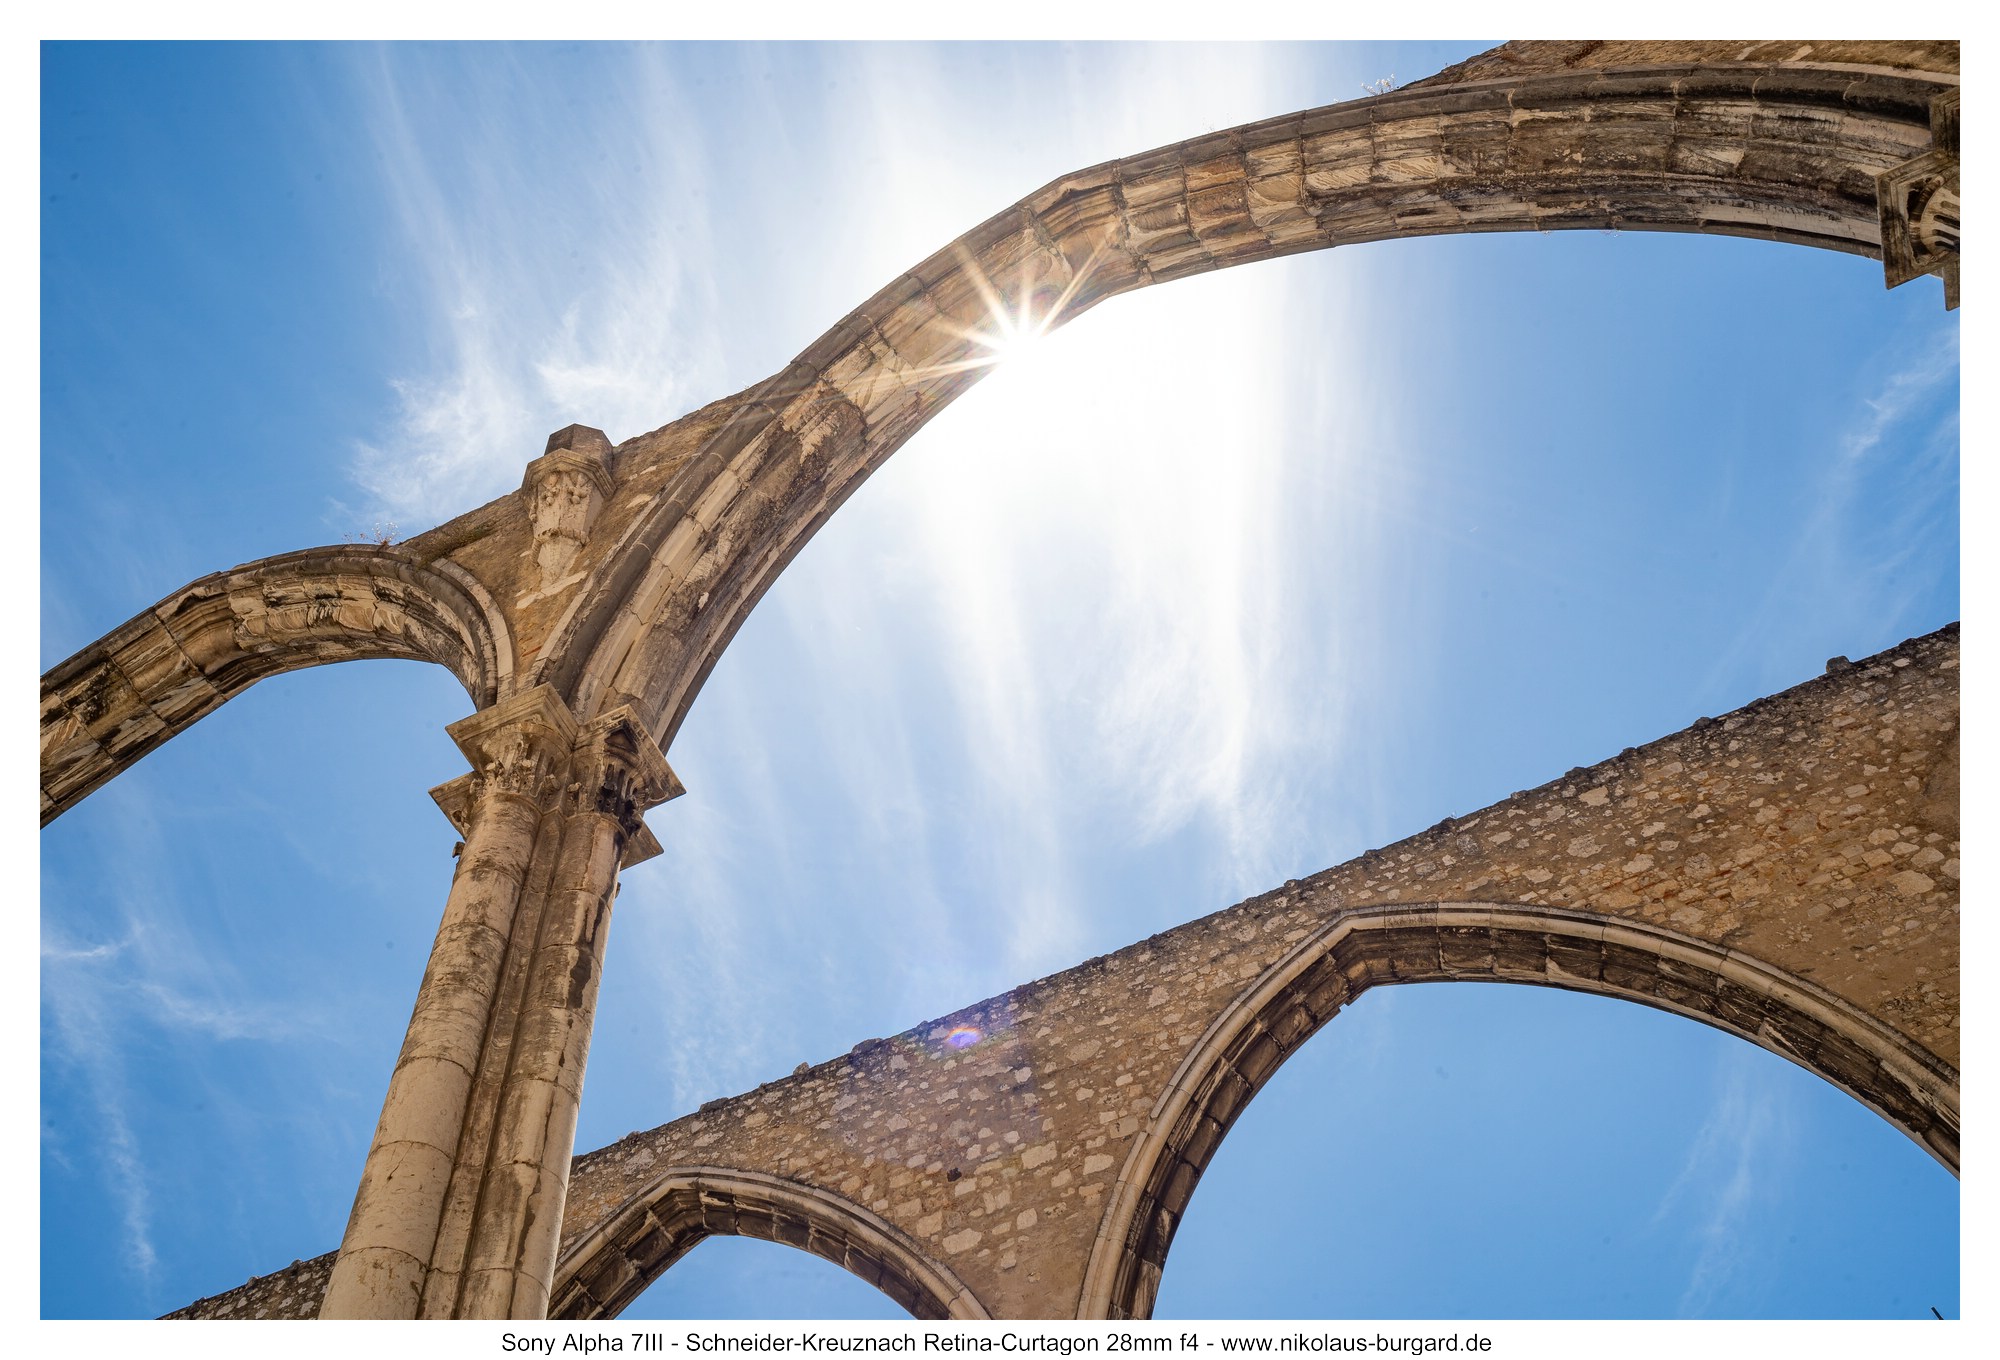
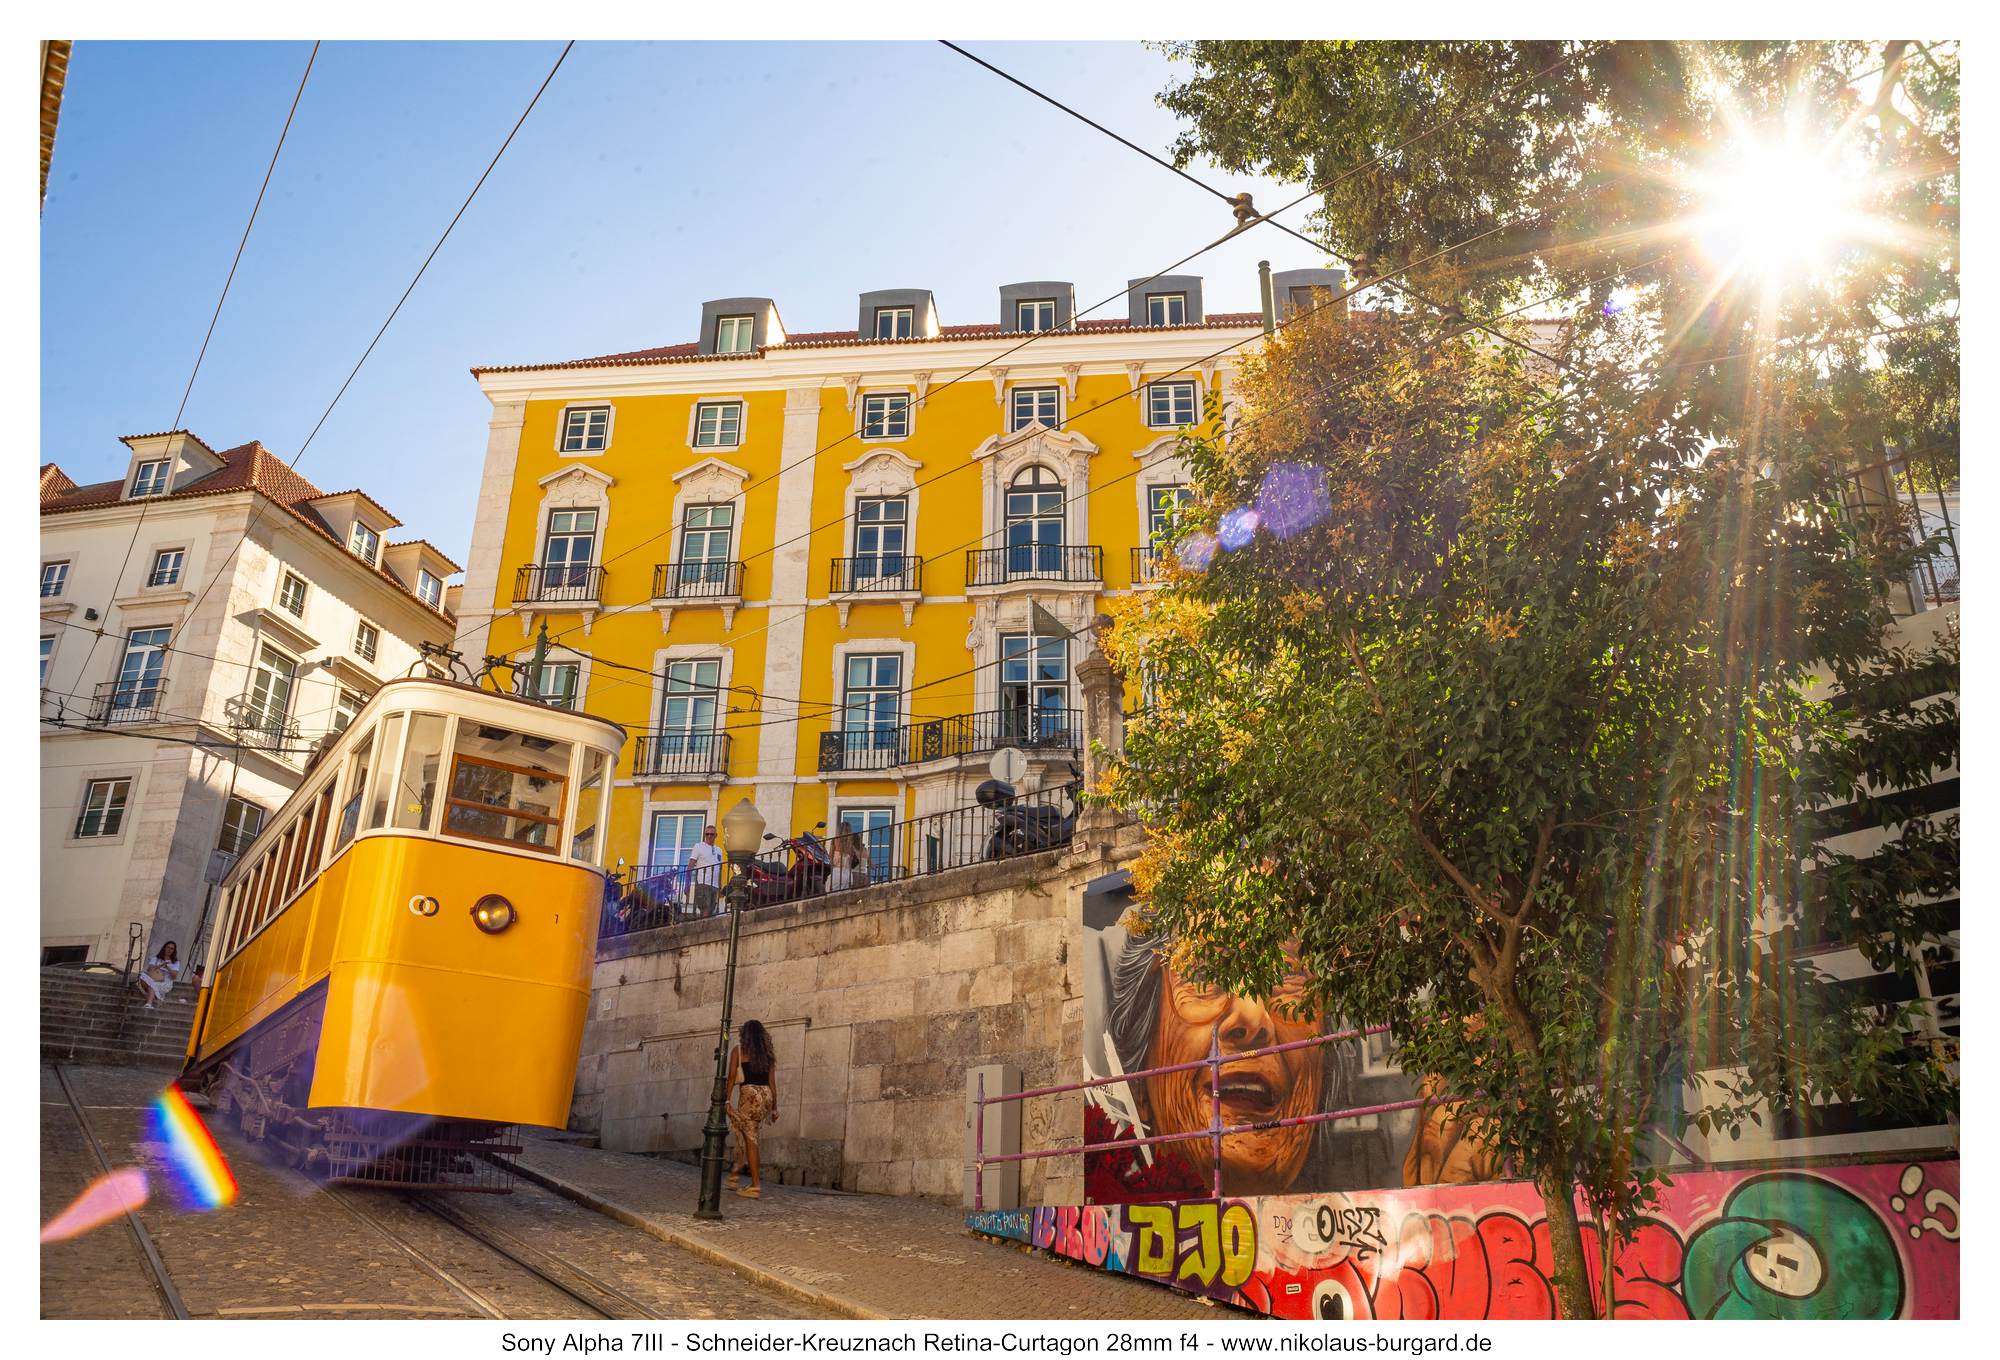
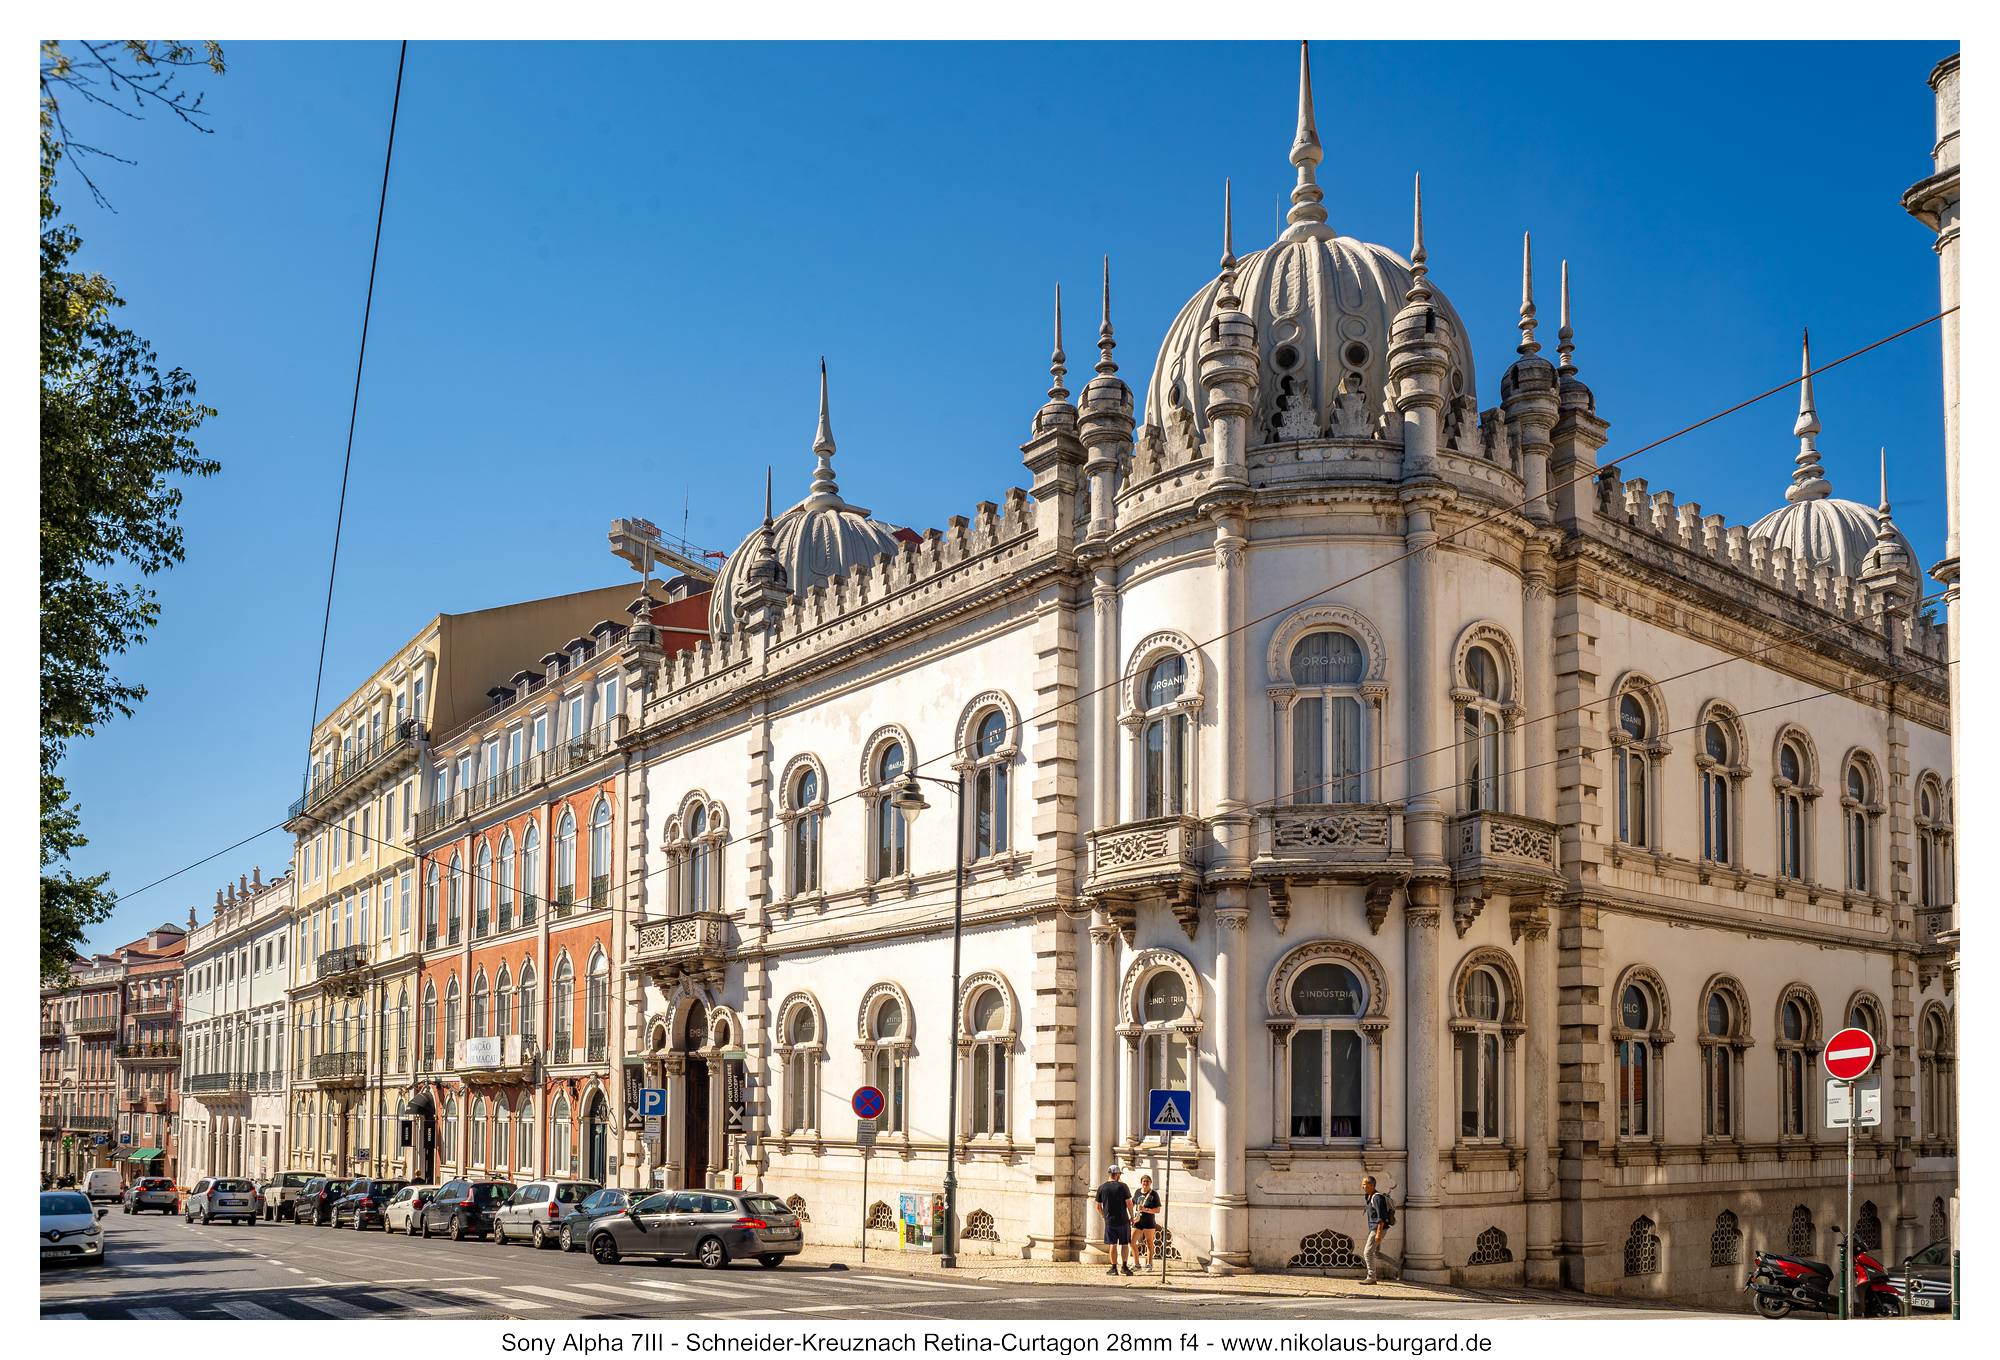
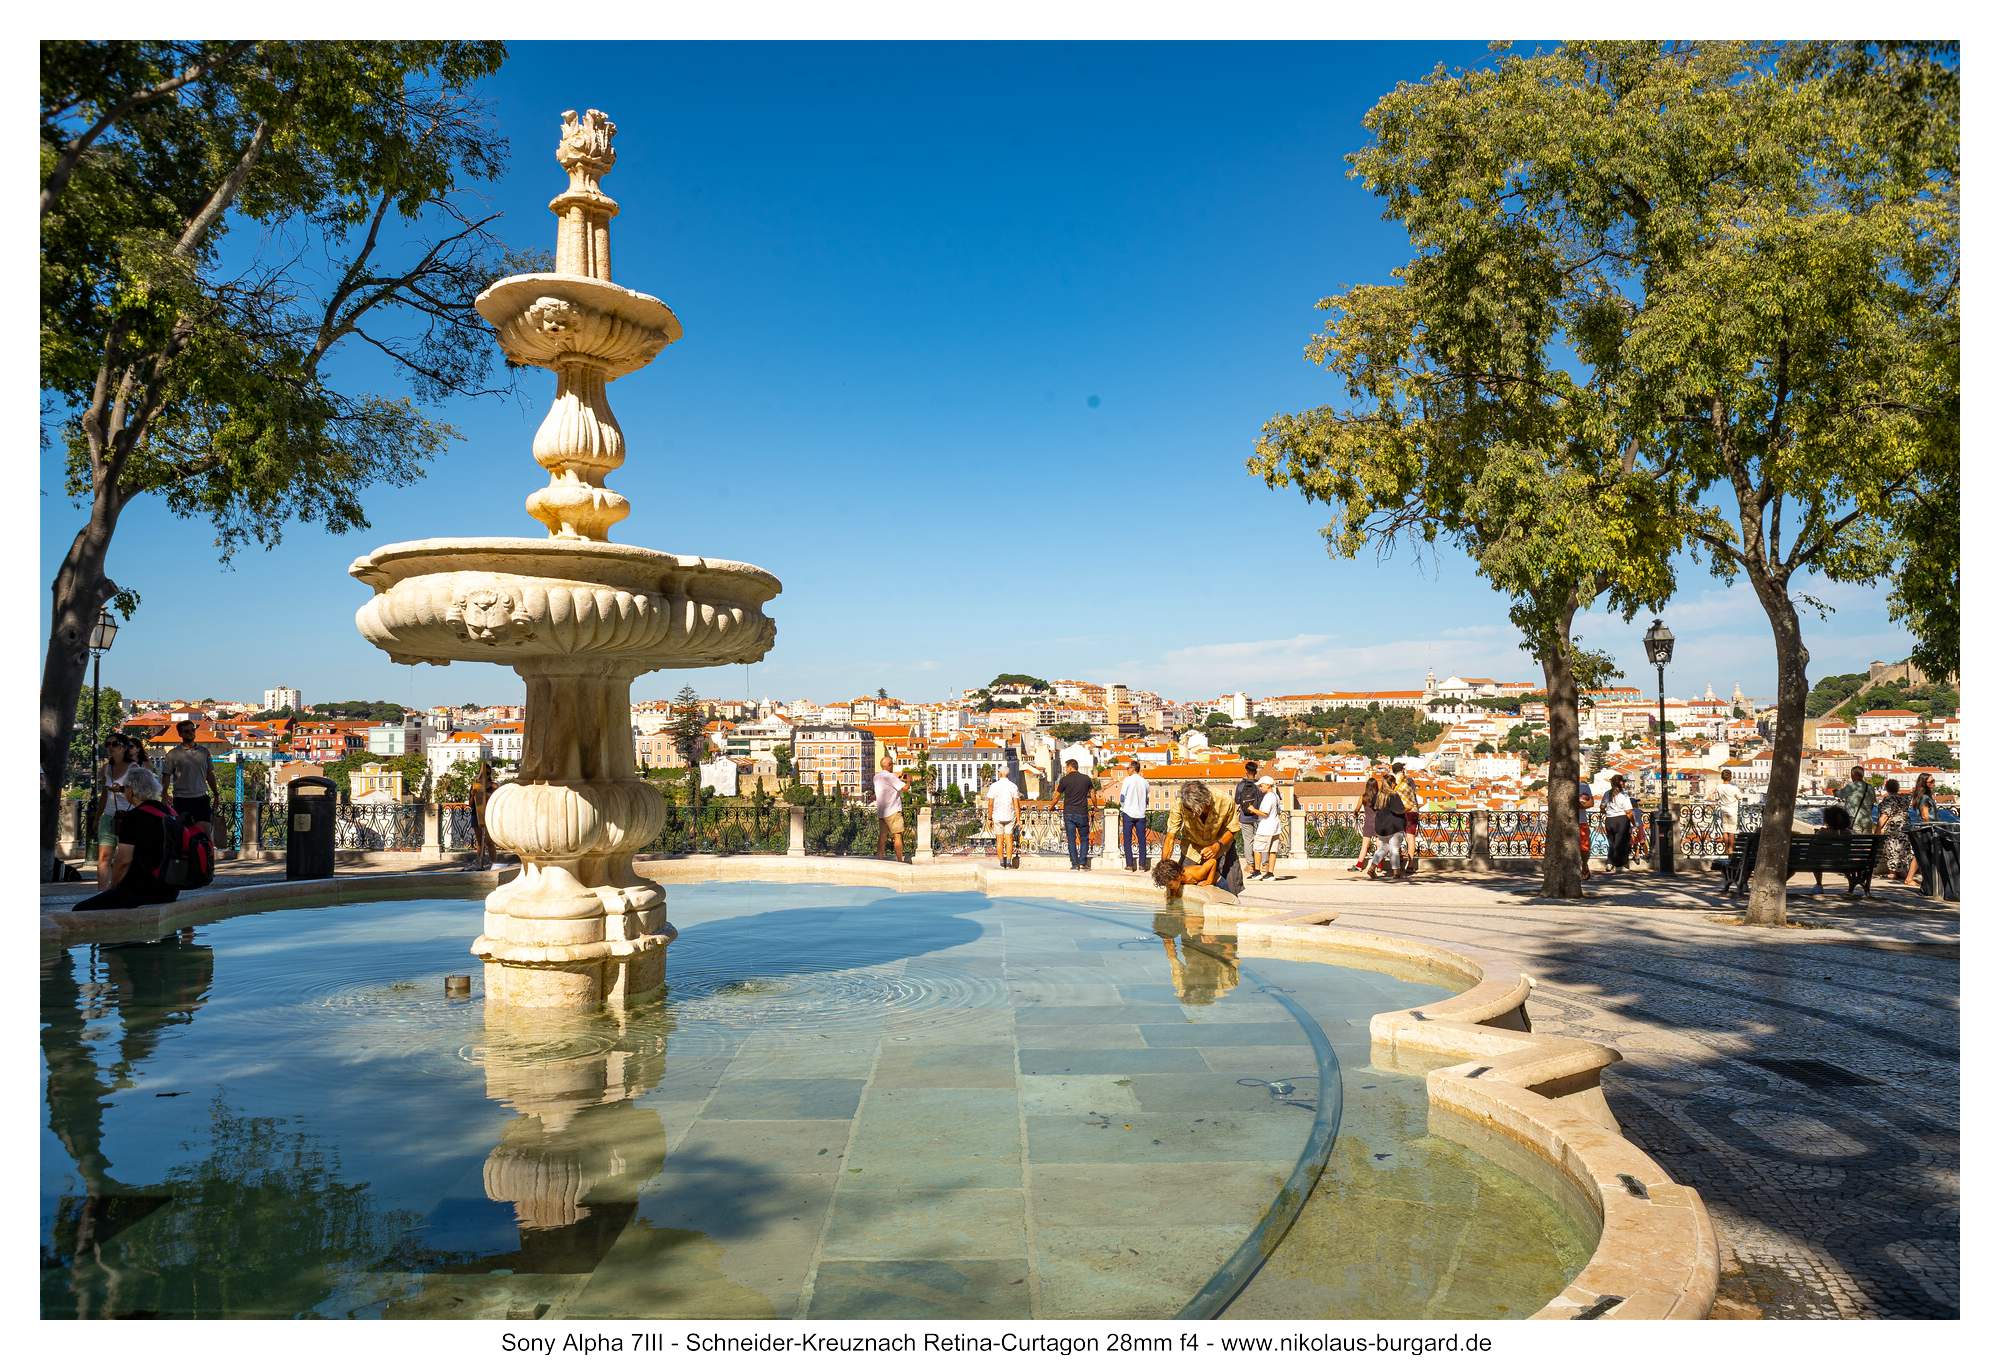
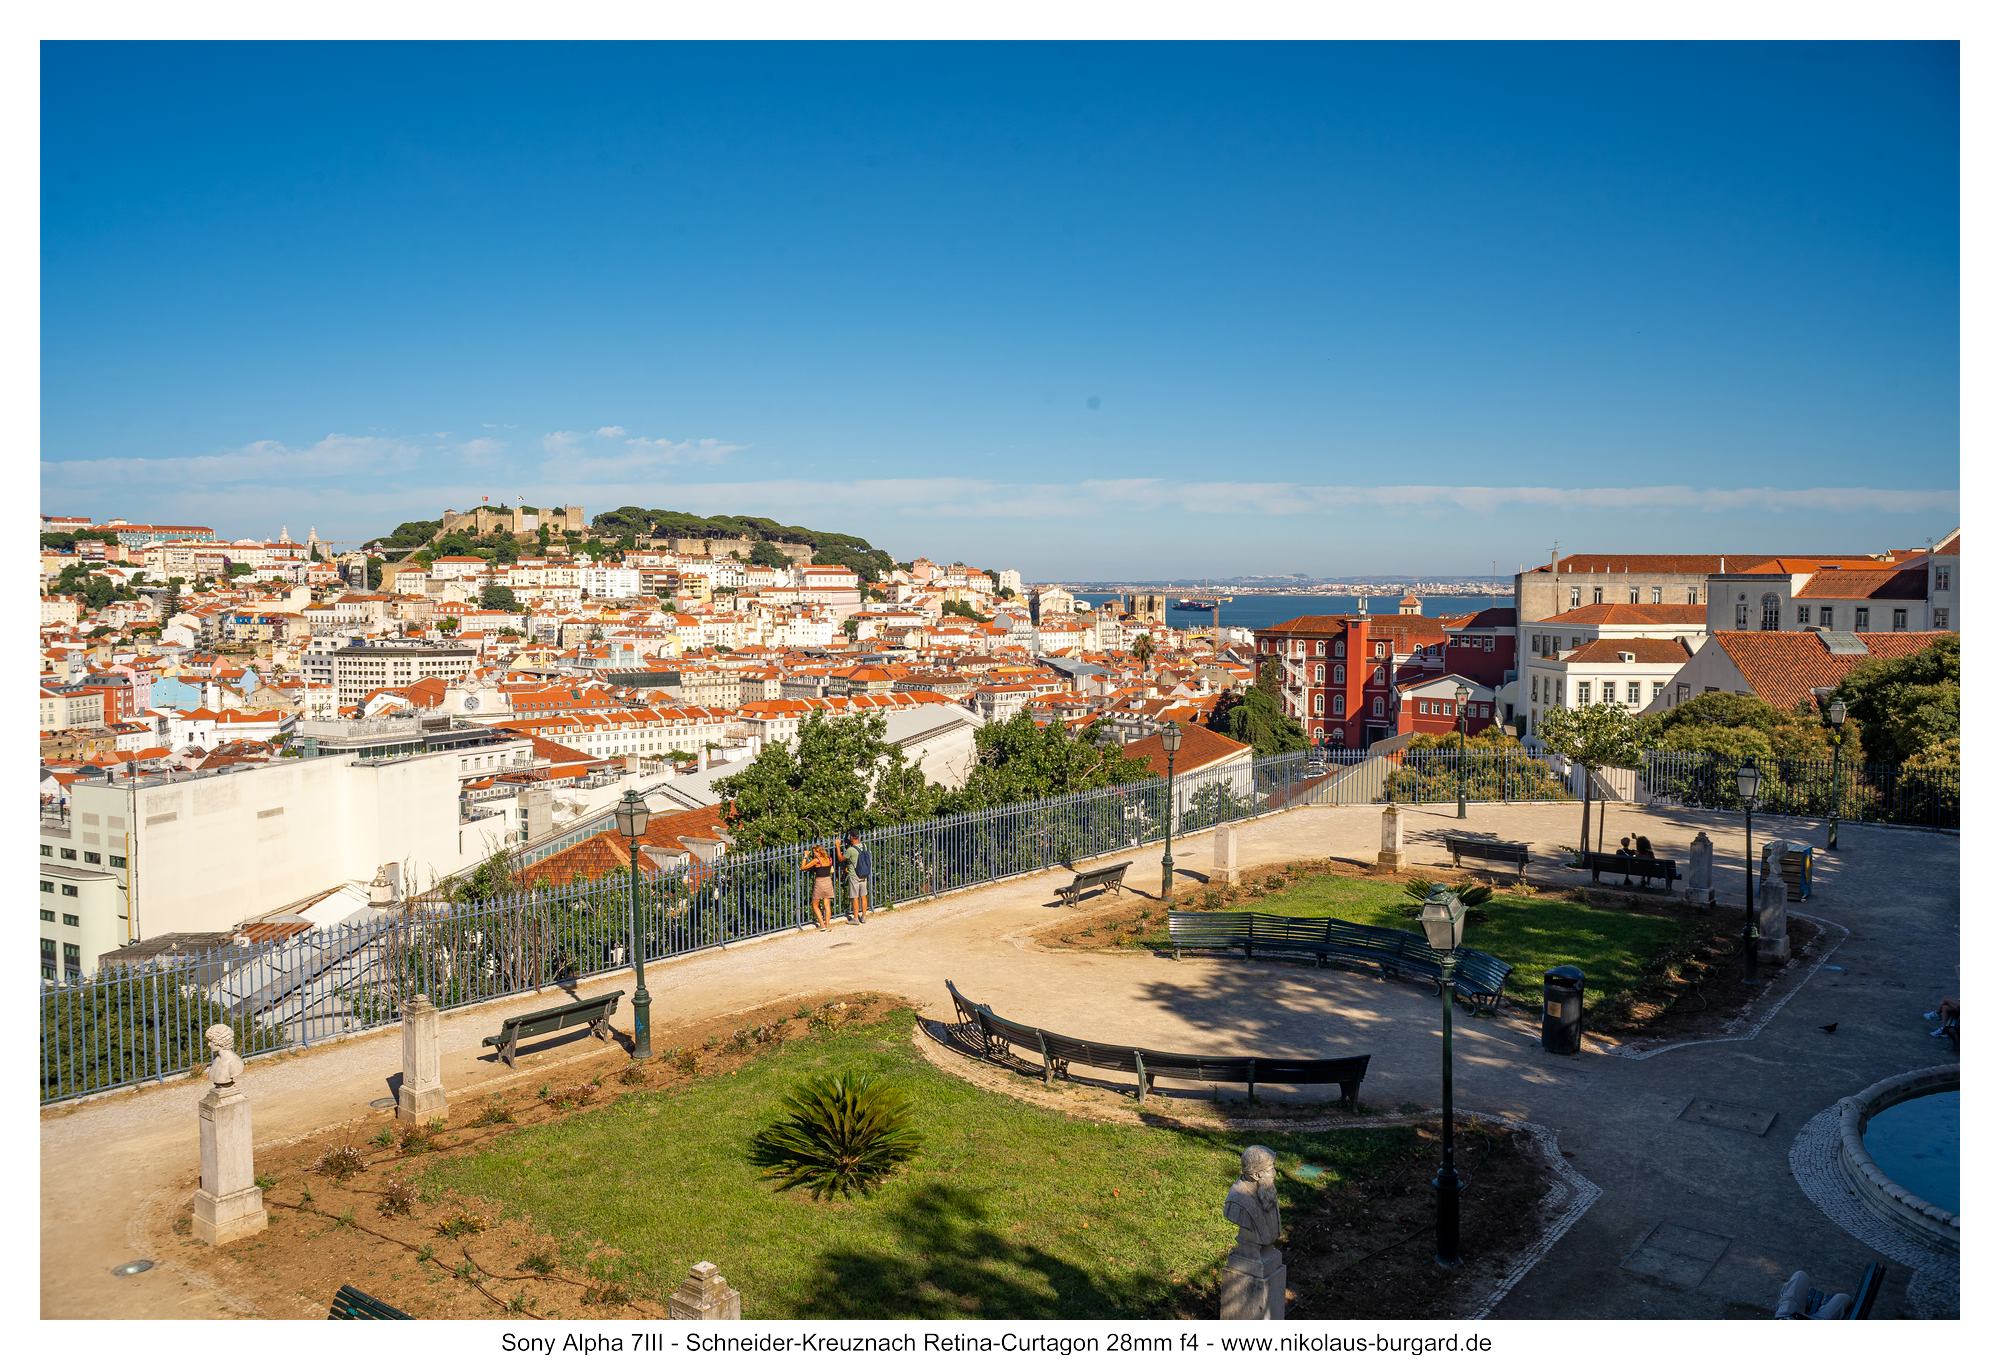
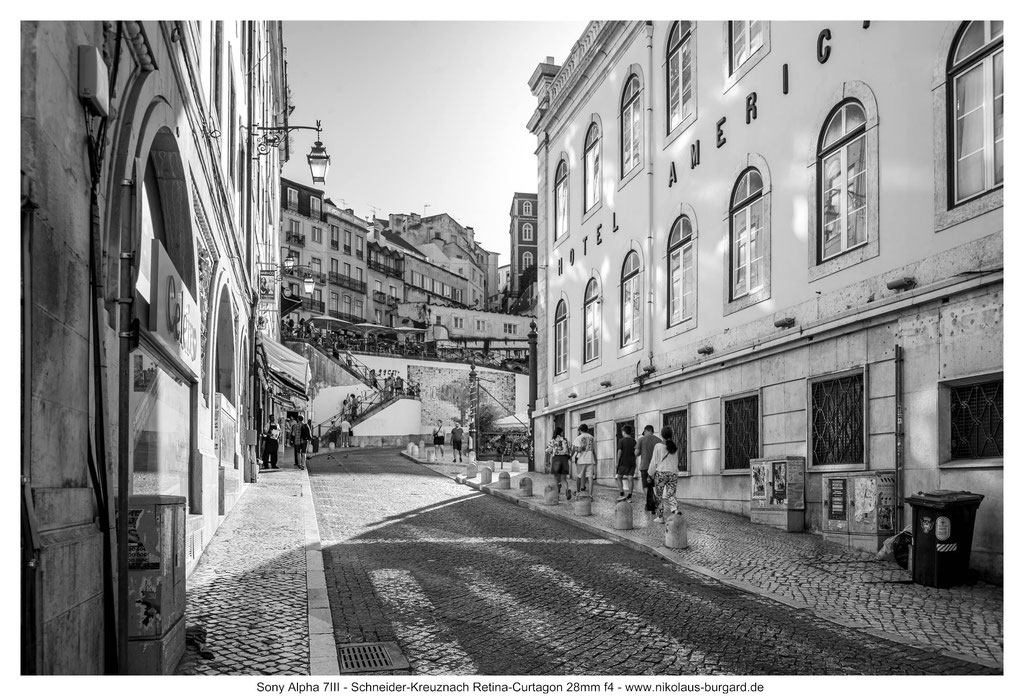
Bildserie: Lissabon Teil 1 / Picture Series: Lisbon pt. 1
Lissabon im Sommer ist ein echtes Erlebnis: Laut, voll und hektisch, aber auch wunderschön!
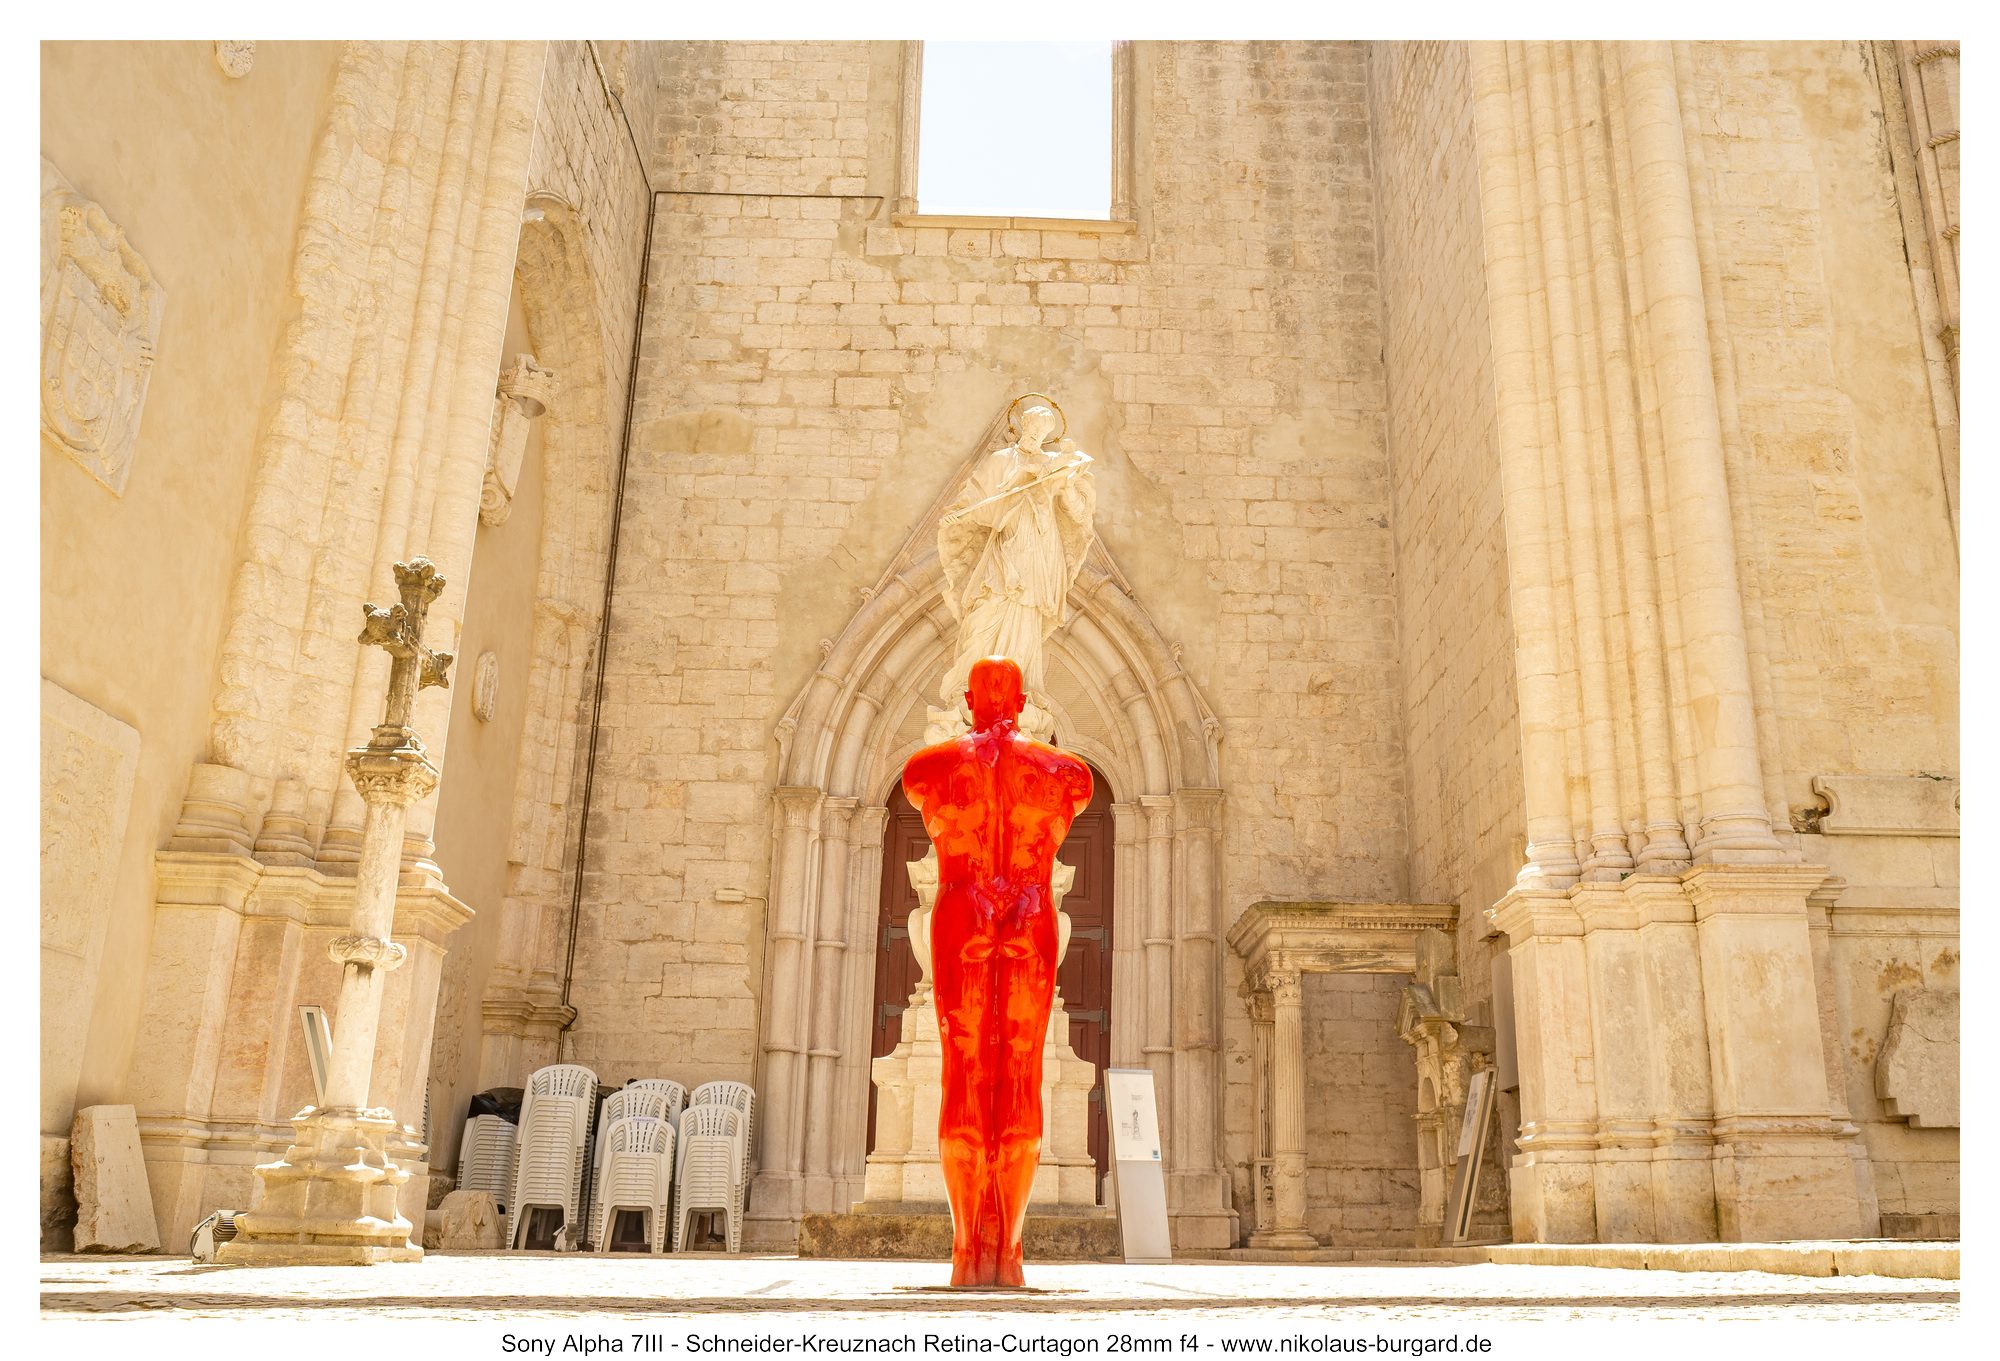
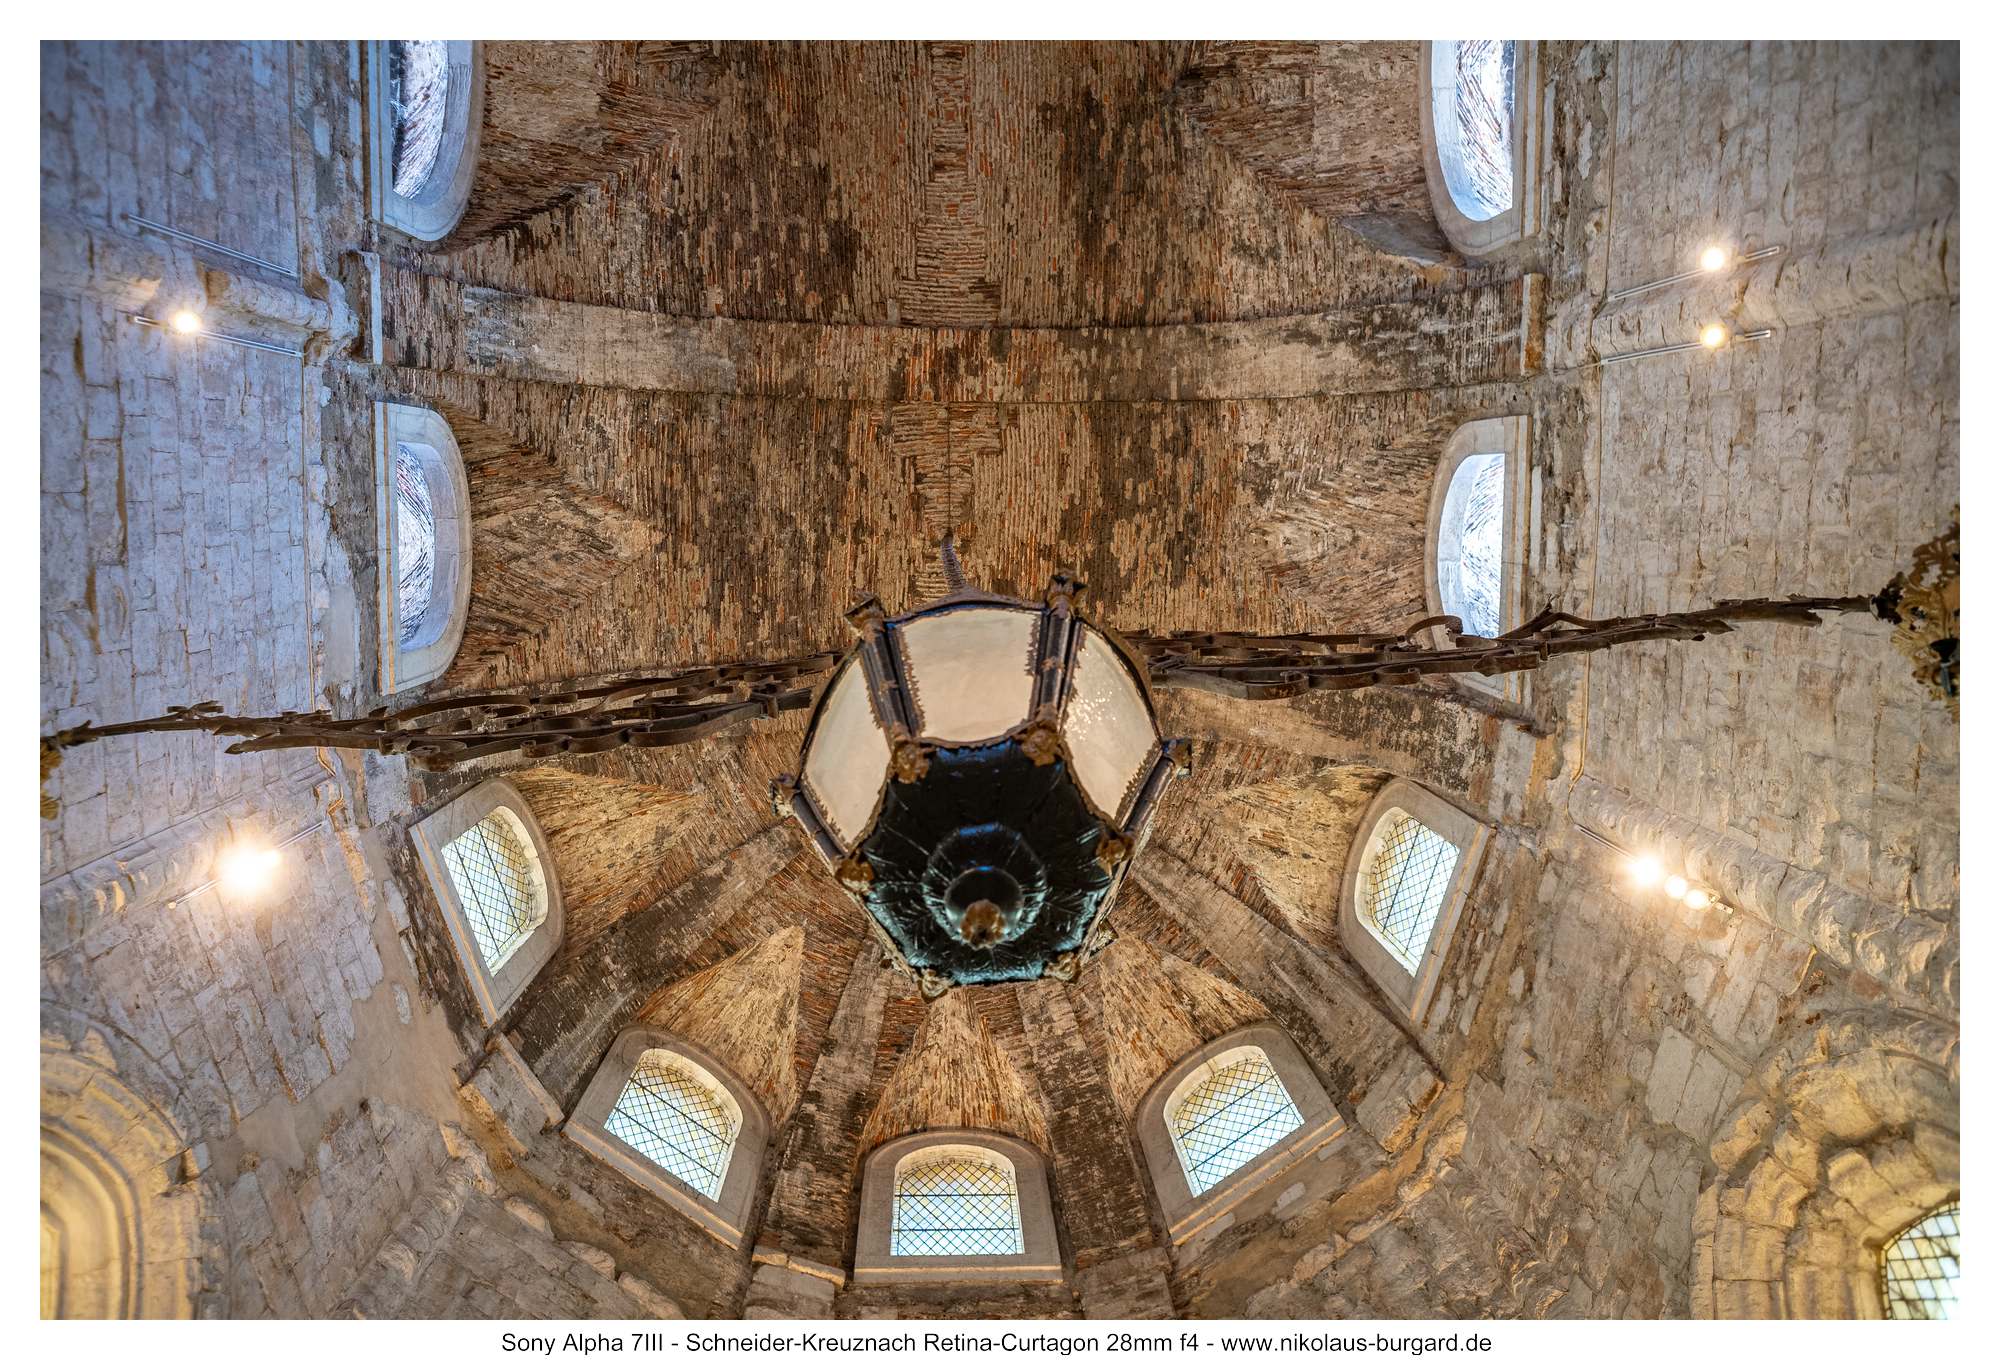
Unser Tag führte uns zuerst quer durch die Stadt hoch zum Convento do Carmo, einer Klosterruine und eines der wenigen Zeugnisse des großen Erdbebens von 1755. Ein fast surrealer Ort der Ruhe mit "freiem Blick in den Himmel" inmitten der hektischen Stadt.
Und auf dem direkt angrenzenden Marktplatz gibt es hervorragende Schuhmacher....
Lisbon in the summer is quite an experience: loud, crowded, and hectic, but also beautiful!
Our day took us first across the city up to the Convento do Carmo, a monastery ruin and one of the few remaining reminders of the great earthquake of 1755. An almost surreal place of tranquility with an “unobstructed view of the sky” in the midst of the bustling city.
And in the market square right next door, there are excellent shoemakers....


Die folgenden Bilder sind Panoramaaufnahmen, zusammengesetzt in Lightroom aus mehreren Hochformat-Bildern:
The following images are panoramas created in Lightroom by stitching together several portrait-oriented photos:

Farbfehler / Chromatic aberrations
Im Kapitel Farbfehler schlägt sich das Retina Curtagon 28mm f4 ziemlich gut.
Wie im Schärfe-Kapitel bereits angesprochen, sind in den Bildern nur wenige Spuren von lateralen chromatischen Aberrationen zu finden.
Etwas genauer lohnt sich die Betrachtung der longitudinalen chromatischen Aberrationen.
Hier das übliche Chrom-Ösen-Testbild mit Vergrößerungen von vor und hinter der Schärfeebene:
In the section on chromatic aberration, the Retina Curtagon 28mm f/4 performs quite well.
As already mentioned in the sharpness section, there are only a few traces of lateral chromatic aberration in the images.
It’s worth taking a closer look at the longitudinal chromatic aberrations.
Here is the standard chrome eyelet test chart with magnifications in front of and behind the plane of focus:


Man findet an den Ösen sowohl vor als auch hinter der Schärfeebene leichte Spuren von loCA's in Form von magentafarbenen bzw. grünen Rändern, diese sind aber nicht sehr breit und sollten in der Praxis kaum Probleme bereiten. Purple Fringing in der Nähe der Schärfeebene konnte ich in meinem Test nicht finden.
Bei "Real-Life"-Bildern sind Farbfehler wirklich kaum ein Thema, ich konnte hier kein abschreckendes Beispielbild finden. Selbst an Highlight-Rändern gibt es keine grünen Spuren:
There are slight traces of loCA visible at the oozes both in front of and behind the focal plane, appearing as magenta or green fringes; however, these are not very wide and should cause hardly any problems in practice. I was unable to find any purple fringing near the focal plane in my test.
In “real-life” images, color aberrations are really hardly an issue; I couldn’t find a single alarming example here. There are no green fringes even at the edges of highlights:
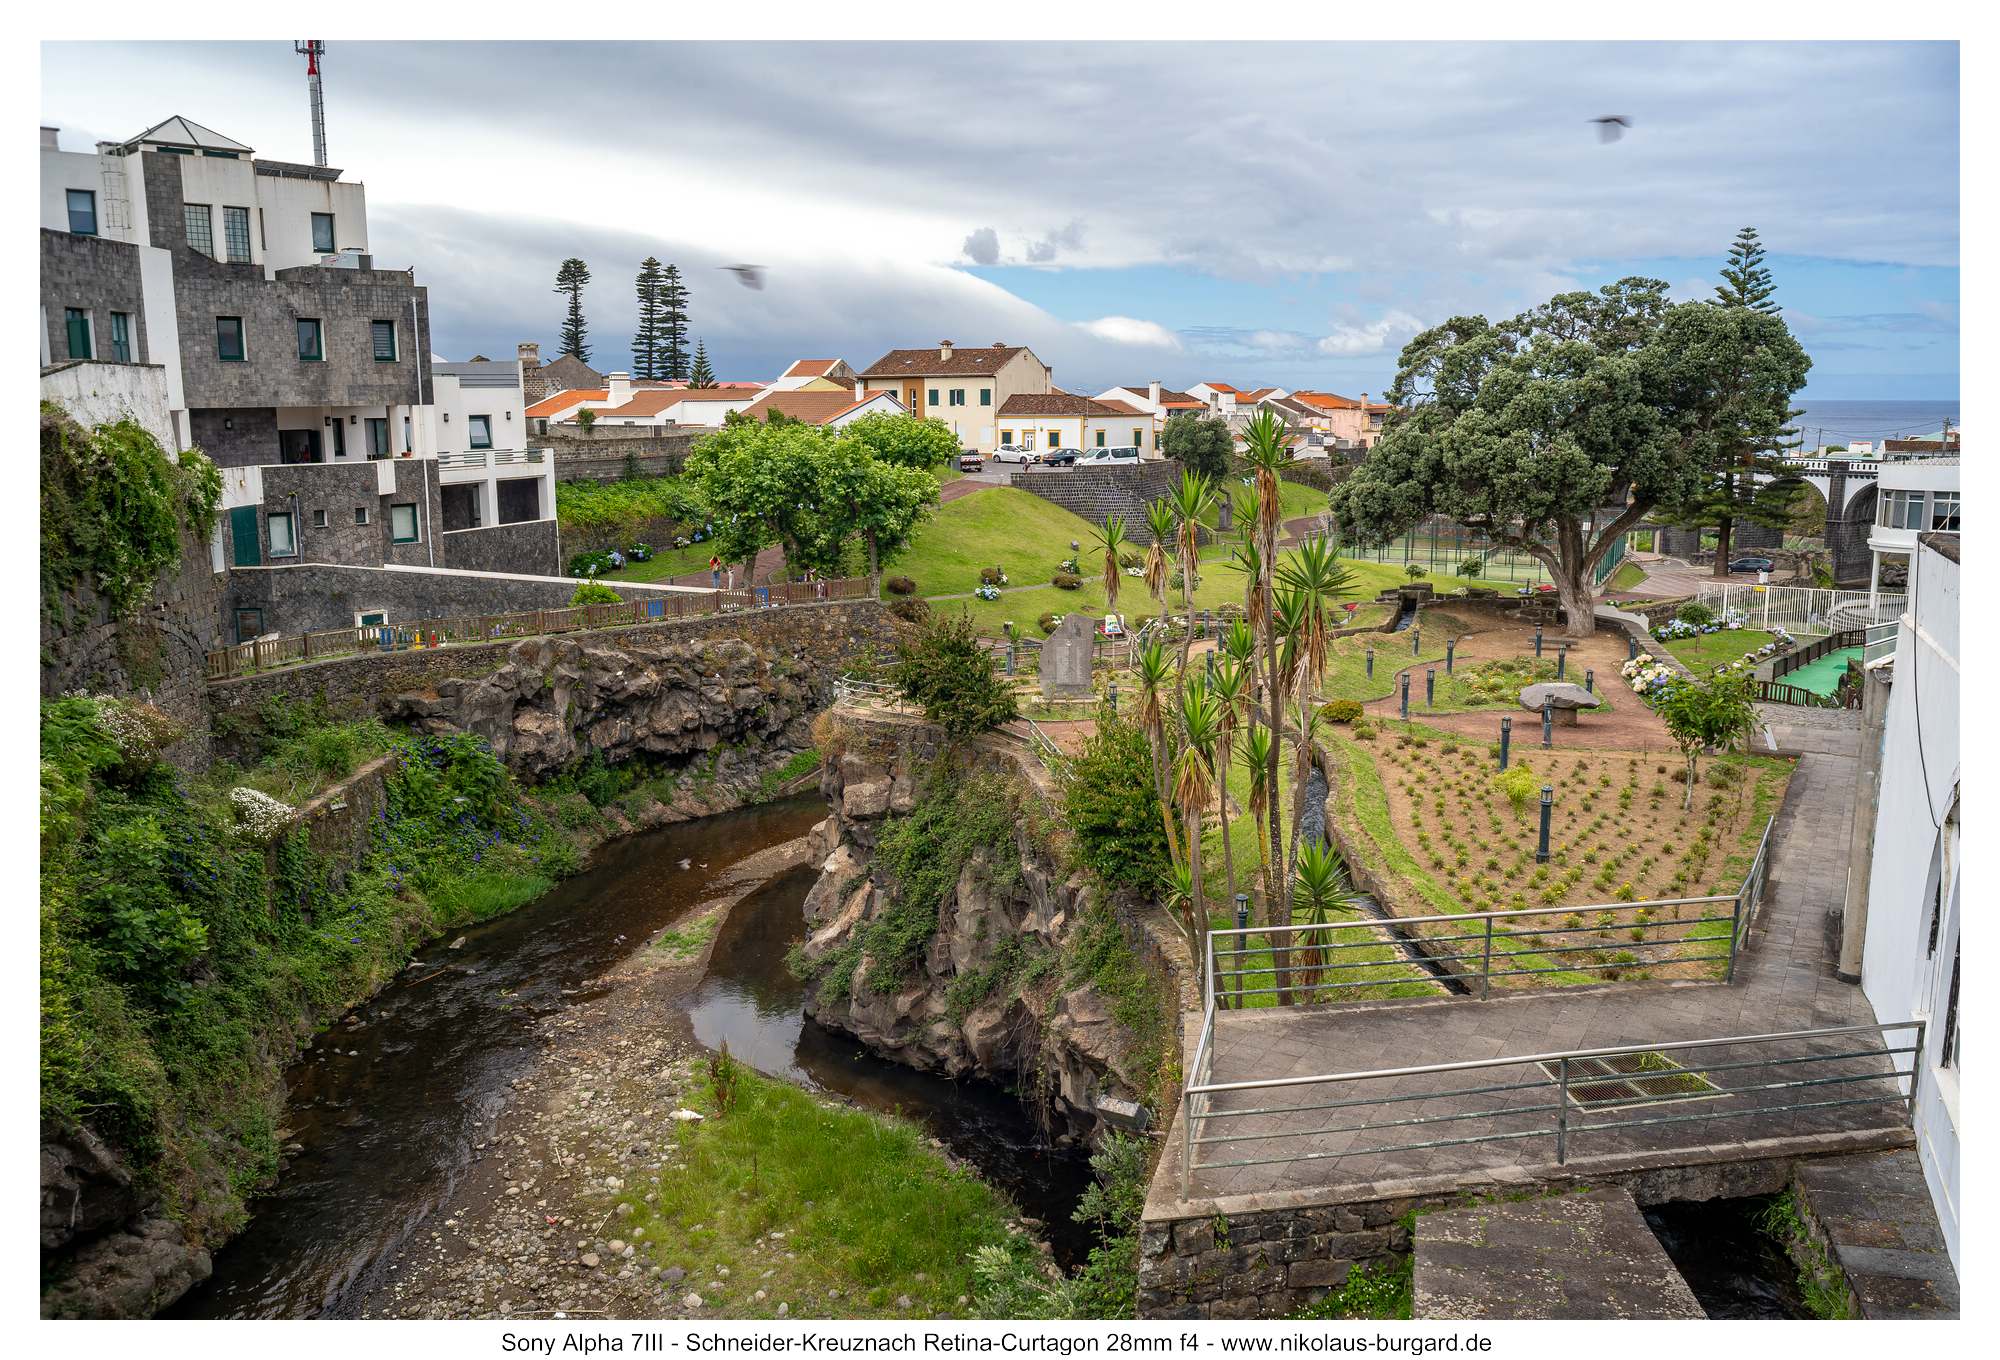
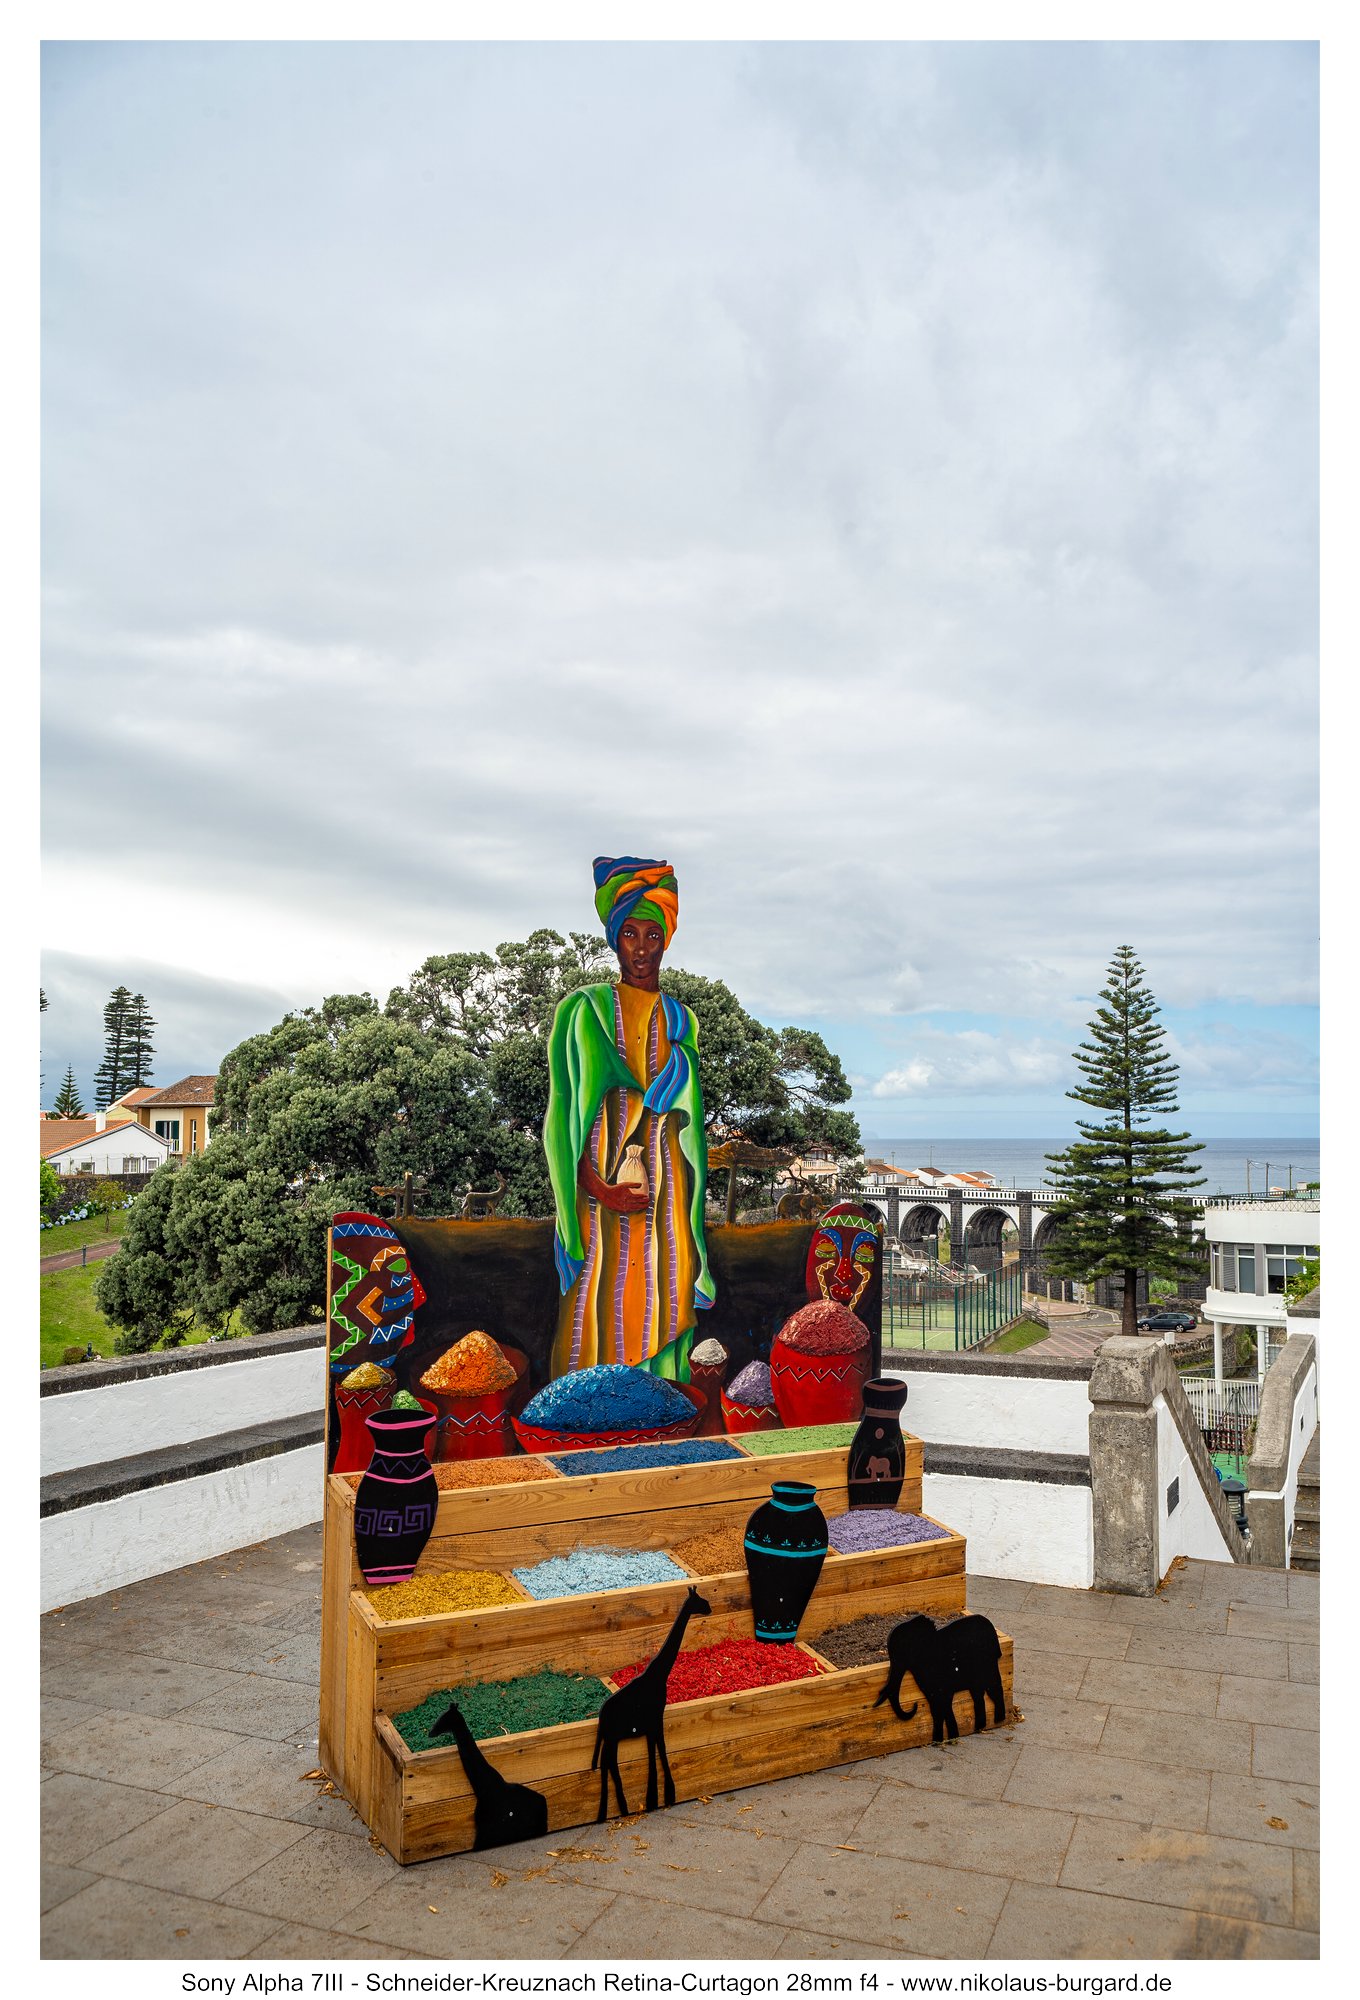
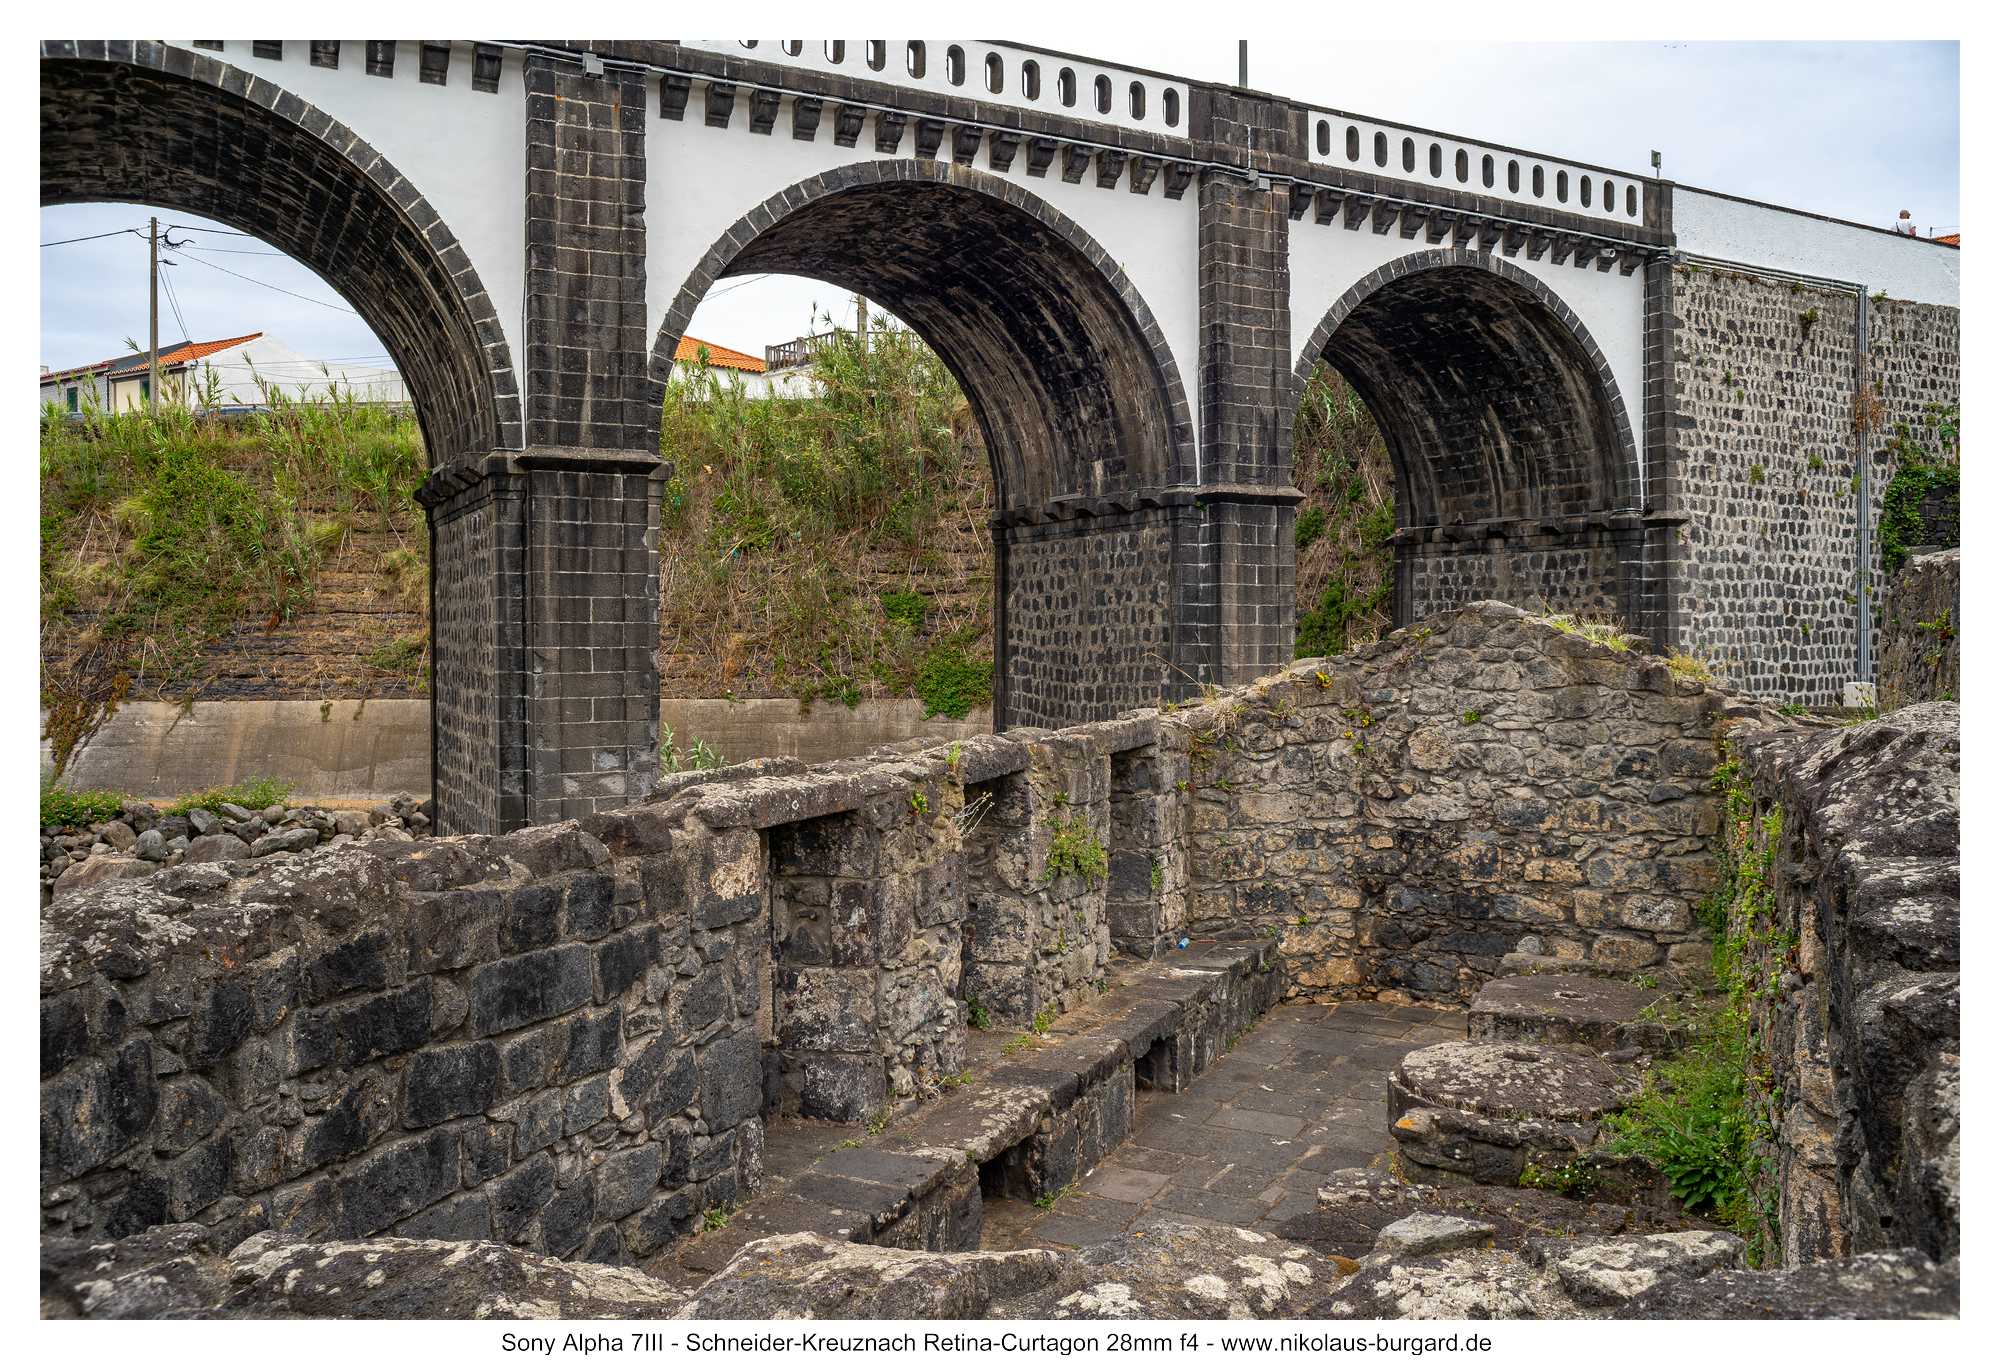
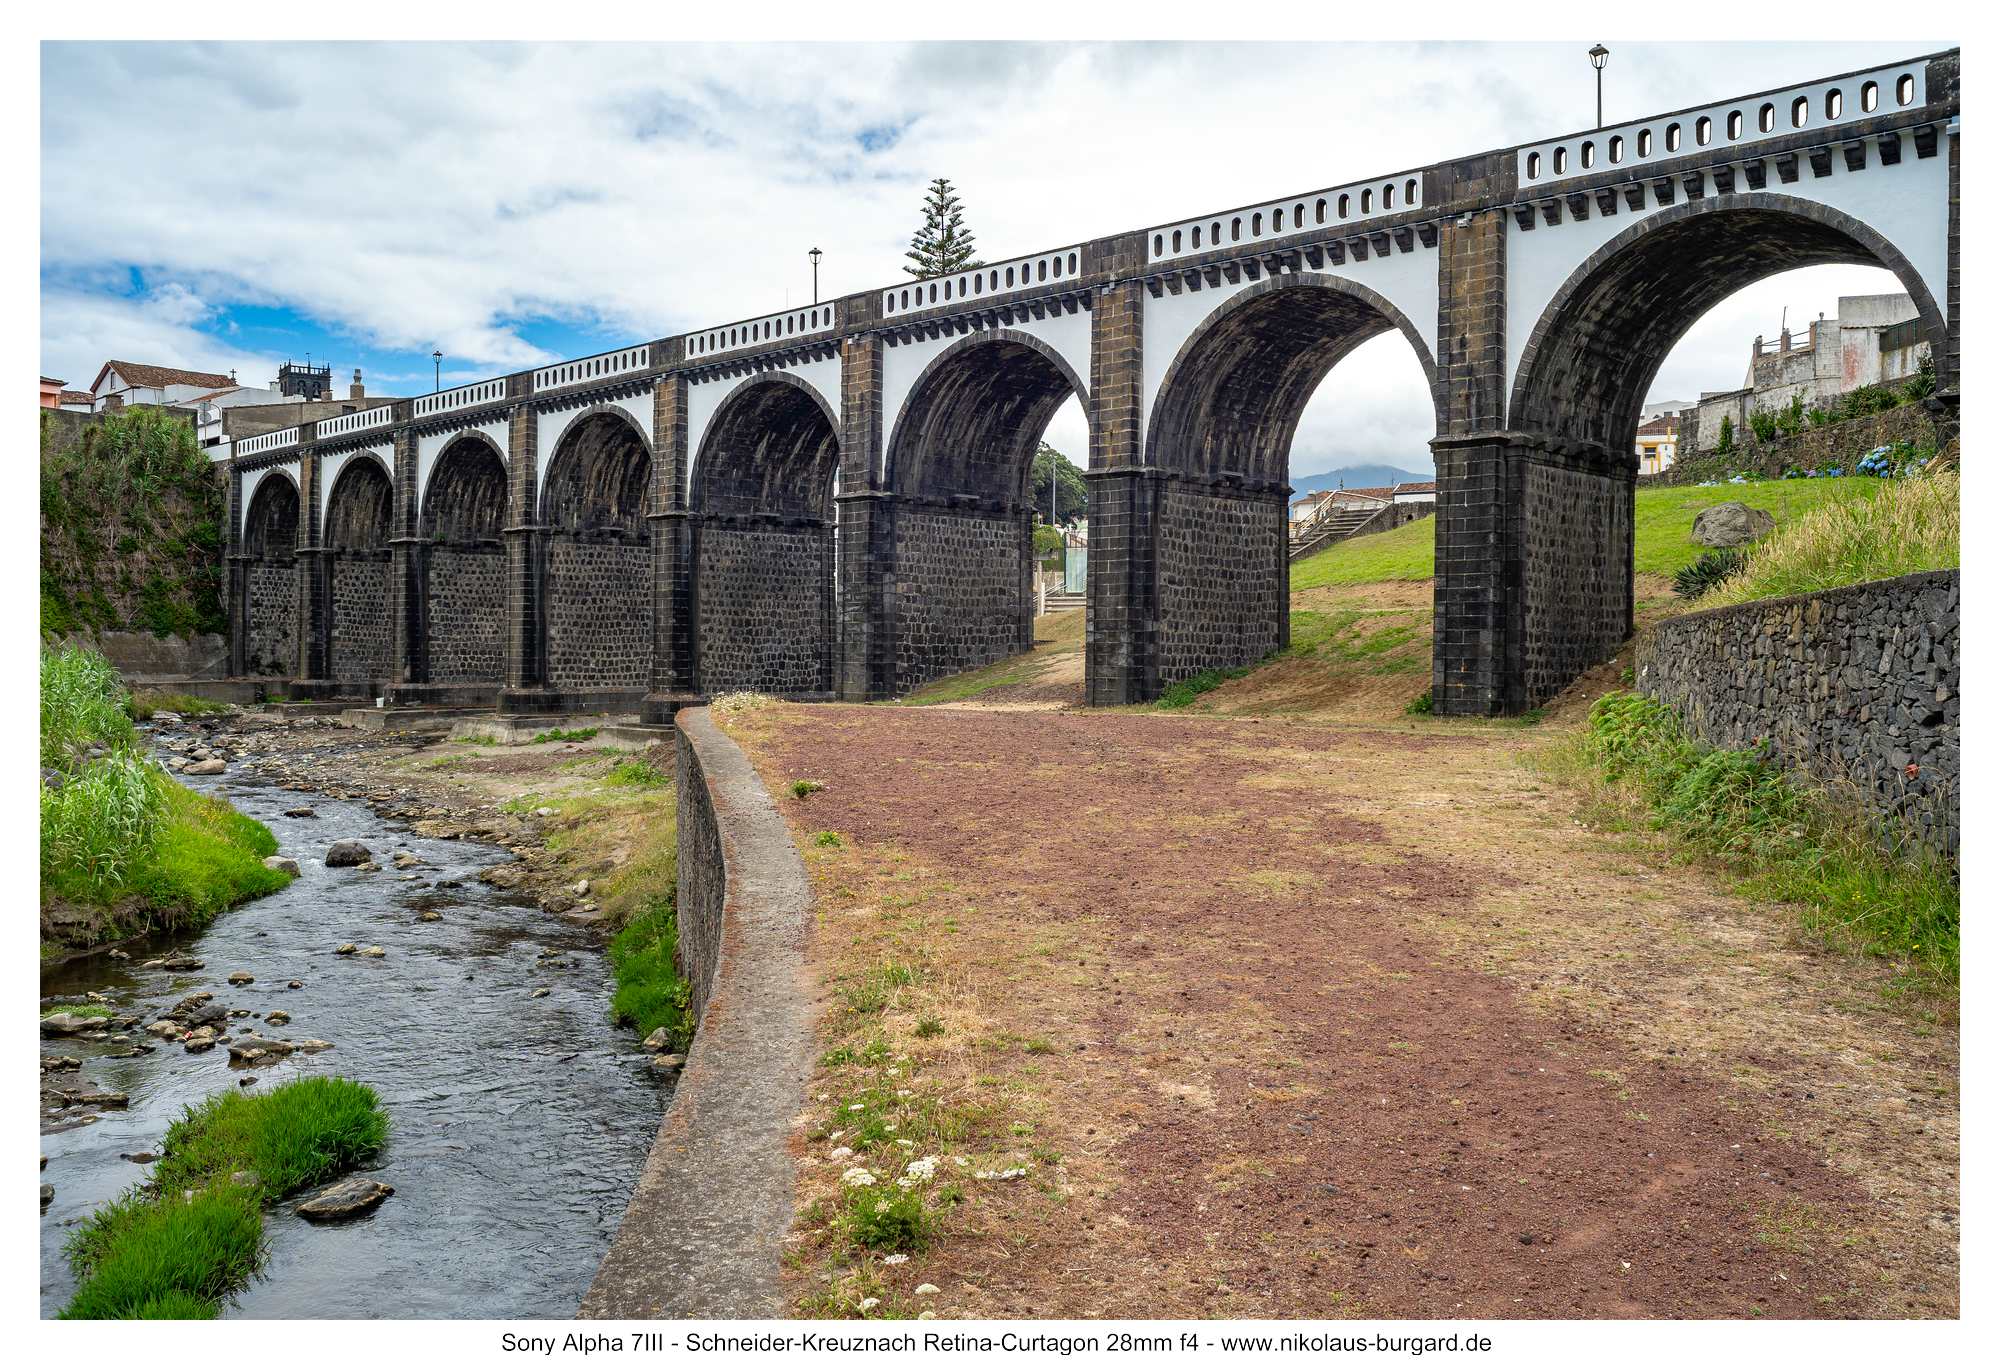
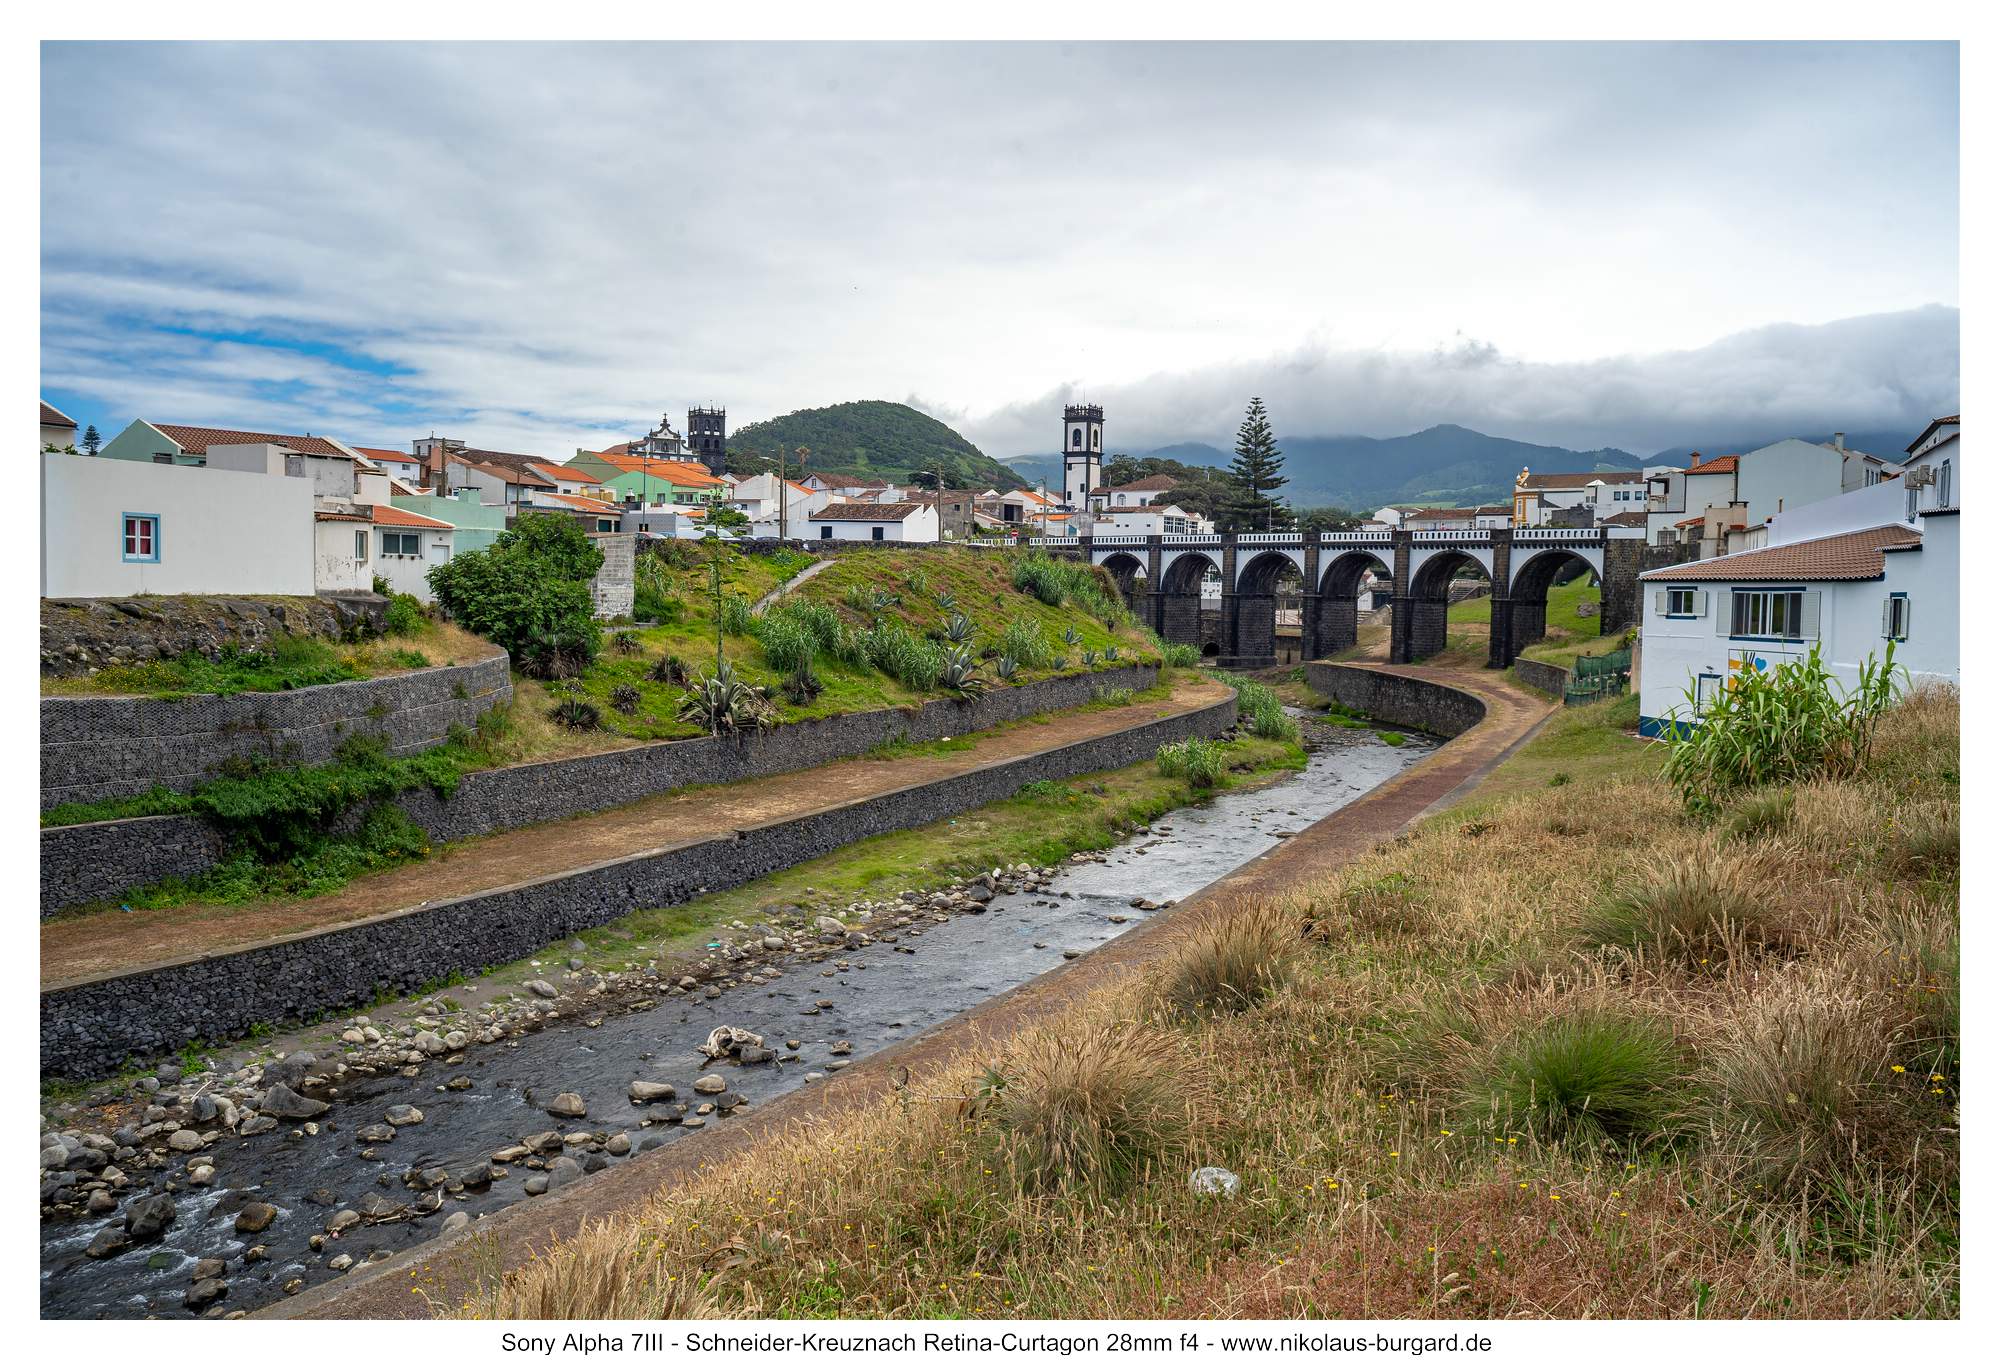
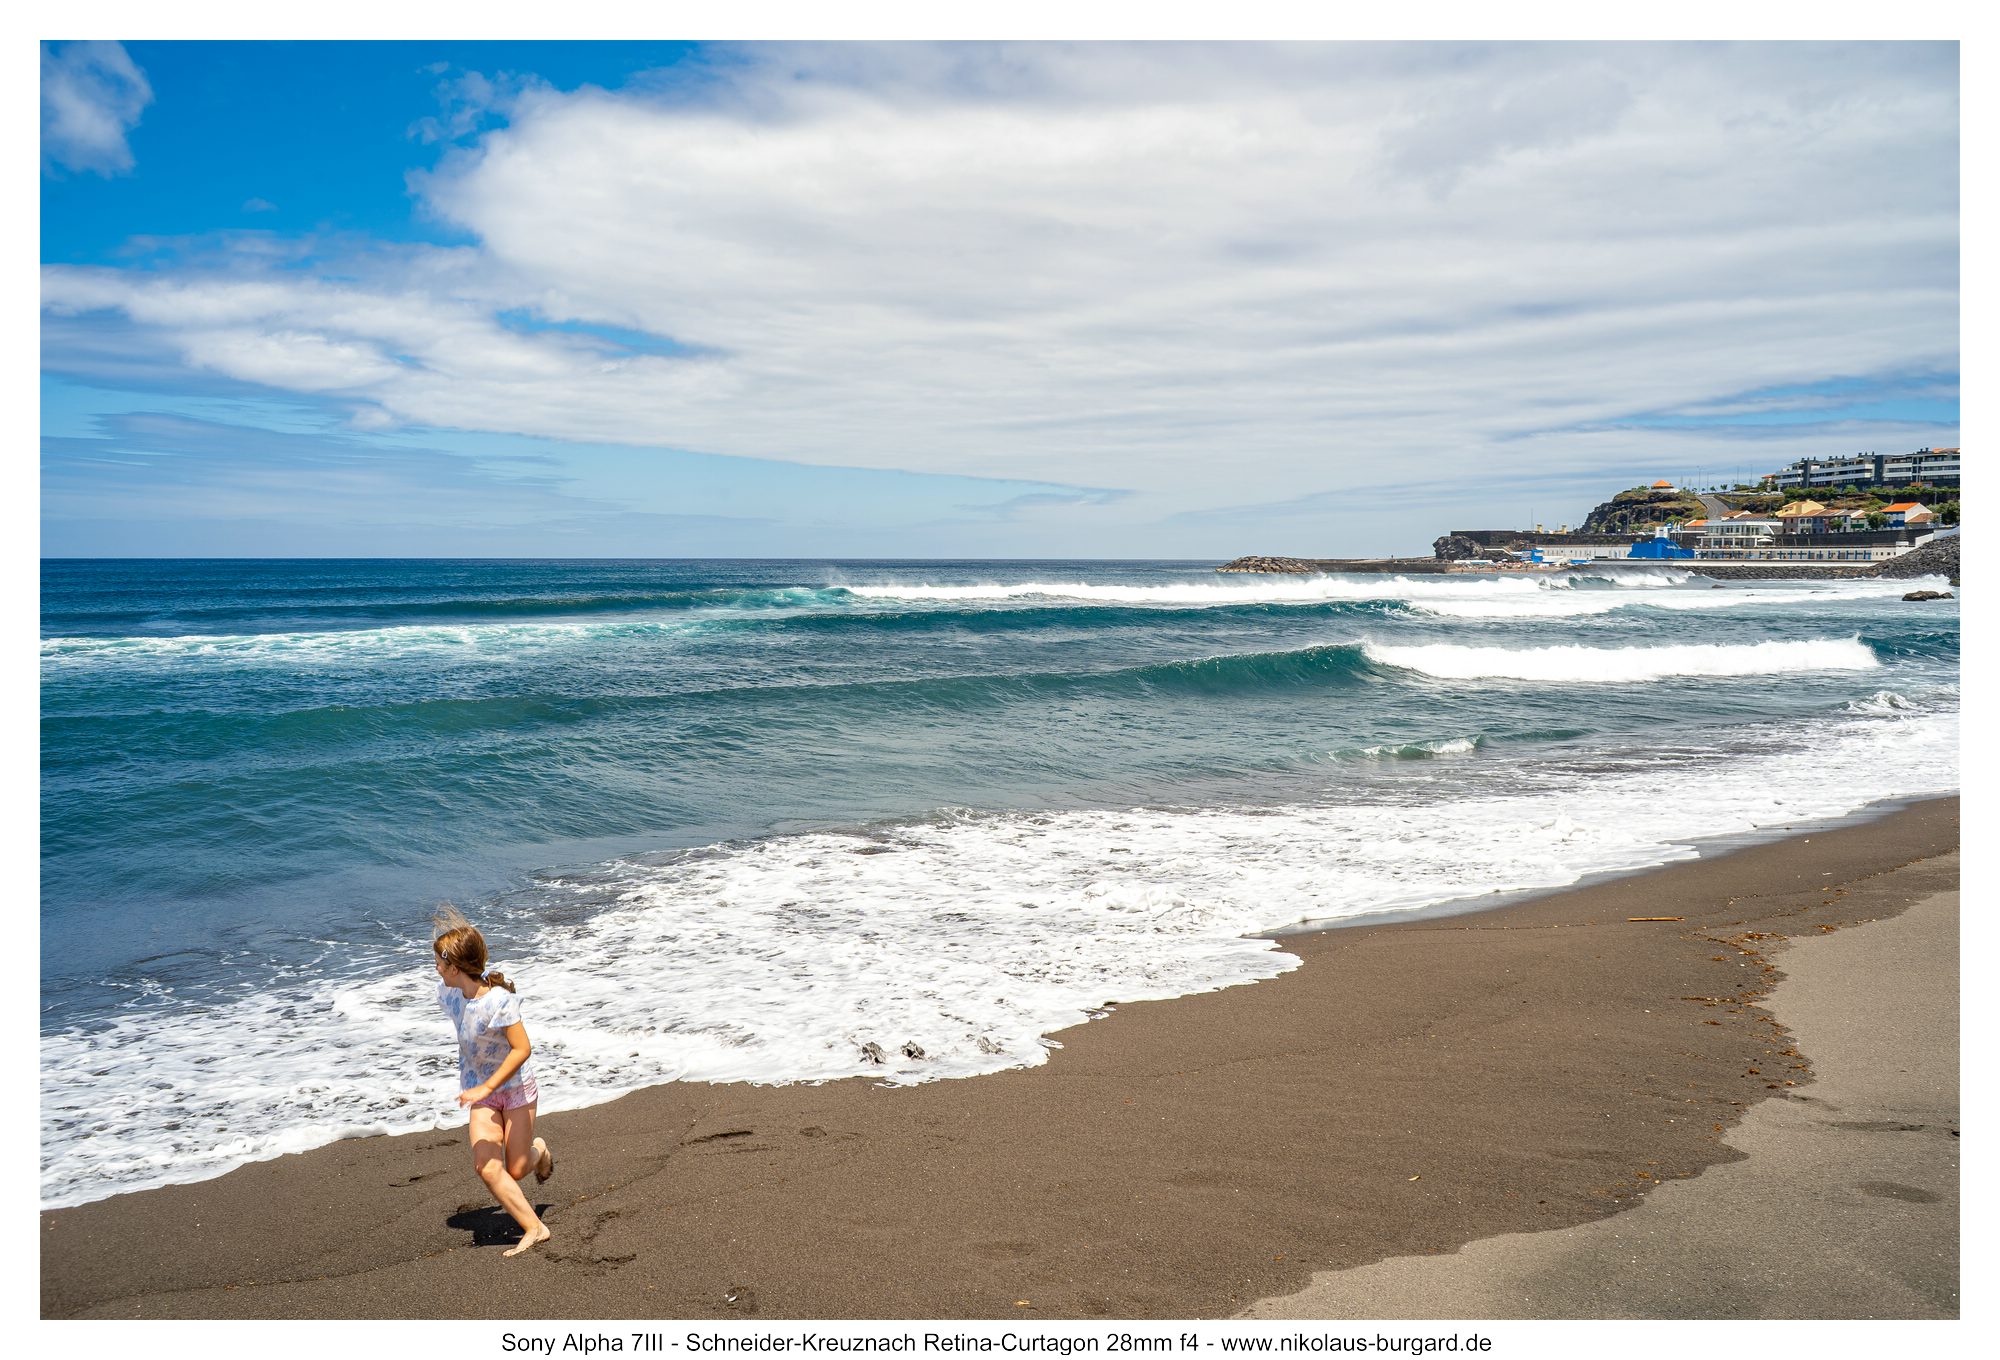
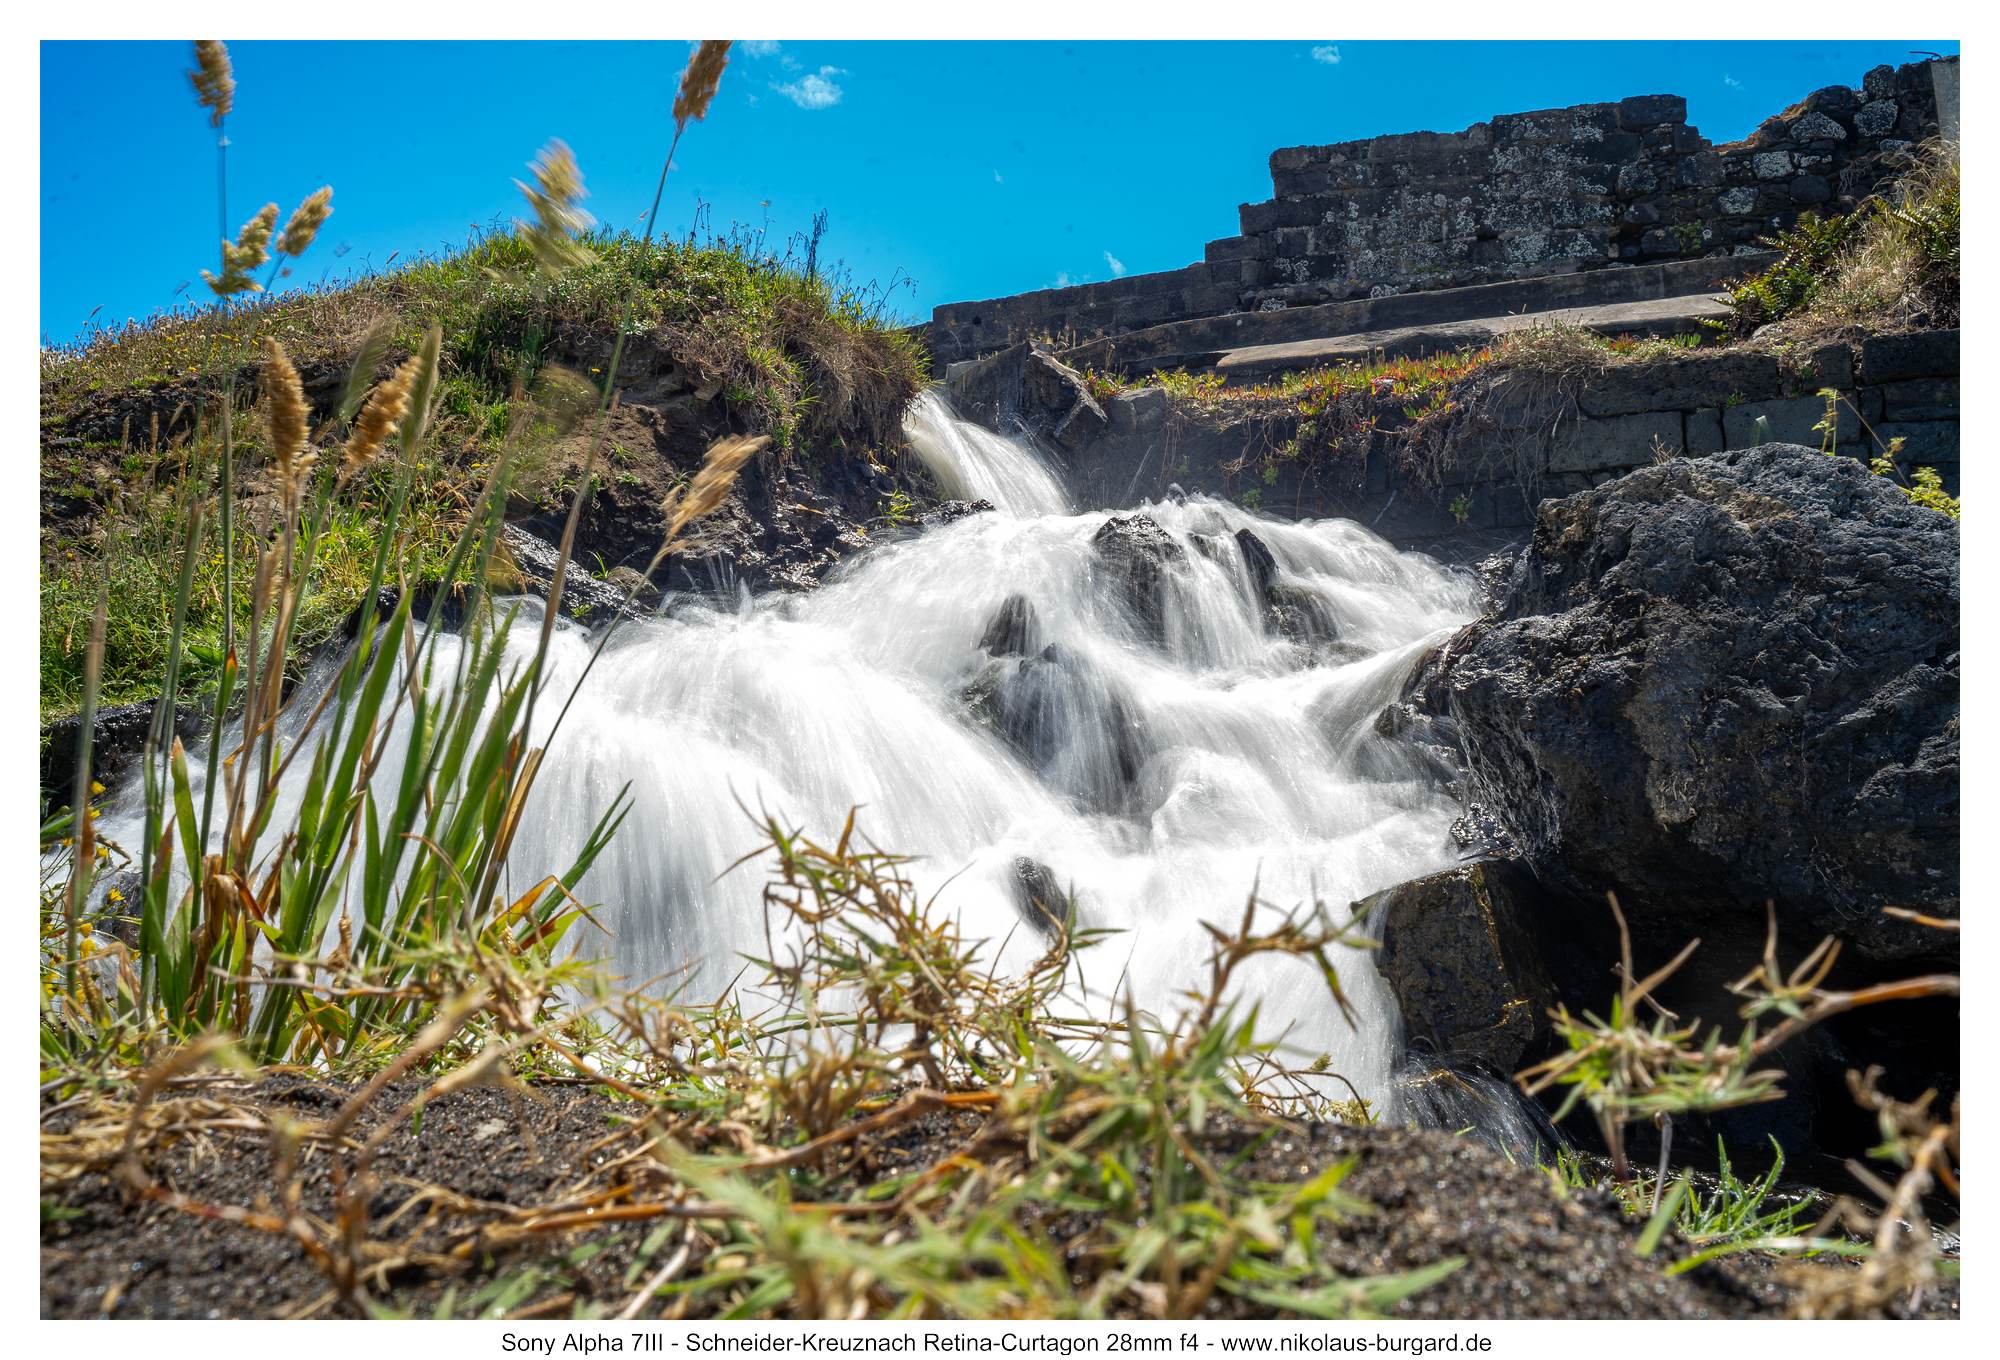
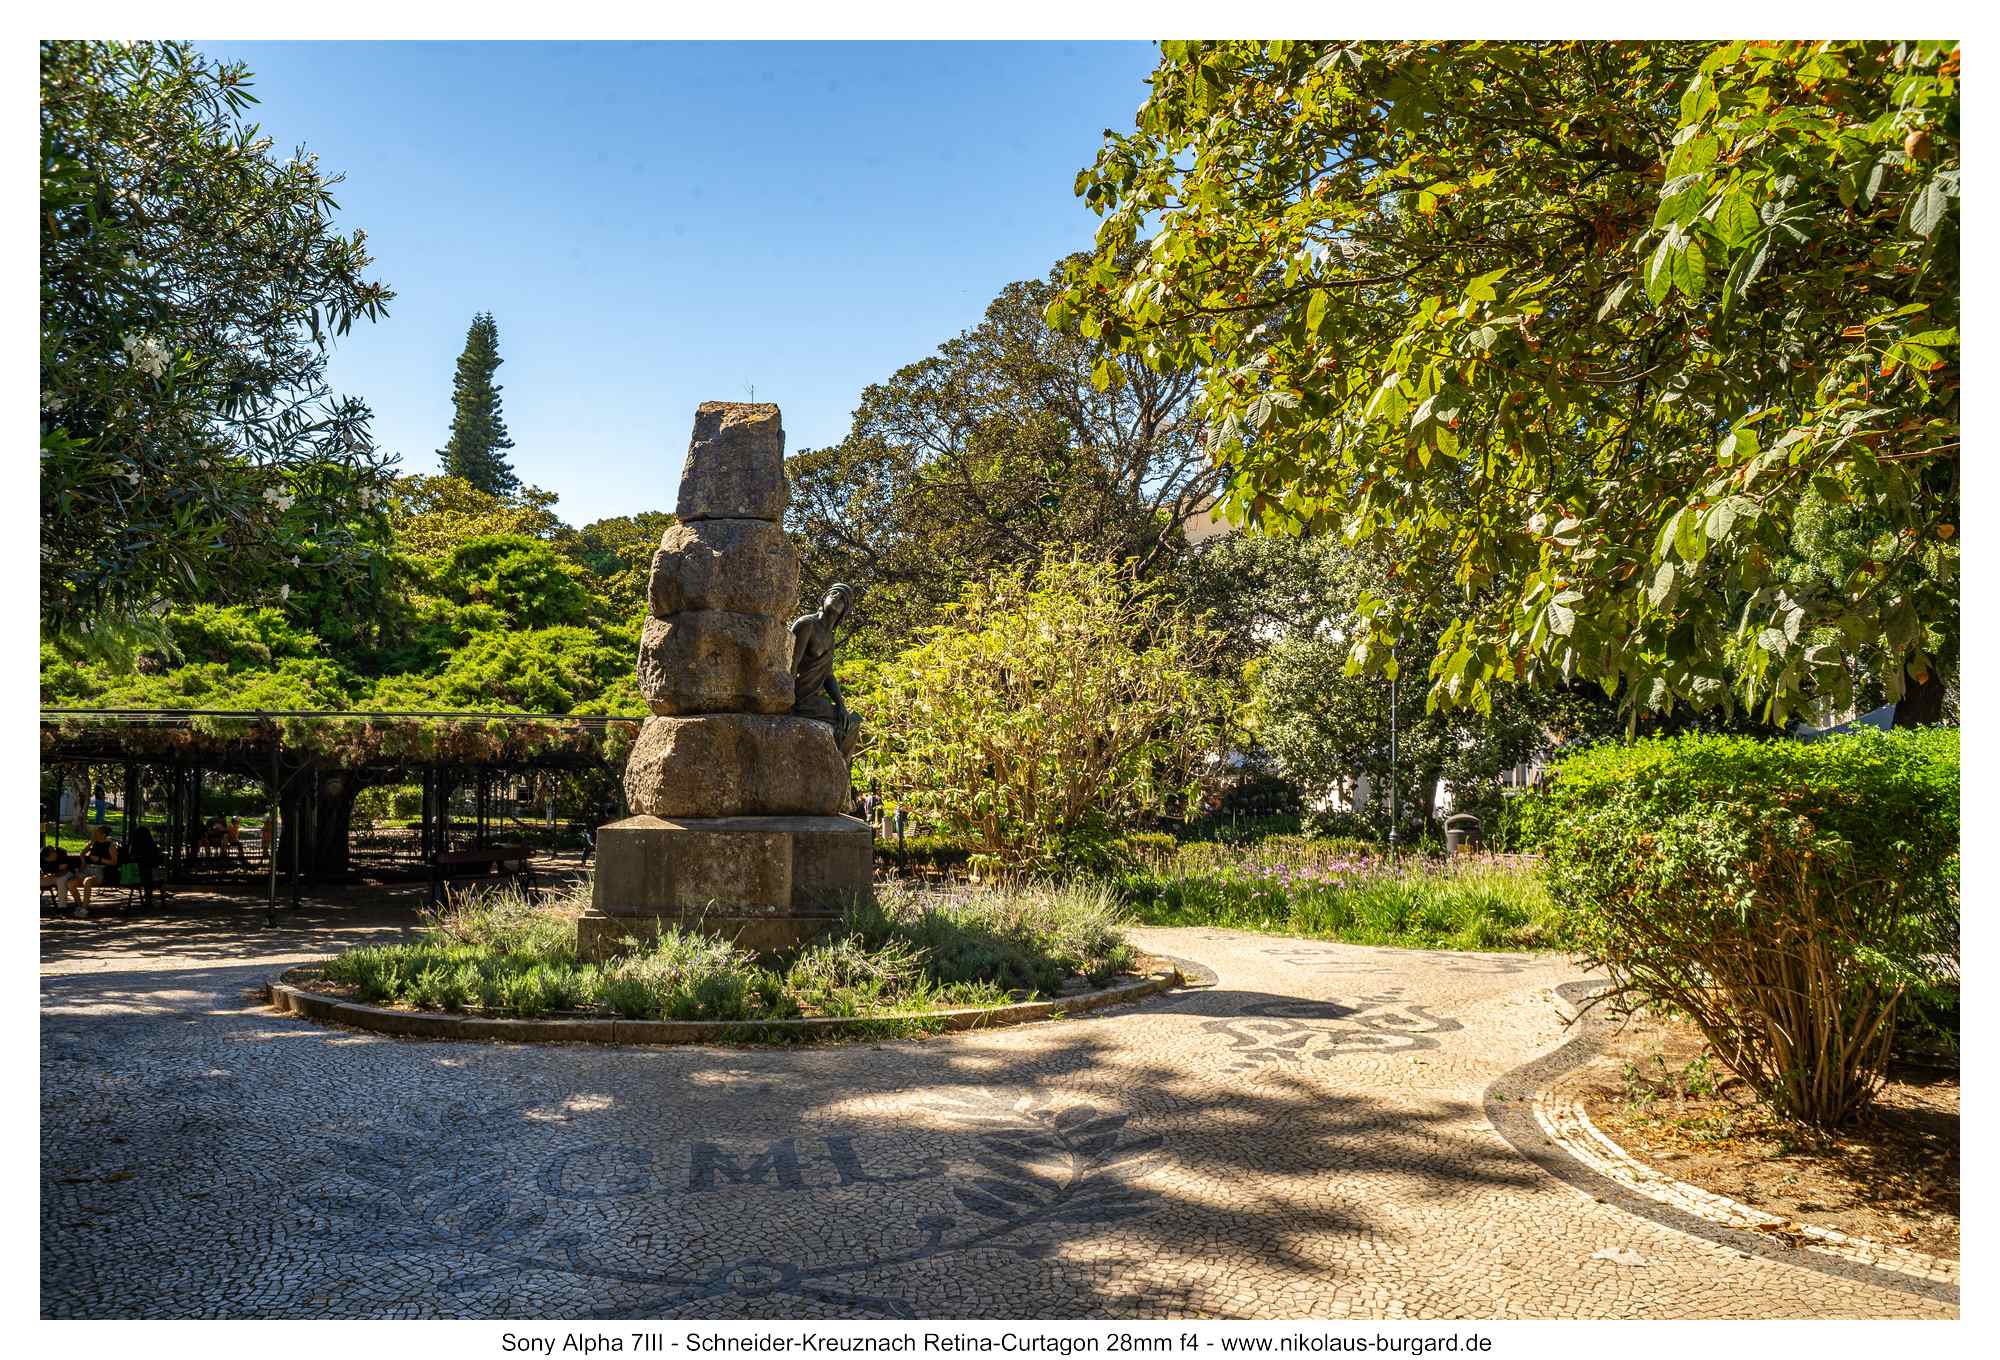
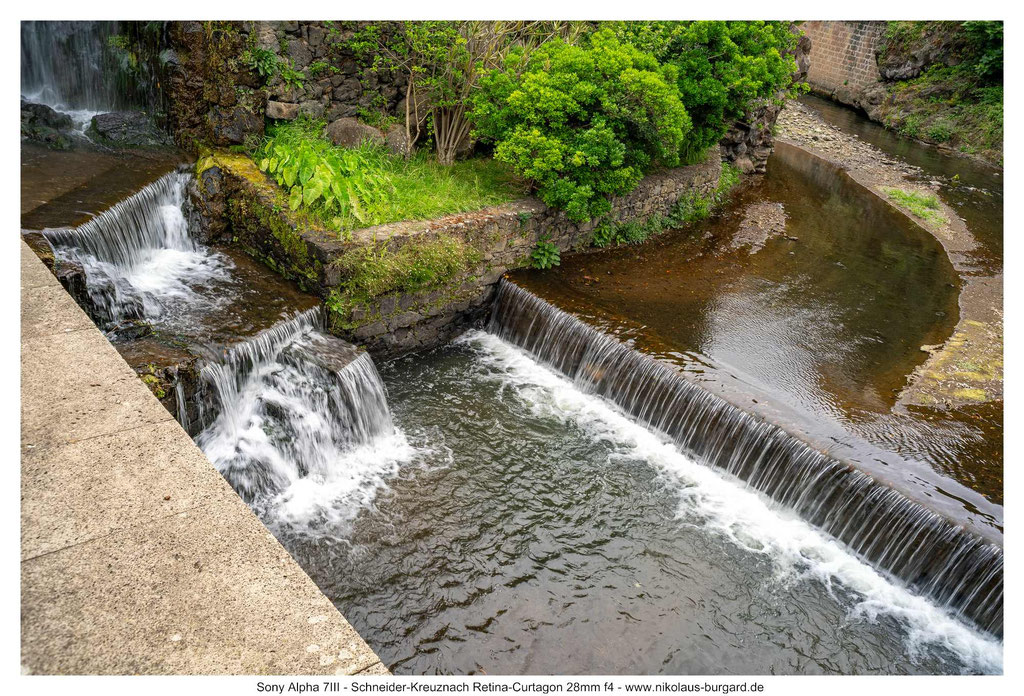
Bildserie: Azoren Teil 2: / Picture Series: Azores pt. 2: Ribeira Grande
Ein Ort, den wir in unserer Zeit auf Sao Miguel mehrfach besucht haben, ist Ribeira Grande.
Dort ist das Wetter meist sehr schön zum Baden im Meer gewesen.
Ribeira Grande ist auch das Surfmekka der Insel mit seinem laaaangen Sandstrand.
Ich fand es auch architektonisch sehr reizvoll und mit den bunten Farben sehr charmant. Highlights sind auch die das Stadtbild prägende Brücke mit ihren Rundbögen sowie der charmante Stadtpark.
One place we visited several times during our stay on São Miguel is Ribeira Grande.
The weather there was usually perfect for swimming in the ocean.
Ribeira Grande is also the island’s surfing mecca, with its loooong sandy beach.
I also found it architecturally very appealing and quite charming with its bright colors. Highlights include the bridge with its round arches, which dominates the cityscape, as well as the charming city park.


Verhalten im Gegenlicht / Flares and Ghosts
Das Retina Curtagon 28mm f4 ist im Gegenlicht schwach und vor allem bei unverdeckter Sonne sehr mit Vorsicht zu genießen.
Wenigstens ist das Flare-Verhalten absolut voraussehbar.
Abgeblendet auf f11 ergeben sich relativ gut definierte Blendensterne, und die auftretenden Flares und Blobs sind immer gleich: genau diagonal zur Position der Lichtquelle ergeben sich die Flares und Blobs:
The Retina Curtagon 28mm f/4 performs poorly in backlit conditions and should be used with extreme caution, especially in direct sunlight.
At least the flare behavior is completely predictable.
When stopped down to f/11, the bokeh stars are relatively well-defined, and the flares and blobs that occur are always the same: they appear exactly diagonal to the position of the light source:
Hier habe ich das Verhalten von "im Gegenlicht mit verdeckter Sonne" über teilverdeckt bis freistehende Sonne für euch durch exerziert:
Here, I've tested the performance for you in various conditions, ranging from “backlit with the sun partially obscured” to a partially obscured sun and a fully visible sun:


Wenn die Sonne verdeckt ist, ist das Kontrastverhalten gut und es gibt keine Probleme.
Je freier im Gegenlicht, desto größer die Flares.
Auch beim folgenden Paar kann man das gut nachvollziehen:
When the sun is obscured, the contrast performance is good and there are no issues.
The more open the background in backlighting, the larger the flares.
This is also clearly evident in the following pair:

Und auch die folgende 3er-Reihe zeigt eindrucksvoll, dass man durch geringes Umkomponieren des Bildes leicht ganz andere Ergebnisse erhält:
And the following series of three photos also clearly demonstrates that even a slight change in the composition can easily yield completely different results:

In Extremsituationen ergeben sich leicht unschöne Sensorreflektionen - aber wie immer ist es eine Frage des Winkels:
In extreme situations, unattractive sensor reflections can easily occur—but as always, it’s a matter of angle:

Und in Ausnahmefällen bin ich bei diffusem Licht auf die folgenden Kontrastverluste gestoßen.
Hier muss aber negativ alles zusammenkommen. Ich hatte dieses Phänomen nur bei den folgenden 3 von insgesamt über 600 Bildern mit dem Objektiv:
And in rare cases, I’ve encountered the following loss of contrast in diffuse lighting.
However, all the negative factors have to align for this to happen. I’ve only observed this phenomenon in the following 3 out of a total of over 600 photos taken with this lens:

Alles in allem also eine nach heutigen Gesichtspunkten schwache Leistung im Kapitel Gegenlicht.
Aber das hat bewusst provoziert manchmal seinen eigenen Charme - ich habe die Flares oft bewusst bei der Bildkomposition gesucht und eingebaut.
All in all, then, a weak performance in terms of backlighting by today's standards.
But that deliberate provocation sometimes has its own charm—I often intentionally sought out and incorporated flares into my compositions.
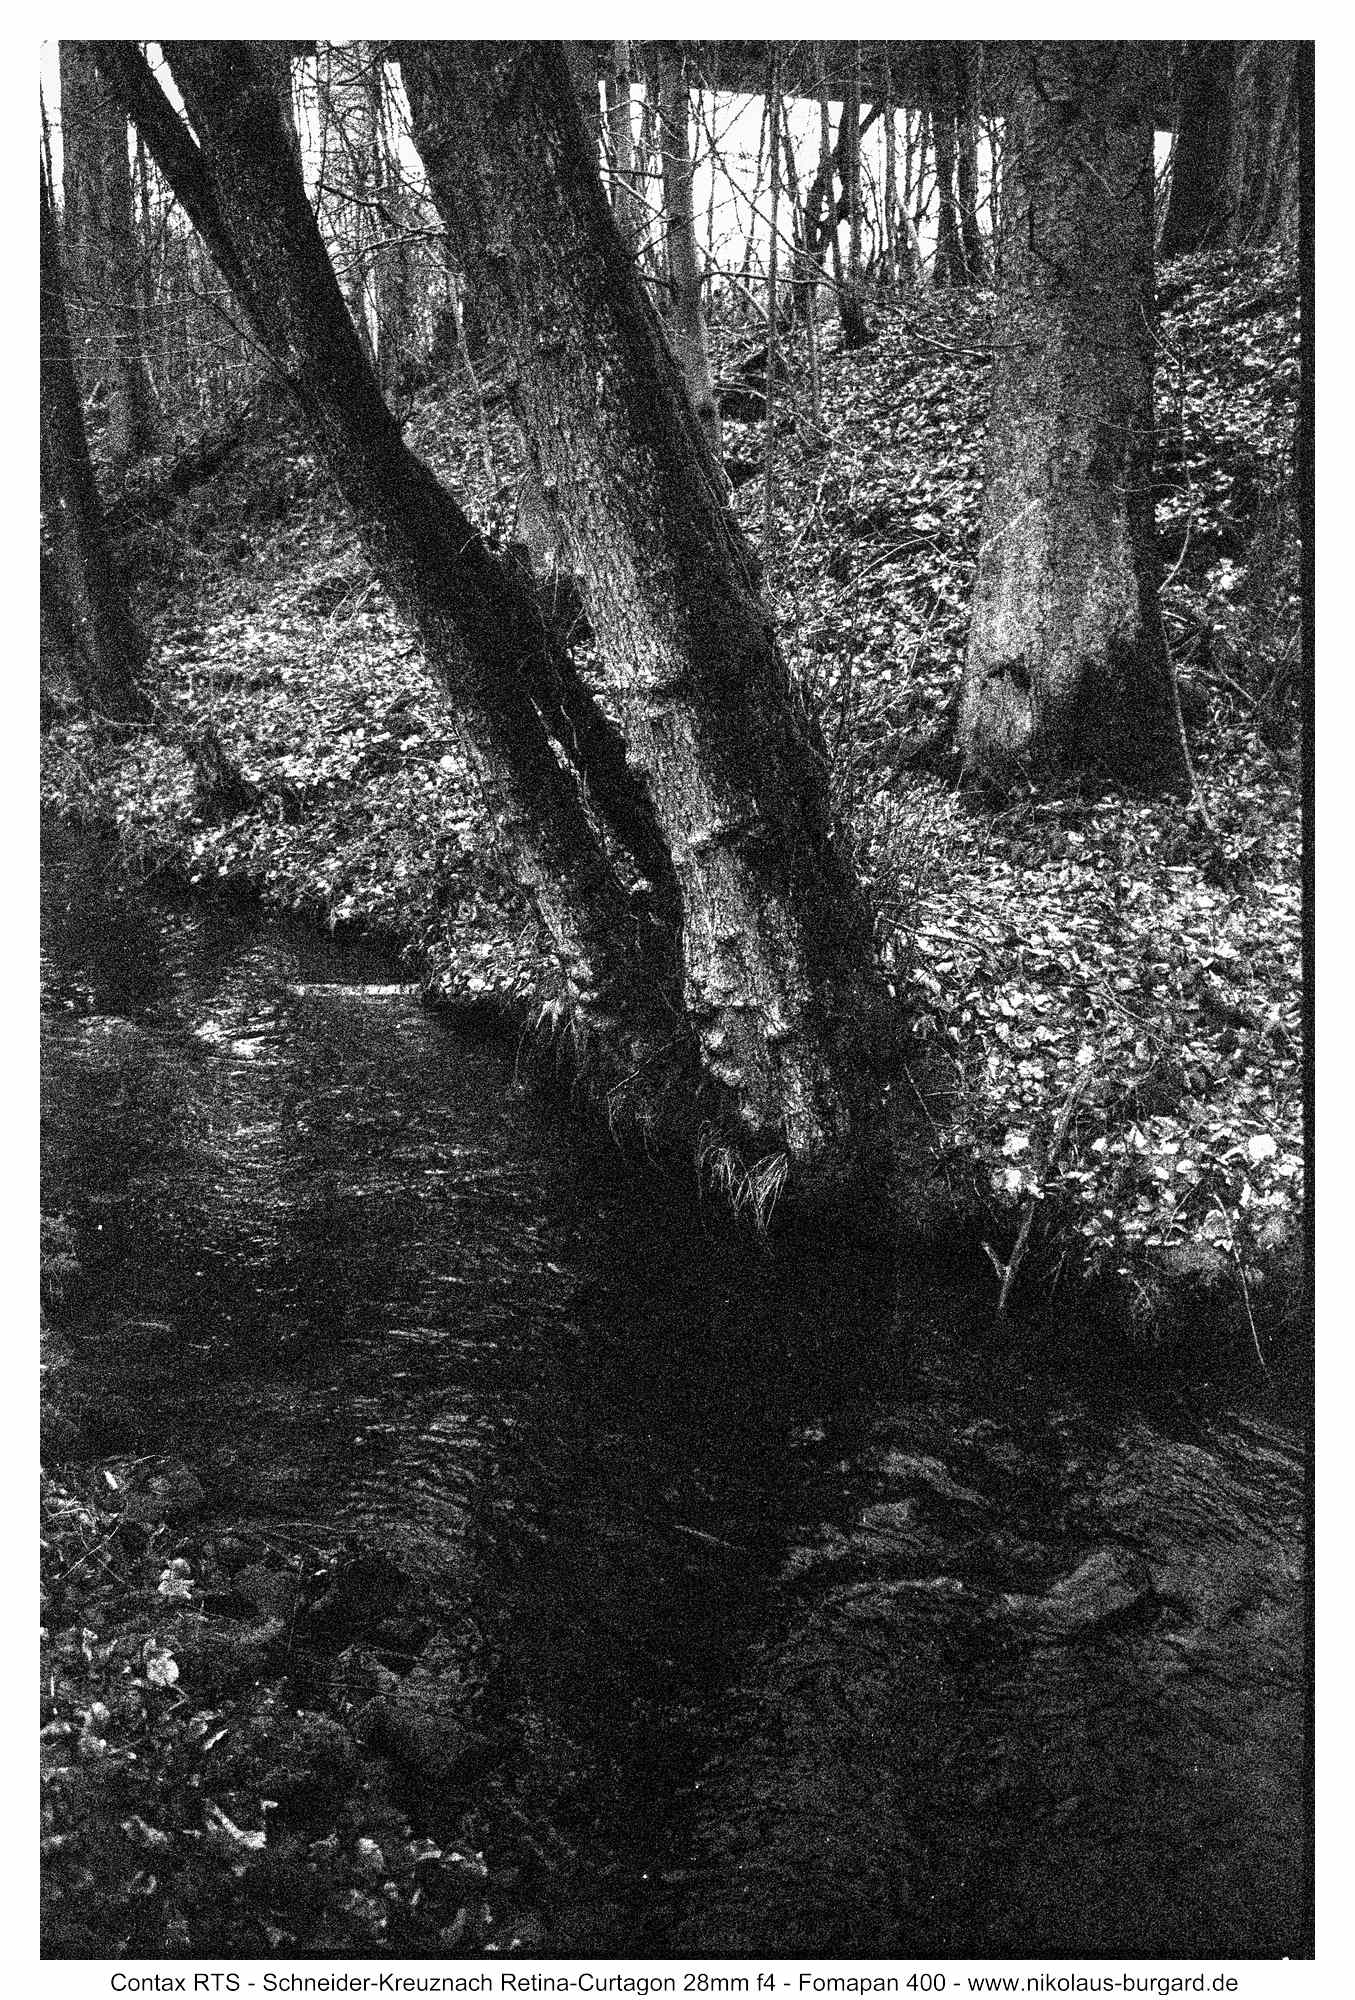
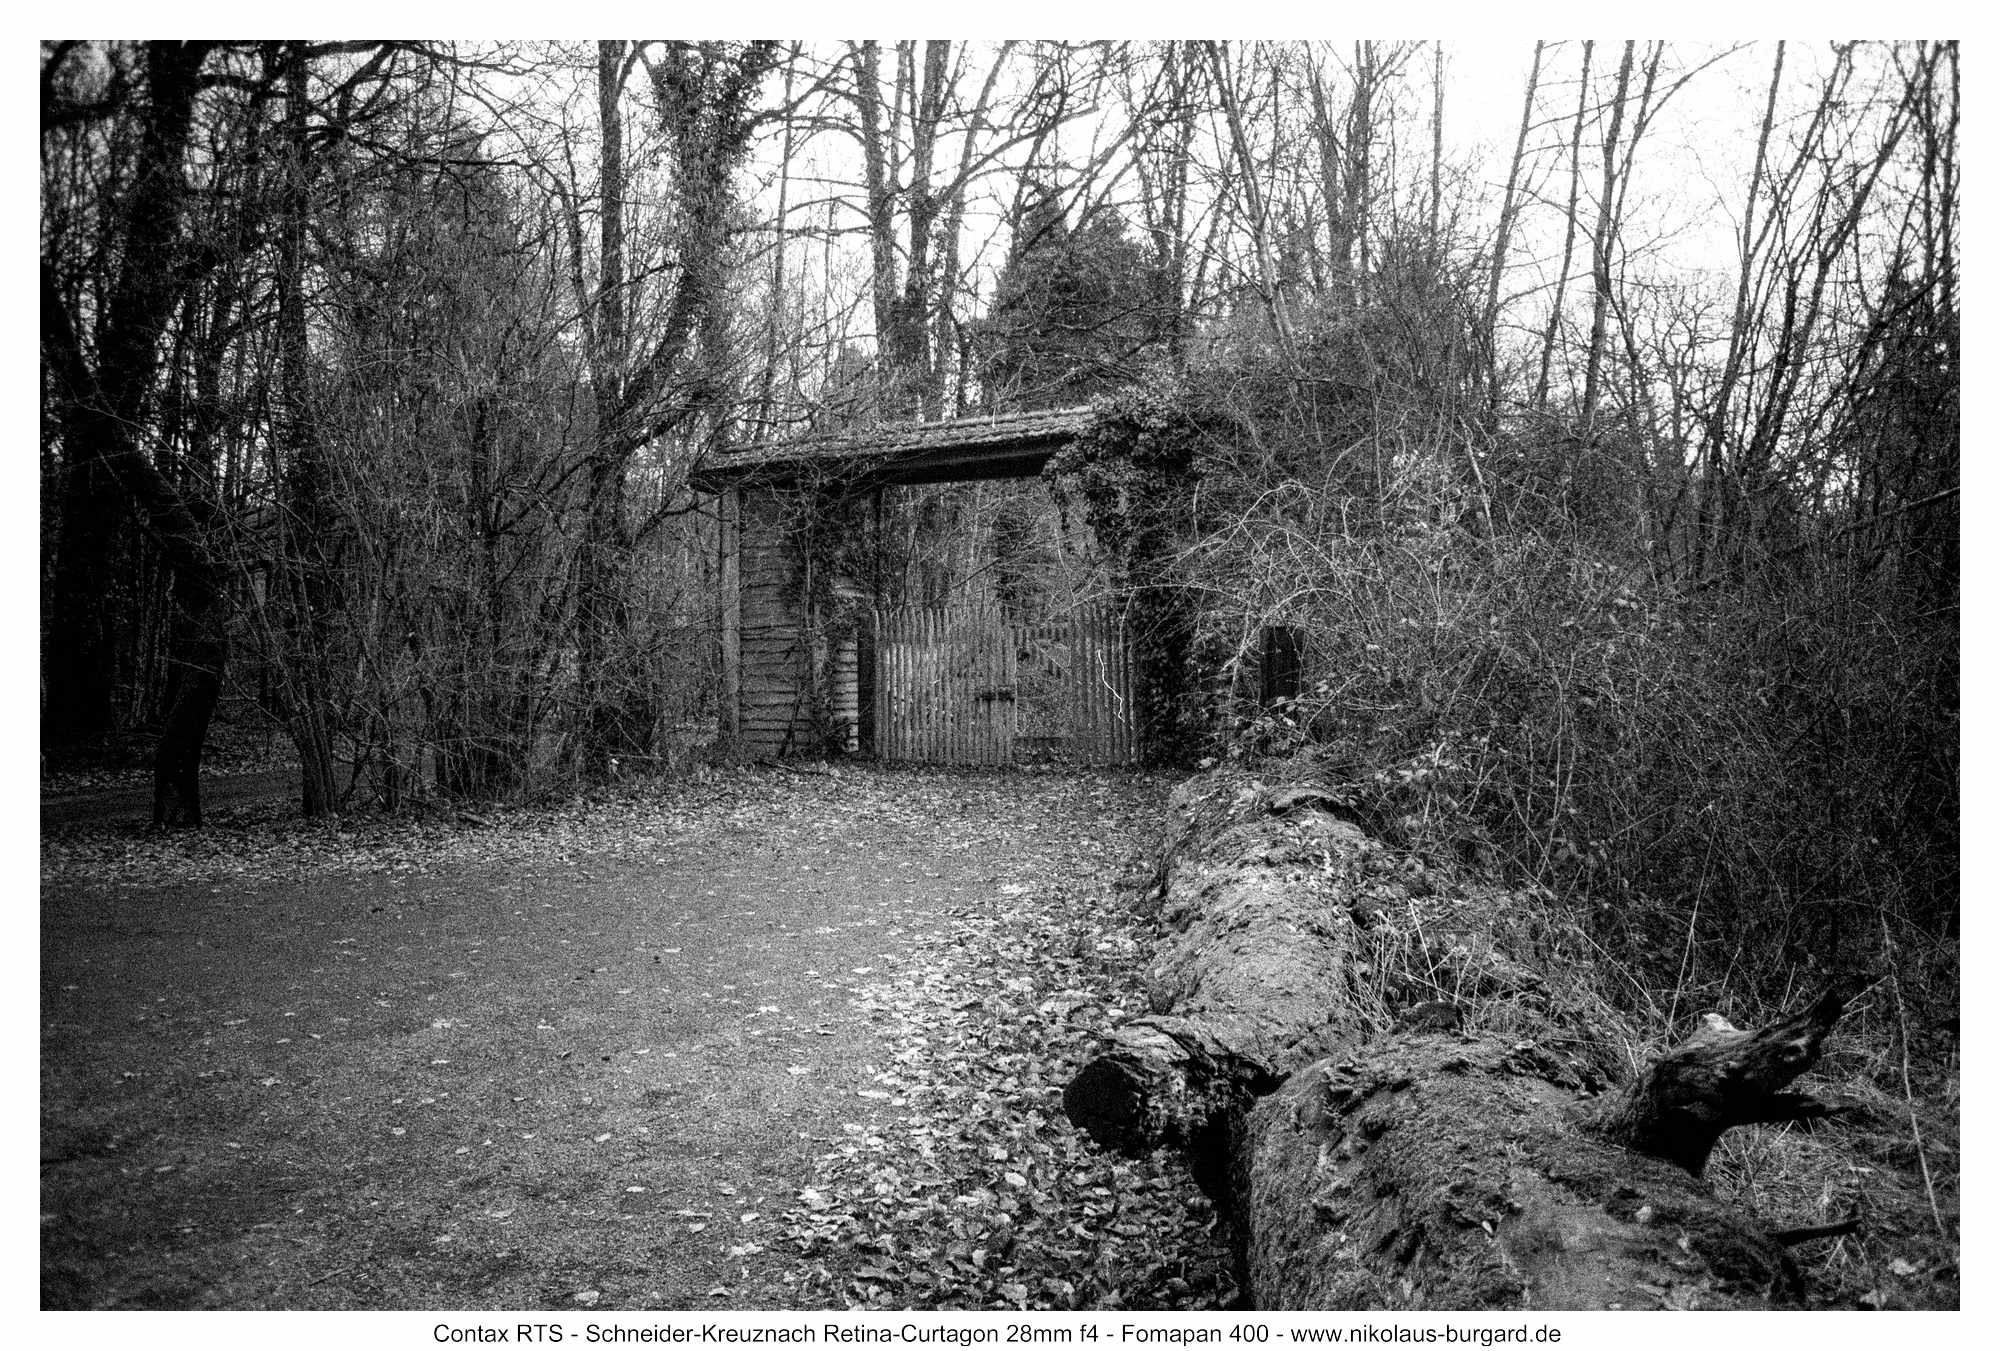
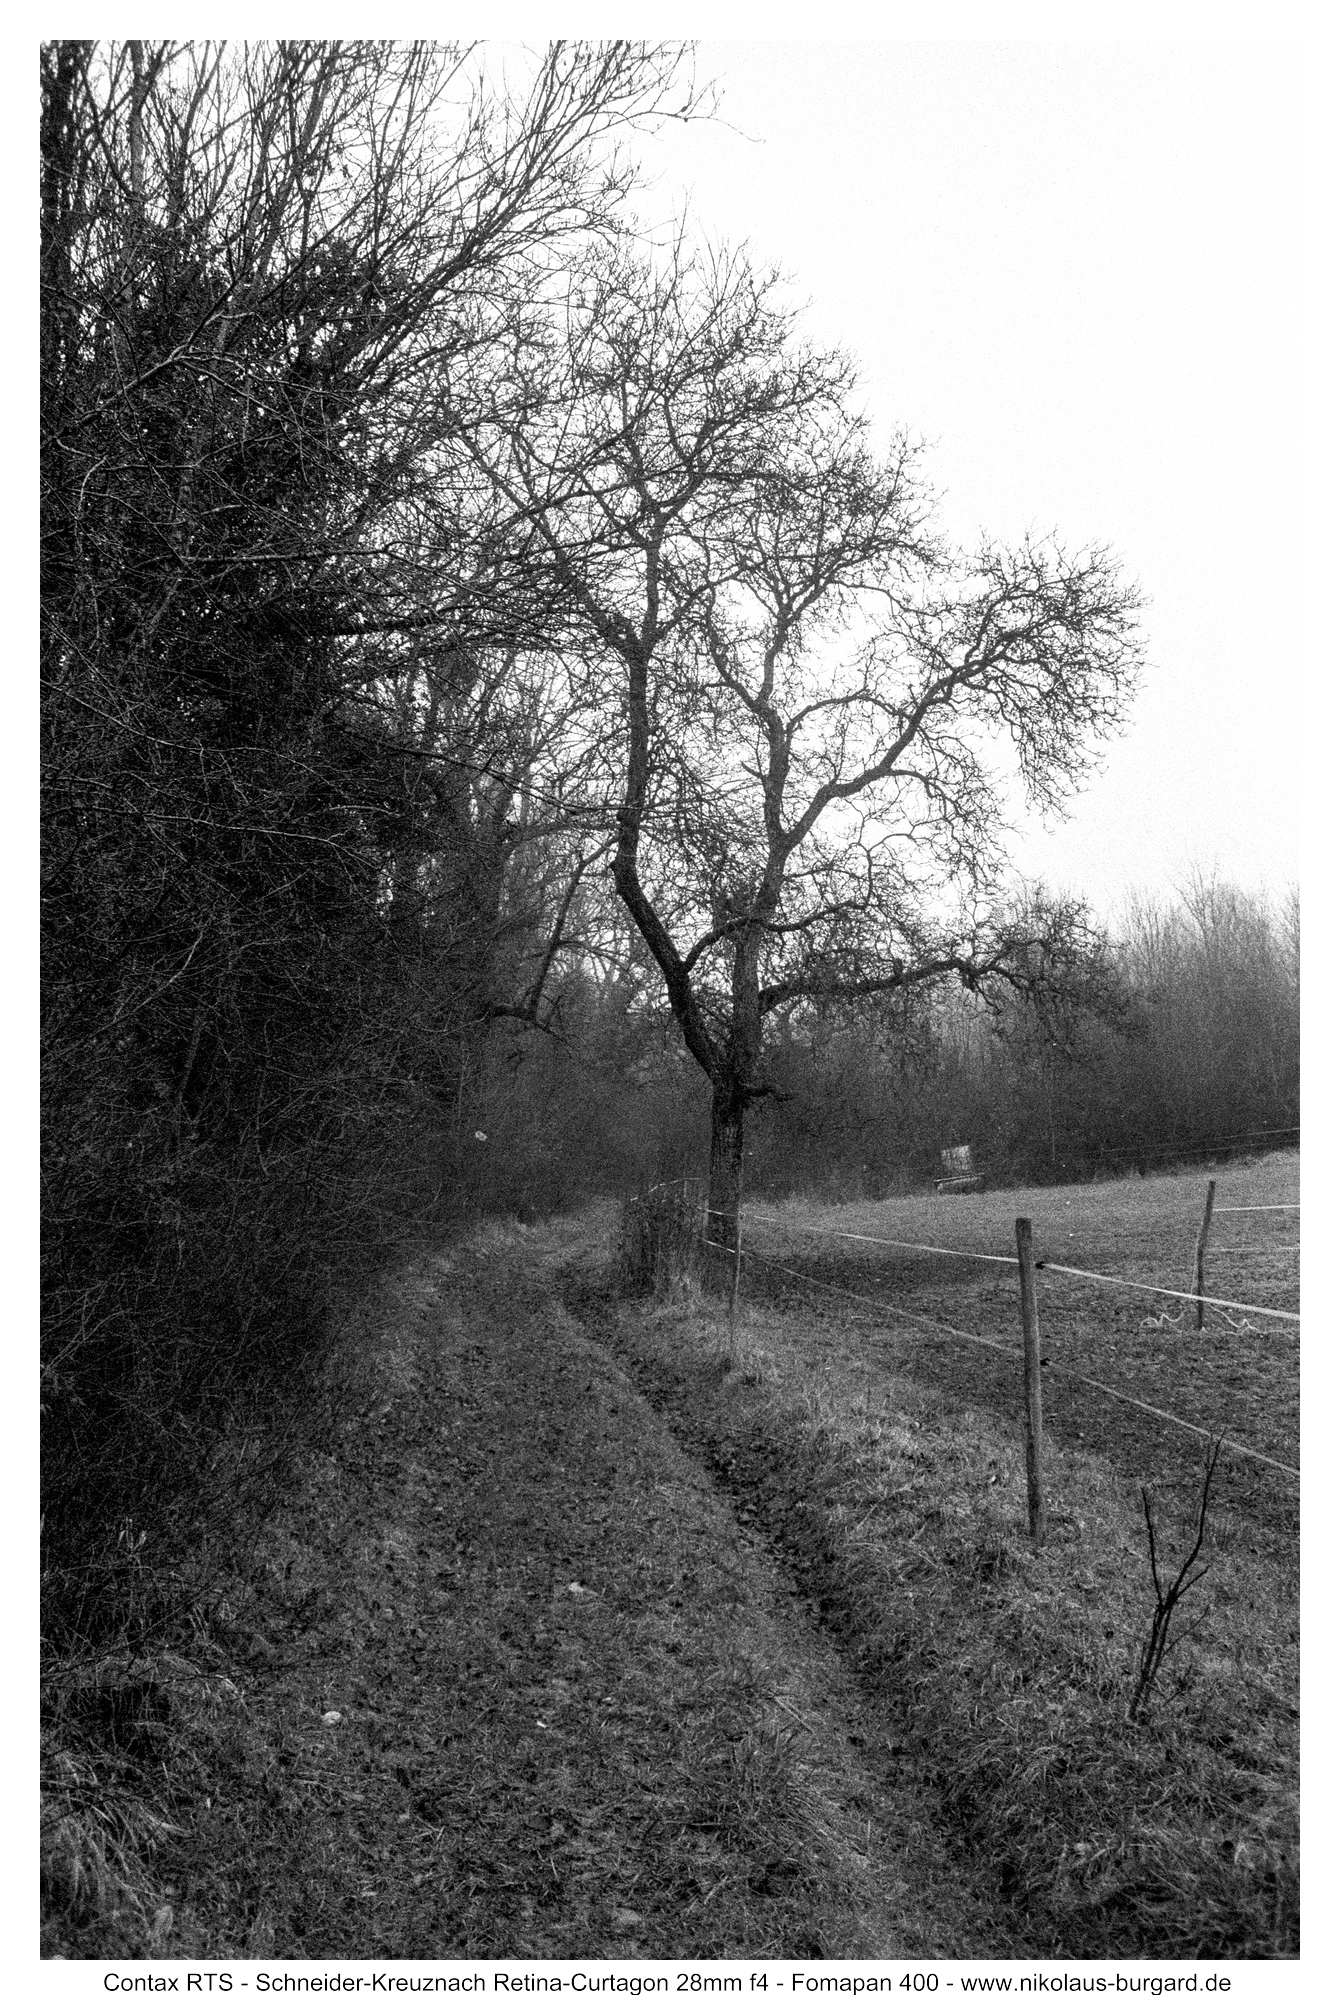
Bildserie analog: / Picture Series analogue: "Der Hannock"
Eine Winterwanderung führte mich und meinen Fotokollegen Peter rund um den namensgebenden Hügel "Der Hannock" in der Biosphäre Bliesgau.
Nebelstimmung und Kälte waren beeindruckend an diesem Februarmorgen.
Alle Fotos auf Fomapan 400 Schwarz-Weiss-Film mit der Contax RTS.
A winter hike took me and my photography colleague Peter around the hill that gives the area its name, “Der Hannock,” in the Bliesgau Biosphere Reserve.
The misty atmosphere and the cold were striking on that February morning.
All photos were taken on Fomapan 400 black-and-white film with the Contax RTS.


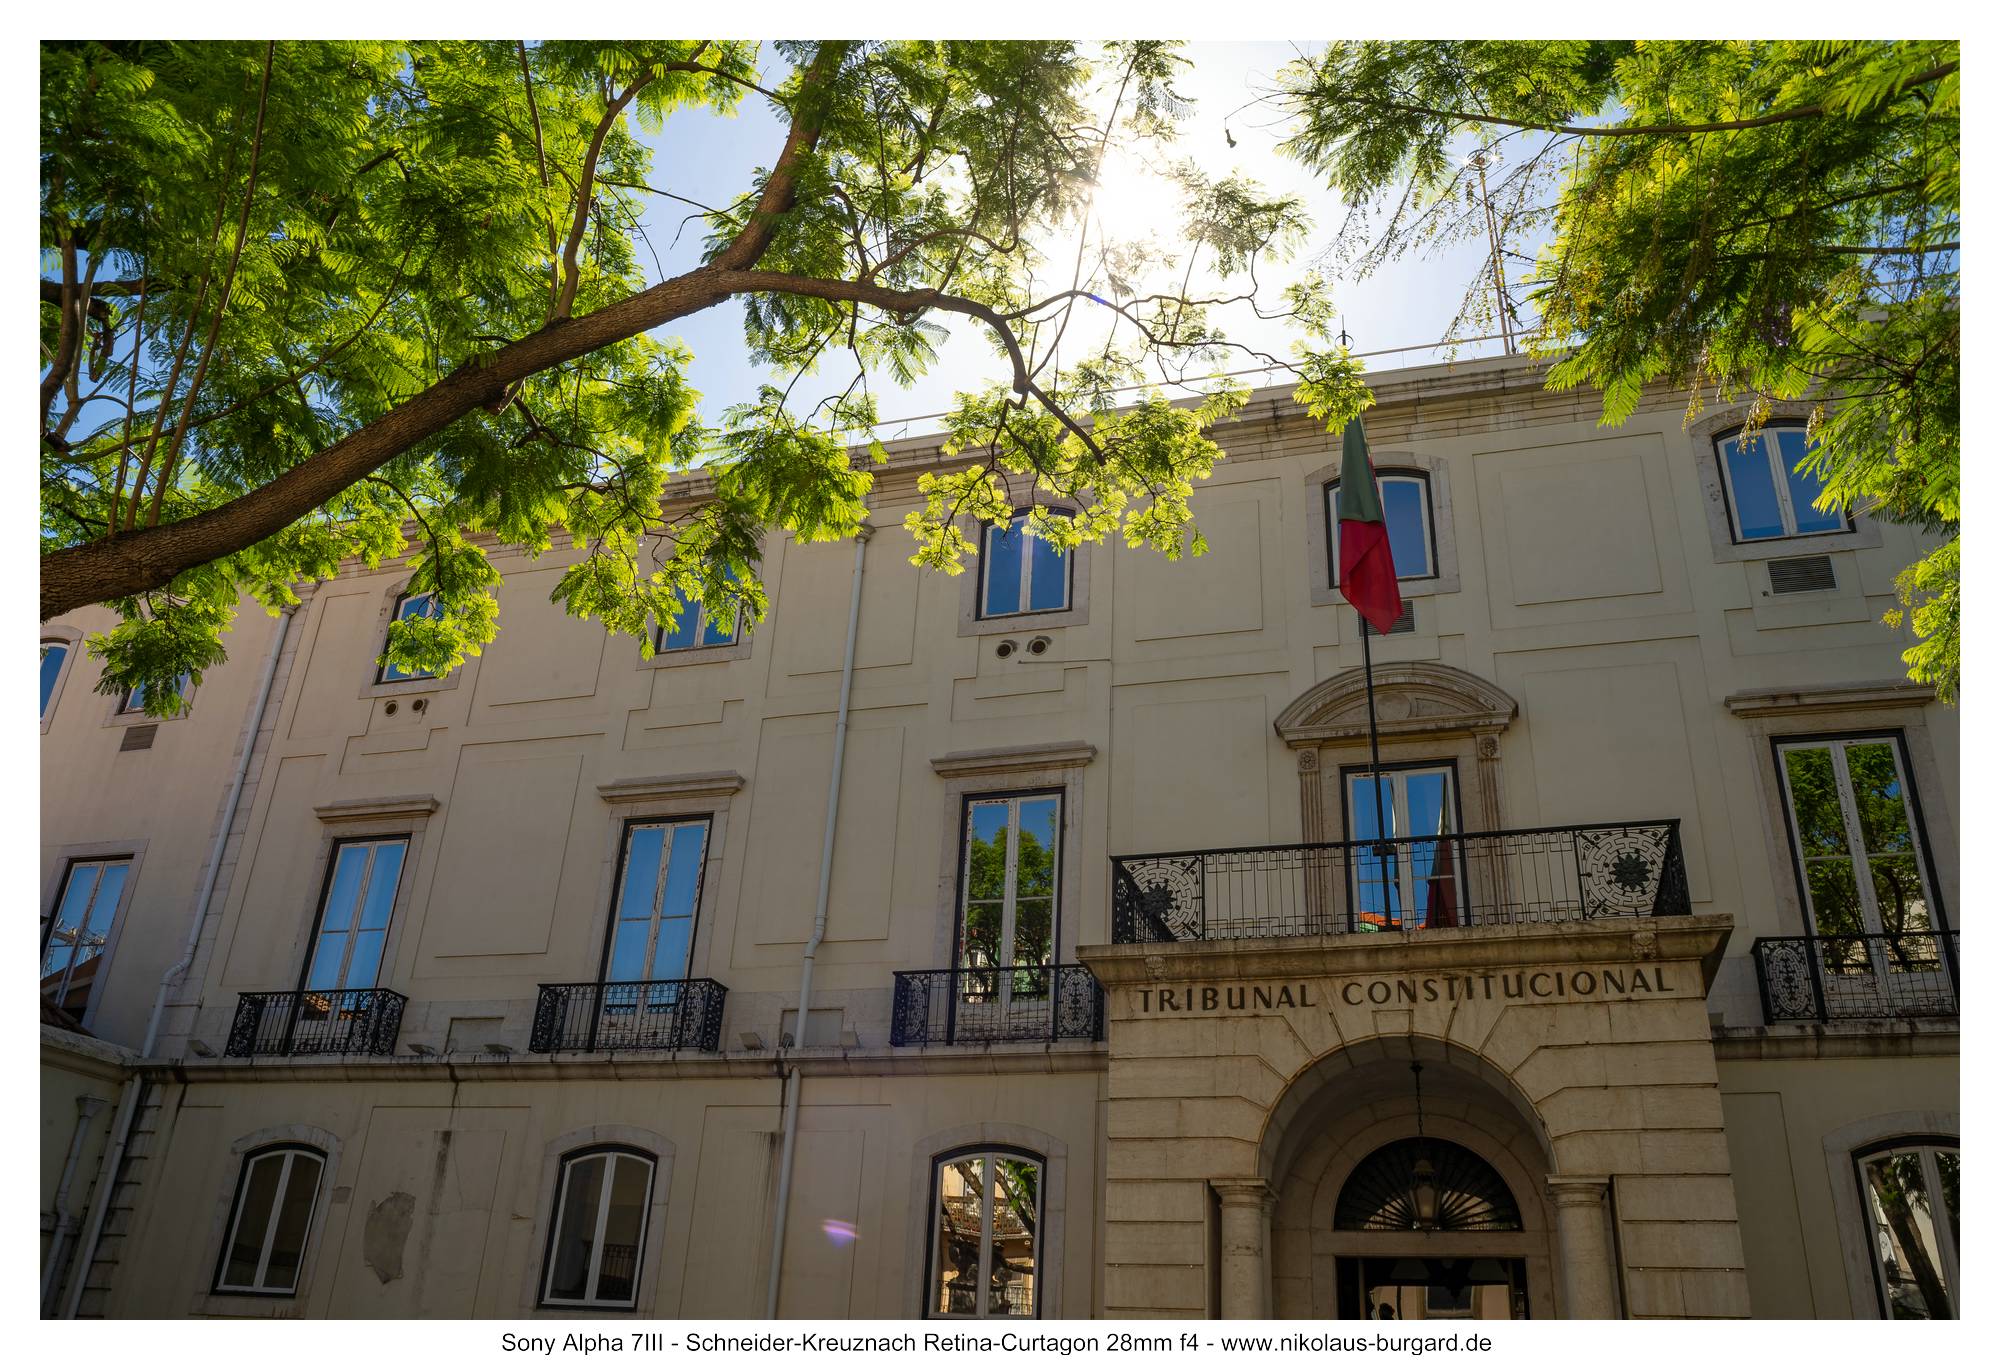
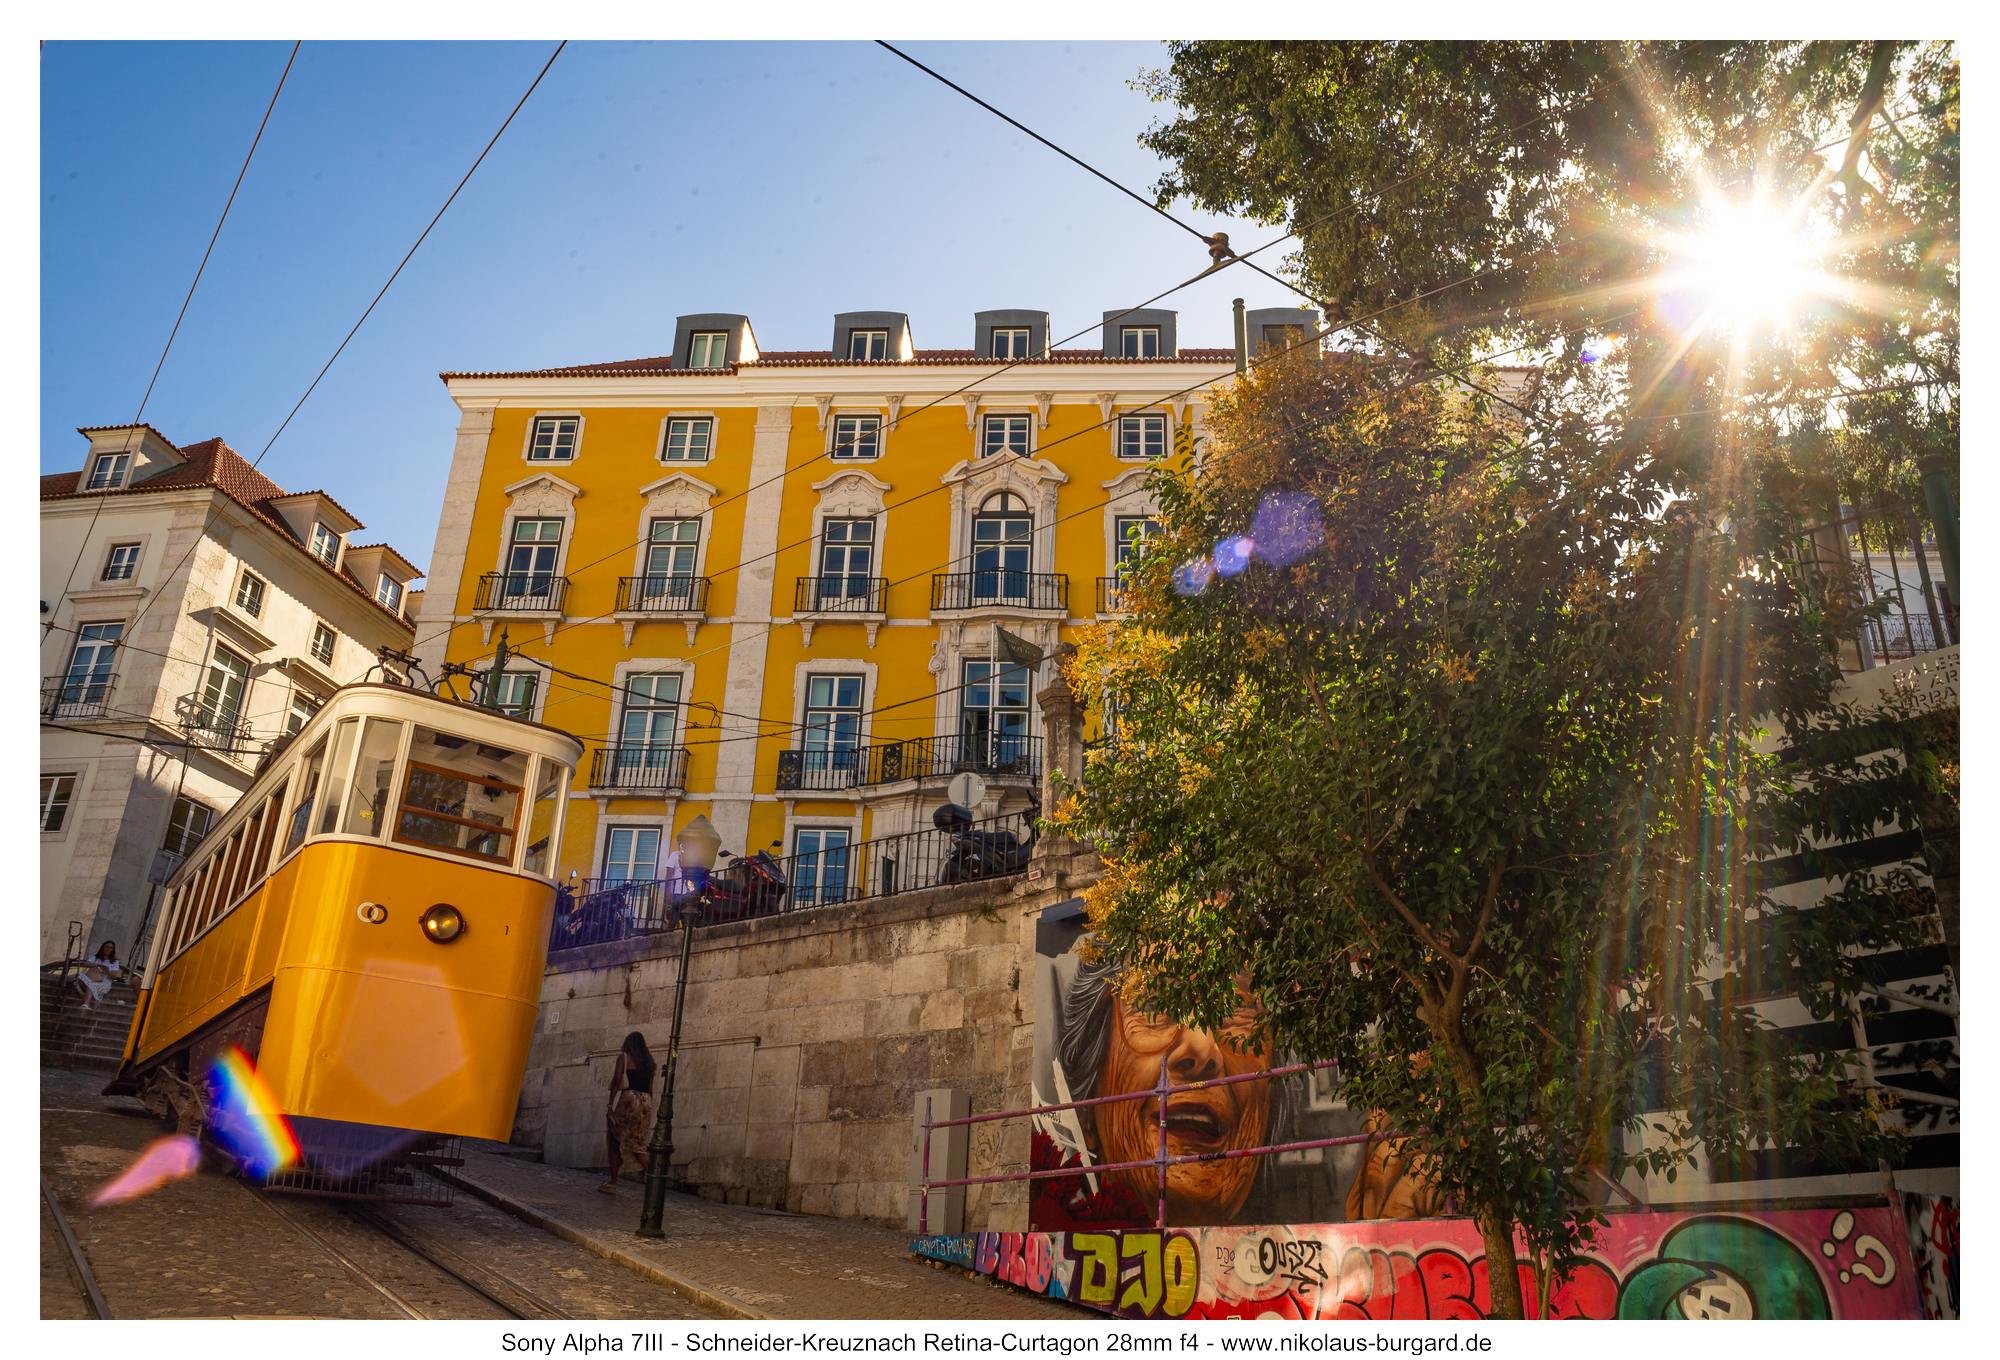
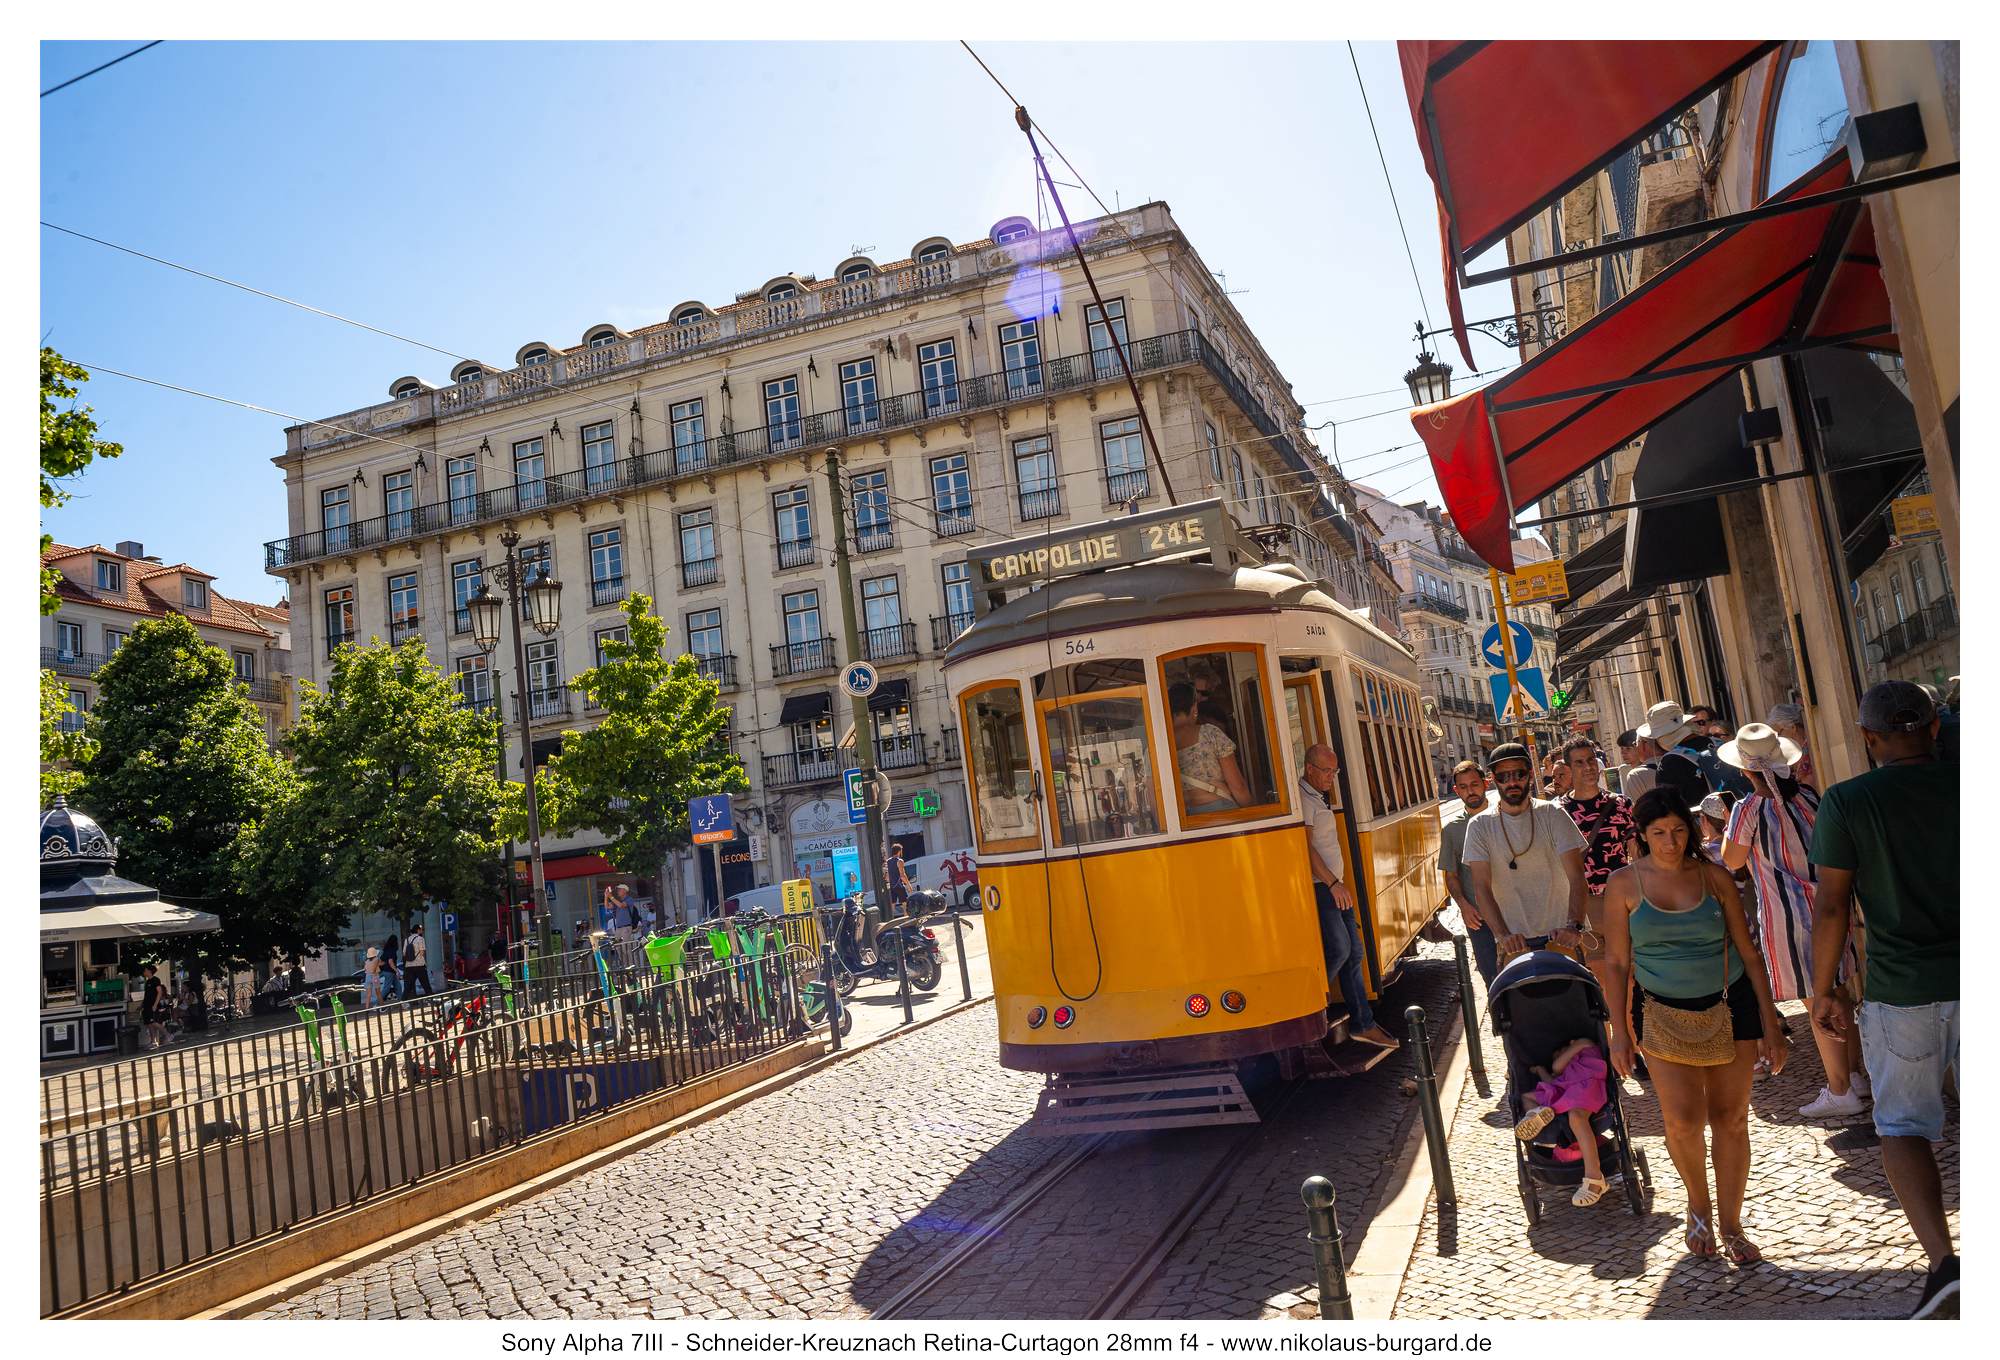
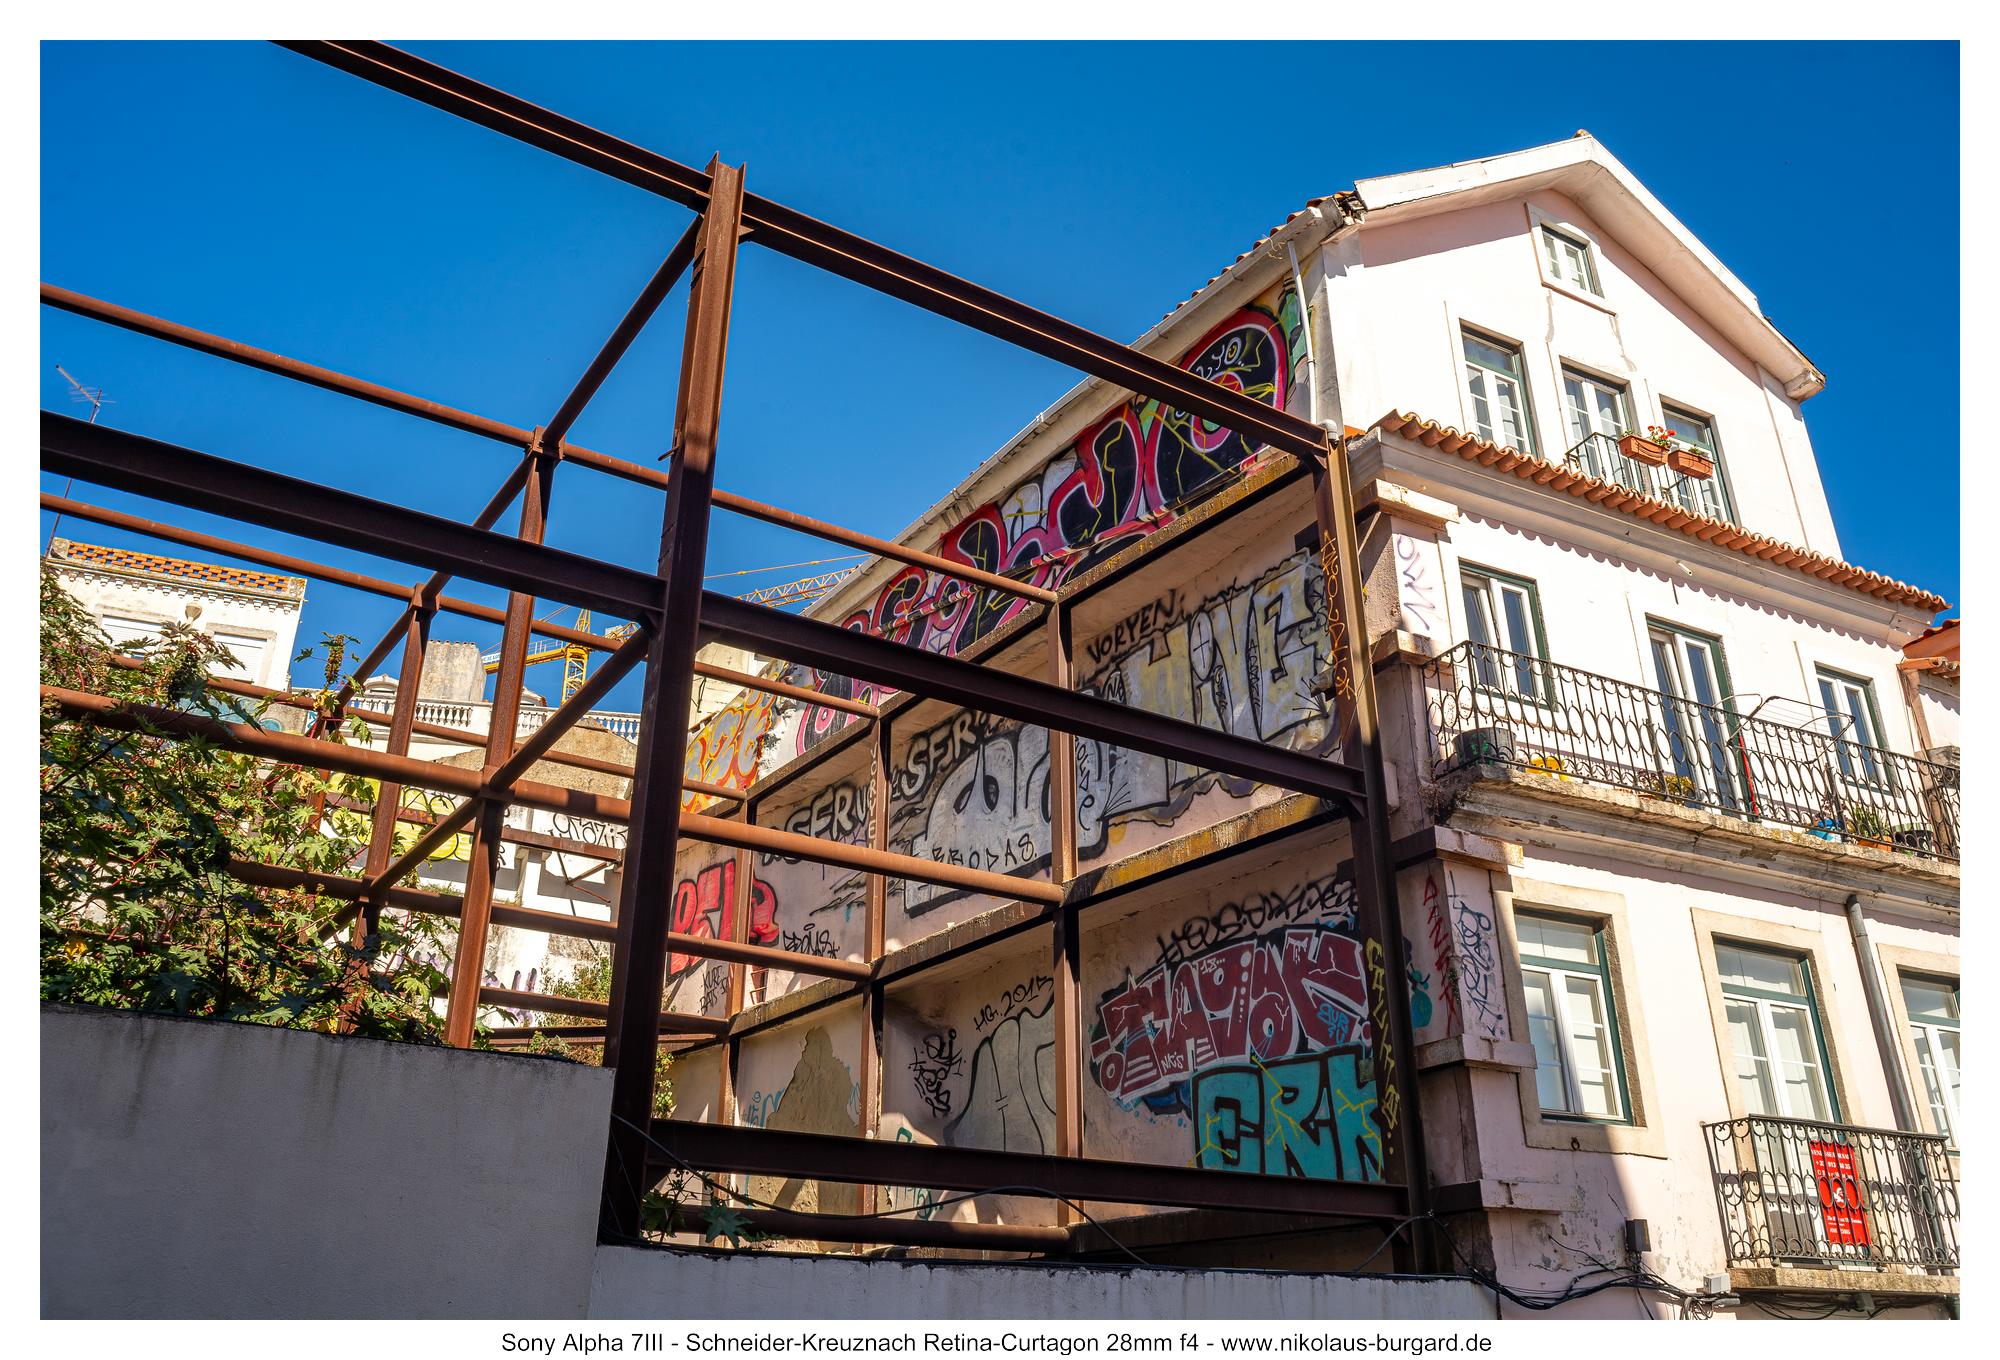
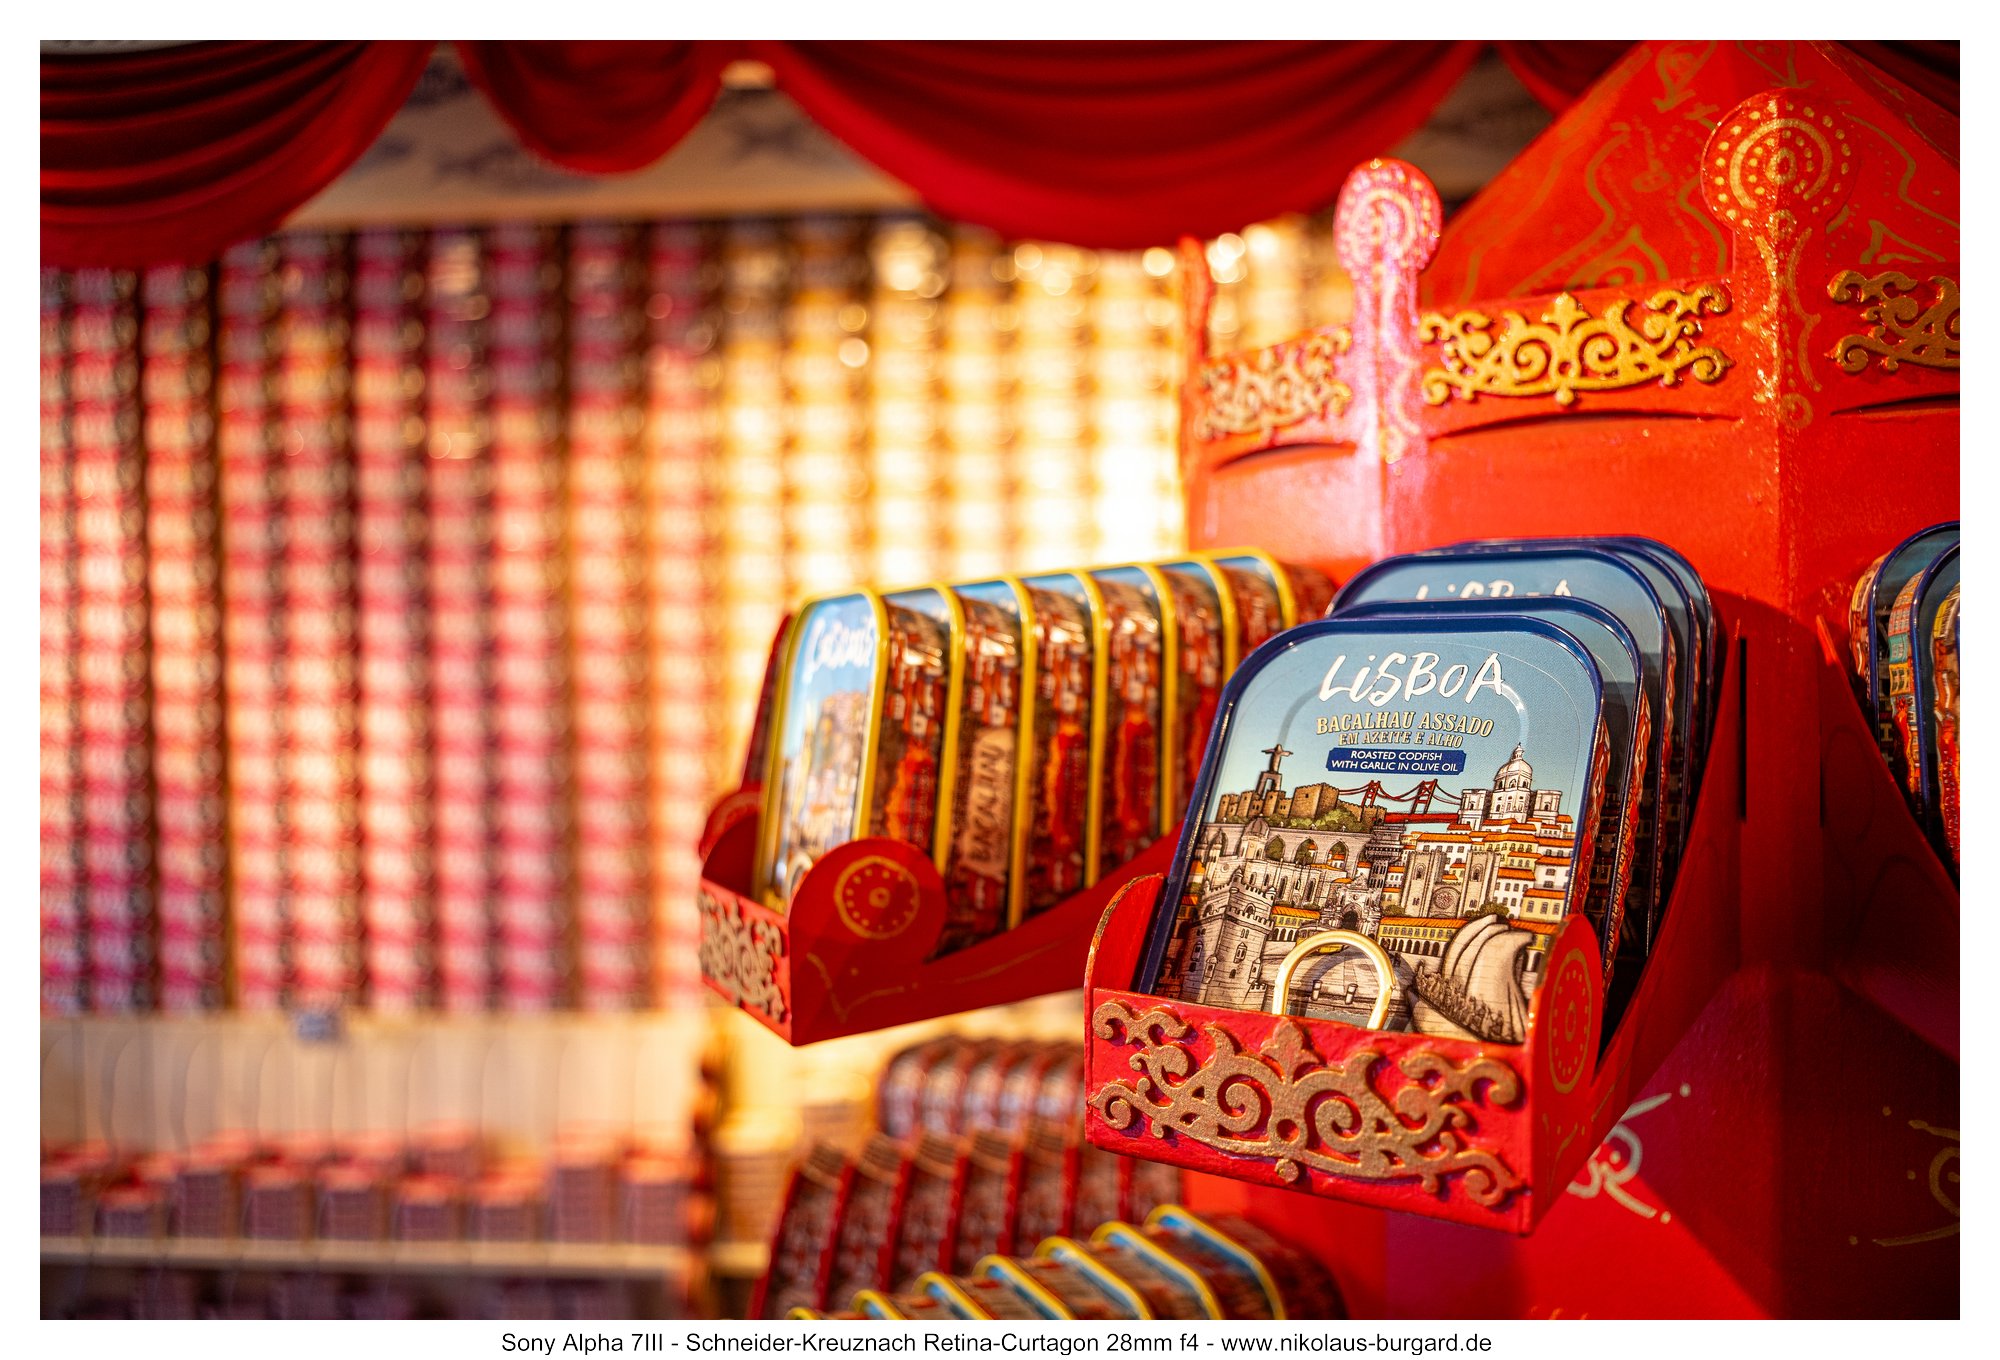
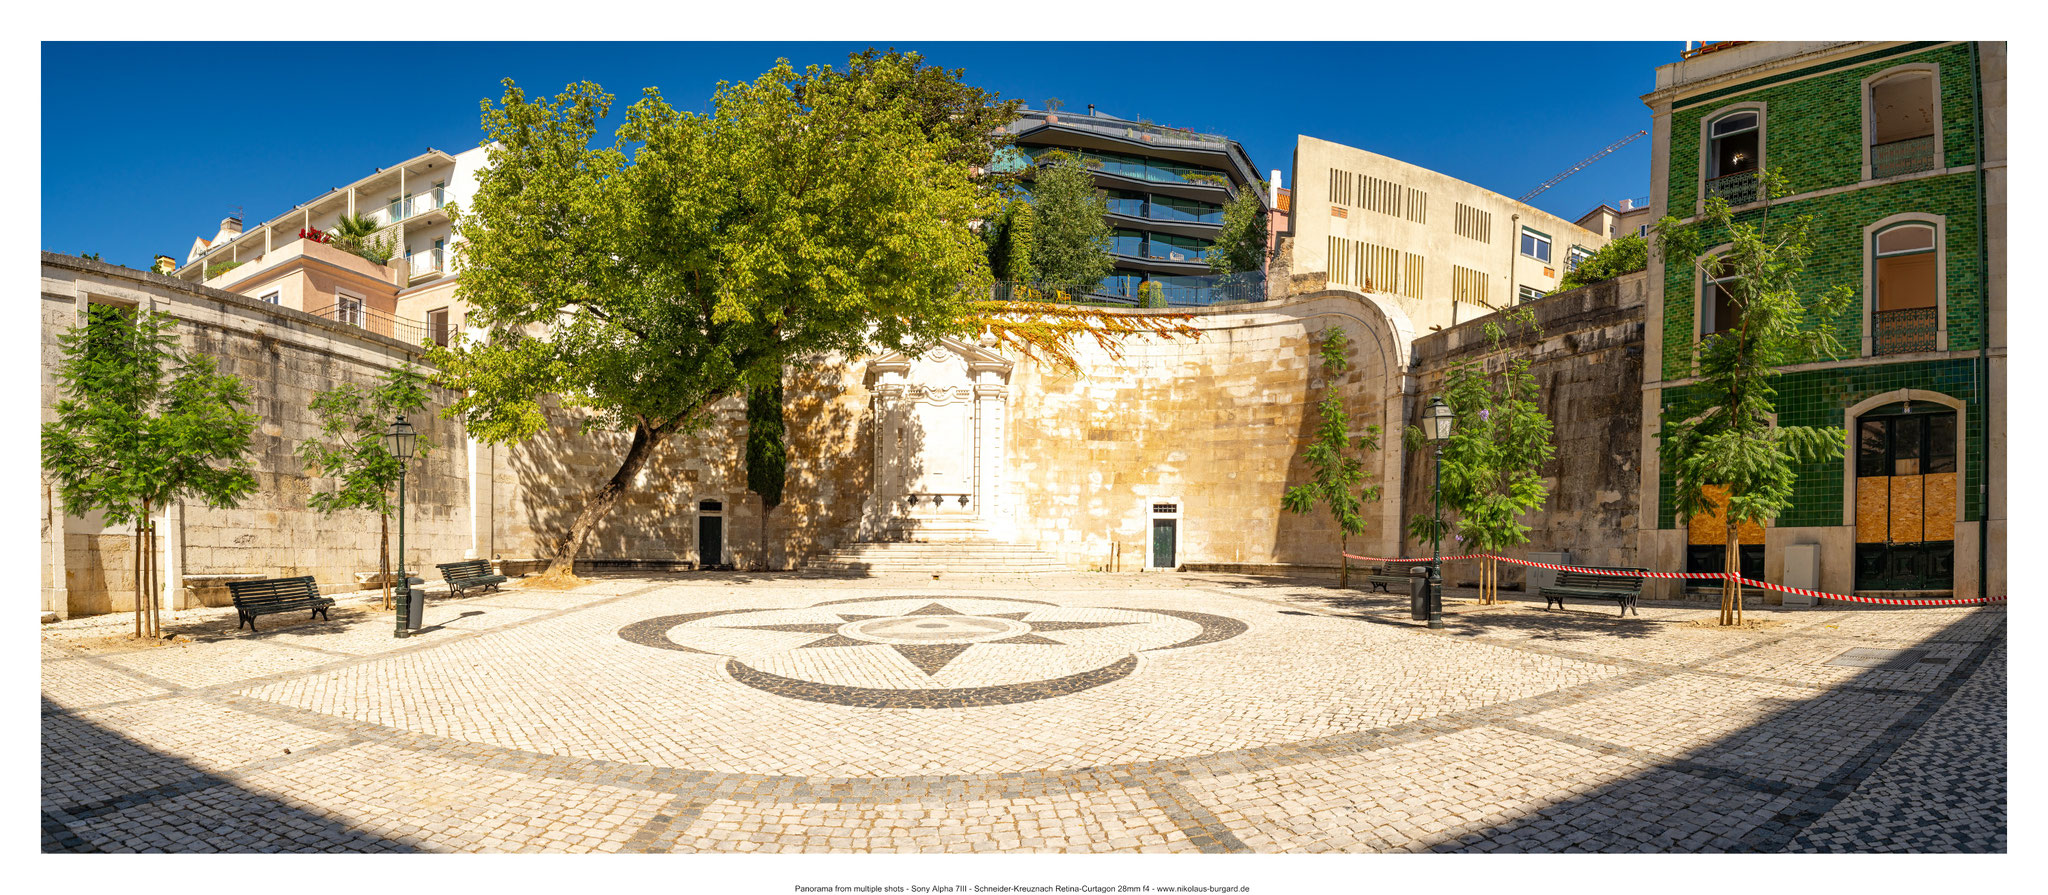
Bildserie: Lissabon Teil 2 / Picture Series: Lisbon pt. 2
Ausserhalb der belebten zentralen Punkte ist Lissabon erst recht interessant.
Die Gebäude und ihre Farben und Muster sowie die Straßenkunst sind mir das eine oder andere Foto wert gewesen! Es lohnt sich, auch mal außerhalb der Touristenströme umzuschauen!
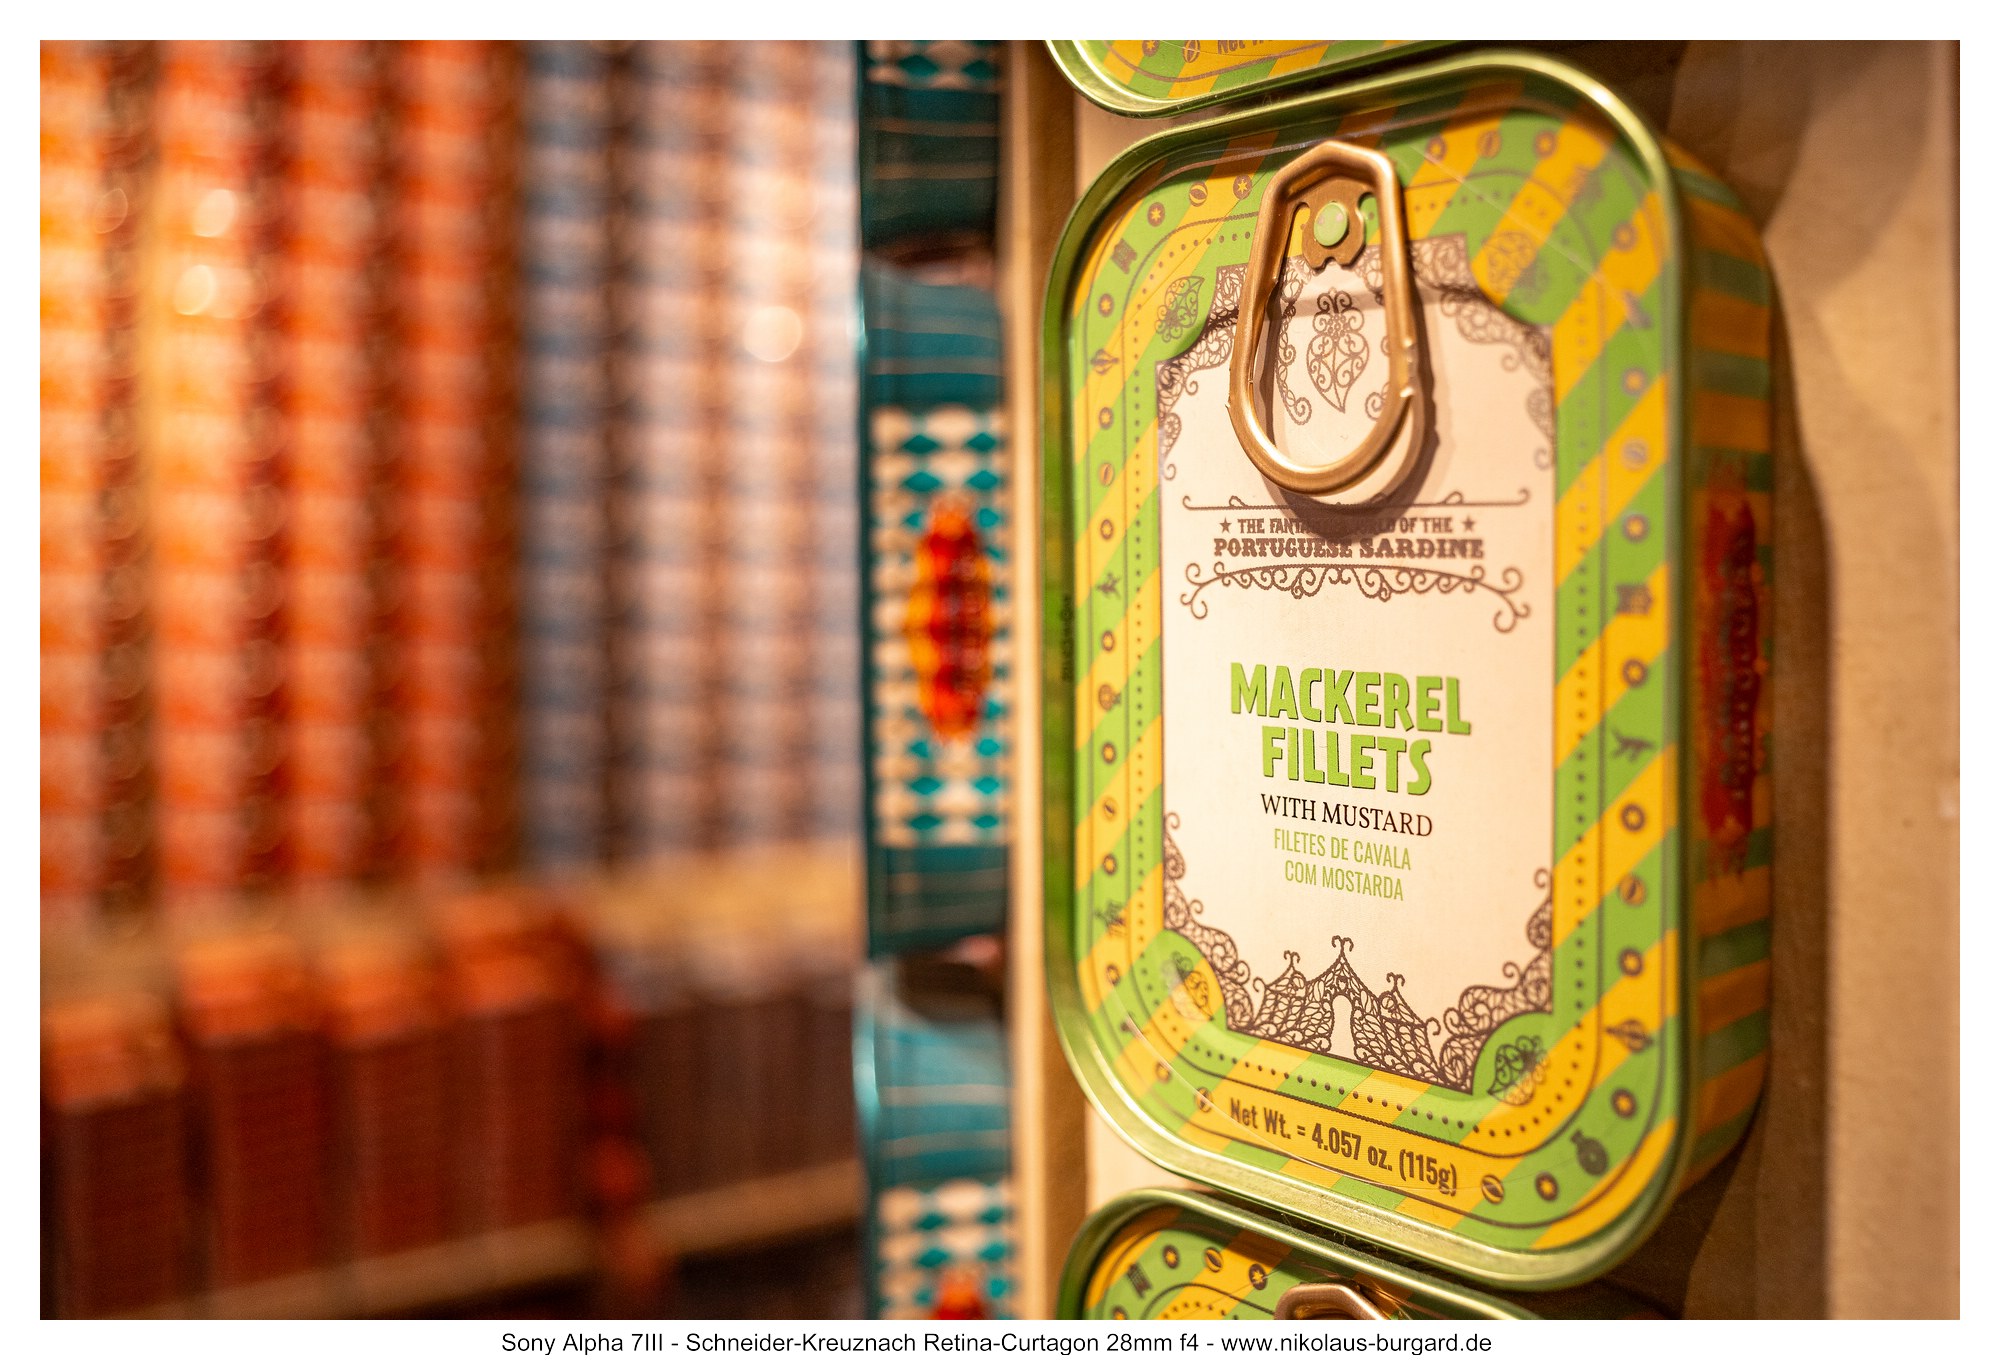
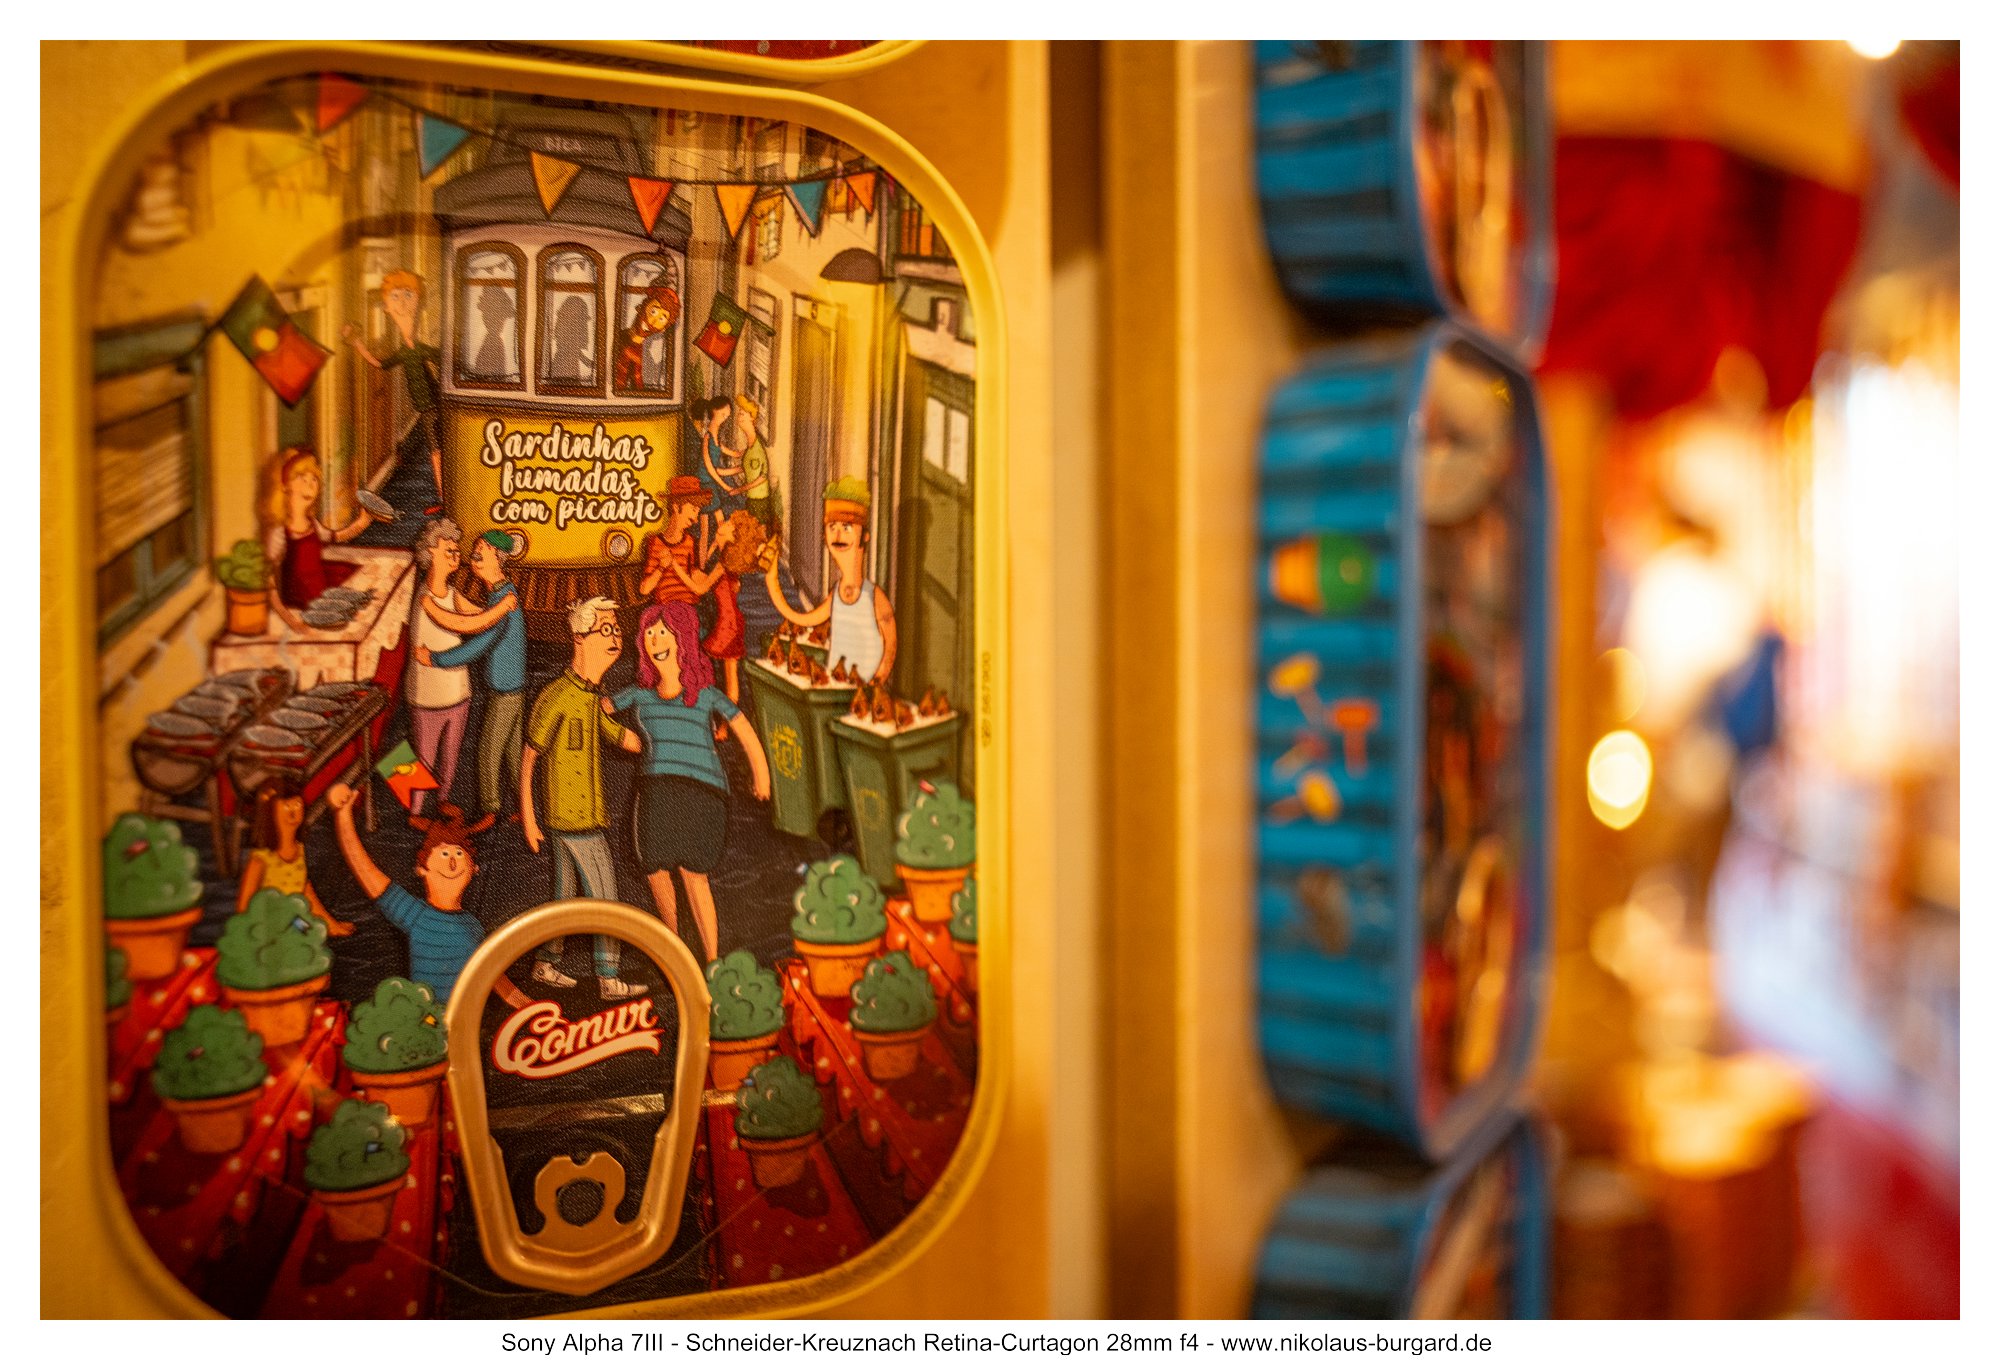
Und eines darf in Lissabon nicht fehlen: Sardinen!
Lisbon is even more interesting away from the bustling central areas.
The buildings, with their colors and patterns, as well as the street art, were definitely worth a few photos! It’s worth taking a look around away from the tourist crowds!
And there’s one thing you can’t miss in Lisbon: sardines!


Auch hier habe ich noch 2 Panoramaaufnahmen aus Hochformat-Bildern in Lightroom angefertigt:
Here, too, I created two panoramic images from portrait-oriented photos in Lightroom:

Mein Fazit / Conclusion
Das Schneider Kreuznach Retina Curtagon 28mm f4 war für mich in vieler Hinsicht ein überraschendes Objektiv. Man muss sich einfach bewusst machen, dass man bei der Konstruktion von Retrofokus-Weitwinkel- Objektiven im Jahr 1959, in dem das Objektiv erschien, noch in den Kinderschuhen steckte. Und die Aufweitung dieser Konstruktionen auf über 35mm erst recht.
Dass das Objektiv trotzdem auch im Jahr 2026 am Digitalsensor noch so performt und Freude bereitet, hatte ich im Vorfeld nicht erwartet.
Doch fassen wir zunächst die objektiv greifbaren Testergebnisse zusammen:
Die Bildschärfe ist im Bildzentrum bei Offenblende wirklich gut, und einmal Abblenden reicht für sehr gute Werte. Randscharf ist es ab f8, die beste Eckleistung wird bei f11 erreicht.
So eingesetzt, gibt es auch heute keinen Grund, sich über mangelnde Schärfe zu beklagen.
Die Vignette ist stark und verbessert sich erst weit abgeblendet auf normales Niveau.
Die Verzeichnung ist gut (wenn auch nicht komplett) korrigiert.
Farbfehler sind kaum ein Thema, weder die lateralen noch die longitudinalen chromatischen Aberrationen sind auffällig.
Im Gegenlicht ist das Retina Curtagon schwach, die Flares haben aber durchaus ihren Charme und sind gut berechenbar.
Die lange Naheinstellgrenze von 90cm darf auch nicht unerwähnt bleiben. Hier kann man sich aber mit der passenden Adaptionsmethode leicht behelfen.
Subjektiv gefallen mir die Bilder, die mit dem Objektiv entstanden sind, sehr gut.
Es hat sehr schön durchgezeichnete dunkle Bildbereiche und bringt von Haus aus eine etwas pastellige Farbanmutung mit, die sich deutlich von modernen Objektiven unterscheidet.
Nahaufnahmen sind scharf und die Hintergründe haben Charakter - sie sind durchaus unruhig, aber mir gefällt das manchmal kontrastierend zum "Weichzeichner-Bokeh-Einheitsbrei" gut.
Außerdem hat es wie alle DKL-Objektive diese Anfassqualität und Optik, die Wertigkeit ausstrahlen. Man schaut und fasst diese Objektivreihe einfach gerne an.
Im Anschluß an die abrundende Bildergalerie freue ich mich im Kommentarbereich wie immer auf eure Anmerkungen zu Objektiv und Testbericht.
The Schneider Kreuznach Retina Curtagon 28mm f/4 was a surprising lens for me in many ways. You have to realize that the design of retrofocus wide-angle lenses was still in its infancy in 1959, the year the lens was released. And extending these designs beyond 35mm was even more of a challenge.
I hadn’t expected beforehand that the lens would still perform so well and bring such joy on a digital sensor even in 2026.
But let’s first summarize the objectively measurable test results:
Image sharpness is really good in the center of the frame at wide-open aperture, and stopping down once is enough to achieve very good results. Edge sharpness is present starting at f/8, with the best corner performance achieved at f/11.
Used this way, there is still no reason to complain about a lack of sharpness today.
Vignetting is strong and only improves to a normal level when stopped down significantly.
Distortion is well (though not completely) corrected.
Chromatic aberrations are hardly an issue; neither lateral nor longitudinal chromatic aberrations are noticeable.
In backlighting, the Retina Curtagon performs poorly, but the flares have their own charm and are quite predictable.
The long minimum focusing distance of 90 cm should also be mentioned. However, this can be easily remedied with the appropriate adaptation method.
Subjectively, I really like the photos taken with this lens.
It renders dark areas of the image with beautiful detail and has a naturally slightly pastel color tone that clearly sets it apart from modern lenses.
Close-ups are sharp, and the backgrounds have character—they’re quite busy, but I actually like that sometimes as a contrast to the “soft-focus bokeh one-size-fits-all” look.
Furthermore, like all DKL lenses, it has that premium feel and look that exude quality. You simply enjoy looking at and handling this lens series.
Following the accompanying photo gallery, I look forward as always to your comments on the lens and this review in the comments section.
Diese Tests von Objektiven mit vergleichbarer Brennweite könnten auch interessant sein:
These tests of lenses with comparable focal length might also be interesting:
- Leitz / Leica Super-Angulon R 21mm f4
- Porst WW-Macro X-M 24mm f3.5
- Rollei Rolleinar 28mm f2.8 HFT
- Tokyo Kogaku RE Auto-Topcor 20mm f4
- Tokyo Kogaku RE Auto-Topcor 25mm f3.5
- Tokyo Kogaku RE Auto-Topcor 28mm f2.8


Kommentar schreiben
CanRoda (Donnerstag, 19 März 2026 19:52)
Als Besitzer einer Bessamatic hat man in den 60er Jahren sehnsüchtig nach diesem 28mm Curtagon für die Retina gesehen. Für die Voigtländer gab es als kürzeste Brennweite leider nur das Skoparex mit 35mm.
Insofern habe ich mit großem Interesse deine Vorstellung mit den interessanten und schönen Bildern angesehen. Die Firma Schneider hatte bei mir schon immer einen sehr guten Namen aber bei diesem 28er hätte auch die damalige Aussage des Konkurrenten Voigtländer gepasst ... "Weil das Objektiv so gut ist" !
Auch die geringe Verzeichnung der Linse hat mich mehr als überrascht , unglaublich gute Farbwiedergabe !
VG Ulrich
Joeweng (Donnerstag, 19 März 2026 22:29)
Meinen Dank für diesen detaillierten Bericht über dieses schöne Stück. Du hast wie immer alle entscheidenden Merkmale gut herausgearbeitet und ich kann aus eigener Erfahrung Deine Ergebnisse bestätigen. Das Curtagon ist ein Objektiv, das ich gerne verwende, sowohl adaptiert als auch an der originalen Kodak Retina.