
Carl Zeiss Planar 135mm f2 (C/Y)
Deutsche Textversion /
English Text Version (sorry for errors, no native english speaker)

21.04.2026
Das 1974 für die Contax / Yashica-Kameras eingeführte
Carl Zeiss Planar 135mm f2
war die ultra-lichtstarke mittlere Teleobjektiv-Option des Systemes.
Es war eine Blendstufe lichtstärker als das Sonnar 135mm f2.8,
erkauft durch erheblich mehr Gewicht und Größe.
Hier einige technische Angaben zum Objektiv:
- Länge: 101mm
- Gewicht: 790g
- Optisches System: 5 Linsen in 5 Gruppen
- Blende: von f2 bis f16 mit Clicks, 8 Blendenlamellen
- Naheinstellgrenze: 150cm
- Filterdurchmesser: 72Das im Jahr 1974 im Contax / Yashica mm
- Anschluß: C/Y-Bajonett
Und so sieht das gute Stück aus:
2026-04-21:
The 1974 introduced for the Contax/Yashica cameras
Carl Zeiss Planar 135mm f2
was the ultra-light-heavy medium telephoto lens option of the system.
It was a glare stage lighter than the Sonnar 135mm f2.8,
purchased by considerably more weight and size.
Here are some technical information on the lens:
- Length: 101mm
- Weight: 790g
- Optical system: 5 lenses in 5 groups
- Aperture: from f2 to f16 with clicks, 8 aperture slats
- Close-up limit: 150cm
- Filter diameter: 72The in 1974 in the Contax / Yashica mm
- Connection: C/Y bayonet
And this is what the good piece looks like:


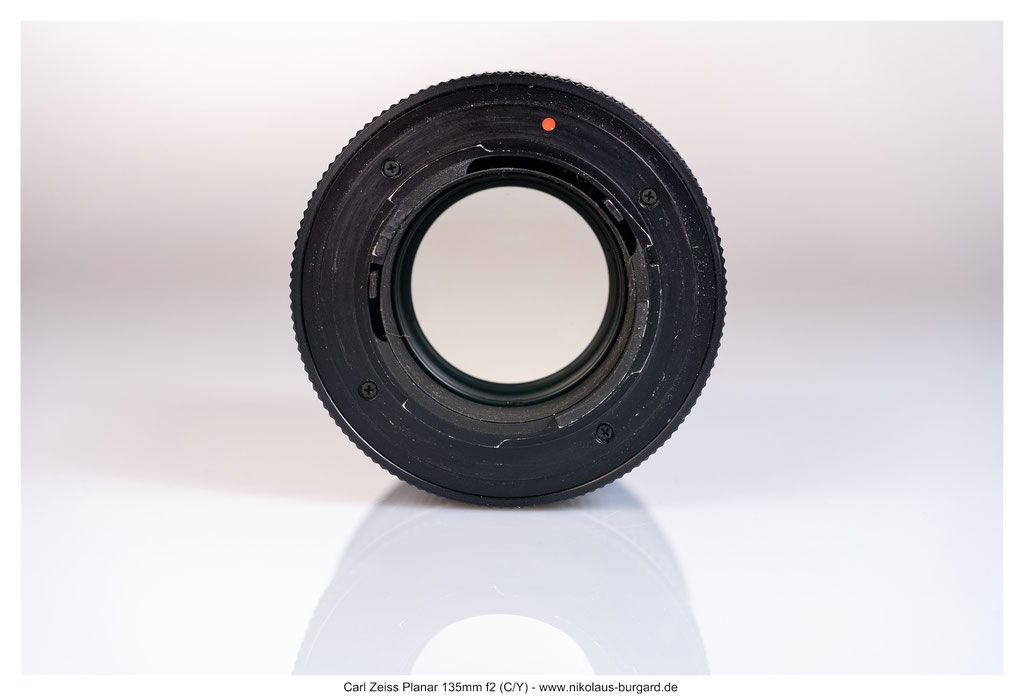

Das Objektiv hat eine normale Auszugsfokussierung.
Am Kürzesten ist es bei unendlich-Einstellung,
je weiter man in den Nahbereich fokussiert, desto länger wird es.
The lens has a normal extension focusing.
It is shortest at infinity setting,
the further you focus into the close range, the longer it becomes.


Adaptieren kann man das Objektiv (Variante 1) mit einem handelsüblichen Adapter von C/Y auf das gewünschte Kamerasystem.
Eine zweite Adaptionsmöglichkeit , die ich auch für diesen Test häufig alternativ angewendet habe, besteht darin, einen sogenannten Helicoid- (macro focusing-) Adapter einzusetzen.
Hierfür muss man sogenanntes Adapter-Stacking betreiben, bestehend aus folgenden Komponenten:
Zuerst ein dünner CY auf Canon EF-Adapterring gepaart mit einem Canon EF auf Sony E-Mount Helicoid-Adapter.
Dies ermöglicht sowohl die Fokussierung auf unendlich als auch im ausgedrehten Zustand eine deutliche Verkürzung der Naheinstellgrenze in den Nah- (Makro-) Bereich.
In den folgenden Bildern seht ihr den CY auf Sony E-Mount-Adapter (also Variante 1) einmal neben dem Objektiv und dann bereits an das Objektiv angebracht:
The lens (variant 1) can be adapted to the desired camera system with a standard adapter from C/Y.
A second adaptation option, which I have also often used alternatively for this test, is to use a so-called helicoid (macro focusing)
adapter.
For this, you have to operate so-called adapter stacking, consisting of the following components:
First, a thin CY to Canon EF adapter ring paired with a Canon EF to Sony E-Mount Helicoid adapter.
This allows both the focusing on infinity and in the turned-out state a significant shortening of the close-focusing limit into the macro
range.
In the following pictures you can see the CY on Sony E-mount adapter (i.e. variant 1) once next to the lens and then already attached to the lens:
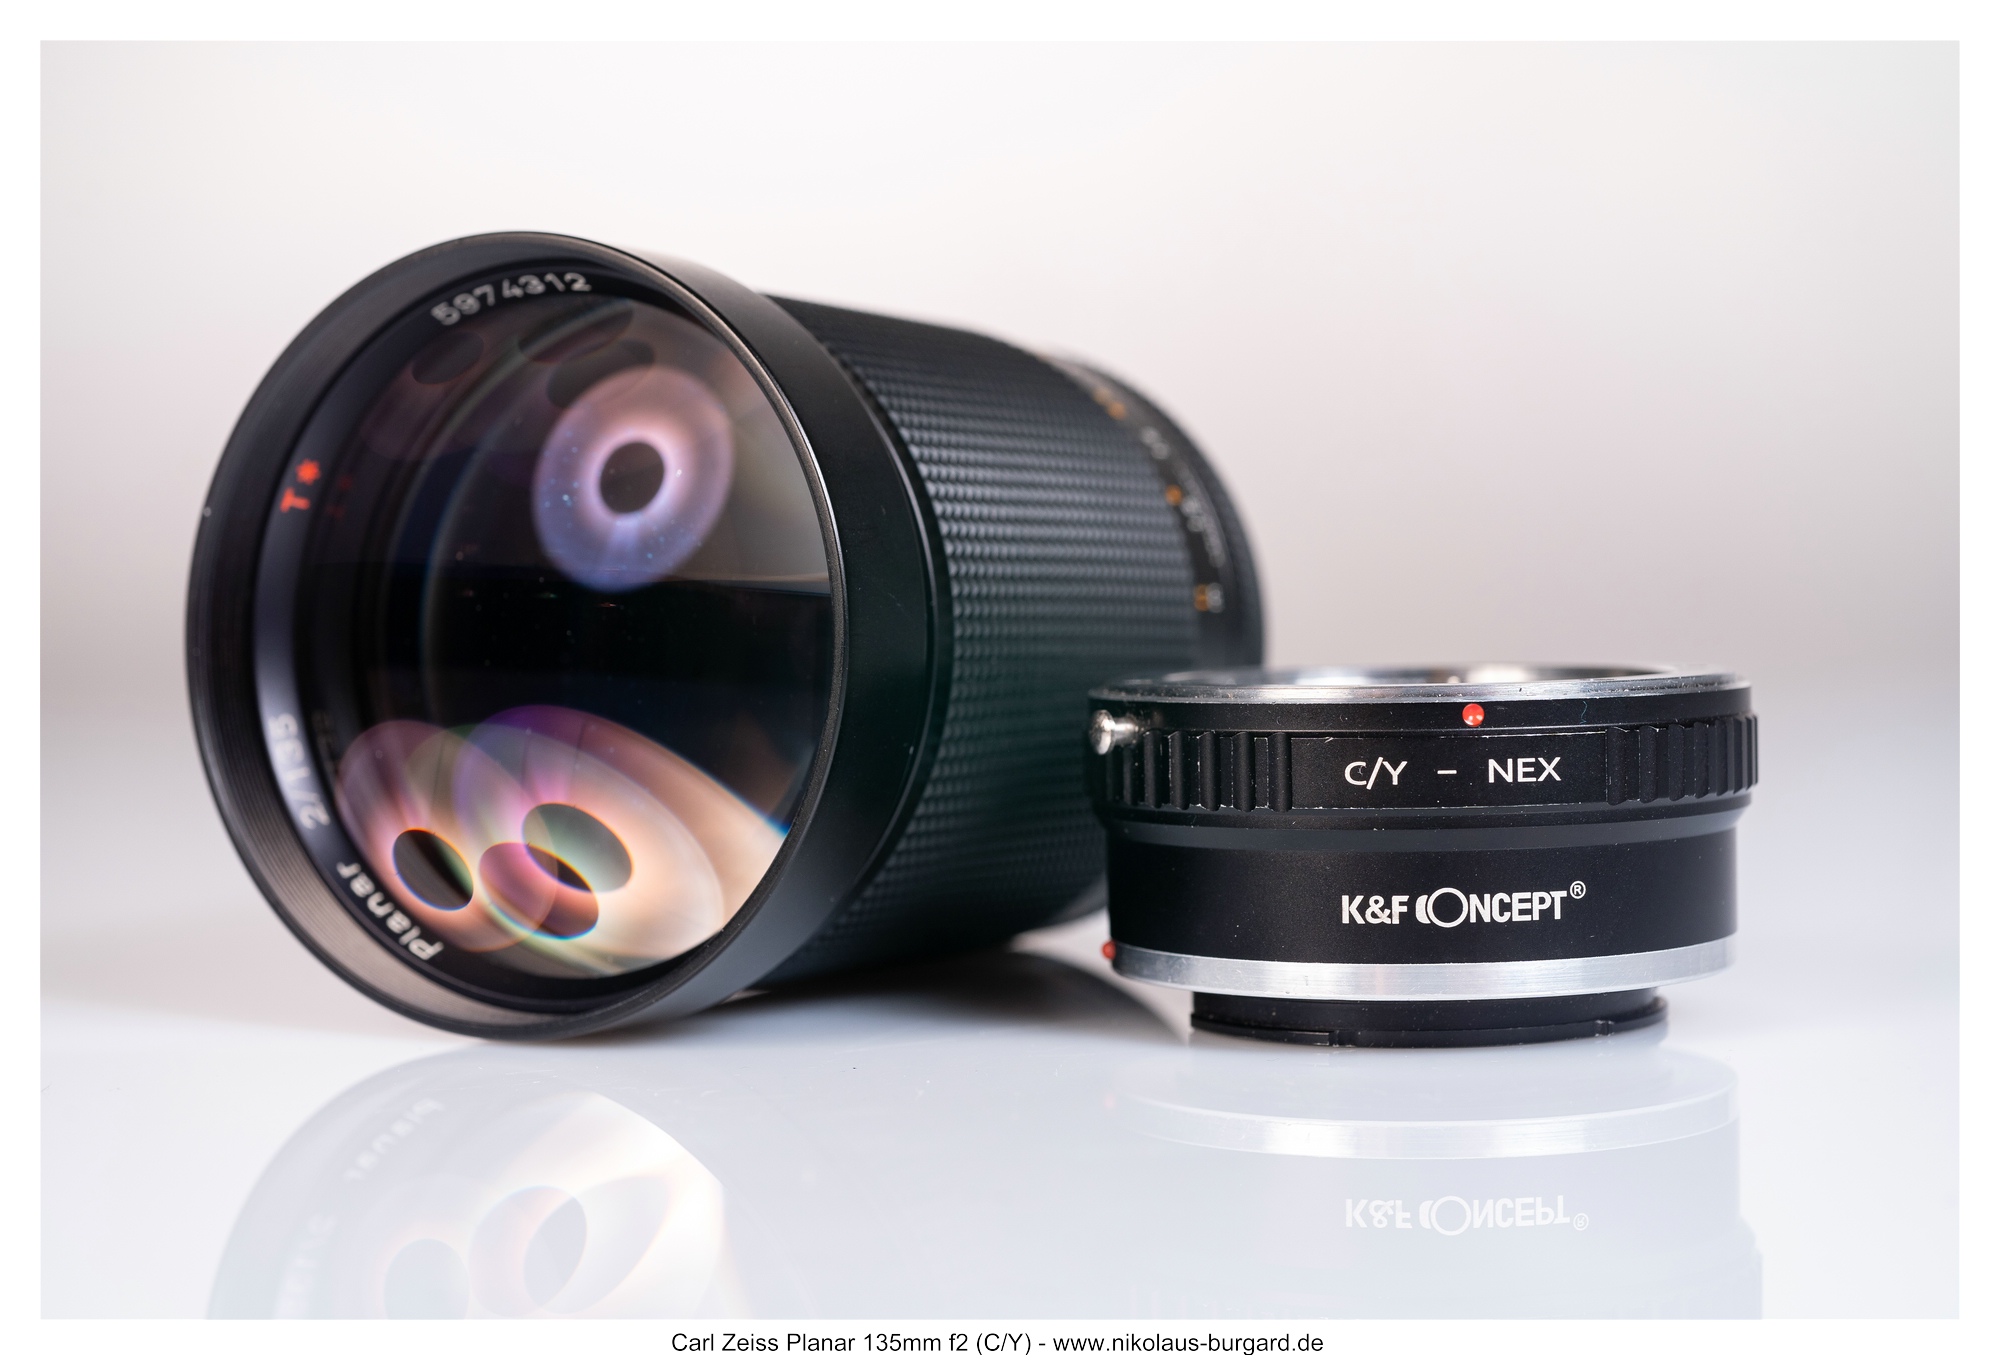

Adaptiert an eine der Testkameras (hier die Sony Alpha 7RIII) ergibt sich eine Kombination aus Objektiv und Kamera, die aufgrund der großen Frontlinse gewichtsmäßig nicht gut austariert ist und auch recht lang ausfällt.
Um es kurz zu machen, das Planar ist ein großes, schweres und etwas unhandliches Objektiv - zusammen mit der Kamera hat man fast 2 kg in der Hand.
Das Testobjektiv ist in sehr gutem Zustand, sowohl die Glaselemente als auch Blende und Bedienringe sind "wie neu".
Adapted to one of the test cameras (here the Sony Alpha 7RIII) results in a combination of lens and camera, which is not well balanced in terms of weight due to
the large front lens and is also quite long.
To make it short, the planar is a big, heavy and somewhat unwieldy lens - together with the camera you have almost 2 kg in your hand.
The test lens is in very good condition, both the glass elements and aperture and operating rings are "like new".


Zwingend erforderlich ist bei einem alten Teleobjektiv wie diesem ein vernünftiger Streulichtschutz.
Hierfür habe ich eigentlich immer eine passende Metall-Tele-Gegenlichtblenden benutzt, wie es sie auf den großen Handelsplattformen für kleines Geld zu kaufen gibt.
Kameras für die Bilder dieses Tests waren die Sony Alpha 7III (Kleinbildformat, 24MP) und die Sony Alpha 7RIII (Kleinbildformat, 42MP).
Die analytischen Bilder zur Bildschärfe sind alle mit der Sony Alpha 7RIII entstanden.
Die jeweils verwendete Kamera steht in den Bildunterschriften.
Alle Bilder sind im raw-Format aufgenommen worden und wurden in Lightroom entwickelt.
Ein großes Dankeschön geht an meinen Fotofreund Dr. Kolio Raltchev für das Ausleihen des Testobjektives.
A reasonable scattered light protection is absolutely necessary with an old telephoto lens like this.
For this I have always used a suitable metal-tele counter-light hood, as it is available on the large trading platforms for small money to buy.
Cameras for the images of this test were the Sony Alpha 7III (small image format, 24MP) and the Sony Alpha 7RIII (small screen format, 42MP).
The analytical images for image sharpness have all been created with the Sony Alpha 7RIII.
The camera used in each case is in the captions.
All images have been taken in raw format and were developed in Lightroom.
A big "Thank You" goes to my photo-friend Dr. Kolio Raltchev for loaning me the test sample of the lens.

Bildschärfe / Sharpness
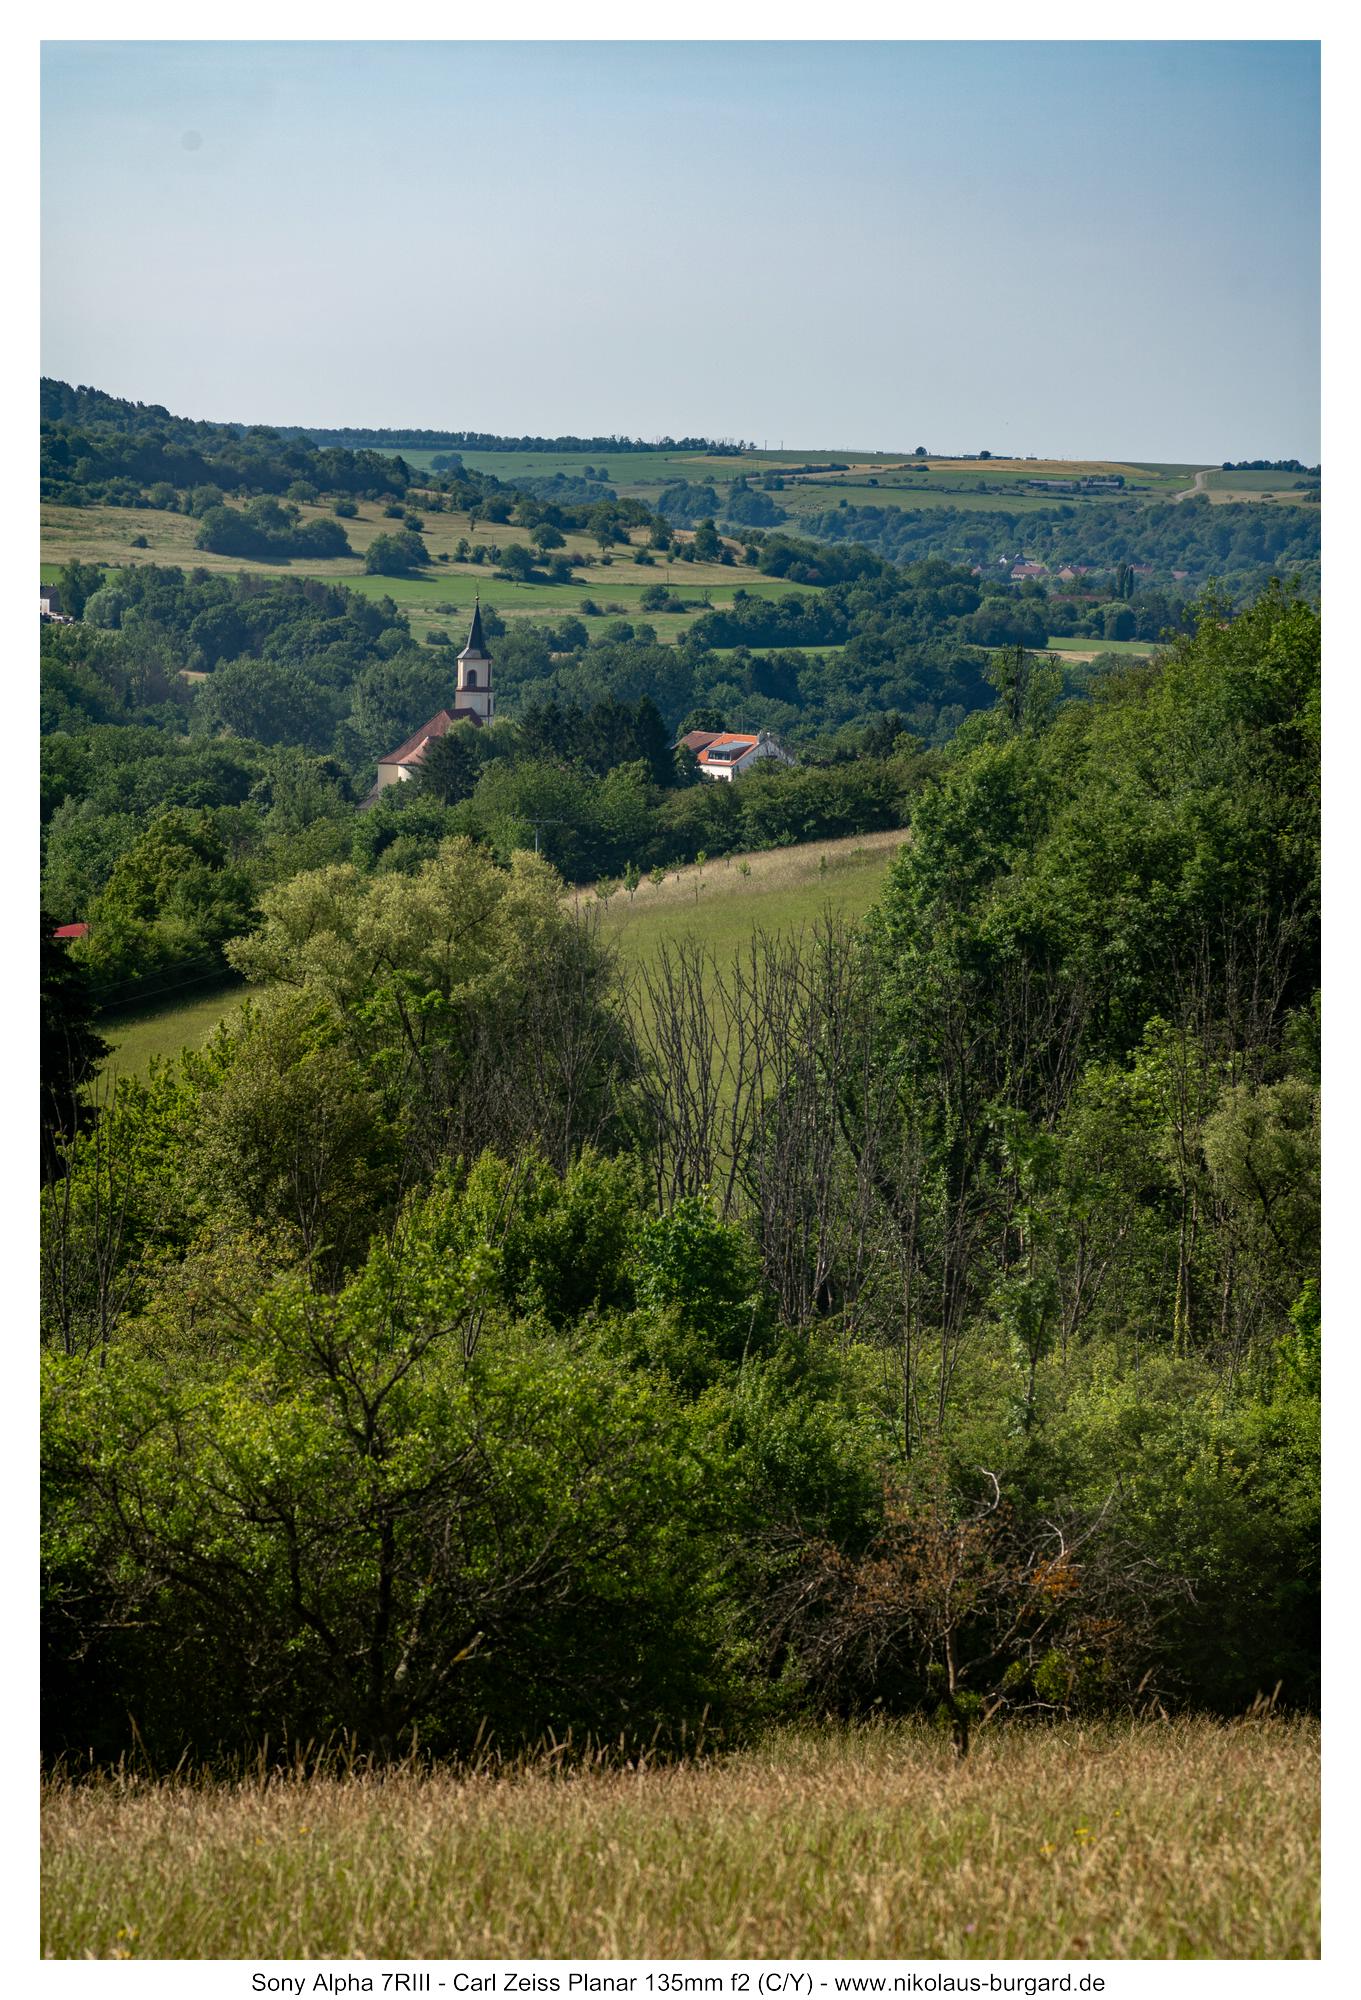
Ich habe eine Bildreihe zur Bewertung der Schärfe für euch angefertigt, bei der sowohl das Bildzentrum als auch die Bildecke in einer Schärfeebene liegen.
Fokuspunkt war das Dach des Hauses rechts der nach oben führenden Straße.
Das Haus in der rechten unteren Bildecke liegt auf der gleichen Höhe und somit in der gleichen Schärfeebene.
Die Blendenreihe zeigt die Werte f2 - f2.8 - f4 - f5.6 - f8 - f11
I have created a series of pictures to evaluate the sharpness for you, in which both the picture center and the picture corner are located in a field
level.
The focus was the roof of the house to the right of the upwards leading road.
The house in the lower right corner of the picture is located at the same height and thus in the same field level.
The aperture series shows the values f2 - f2.8 - f4 - f5.6 - f8 - f11


Die vom Objektiv verursachte Vignettierung ist auch bei Offenblende gut sichtbar.
Bei f2.8 ist sie schon fast verschwunden, ab f4 unkritisch.
Als nächstes folgen 100%-Vergrößerungen aus der Bildmitte vom Fokuspunkt,
in der gleichen Reihenfolge wie oben:
The vignetting caused by the lens is also clearly visible when the open aperture is open.
At f2.8 it is almost gone, from f4 uncritical.
Next, 100% magnifications from the center of the image from the focus point follow, in the same order as above:


Bei f2 ist die Schärfe in der Bildmitte auf gutem Niveau. Es gibt einen leichten Schleier aufgrund der sphärischen Aberration und der Kontrast ist sichtbar gemindert. Auffällig sind auch die loCA's, vor allem in Form von Purple Fringing.
Bei f2.8 verschwindet der Schleier, die Kontraste werden viel besser und die Schärfe erreicht schon sehr gutes Niveau. Das Purple Fringing ist noch erkennbar.
Bei f4 steigert sich die Schärfe auf hervorragendes Niveau, das Purple Fringing verschwindet.
F5.6 sowie f8 bleiben hierzu unverändert und auch bei f11 ist noch keine Verringerung der Schärfe durch die Beugung wahrnehmbar.
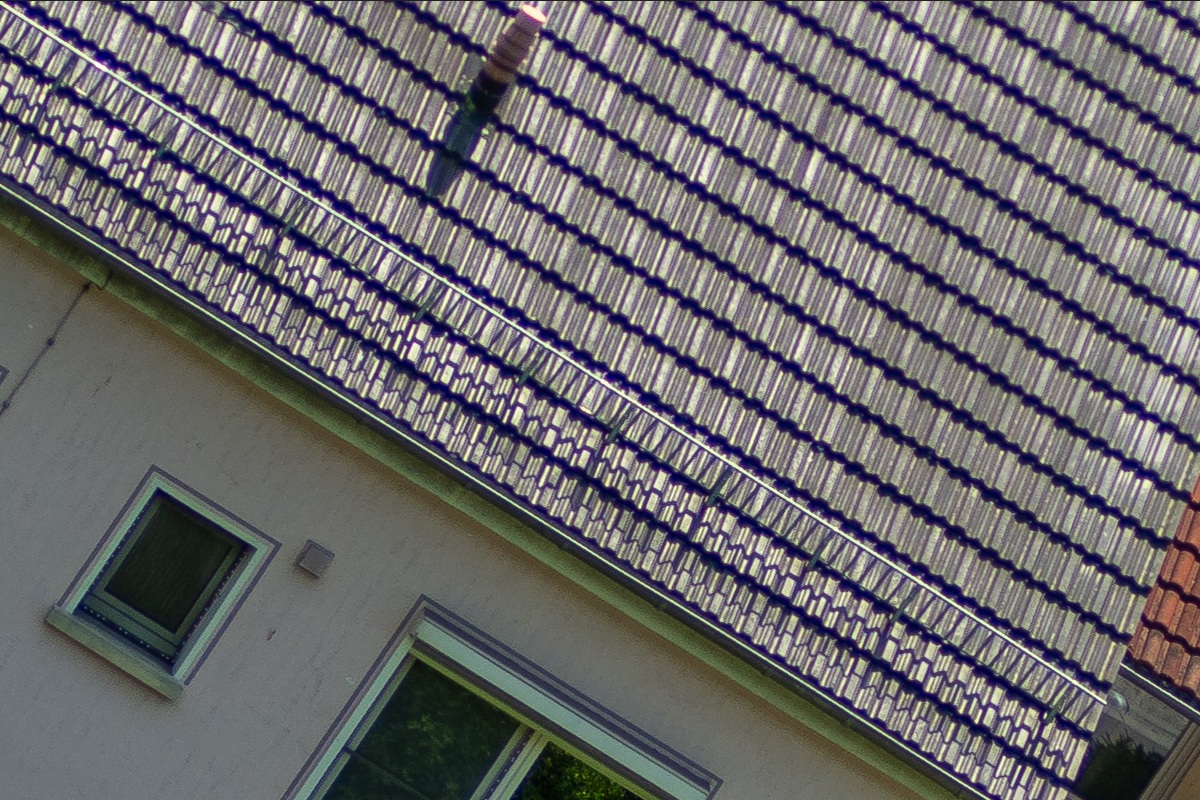
Auch aus der Bildecke unten rechts habe ich 100%-Vergrößerungen vorbereitet:
At f2, the sharpness in the middle of the picture is at a good level. There is a slight veil due to the spherical aberration and the contrast is visibly reduced.
Also striking are the loCA's, especially in the form of Purple Fringing.
At f2.8 the veil disappears, the contrasts get much better and the sharpness already reaches very good level. The Purple Fringing is still
recognizable.
At f4, the sharpness increases to an excellent level, the Purple Fringing disappears.
F5.6 and f8 remain unchanged for this purpose and no reduction in the sharpness due to the diffraction is yet perceptible even with f11.
Also from the picture corner on the lower right I prepared 100% magnifications:


In der Bildecke sieht die Bewertung folgendermaßen aus:
Bei f2 ist die Eckschärfe bereits ganz gut, die Vignette dunkelt das Bild allerdings sichtbar ab.
Ab f2.8 bis f5.6 steigern wir uns über gutes bis auf sehr gutes Schärfeniveau. Auch die Vignette verschwindet restlos.
Kleiner Wermutstropfen ist das starke Purple Fringing, das auch bis f5.6 sehr deutlich bleibt.
Bei f8 und f11 erreicht auch die äußere Ecke ausgezeichnetes Schärfeniveau und die Farbfehler fallen nicht mehr ins Gewicht.
Zusätzlich zu den loCA's sieht man auch bei allen Vergrößerungen aus der Ecke relativ deutliche Spuren von lateralen chromatischen Aberrationen.
Fazit:
Auf weite Distanz ist das Objektiv in der Bildmitte bei Offenblende schon gut scharf - die Kontraste sind noch steigerungsfähig . Bei f2.8 ist die Schärfe schon sehr gut, ab f4 ausgezeichnet.
Es gibt nur sehr wenig Rand- und Eckabfall.
Randscharf ist das Objektiv bei f4.
Die Ecken sind schon ab Offenblende ordentlich scharf und steigern sich durch Abblenden bis f8 kontinuierlich bis auf hervorragendes Niveau. Hat man in den Eckbereichen relevante Details, reicht es auf f5.6 abzublenden.
In the picture corner, the evaluation looks like this:
With f2, the corner sharpness is already quite good, but the vignette visibly darkens the image.
From f2.8 to f5.6 we increase over good to very good level of sharpness. The vignette also disappears completely.
The small drop of vermouth is the strong Purple Fringing, which remains very clear even up to f5.6.
At f8 and f11, the outer corner also achieves excellent sharpness level and the color errors are no longer significant.
In addition to the loCA's, you can also see relatively clear traces of lateral chromatic aberrations at all magnifications from the
corner.
Conclusion:
For a long distance, the lens in the center of the picture is already well sharp with the open aperture - the contrasts are still increasing. At f2.8 the
sharpness is already very good, from f4 excellent.
here is very little edge and corner fall-off.
The lens is edge-sharp at f4.
The corners are already neatly sharp from wide open and increase continuously to an excellent level by f8 . If you have relevant details in the corner
areas, it is enough to stop down to f5.6.
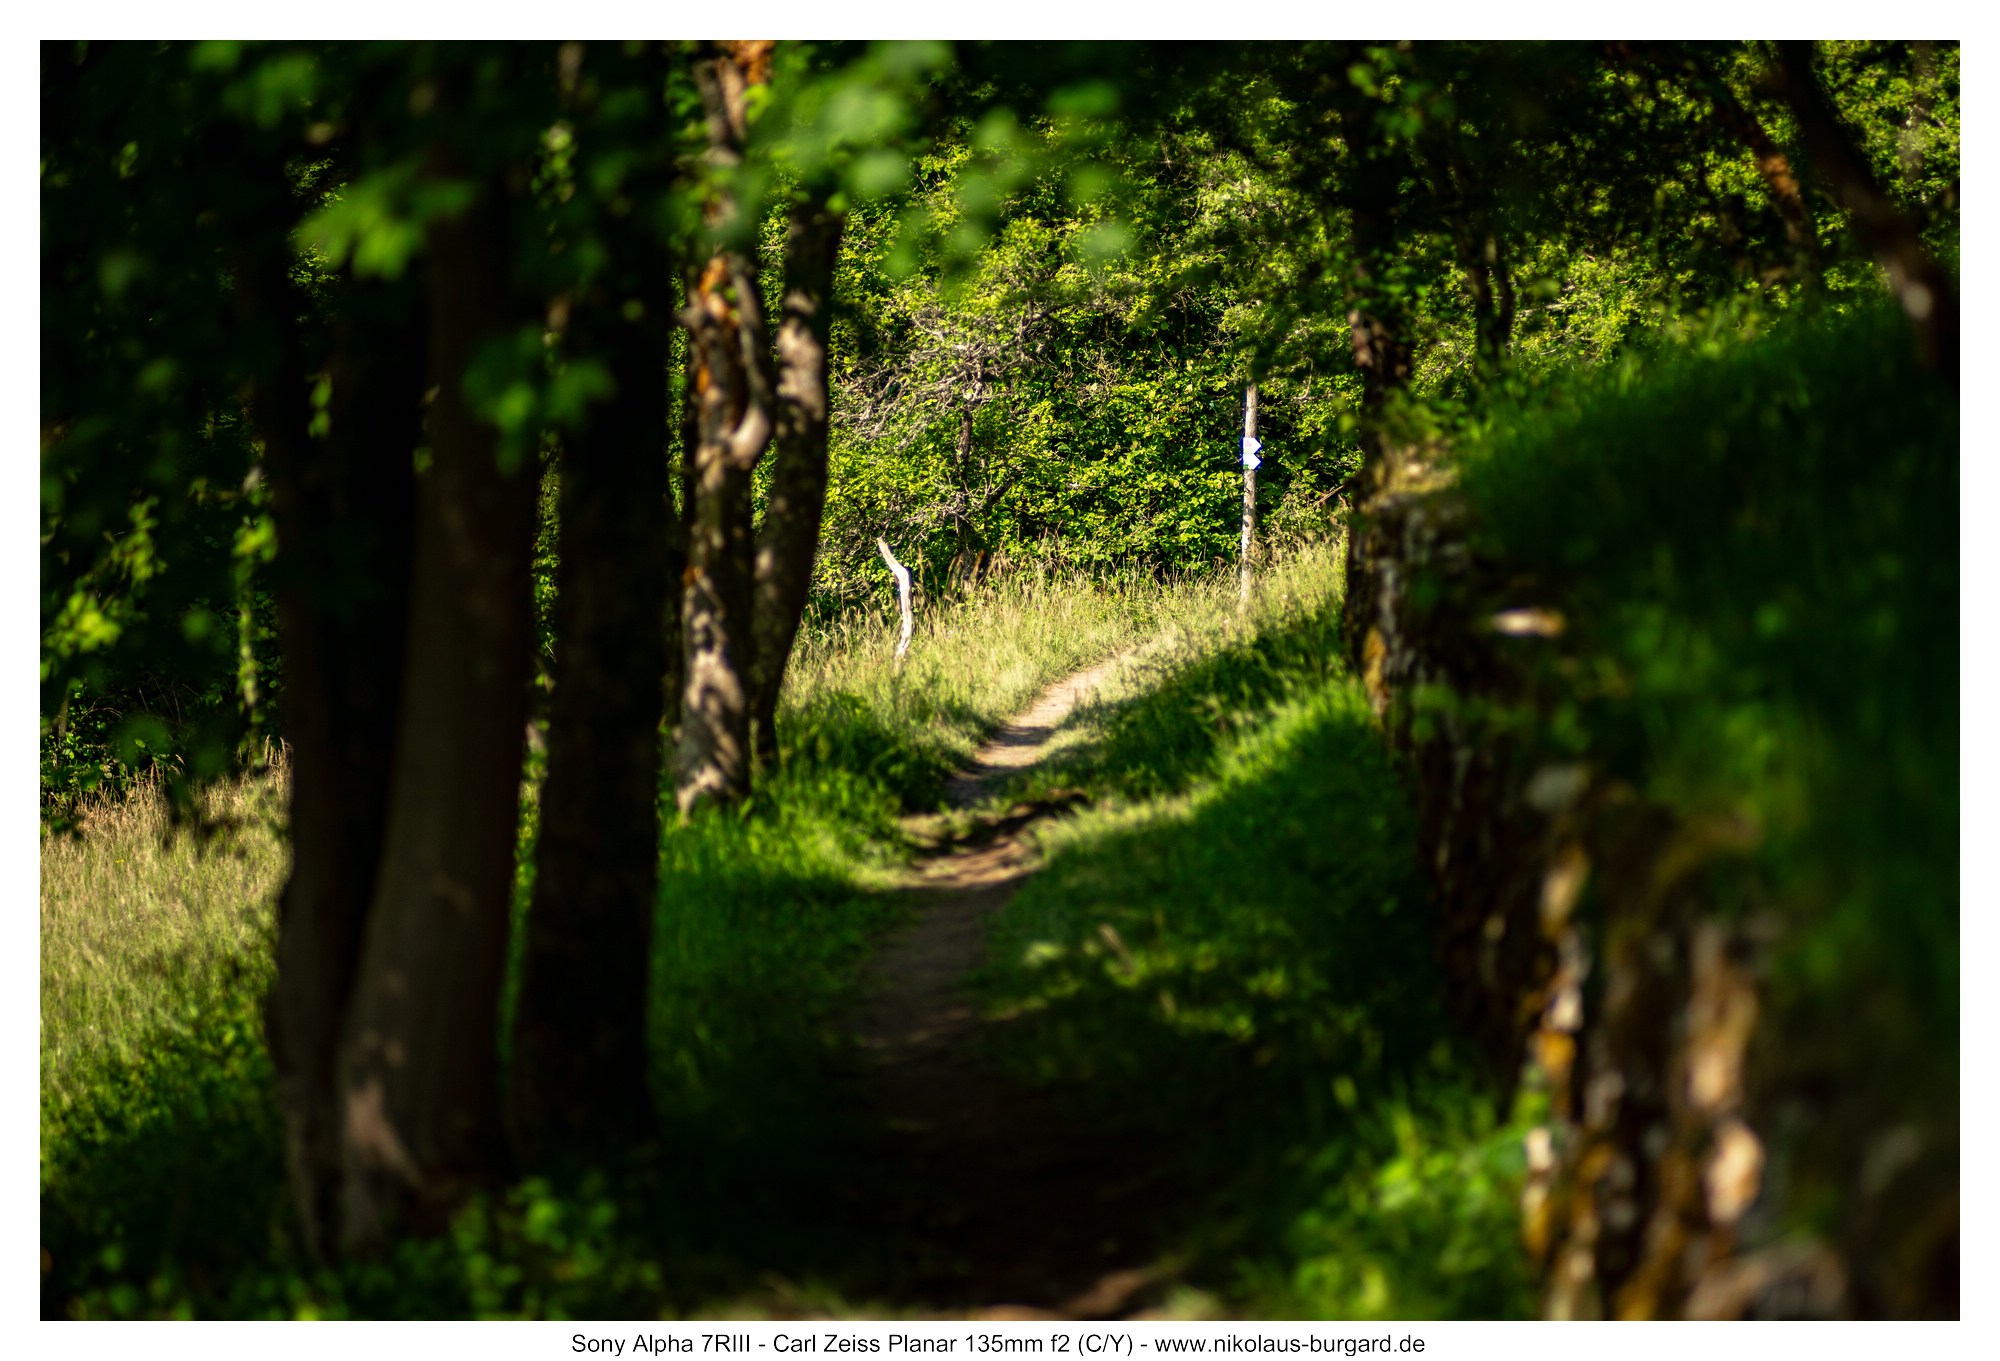
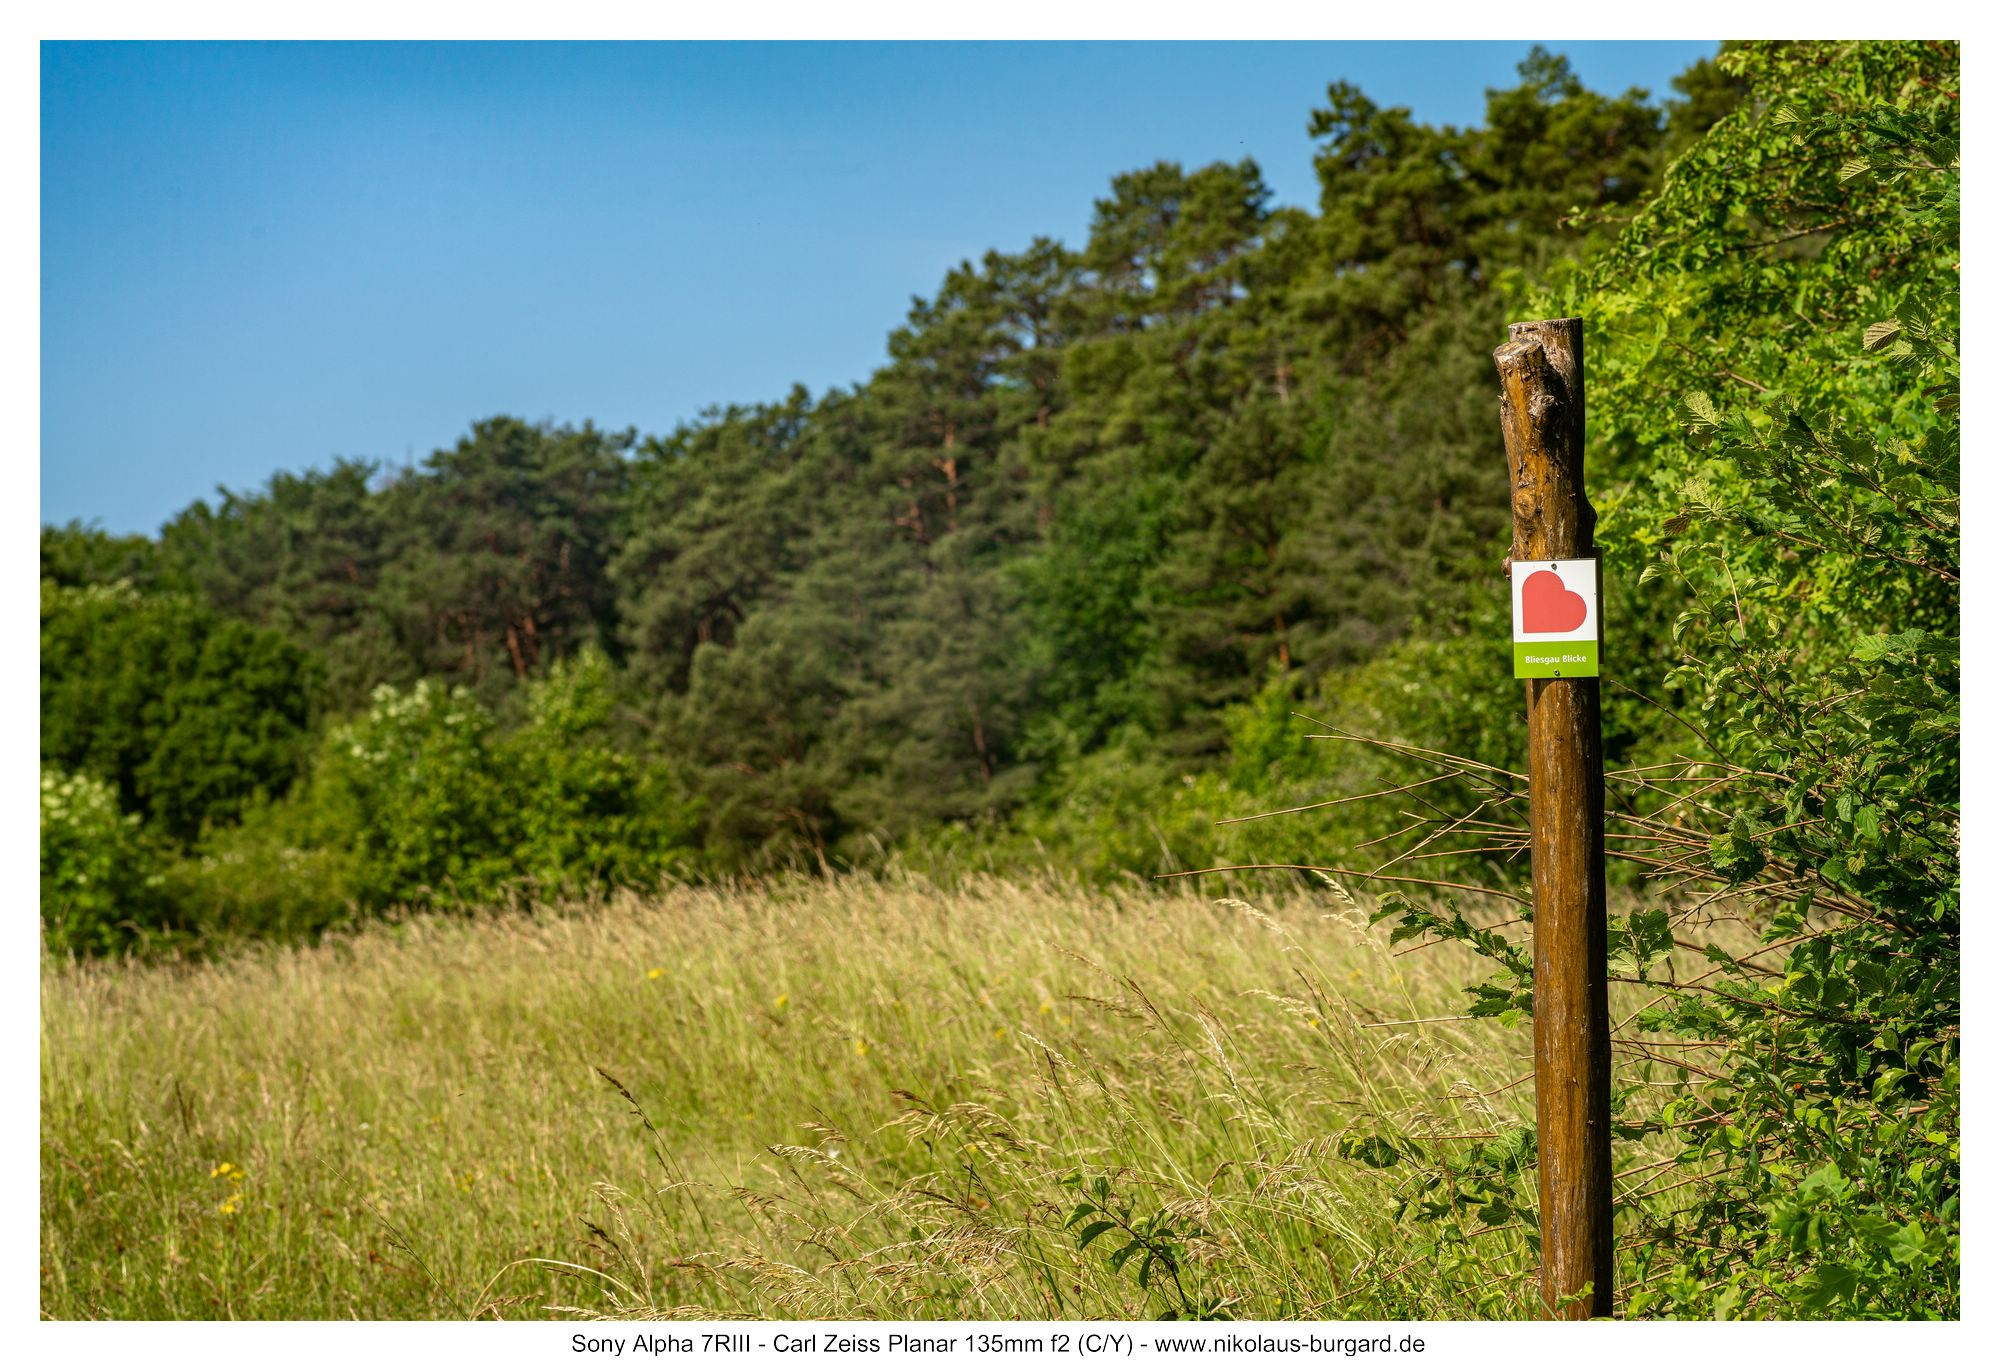
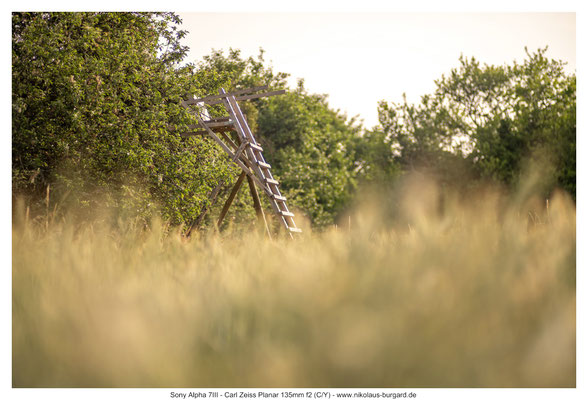
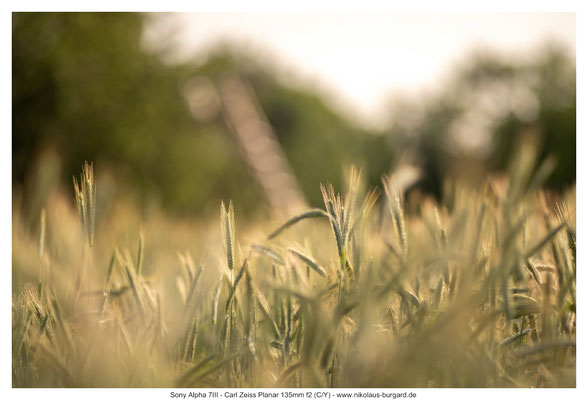
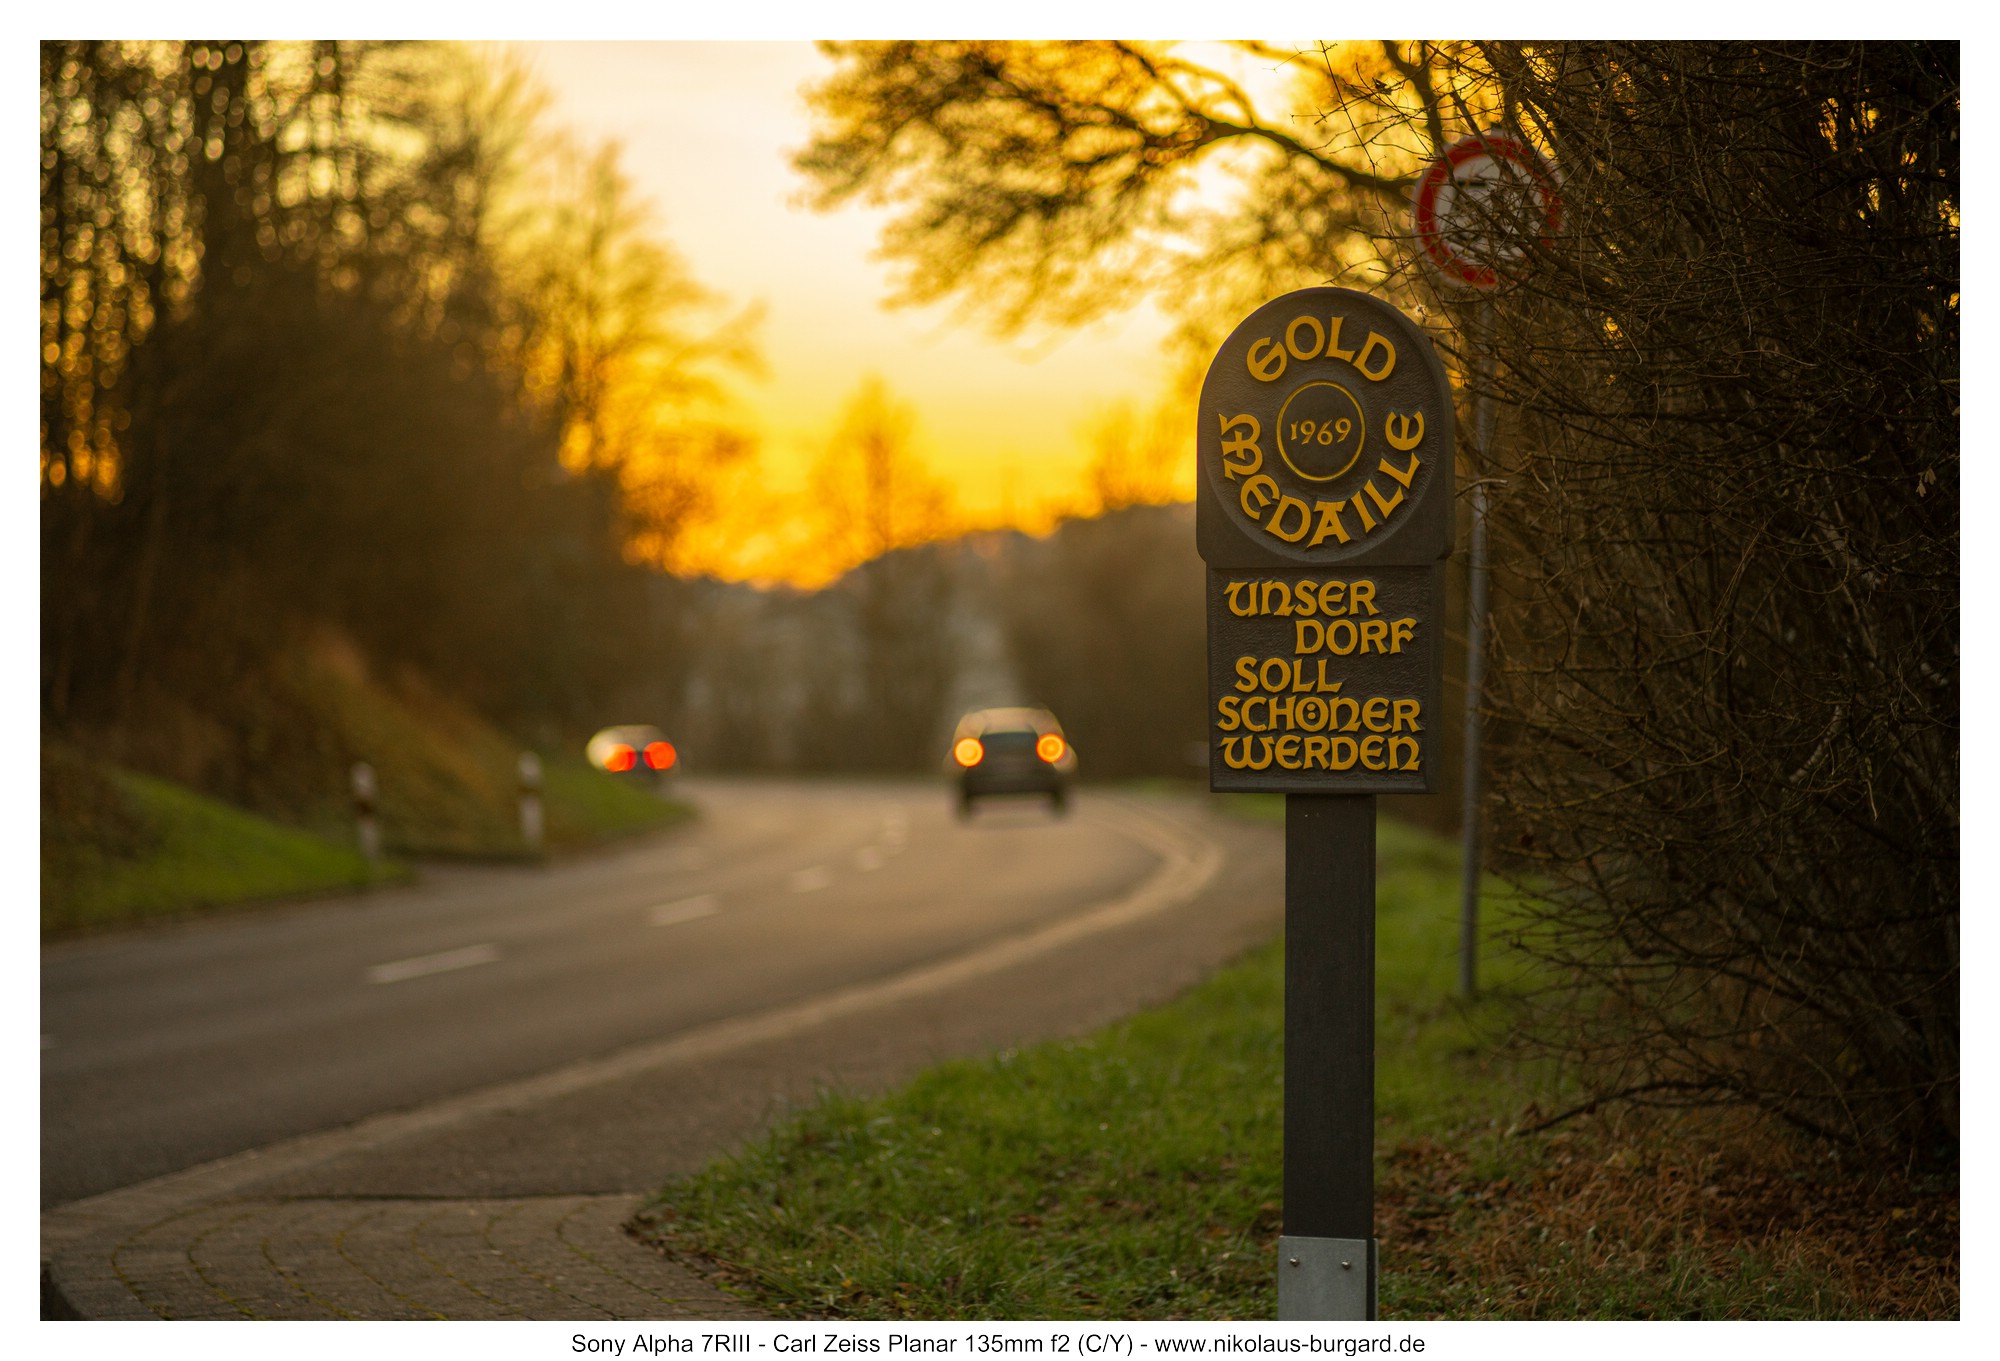
Bildserie: "Bliesgau-Blicke" / Picture Series: "Bliesgau-Views"
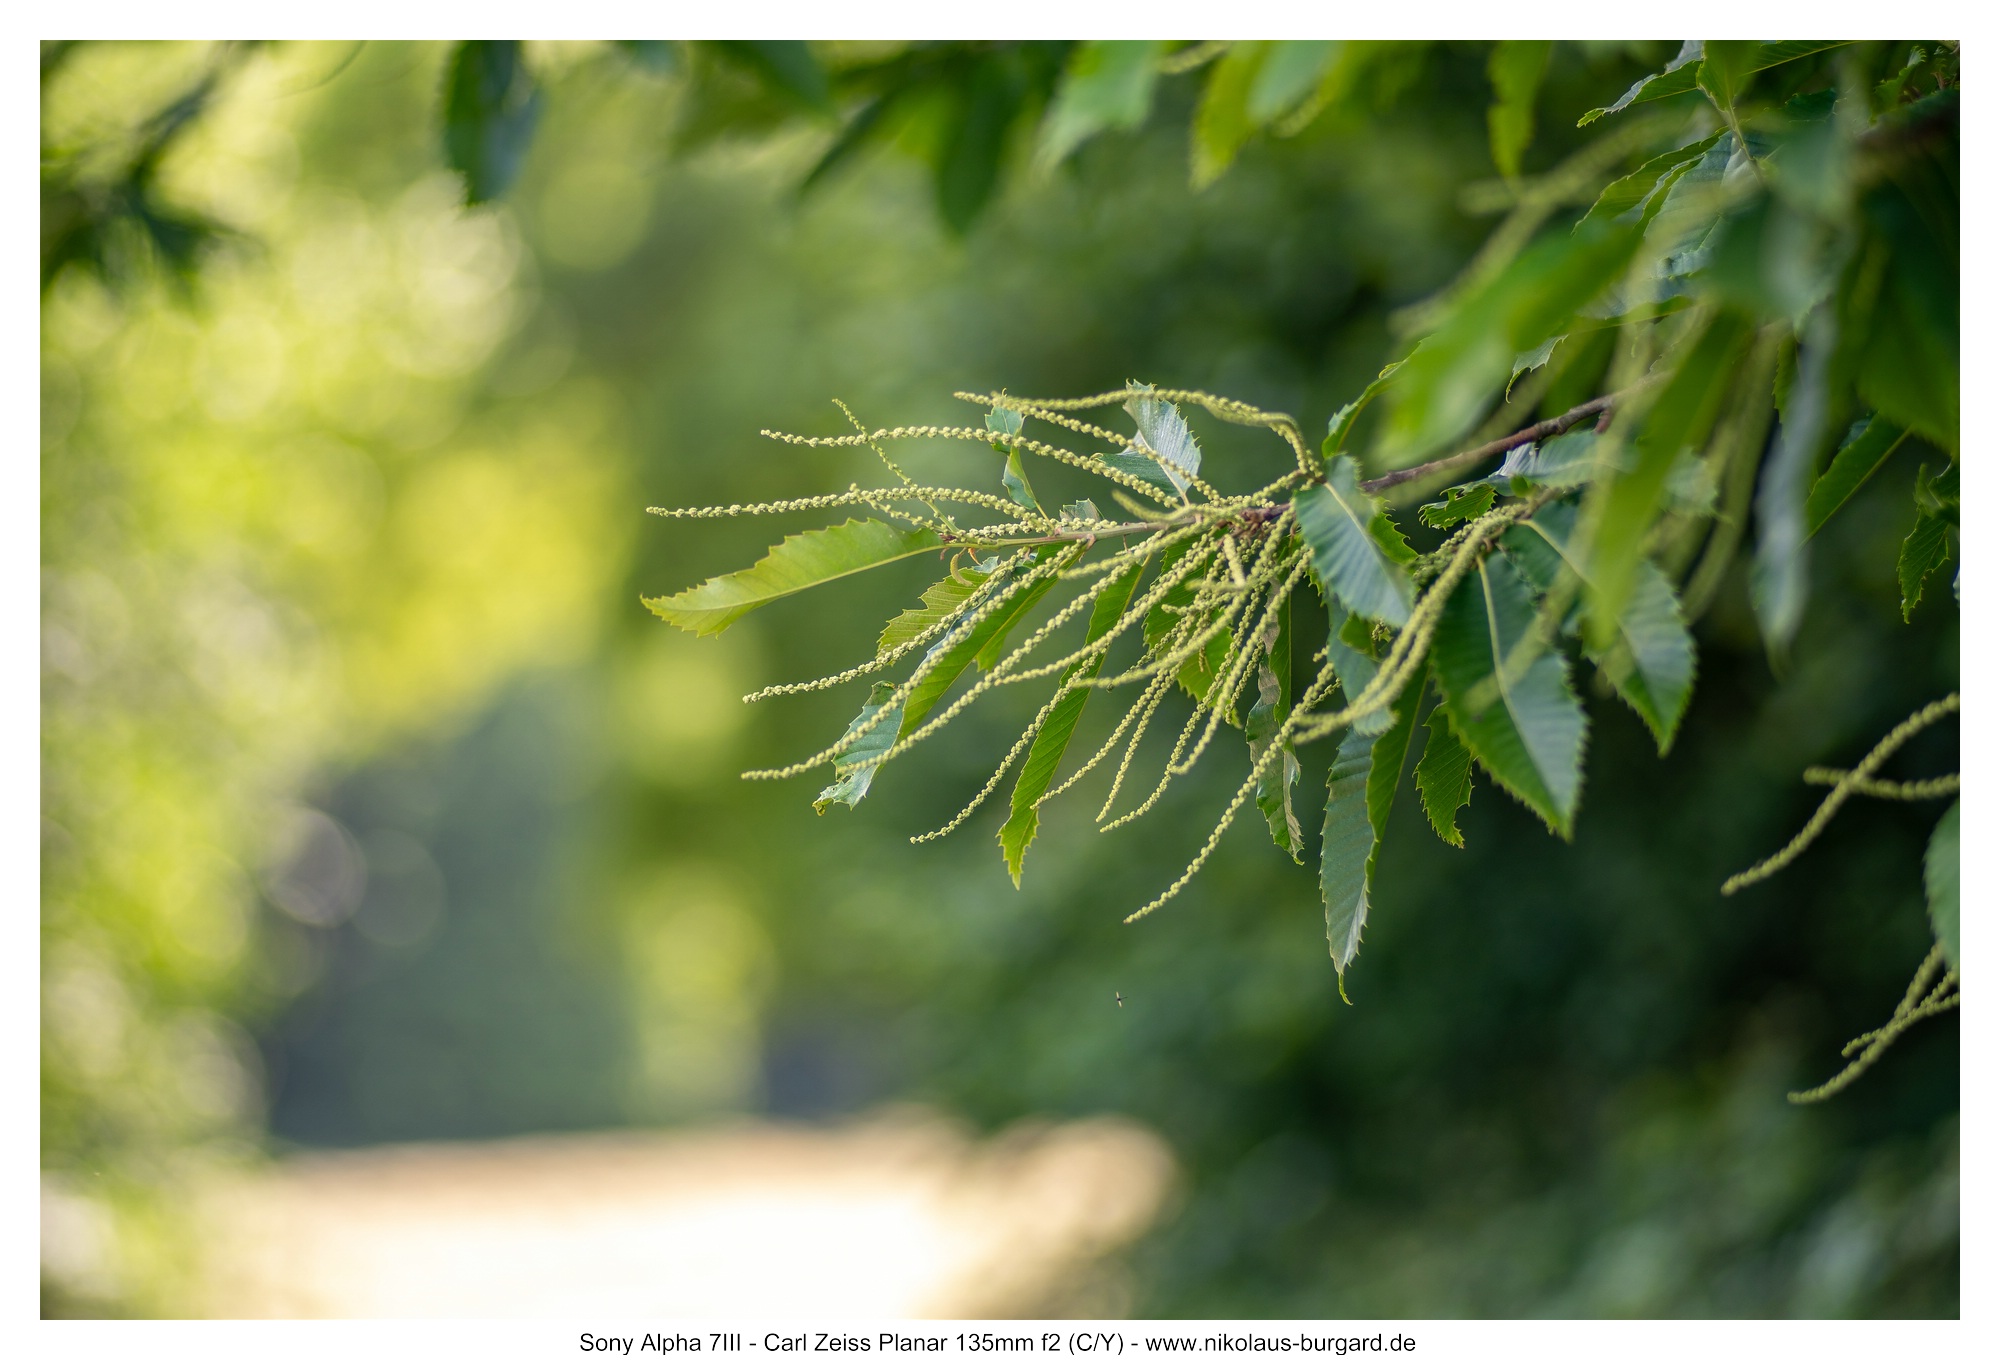
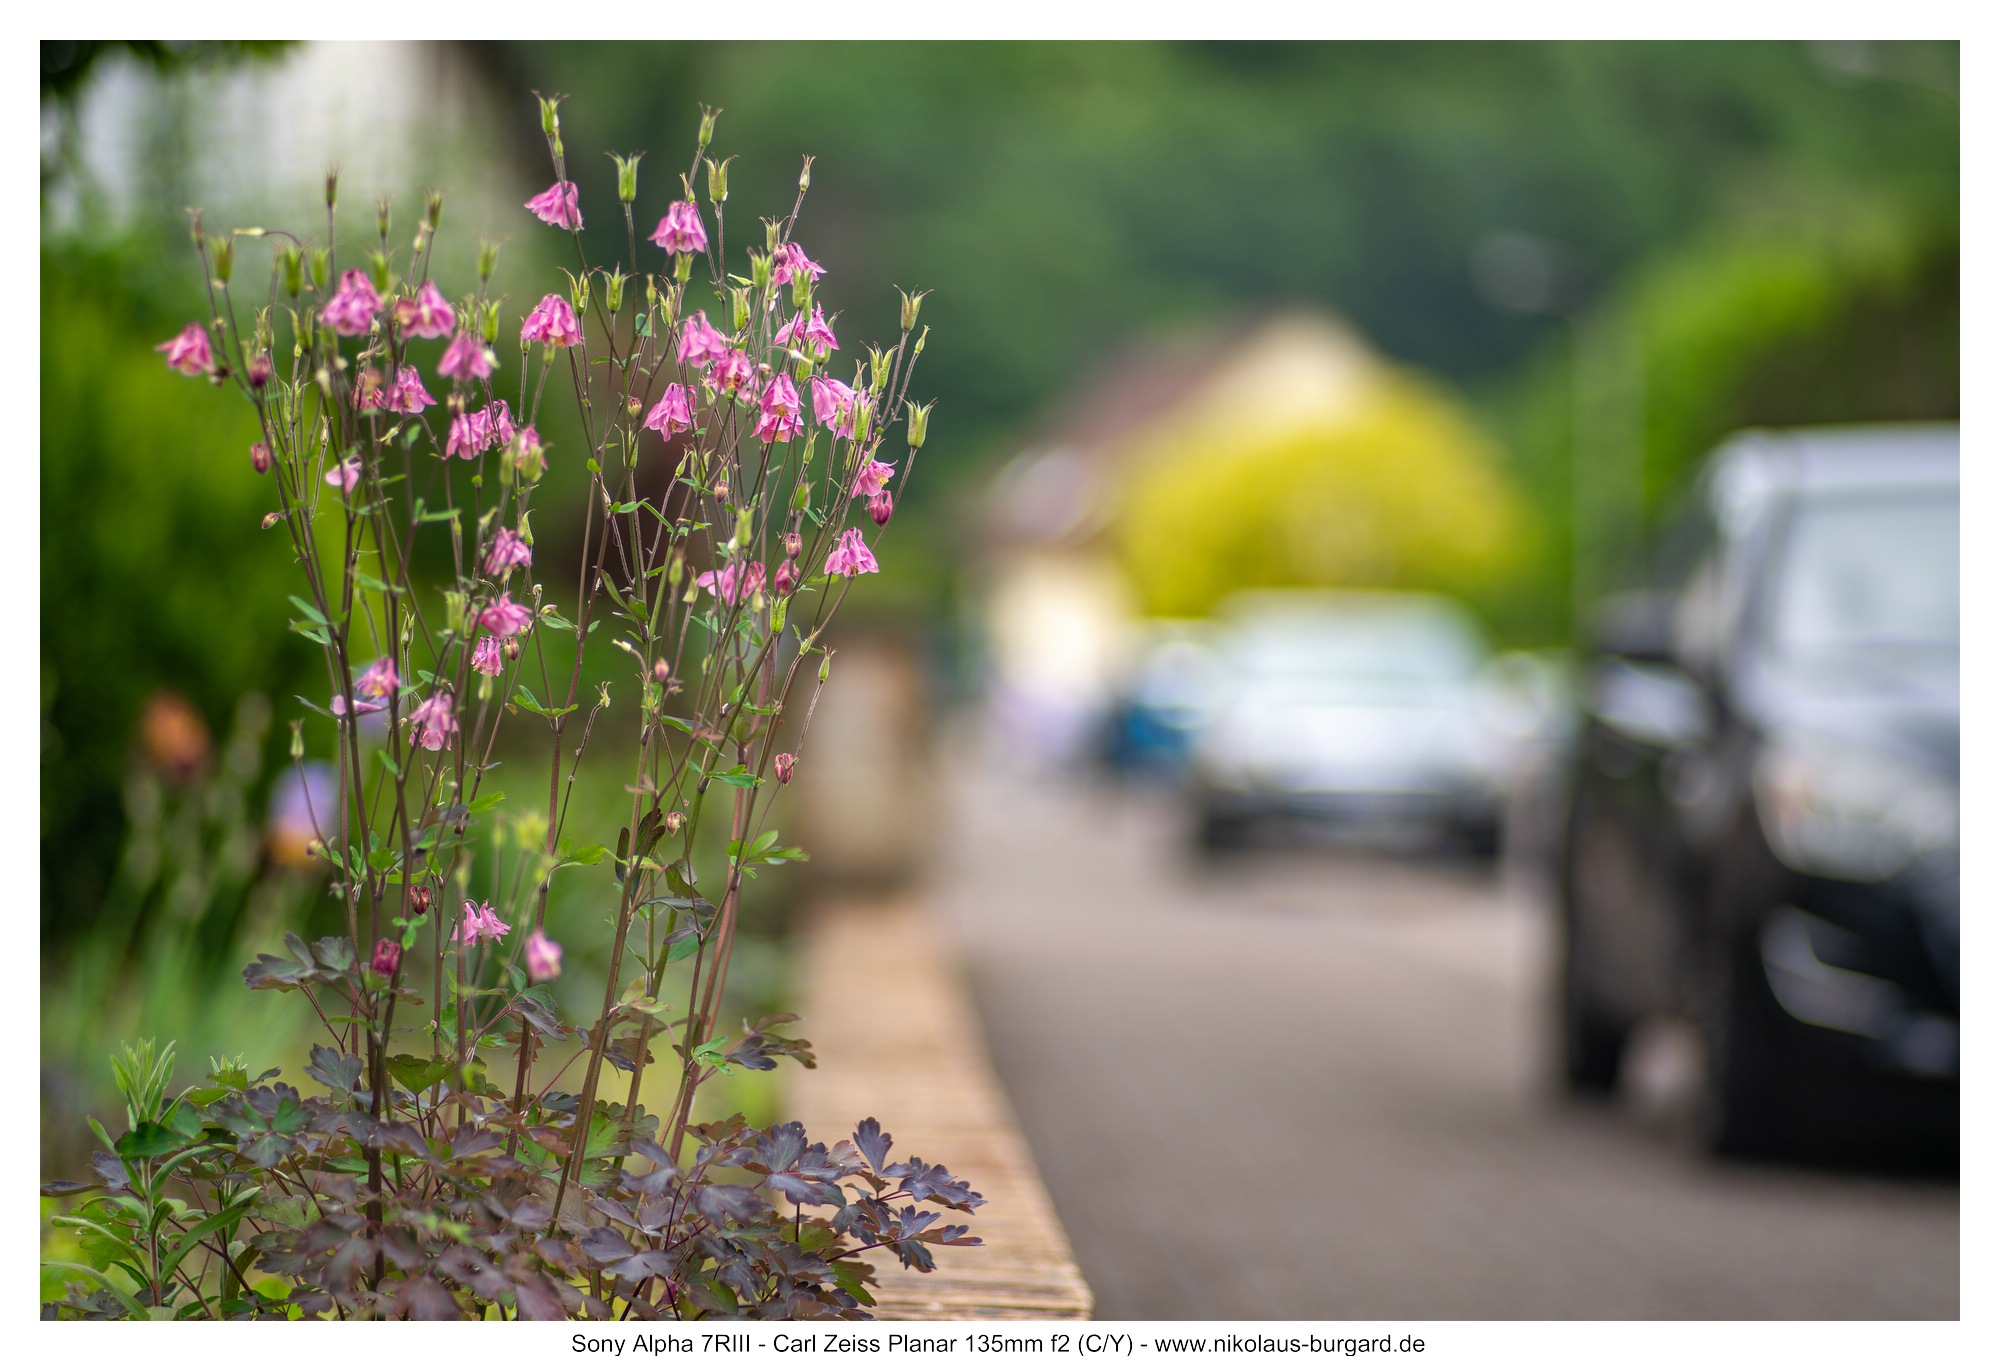
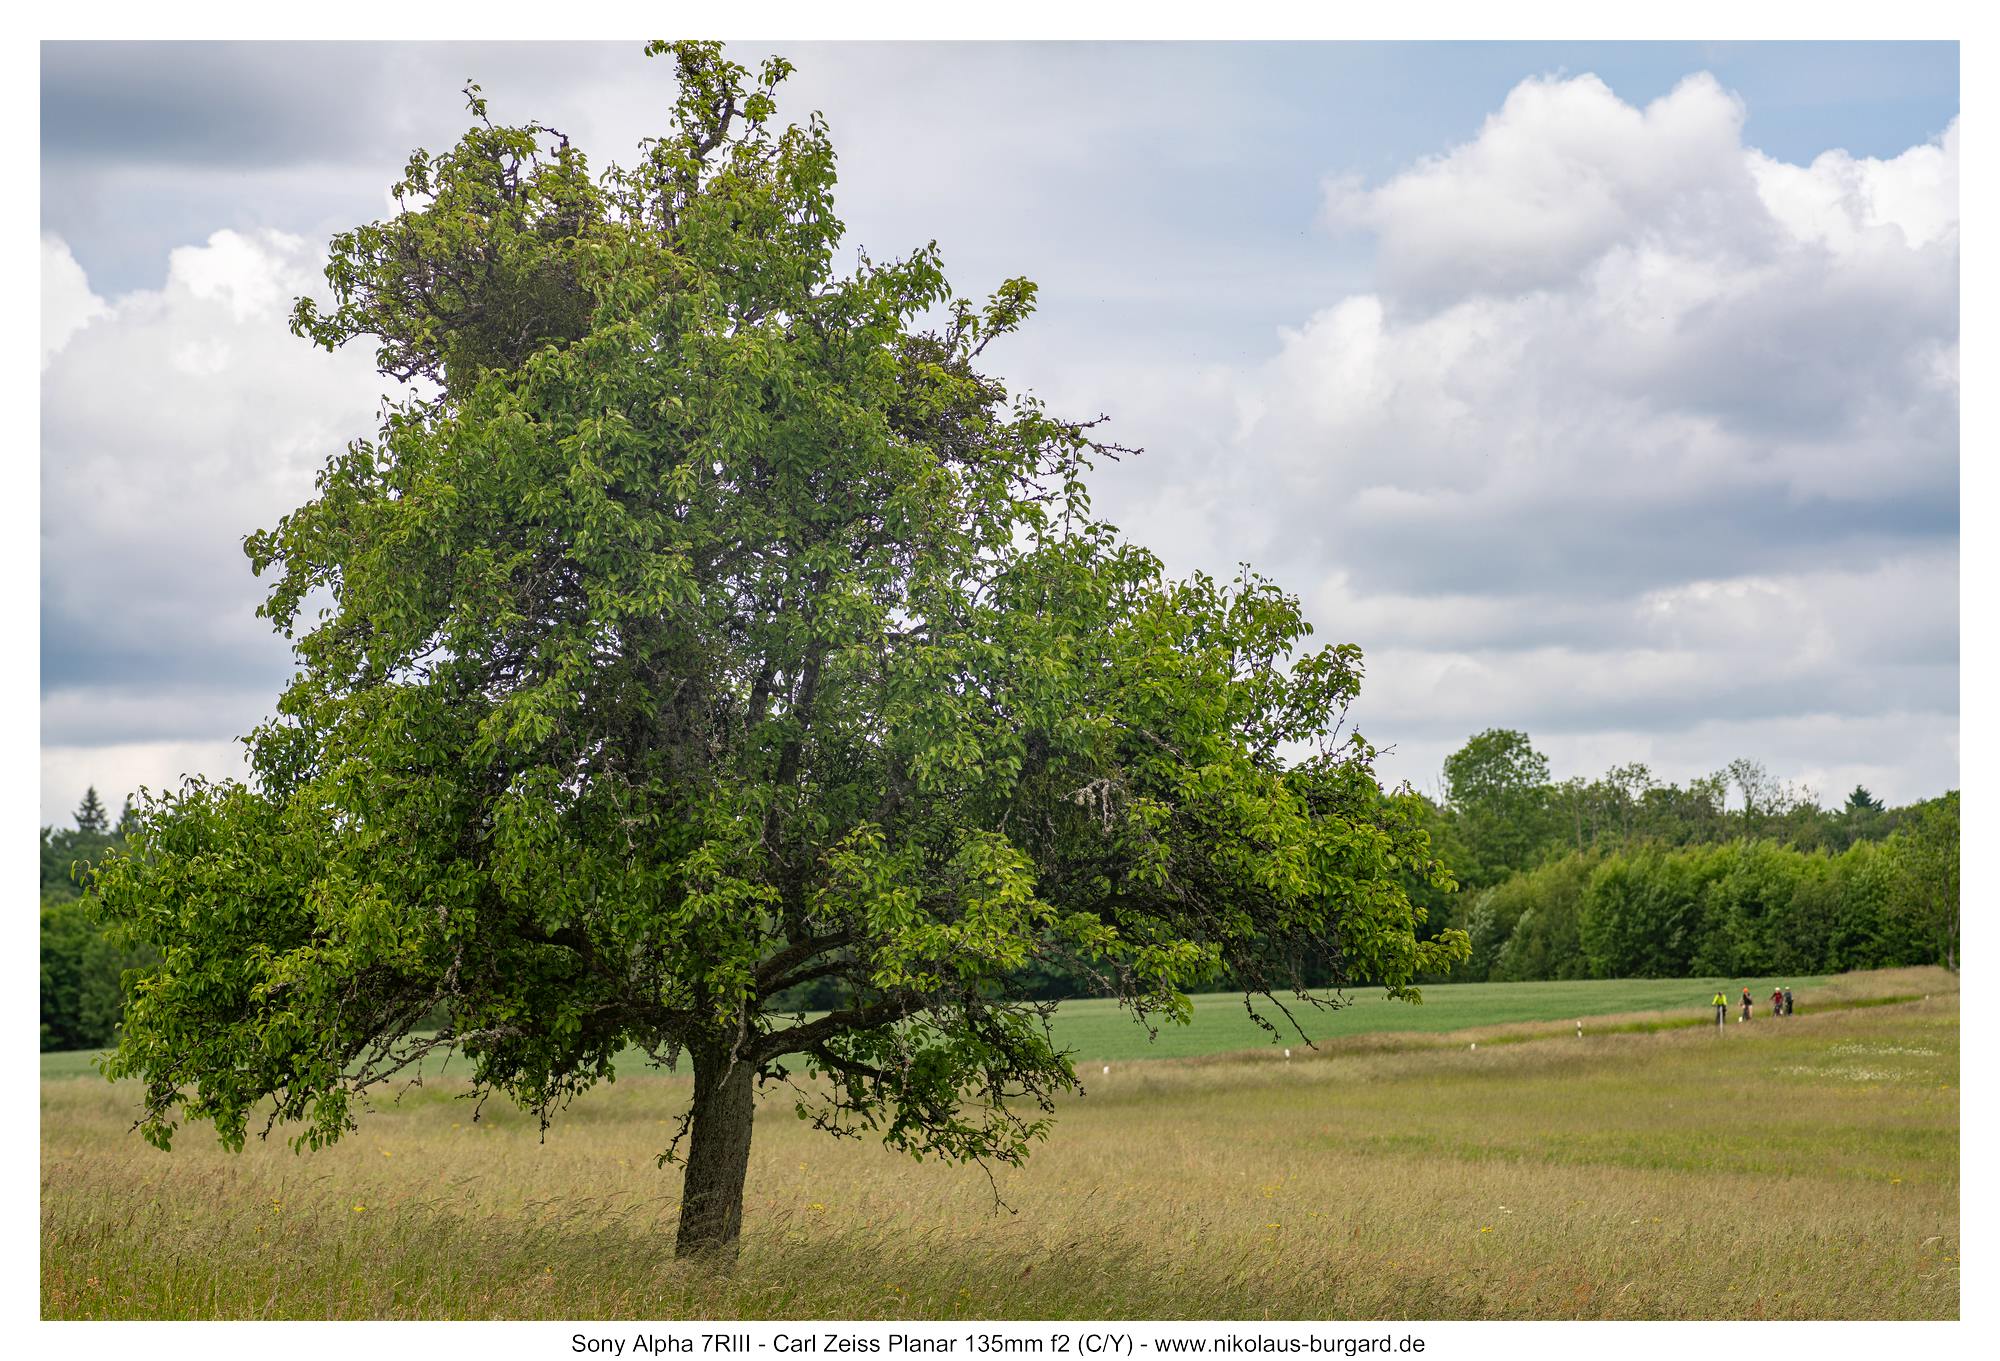
Eine Bildserie "aus der Praxis" sagt für mich immer mehr als 1000 Worte.
Eine Sommertour führte uns über den schönen Wanderweg "Bliesgau-Blicke", ausgeschildert durch die Saarpfalz-Touristik. Hier konnte sich das Planar bewähren: Detail- und Portraitaufnahmen bei Offenblende, Landschaftsfotos abgeblendet bei f8 - und das Objektiv liefert einfach!
A series of pictures "from practice" always says more than 1000 words for me.
A summer tour took us over the beautiful hiking trail "Bliesgau-Blicke", signposted by the Saarpfalz-Touristik. Here the planar could prove itself: detail and
portrait shots at open aperture, landscape photos stopped down mostly to f8 - and the lens simply delivers!


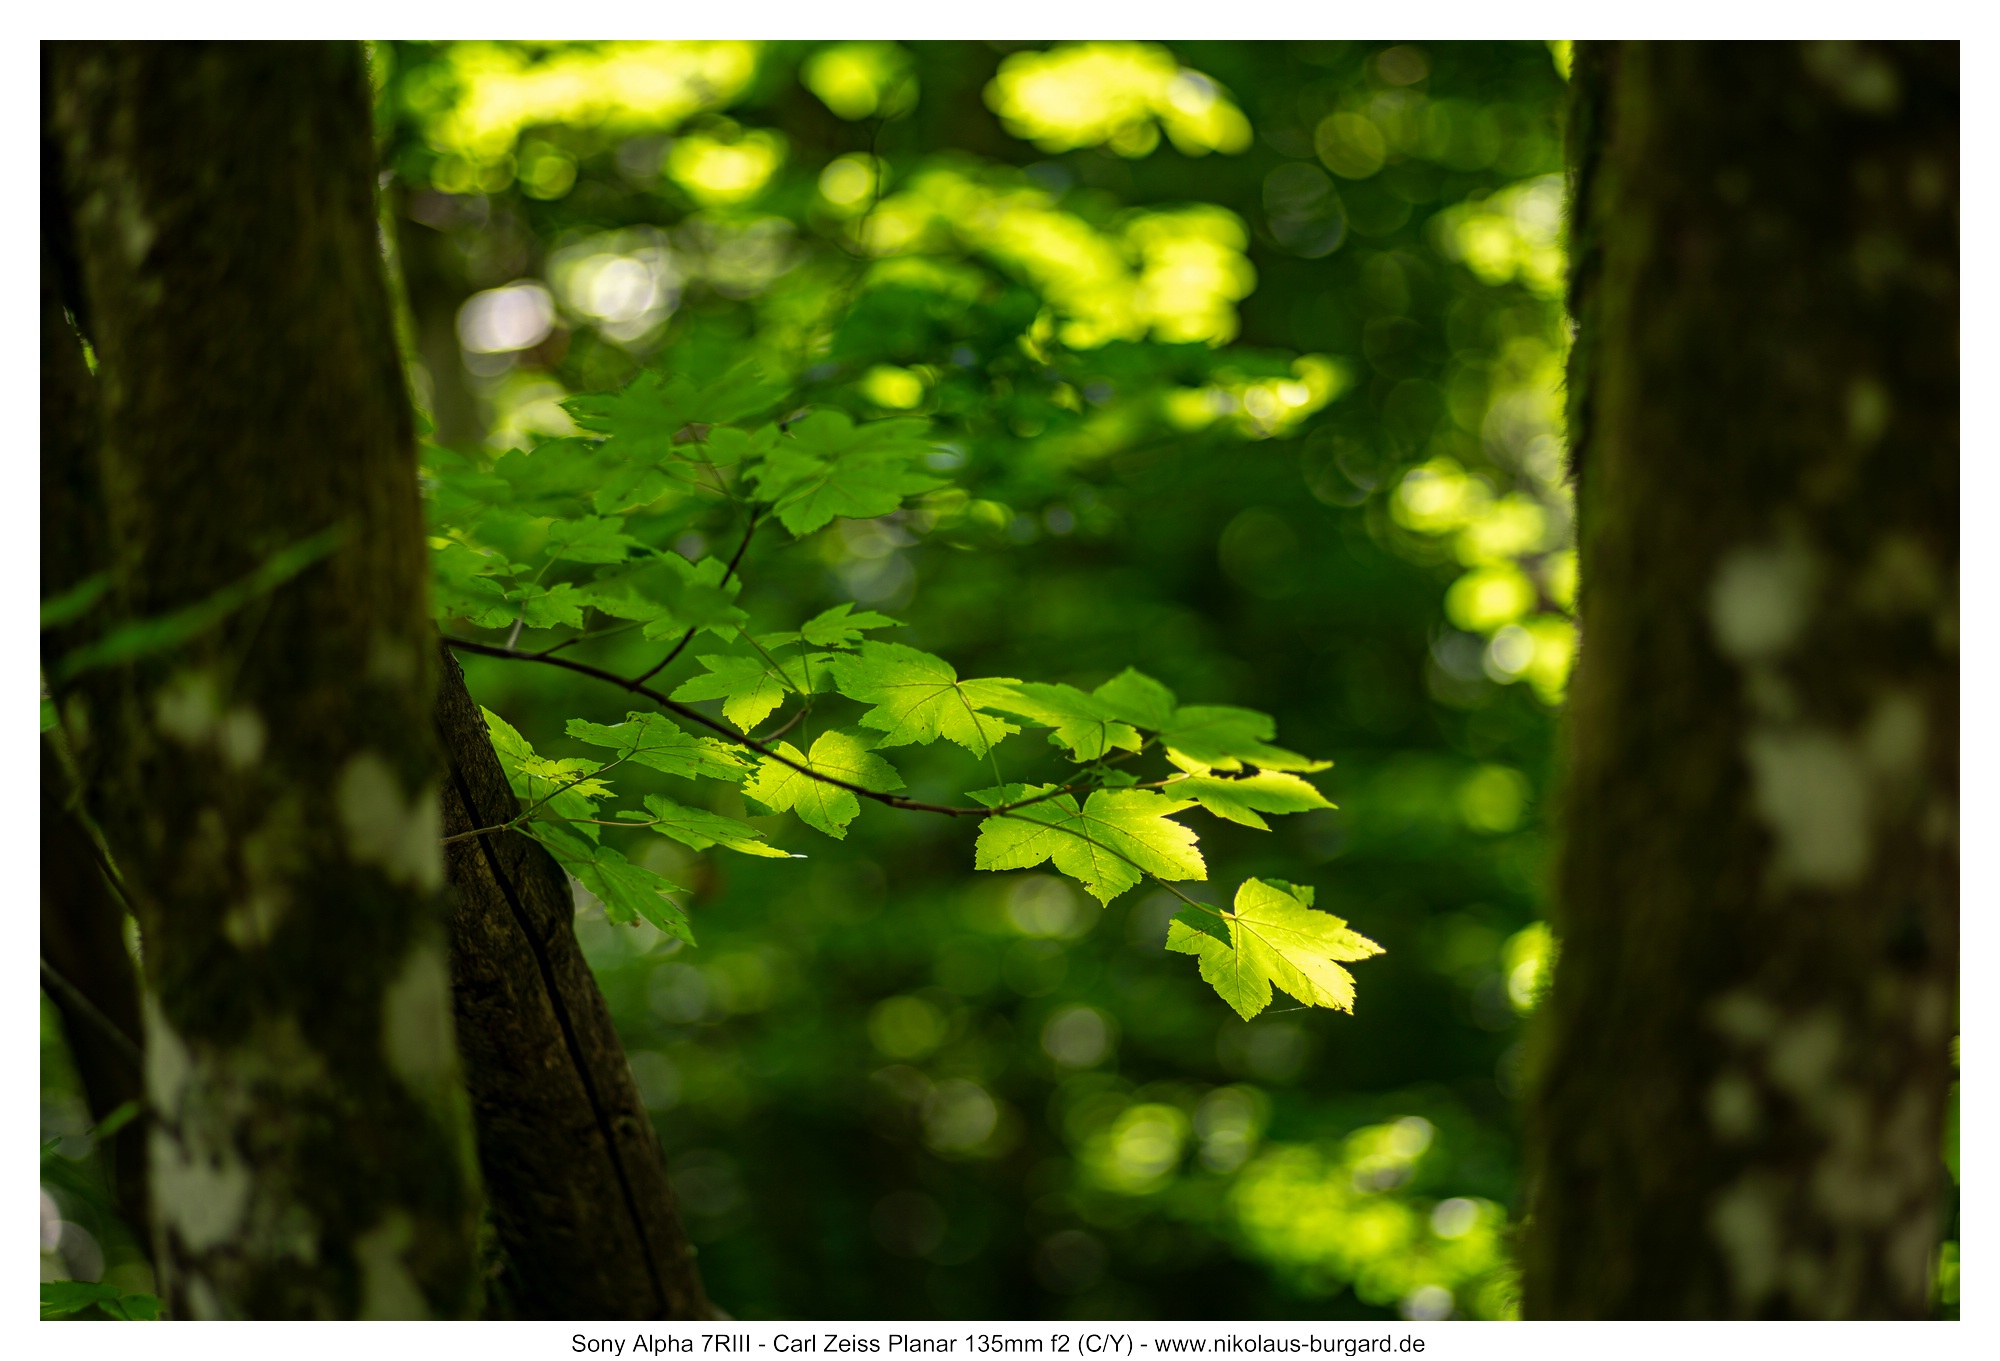


Rendering & Bokeh
Wenn es um das Hintergrundrendering geht, gibt es immer viele gegensätzliche Meinungen.
Denn ob einem die Art der Darstellung eines Objektives gefällt oder nicht, ist einfach Geschmackssache.
Der Eine möchte alles butterweich aufgelöst haben, der Andere mag es busy mit viel Outlining und Strukturen und/oder Swirl (und natürlich gibt es ganz viel zwischen diesen Extremen in der Mitte)...
Das Carl Zeiss Planar 135mm f2 ist eindeutig ein Vertreter der weichen, unaufgeregten Fraktion.
Die Hintergründe werden fast immer weich aufgelöst, störende Strukturen bleiben meist unsichtbar. Outlining und vor allem deutlich sichtbar begrenzte Hintergrundhighlights sind eigentlich kein Thema.
Die Blendenwerte sind f2 - f2.8 - f4 - f5.6 - f8:
When it comes to background rendering, there are always a lot of opposing opinions.
Because whether you like the way of representing a lens or not, is simply a matter of taste.
One wants to have everything butter-soft resolved, the other likes it busy with a lot of outlining and structures and/or swirl (and of course there is quite
a lot between these extremes in the middle)...
The Carl Zeiss Planar 135mm f2 is clearly a representative of the soft, unexcited fraction.
The backgrounds are almost always softly dissolved, disturbing structures usually remain invisible. Outlining and above all clearly visibly limited
background highlights are actually not an issue.
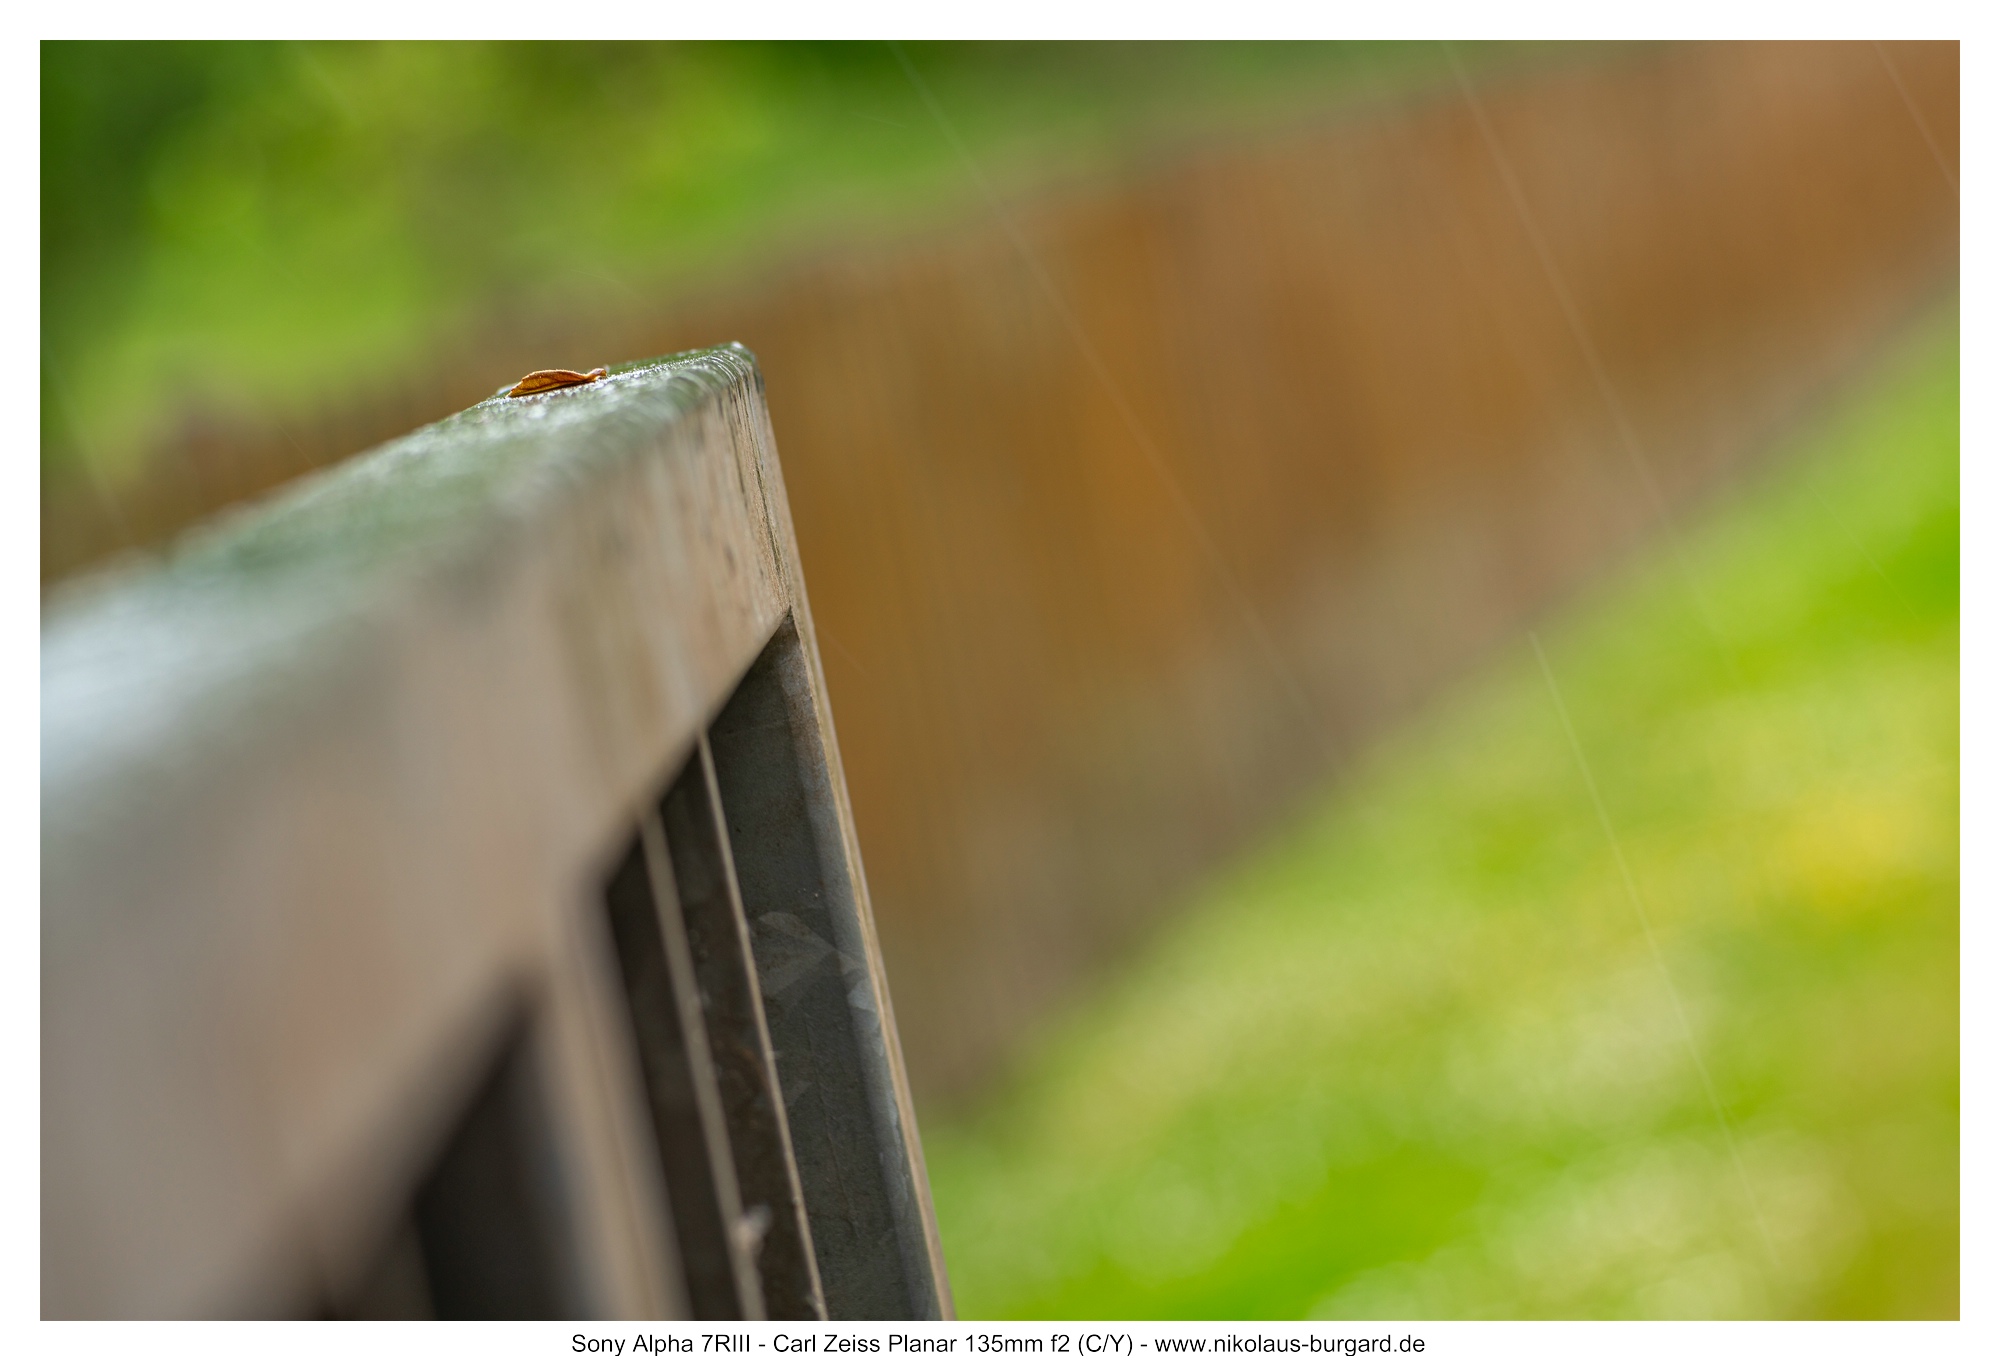
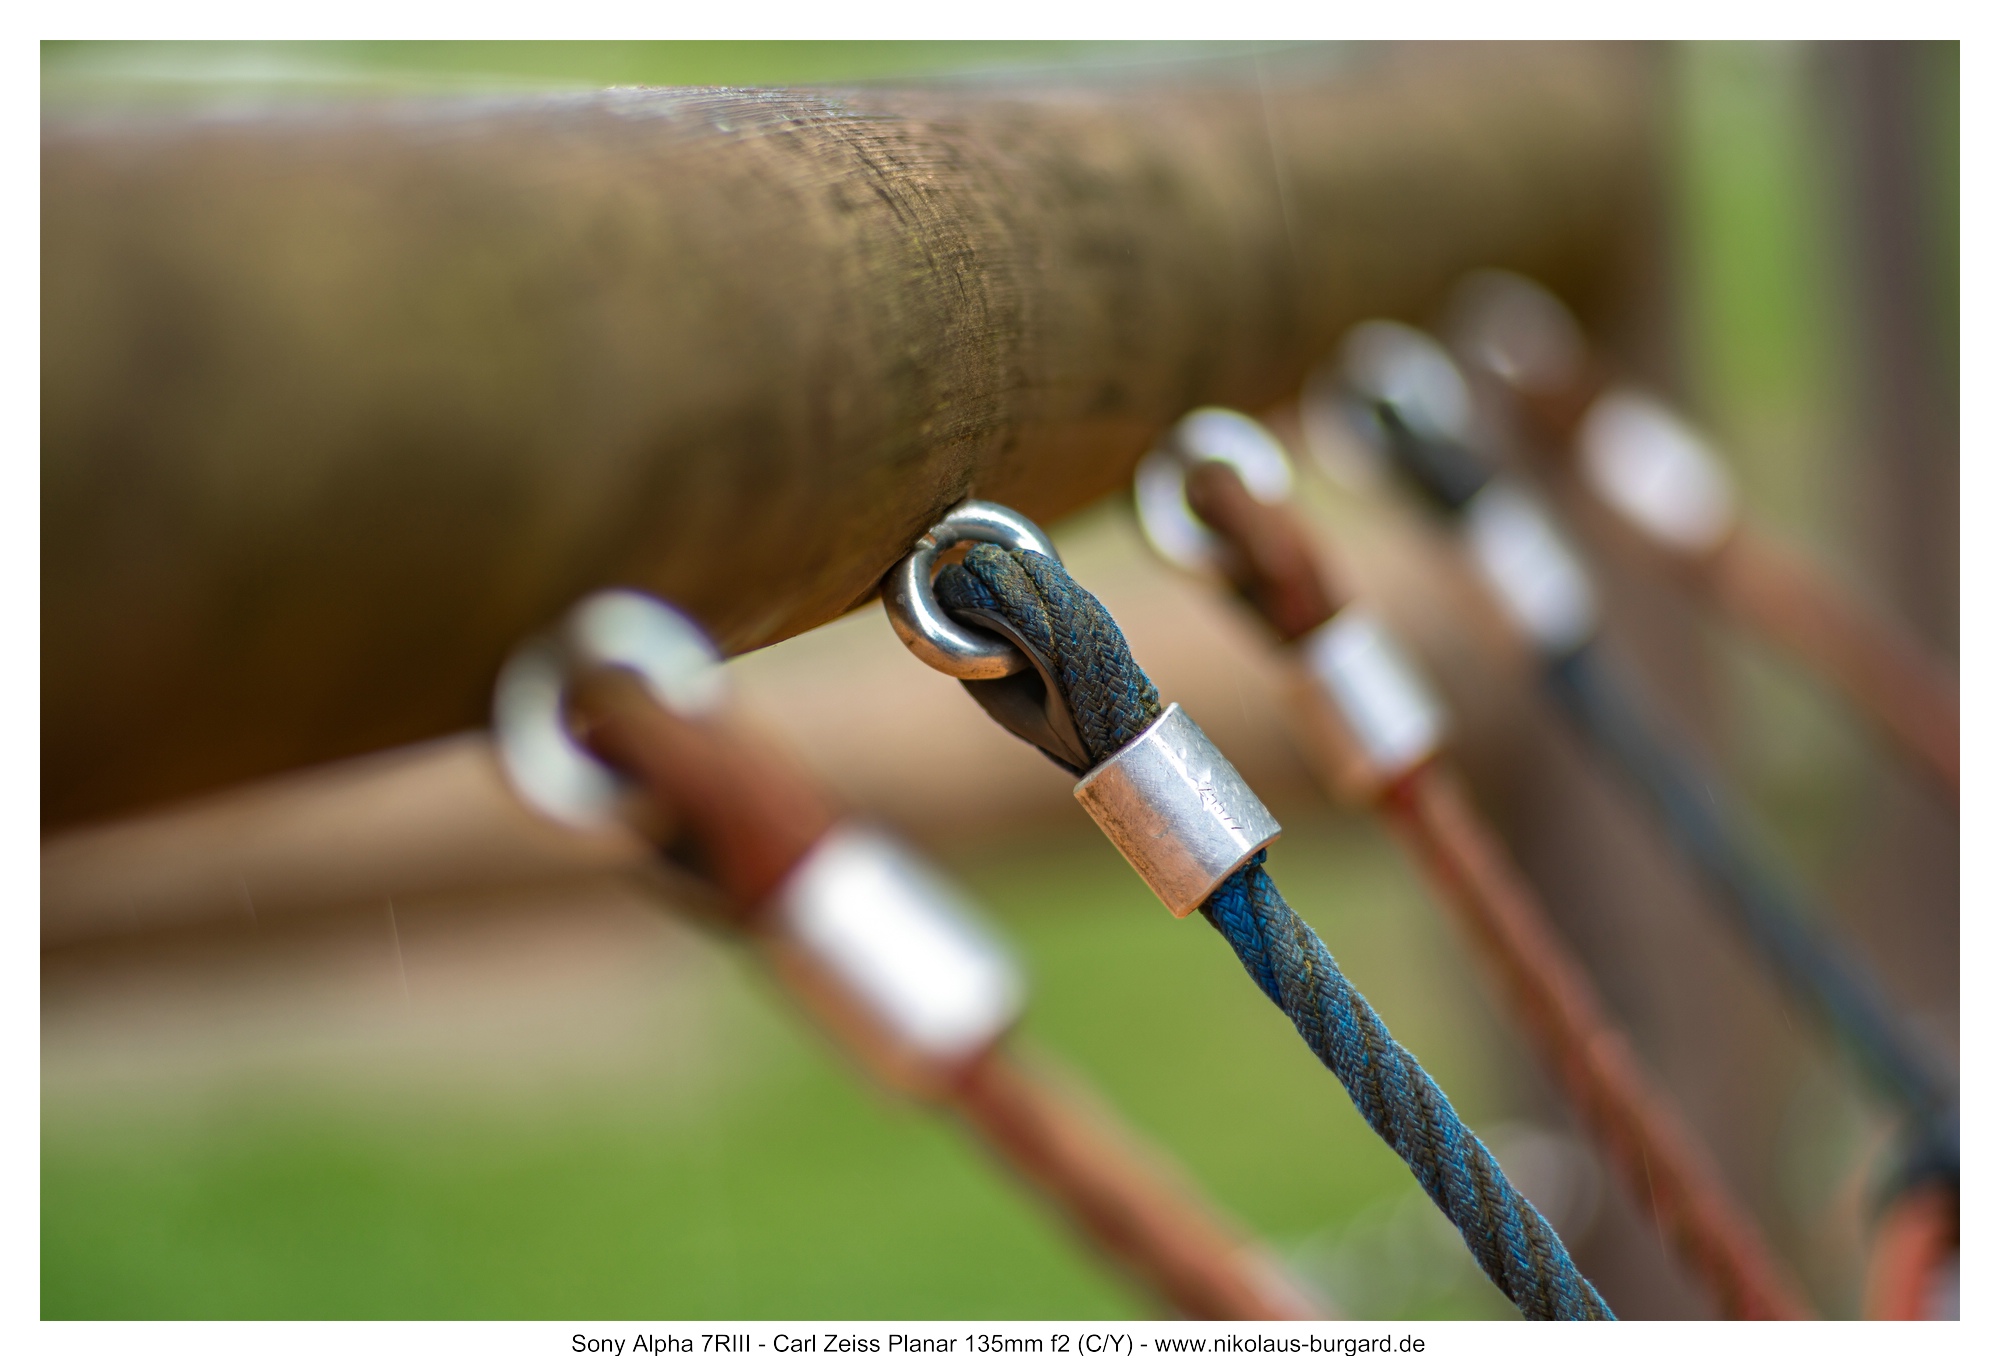
The following series shows the development of the background blur when dimming.
The focus was on the middle screw on the right in the picture, distance to this was about two to three meters.
The aperture values are f2 - f2.8 - f4 - f5.6 - f8:


Bereits bei Offenblende ist das Rendering sehr schön weich, es gibt auf diese Distanz kein sichtbares Outlining und keine Neigung zum Swirl. Auch der Übergang von Schärfe zu Unschärfe ist schön weich und fließend.
Dies bleibt in meinen Augen auch bei allen abgeblendeten Bildern der Fall, es nimmt nur die Schärfentiefe jeweils zu.
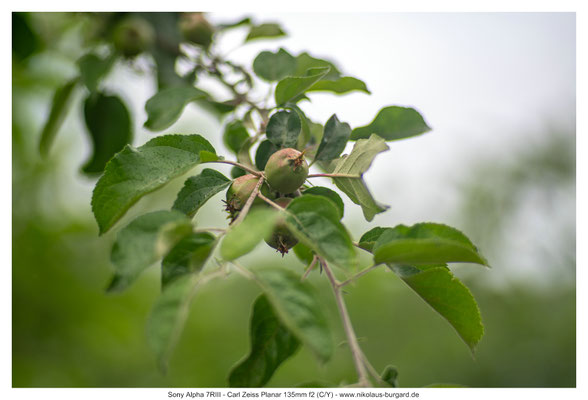
Auch mein anderes häufig gezeigtes Bokehtestmotiv zeigt dieses grundsätzliche Verhalten:
Even with the aperture, the rendering is very nicely soft, there is no visible outlining and no inclination to the swirl at this distance. The transition from
sharpness to blur is also nice and soft and fluid.
In my opinion, this remains the case with all the hidden images, it only increases the depth of field in each case.
Also my other frequently shown bokeh test motif shows this basic behavior:

An der nativen Naheinstellgrenze von 150cm ist das Bokeh wirklich sehr schön weich -
es gibt bei f2 kein Outlining, alles wird zu Farbflächen aufgelöst.
Erst durch zunehmendes Abblenden werden mehr Strukturen in den Hintergründen sichtbar, aber auch diese werden weiterhin weich und rund dargestellt.
At the native near-adjustment limit of 150cm, the bokeh is really very nice soft -
There is no outlining at f2, everything is resolved to color areas.
Only by increased stopping down more structures become visible in the backgrounds, but these are also still presented softly and round.


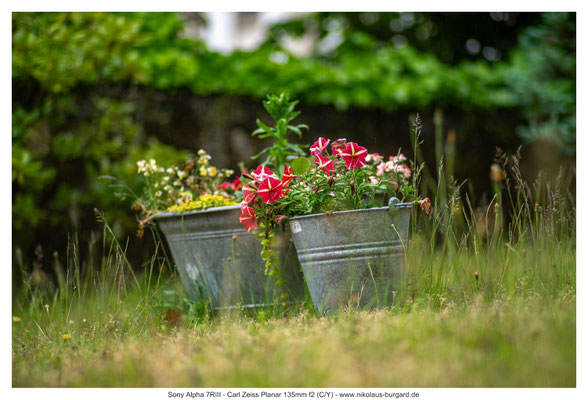
Selbst auf größere Distanz ist mit 135mm Brennweite und f2 noch eine sichtbare Freistellung möglich, wohl der Hauptgrund das Mehrgewicht und die Mehrgröße zu tragen.
Der Unterschied zu f2.8 und den weiter abgeblendeten Stufen ist deutlich sichtbar, und das Rendering auch auf diese Distanz bei Offenblende schön weich.
Even at a longer distance, with 135mm focal length and f2, a visible isolation of the motif is still possible, probably the main reason to bear the extra weight
and the multi-size.
The difference to f2.8 and the further aperture steps is clearly visible, and the rendering also at this distance with open aperture nicely soft.


Auf kurze Distanz ist das Rendering des Planar wirklich sehr weich und samtig. Hintergründe werden zu ineinanderfließenden Farbflächen.
At a short distance, the rendering of the Planar is really very soft and velvety. Backgrounds become interconnected color areas.


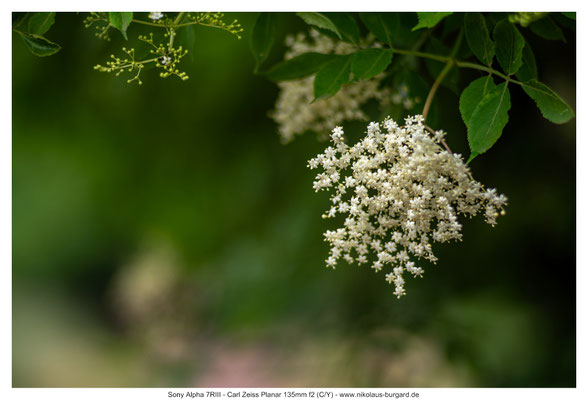


Auch auf mittlere Distanz gibt es keine störenden Hintergrunddetails:
Even at medium distance there are no annoying background details:

Je näher heran man ans Motiv kommt, desto größer werden natürlich die Hintergrundhighlights.
Für die folgenden Annäherungsserien habe ich den zusätzlichen Helicoid-Adapter ins Spiel gebracht.
Zu den Rändern hin werden die Highlights flacher und es ergeben sich leichte Catseyes. Diese Neigung ist nicht sehr ausgeprägt, die optische Vignettierung ist nicht sehr stark.
The closer you get to the motif, the bigger the background highlights of course.
For the following approach series I brought the additional helicoid adapter into play.
Towards the edges, the highlights become flatter and there are light catseyes. This inclination is not very pronounced, the optical vignetting is not very
strong.


Fokuspaare eignen sich in meinen Augen immer sehr, um das Vorder- und hintergrundbokeh eines Obejktives in der Praxis zu zeigen.
Ihr seht also Fotos vom gleichen Standpunkt mit unterschiedlicher Fokussetzung:
In my eyes, focus pairs are always very suitable to show the front and background boke of an object in practice.
So you can see photos from the same point of view with different focus:


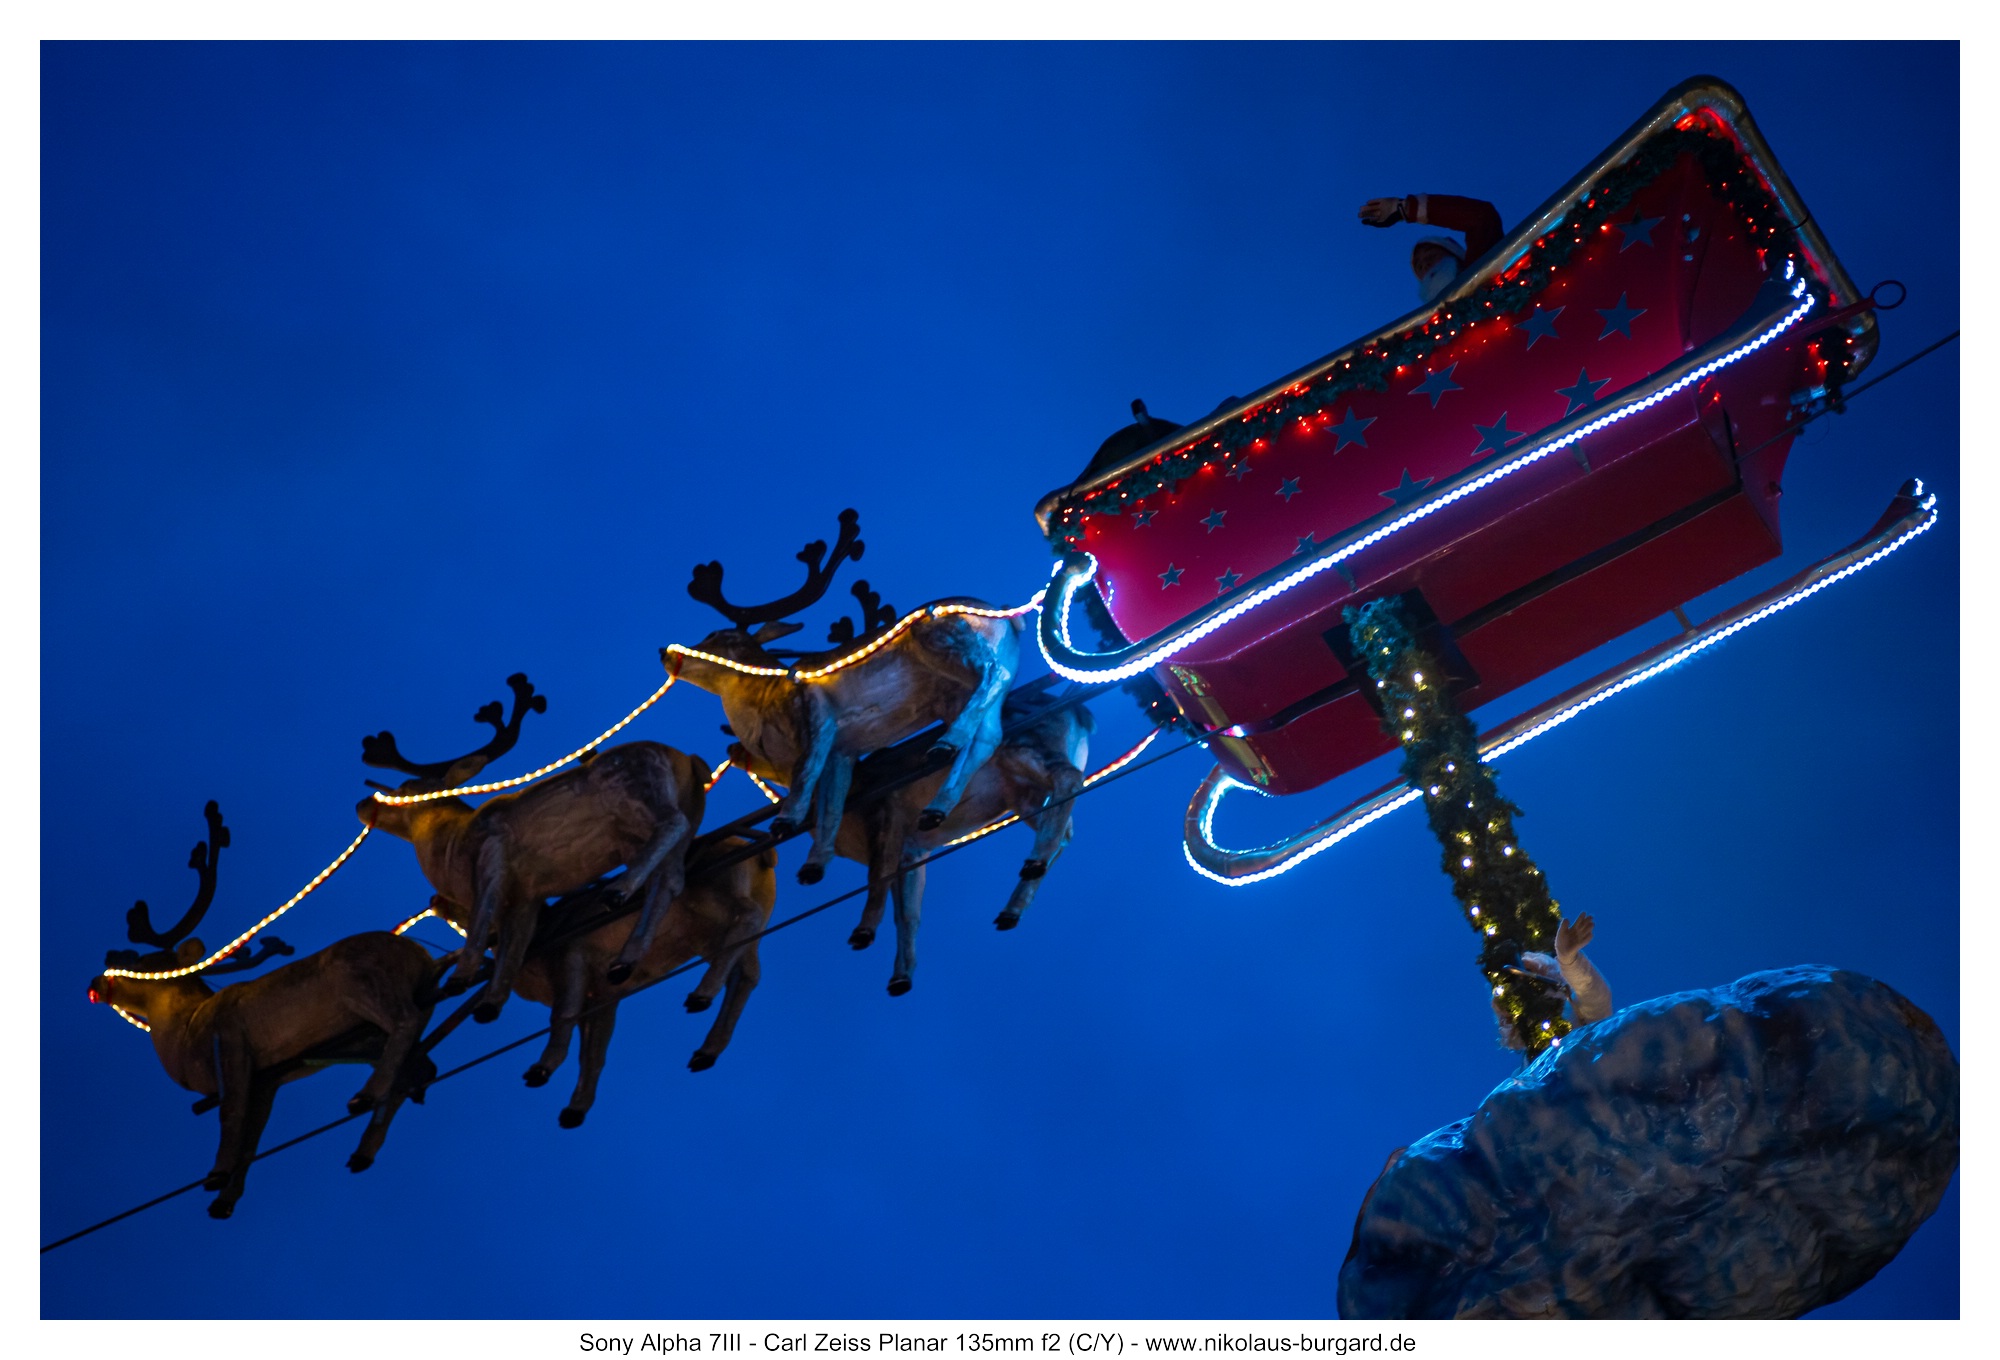
Bildserie: Saarbrücken kurz vor Weihnachten / Picture Series: Saarbrücken before christmas
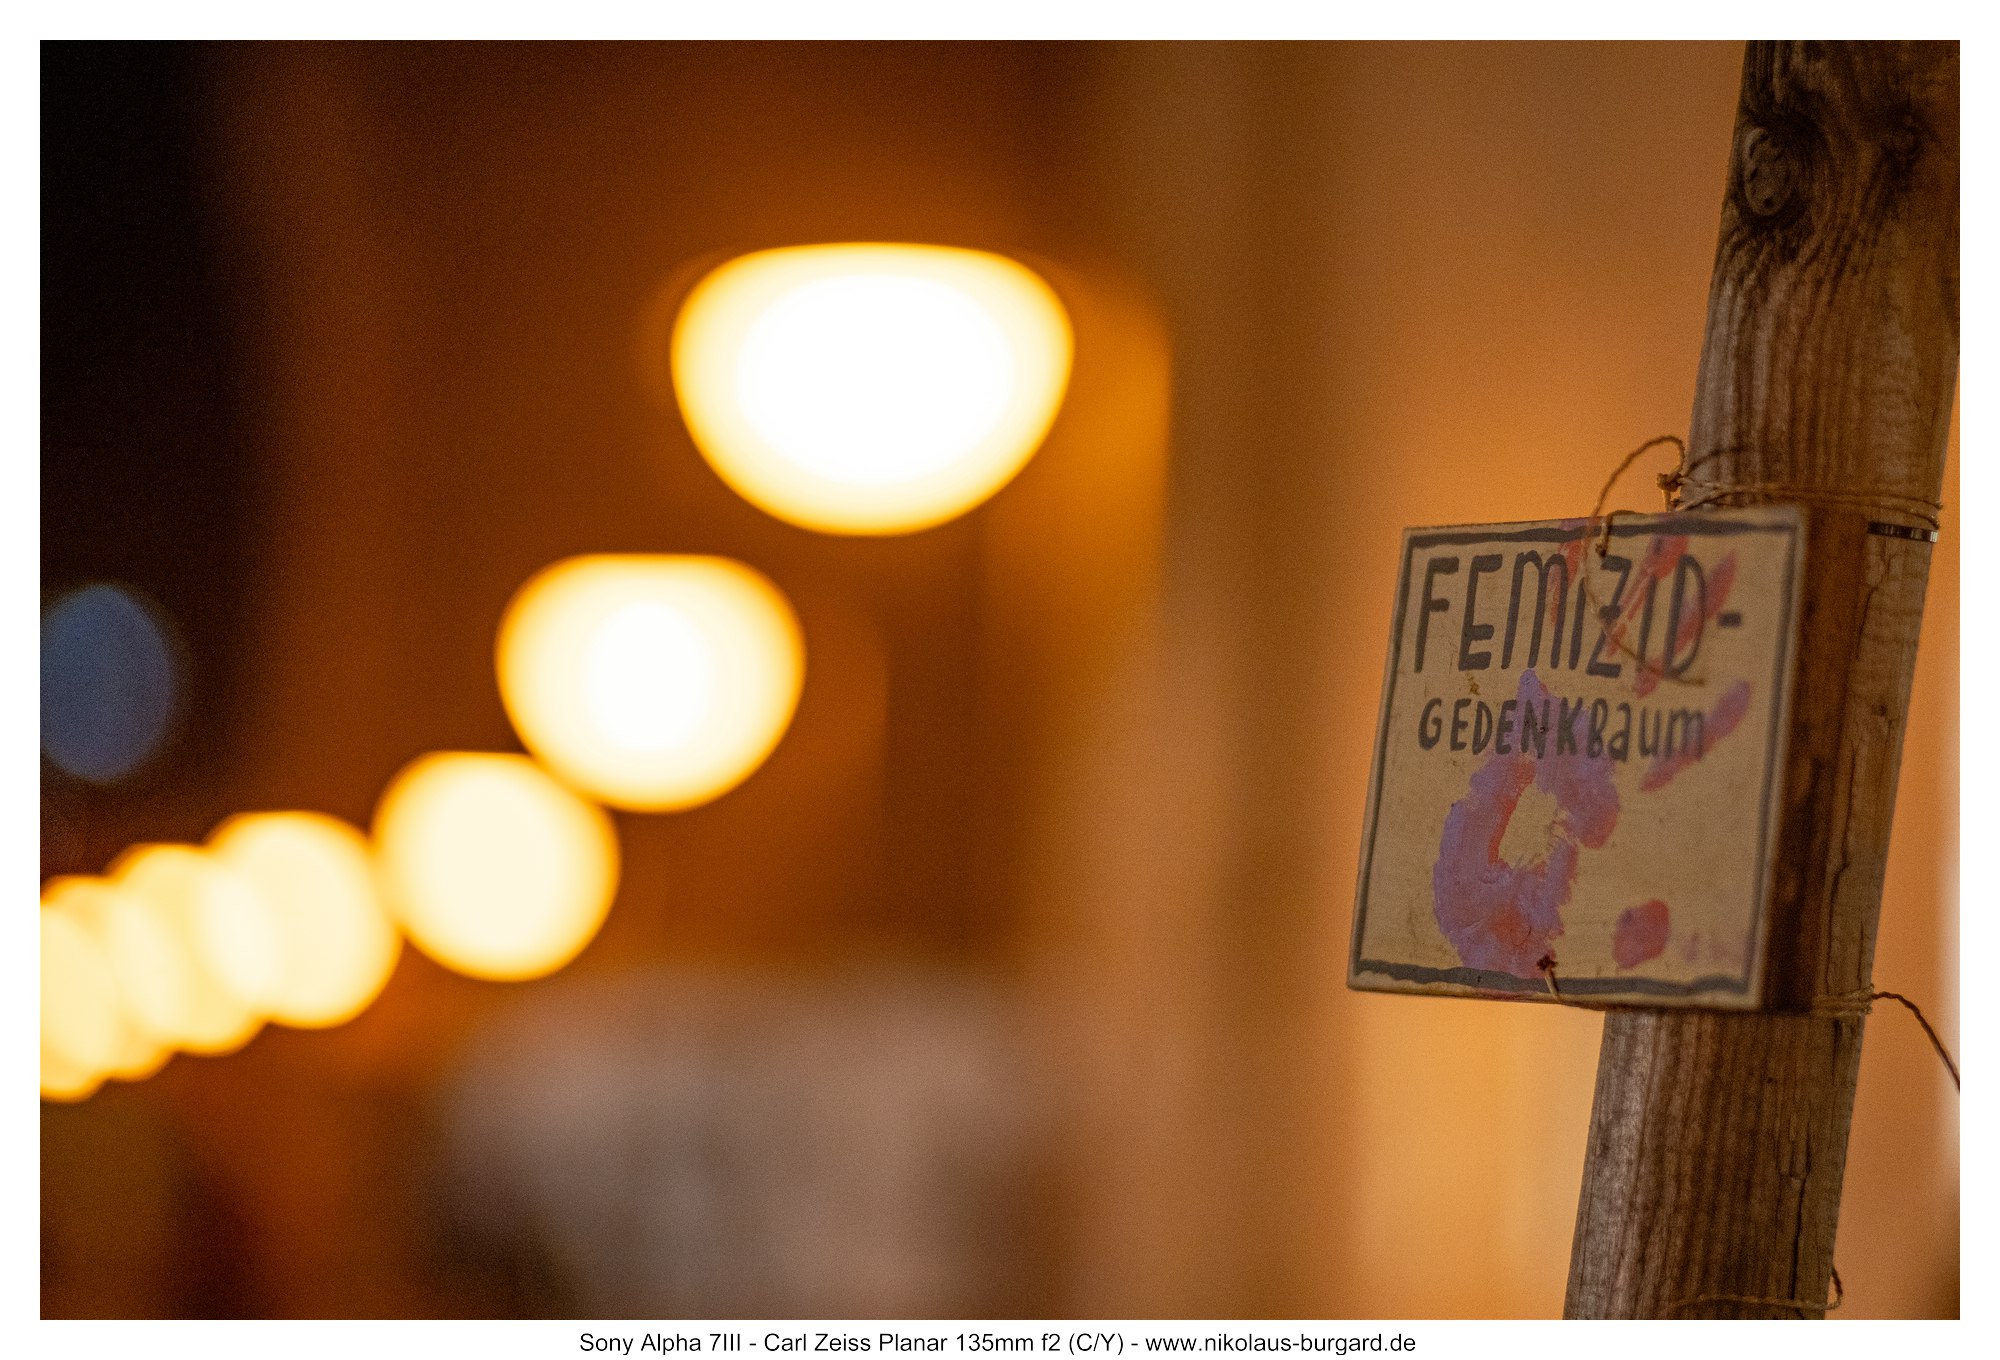
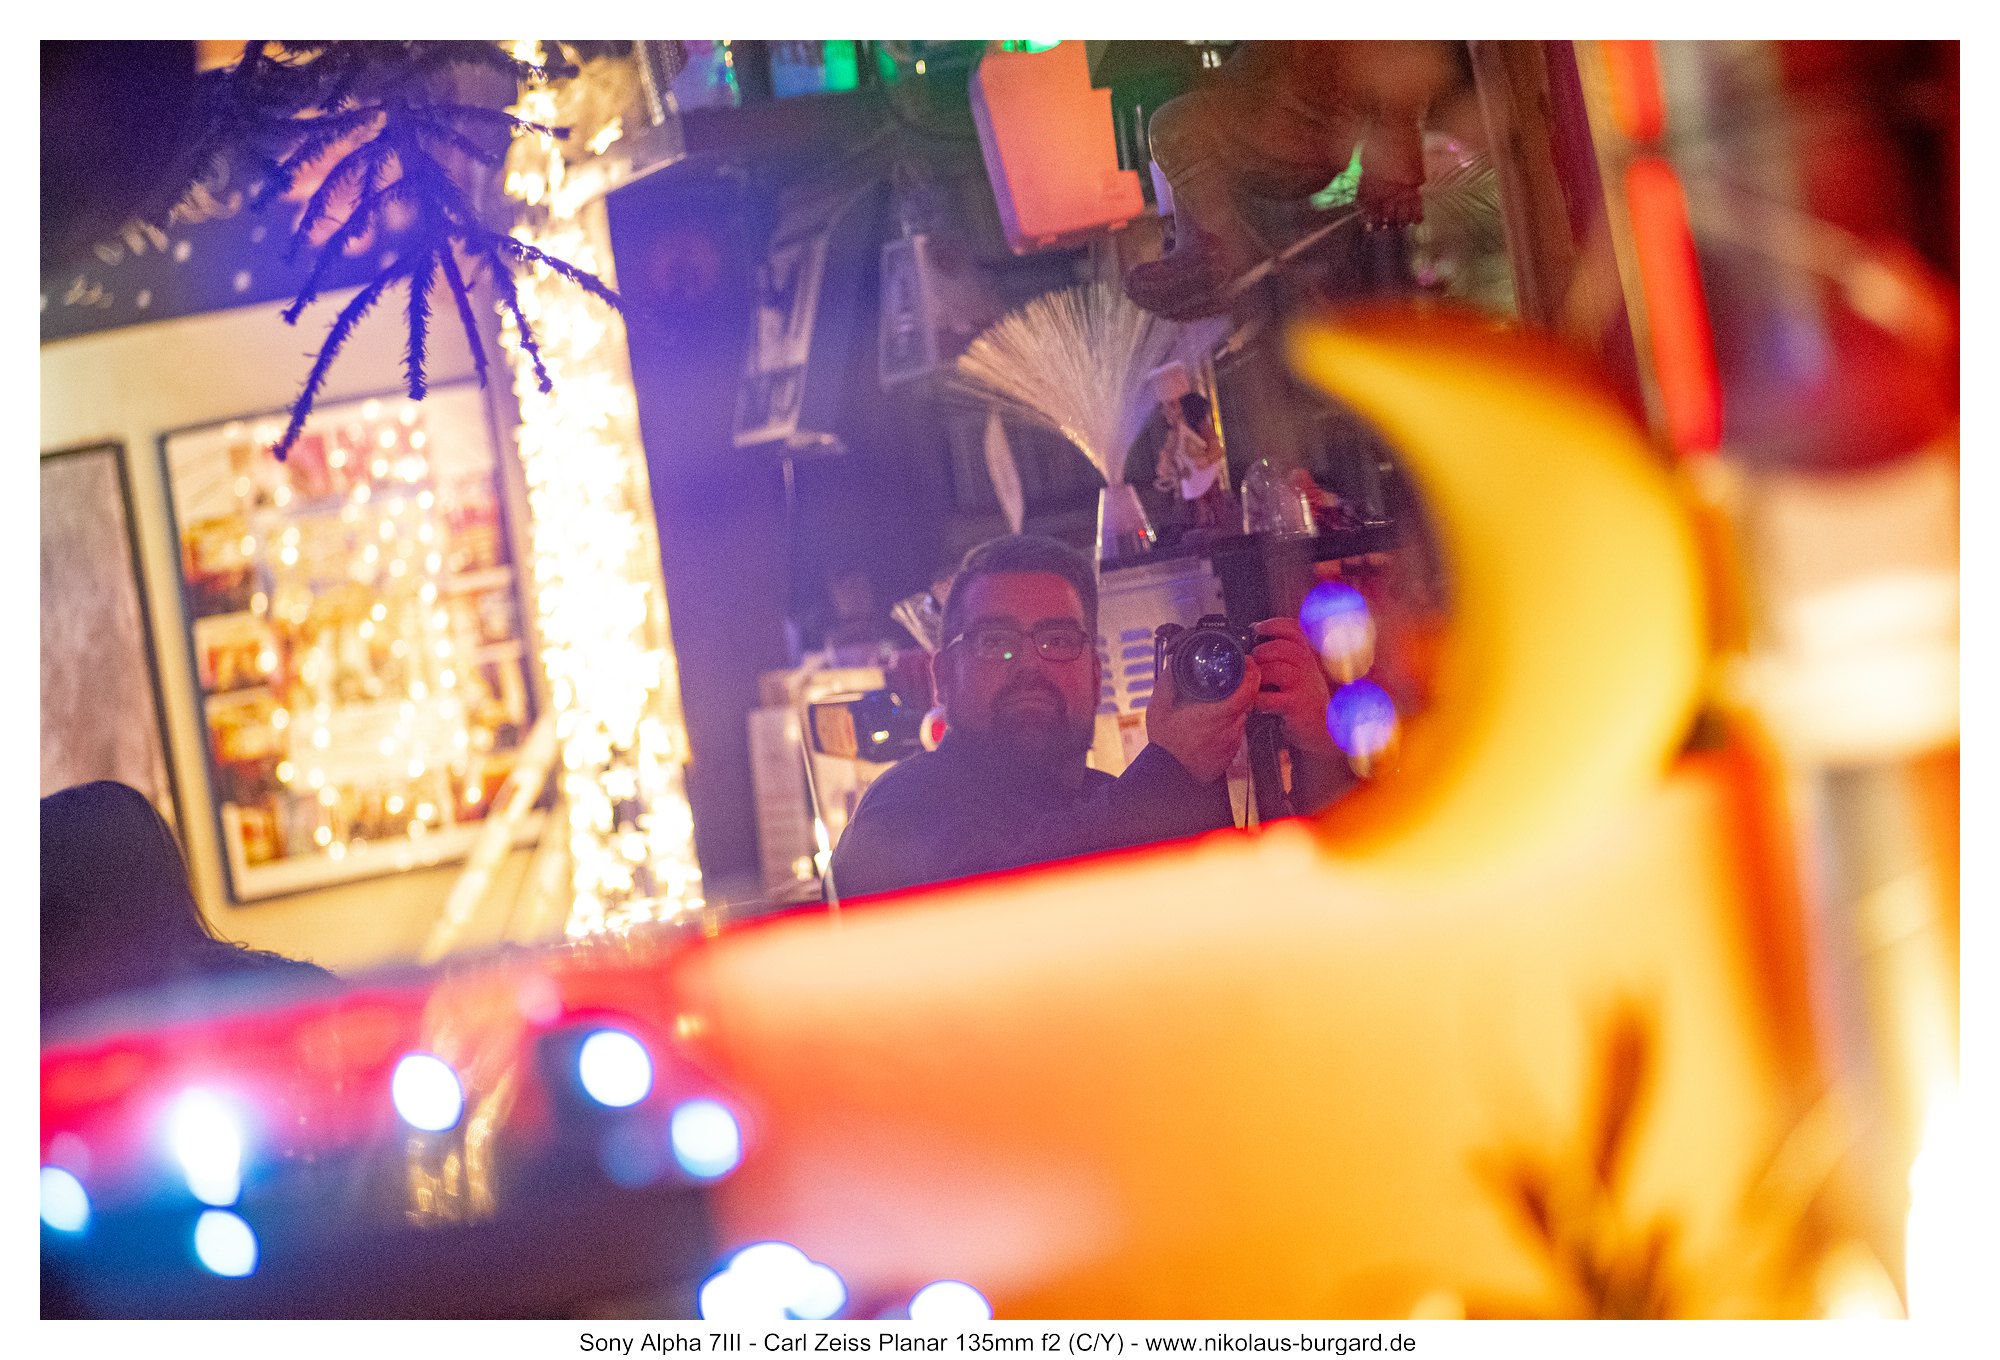
Eine Runde quer durch Saarbrücken zur Zeit des Weihnachtsmarktes - herrlich mit den vielen Lichtern und allerlei Stände zum Genießen.
Ein Abschluss im Nauwieser Viertel darf natürlich nicht fehlen und das Planar kommt dank seiner Lichtstärke auch hier bei wenig Licht nie ins Schwitzen - wenn die Farbfehler in Form von grünem und violettem Bokeh-Fringing bei Offenblende nicht wären....
A round across Saarbrücken at the time of the Christmas market - wonderful with the many lights and all kinds of stalls to enjoy.
A final in the Nauwieser Viertel should not be missing and thanks to its luminous intensity, the planar never breaks a sweat here with little light - if the
color defects in the form of green and purple bokeh-fringing would not be at open aperture....


Verzeichnung / Distortion
Die Verzeichnung des Zeiss Planar 135mm f2 ist minimal kissenförmig.
Sie bedarf in meinen Augen keiner Korrektur.
The distortion of the Zeiss Planar 135mm f2 is minimally pincushion-shaped.
In my opinion, it does not require any correction.

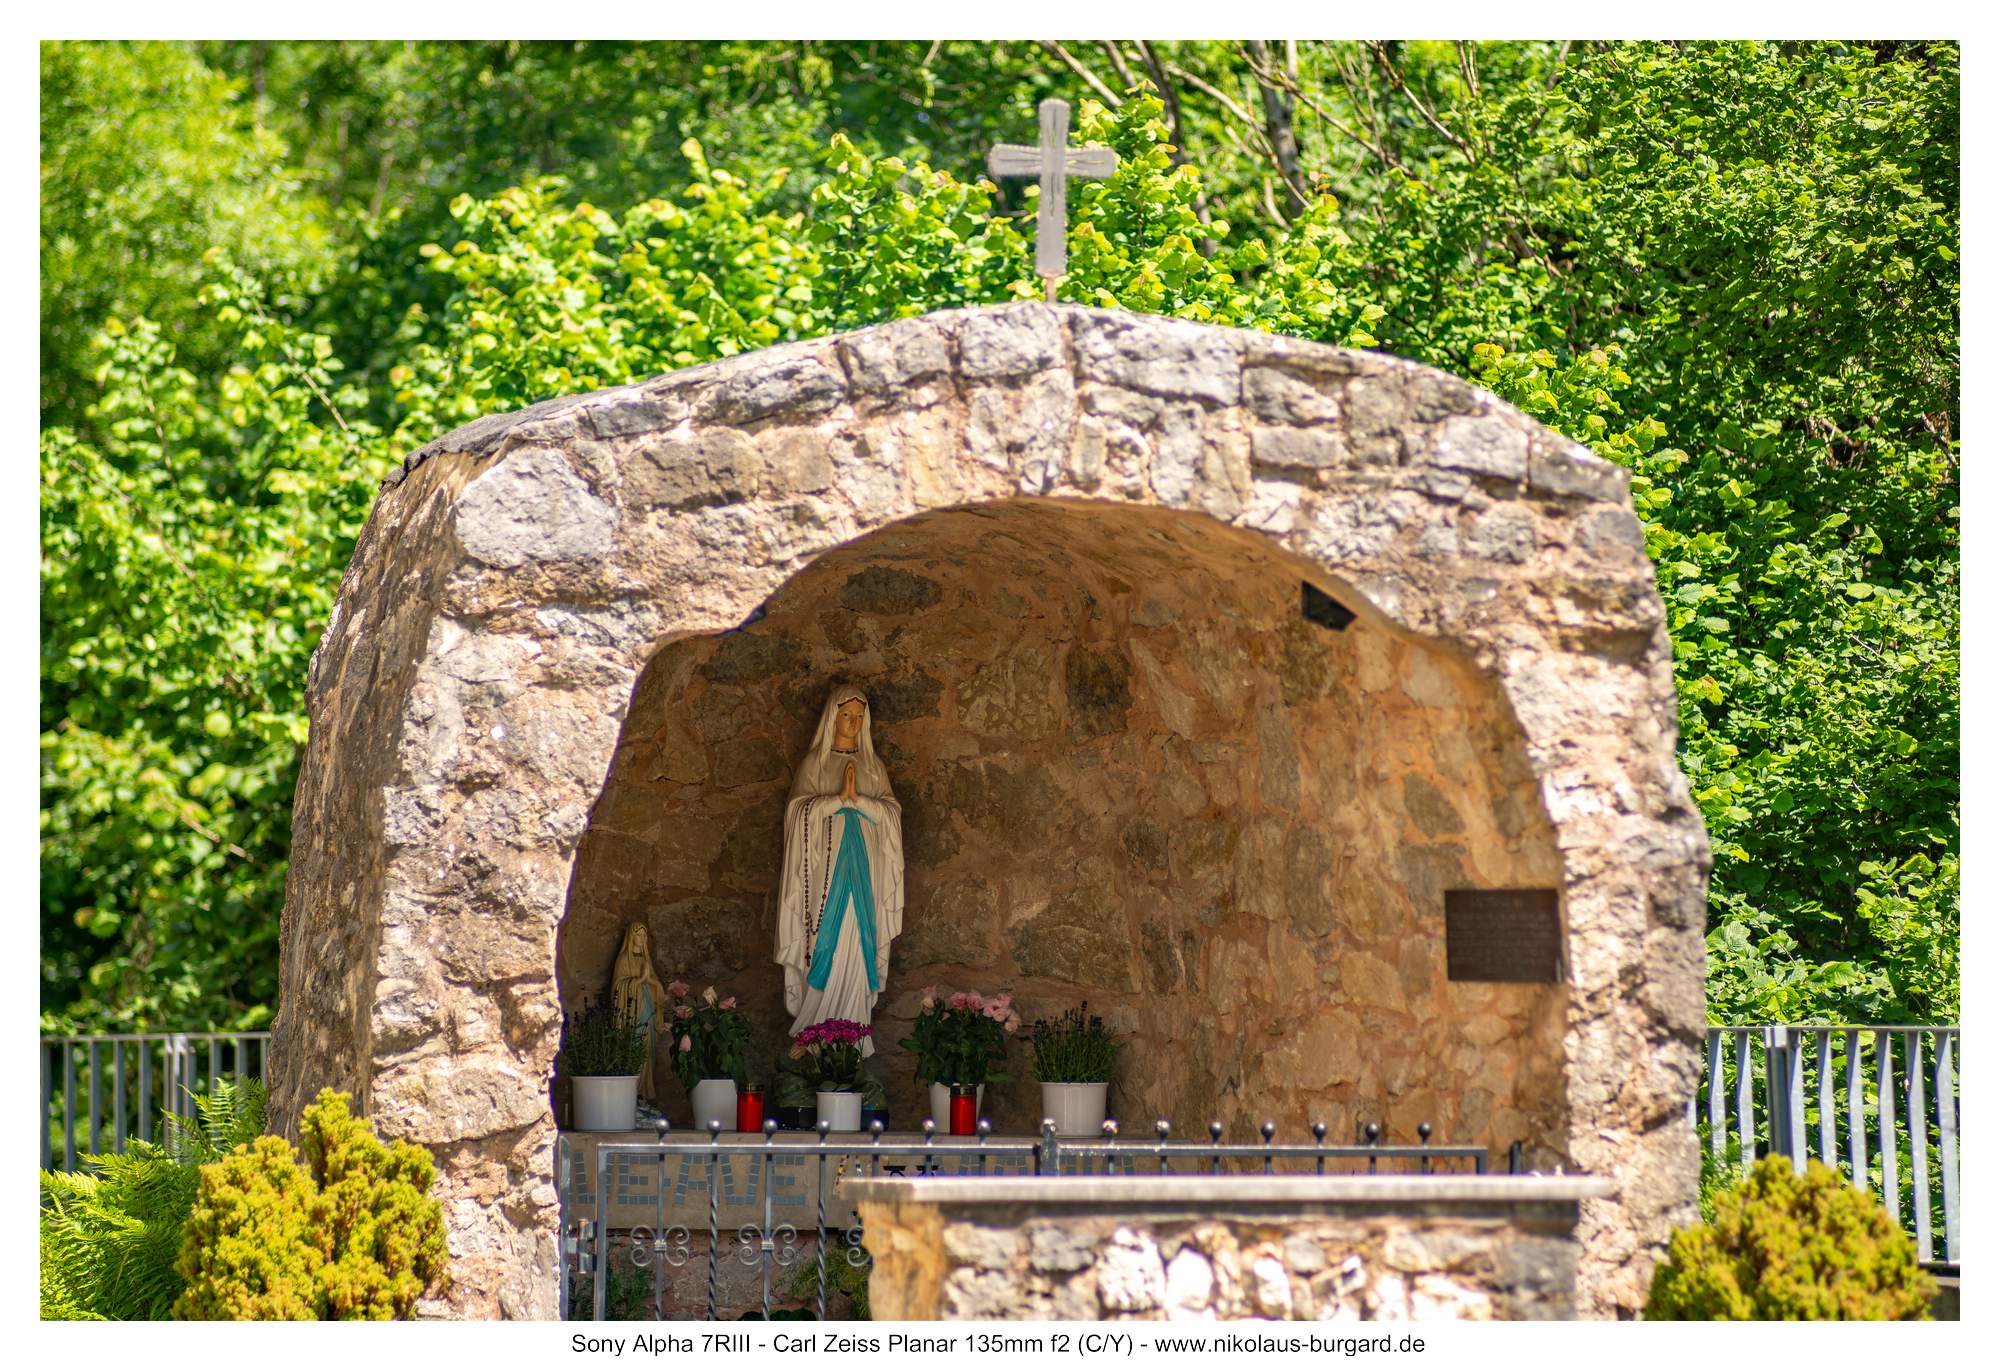
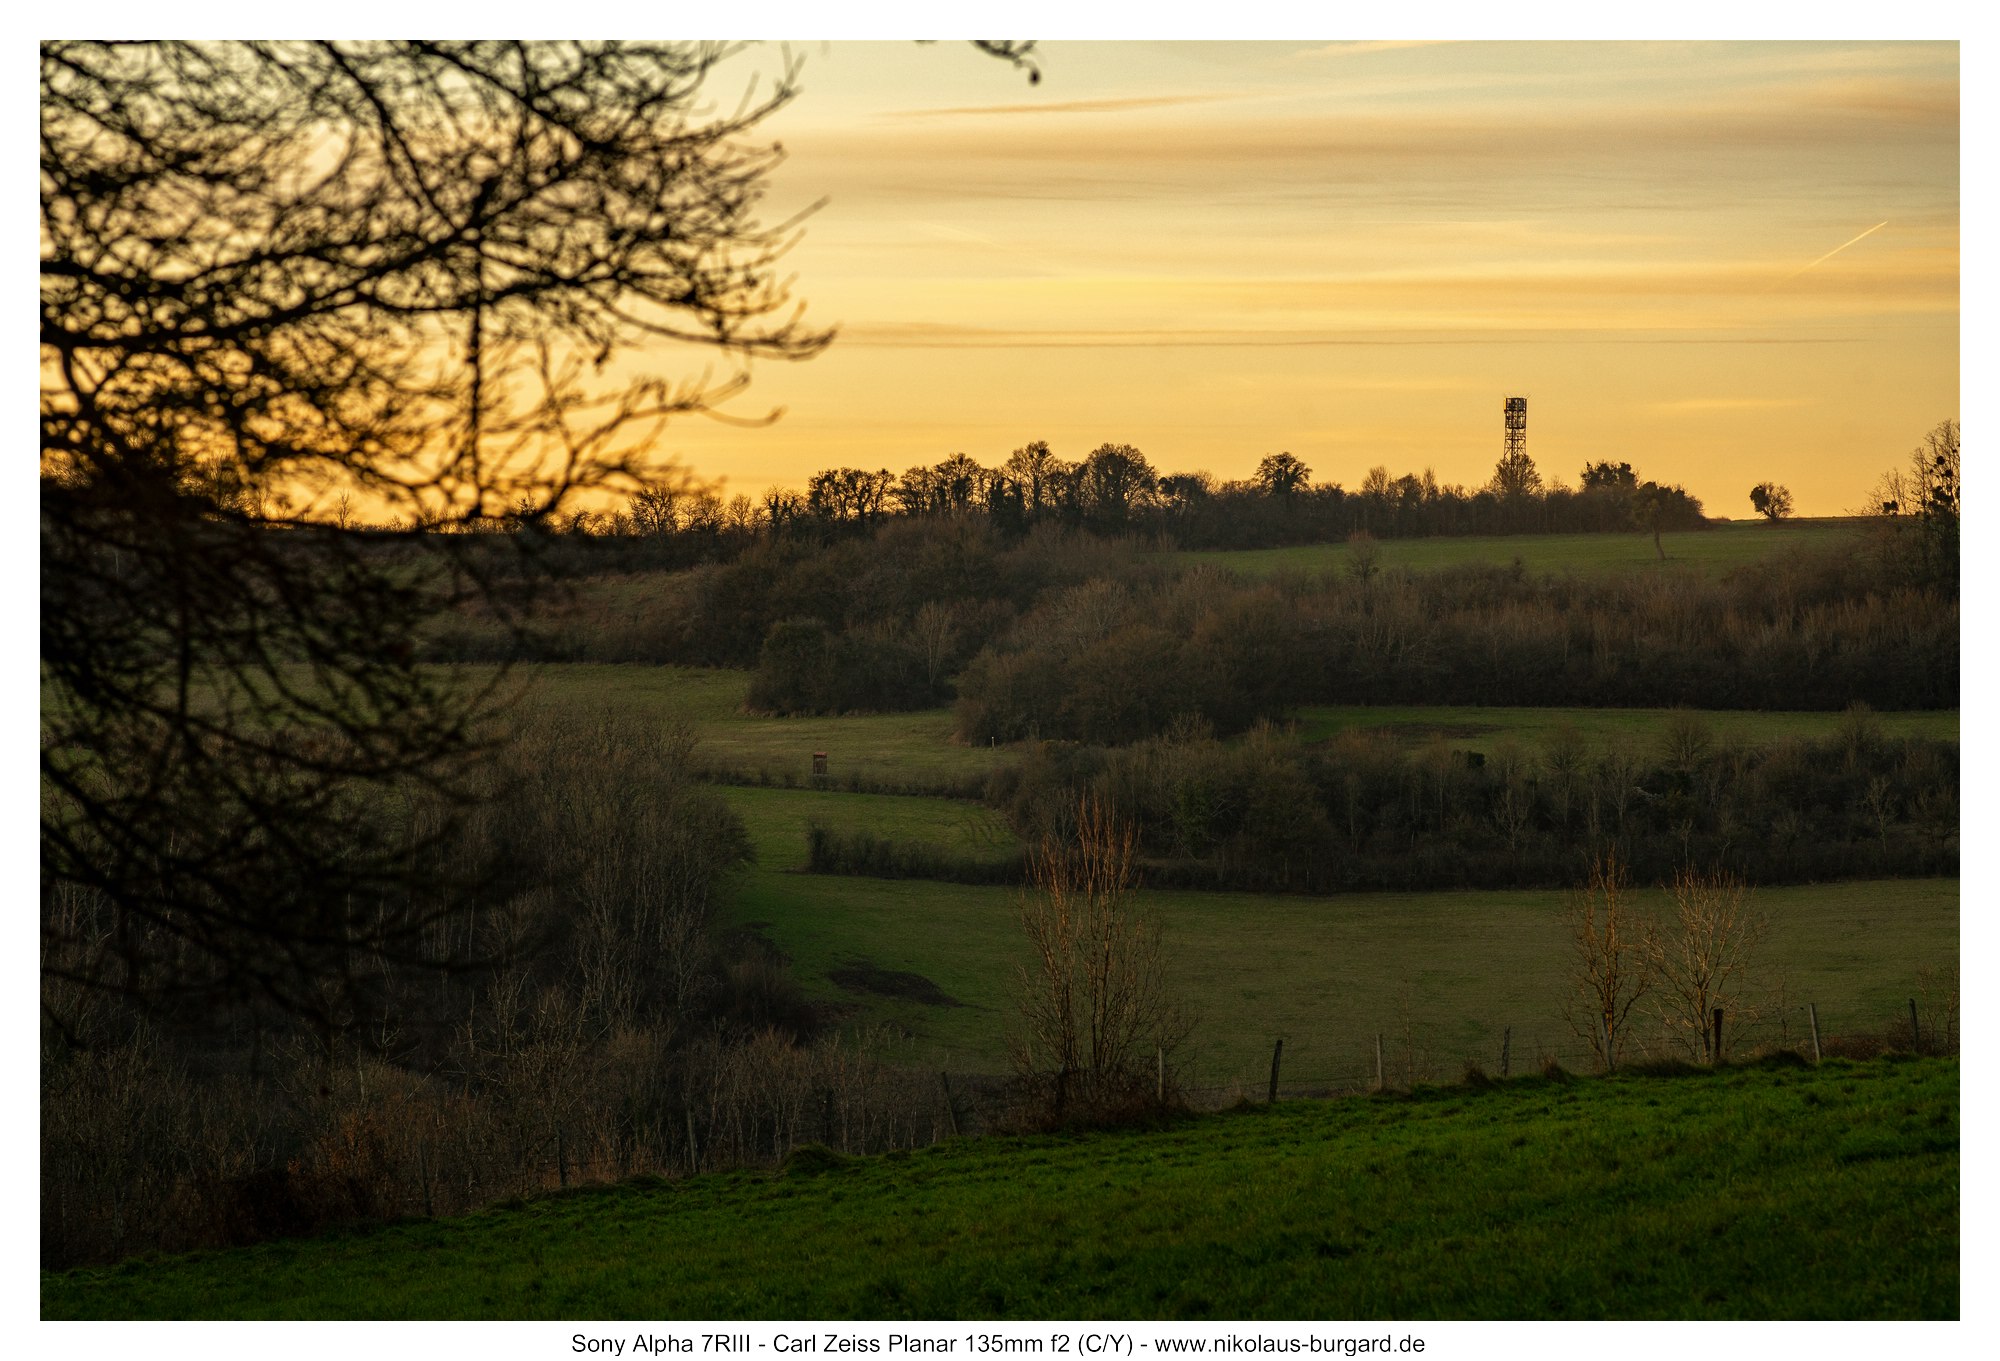
Bildserie: "Ritter-Bolch" / Picture Series: "Ritter-Bolch"
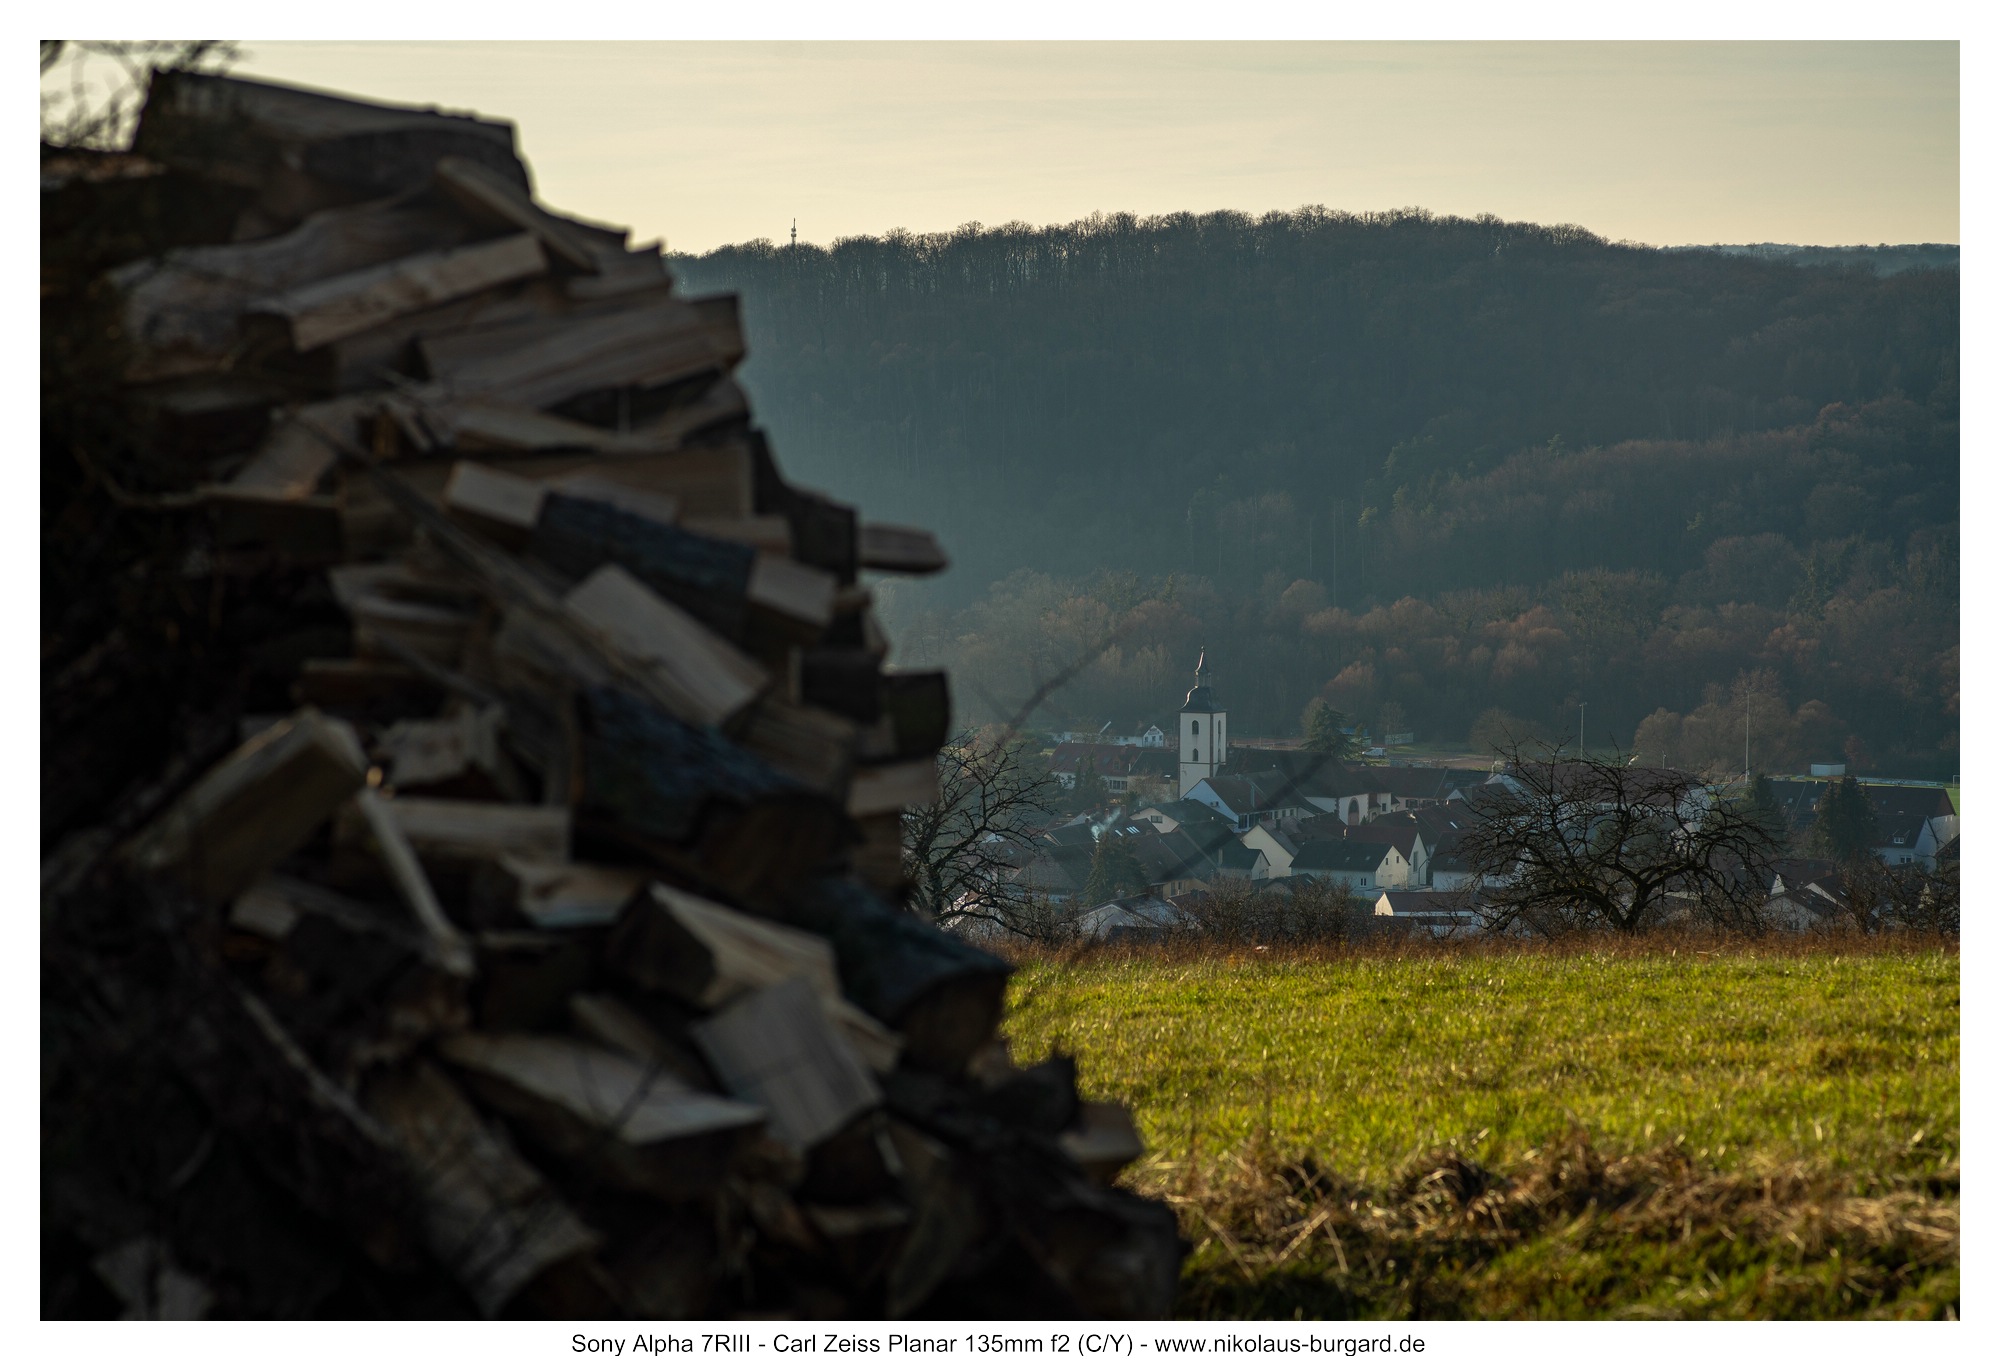
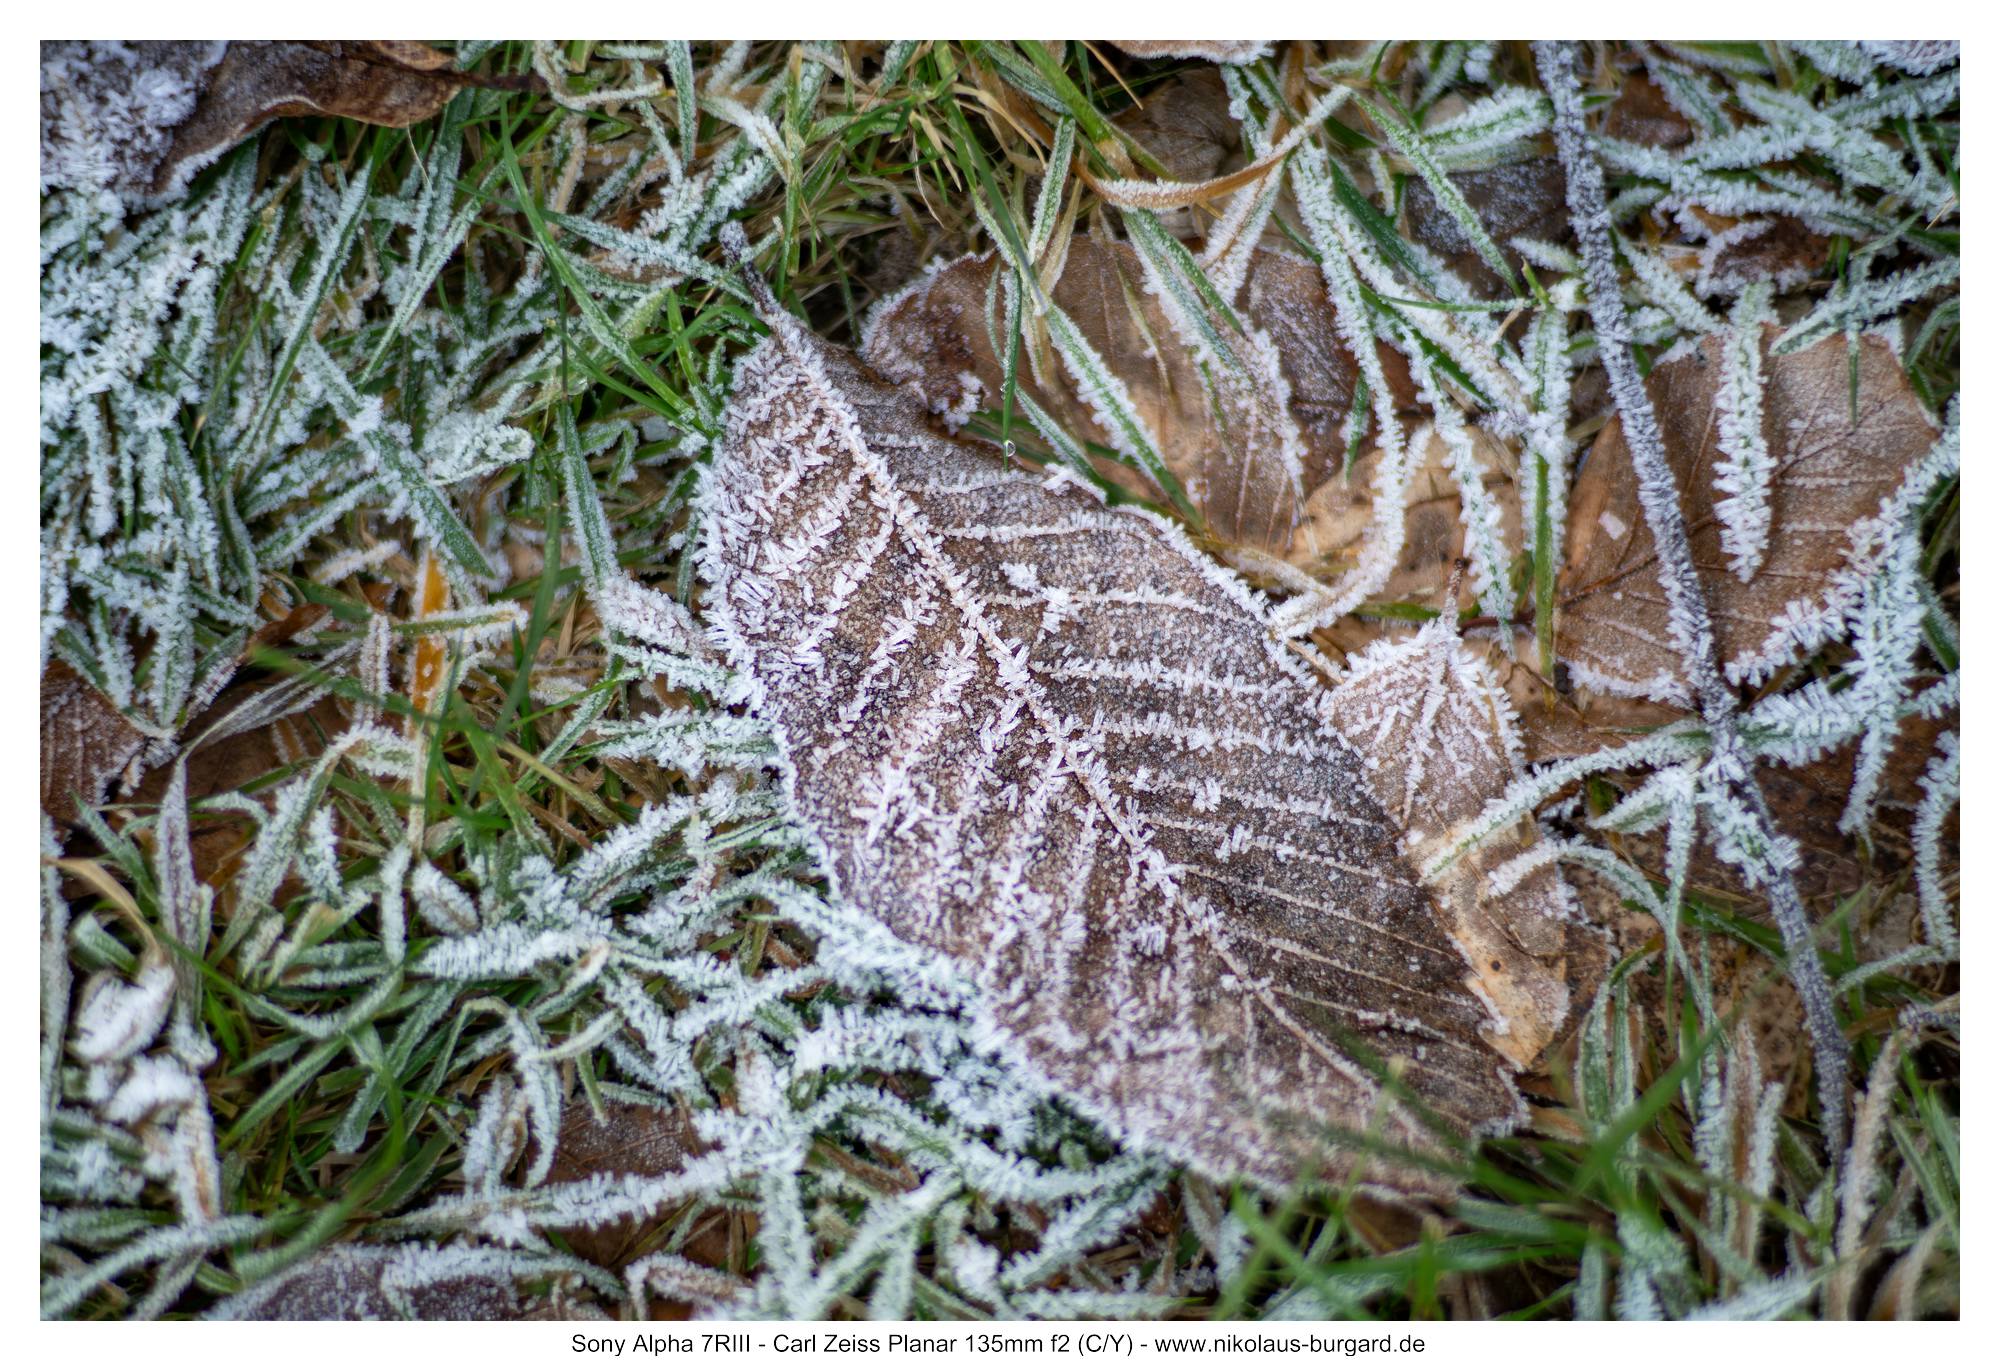
Ein neuer Wanderweg namens "Ritter Bolch" führt rund um Bliesmengen-Bolchen und Gräfinthal in der Biosphäre Bliesgau.
Auch wenn man es den Bildern kaum ansieht, entstanden sind sie tatsächlich am 27. Dezember. Solch einen schönen, sonnigen (aber kalten!) Wintertag gibt es nur selten und bietet dem Planar natürlcih optimale Bedingungen.
A new hiking trail called "Ritter Bolch" leads around Bliesmengen-Bolchen and Gräfinthal in the Biosphere Bliesgau.
When looking at the pictures, you hardly can believe they were actually created on 27. December. Such a beautiful, sunny (but cold!) Winter day is rare and of
course offers the optimal conditions for the Planar.


Farbfehler / Chromatic Aberrations
Hier sind wir bei einer Schwachstelle des Objektives angekommen.
Während die lateralen chromatischen Aberrationen (wie im Schärfe-Kapitel gezeigt und beschrieben) zwar sichtbar vorhanden sind, aber im Raw-Konverter per "Häkchen setzen" entfernt werden können, sind die longitudinalen chromatischen Aberrationen oft ein Problem.
Zunächst das übliche Chrom-Ösen-Bild mit Vergrößerungen von vor und hinter der Schärfeebene:
This is where we come to a weak point of the lens.
While the lateral chromatic aberrations (as shown and described in the sharpness chapter) are visibly present but can be removed in the raw converter by "checking the box", the longitudinal chromatic aberrations are often a problem.
First, the usual chrome eyelet image with enlargements from in front of and behind the focal plane:


Das Bokeh-Fringing (magenta/lila vor der Schärfeebene, grün hinter der Schärfeebene) ist sehr deutlich sichtbar und oft auch ohne Vergrößerung in den Gesamtbildern sehr prägnant:
The bokeh fringing (magenta/purple in front of the focal plane, green behind the focal plane) is very clearly visible and often very striking in the overall images even without magnification:

Besonders problematisch ist das Purple Fringing an Kontrastkanten in der Schärfeebene:
The Purple Fringing on contrast edges in the sharpness plane is particularly problematic:


Insgesamt ist dies mit Sicherheit nicht die Paradedisziplin des Objektives.
Aber andere Vertreter der frühen ultralichtstarken Tele-Brennweiten sind in diesem Bereich auch nicht deutlich besser (z.B. Nikkor 135mm f2 AIS oder Canon nFD 135mmf2) - und die Dritthersteller-135mm f1.8 von z.B. Sigma oder Porst sind schwächer.
Also eine "erwartbare" Leistung im Leistungsbereich der direkten (zeitgenössischen!) Konkurrenz.
Overall, this is certainly not the parade discipline of the lens.
But other representatives of the early ultra-light-strong tele-focal ranges are also not significantly better in this area (e.g. Nikkor 135mm f2 AIS or Canon nFD
135mmf2) - and the third-party manufacturers-135mm f1.8 from e.g. Sigma or Porst are weaker.
So an "expected" performance in the performance range of the direct (contemporary!) Competition.
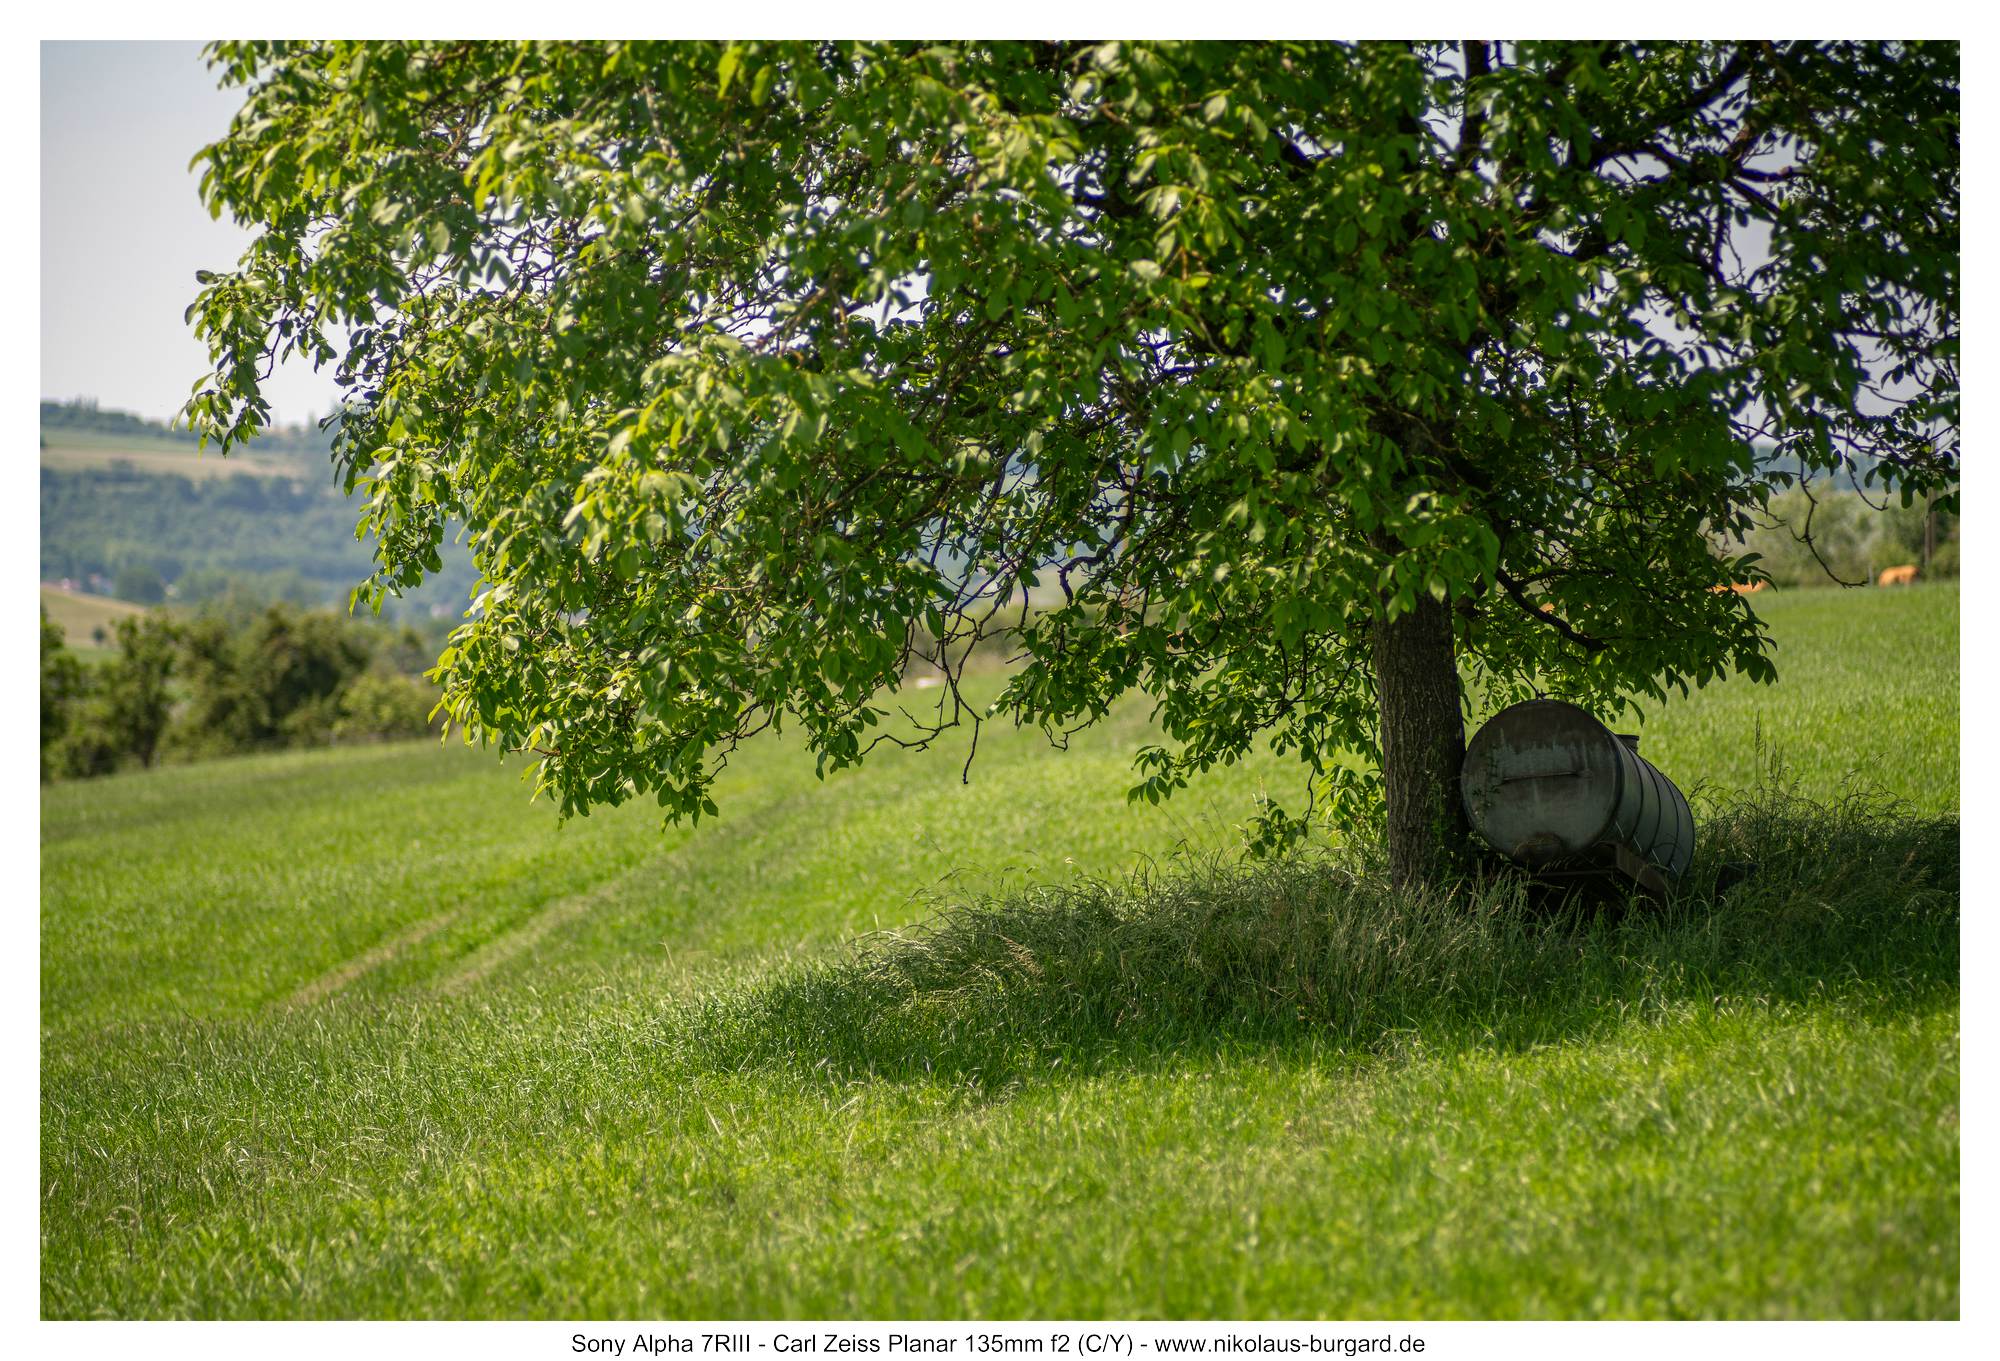
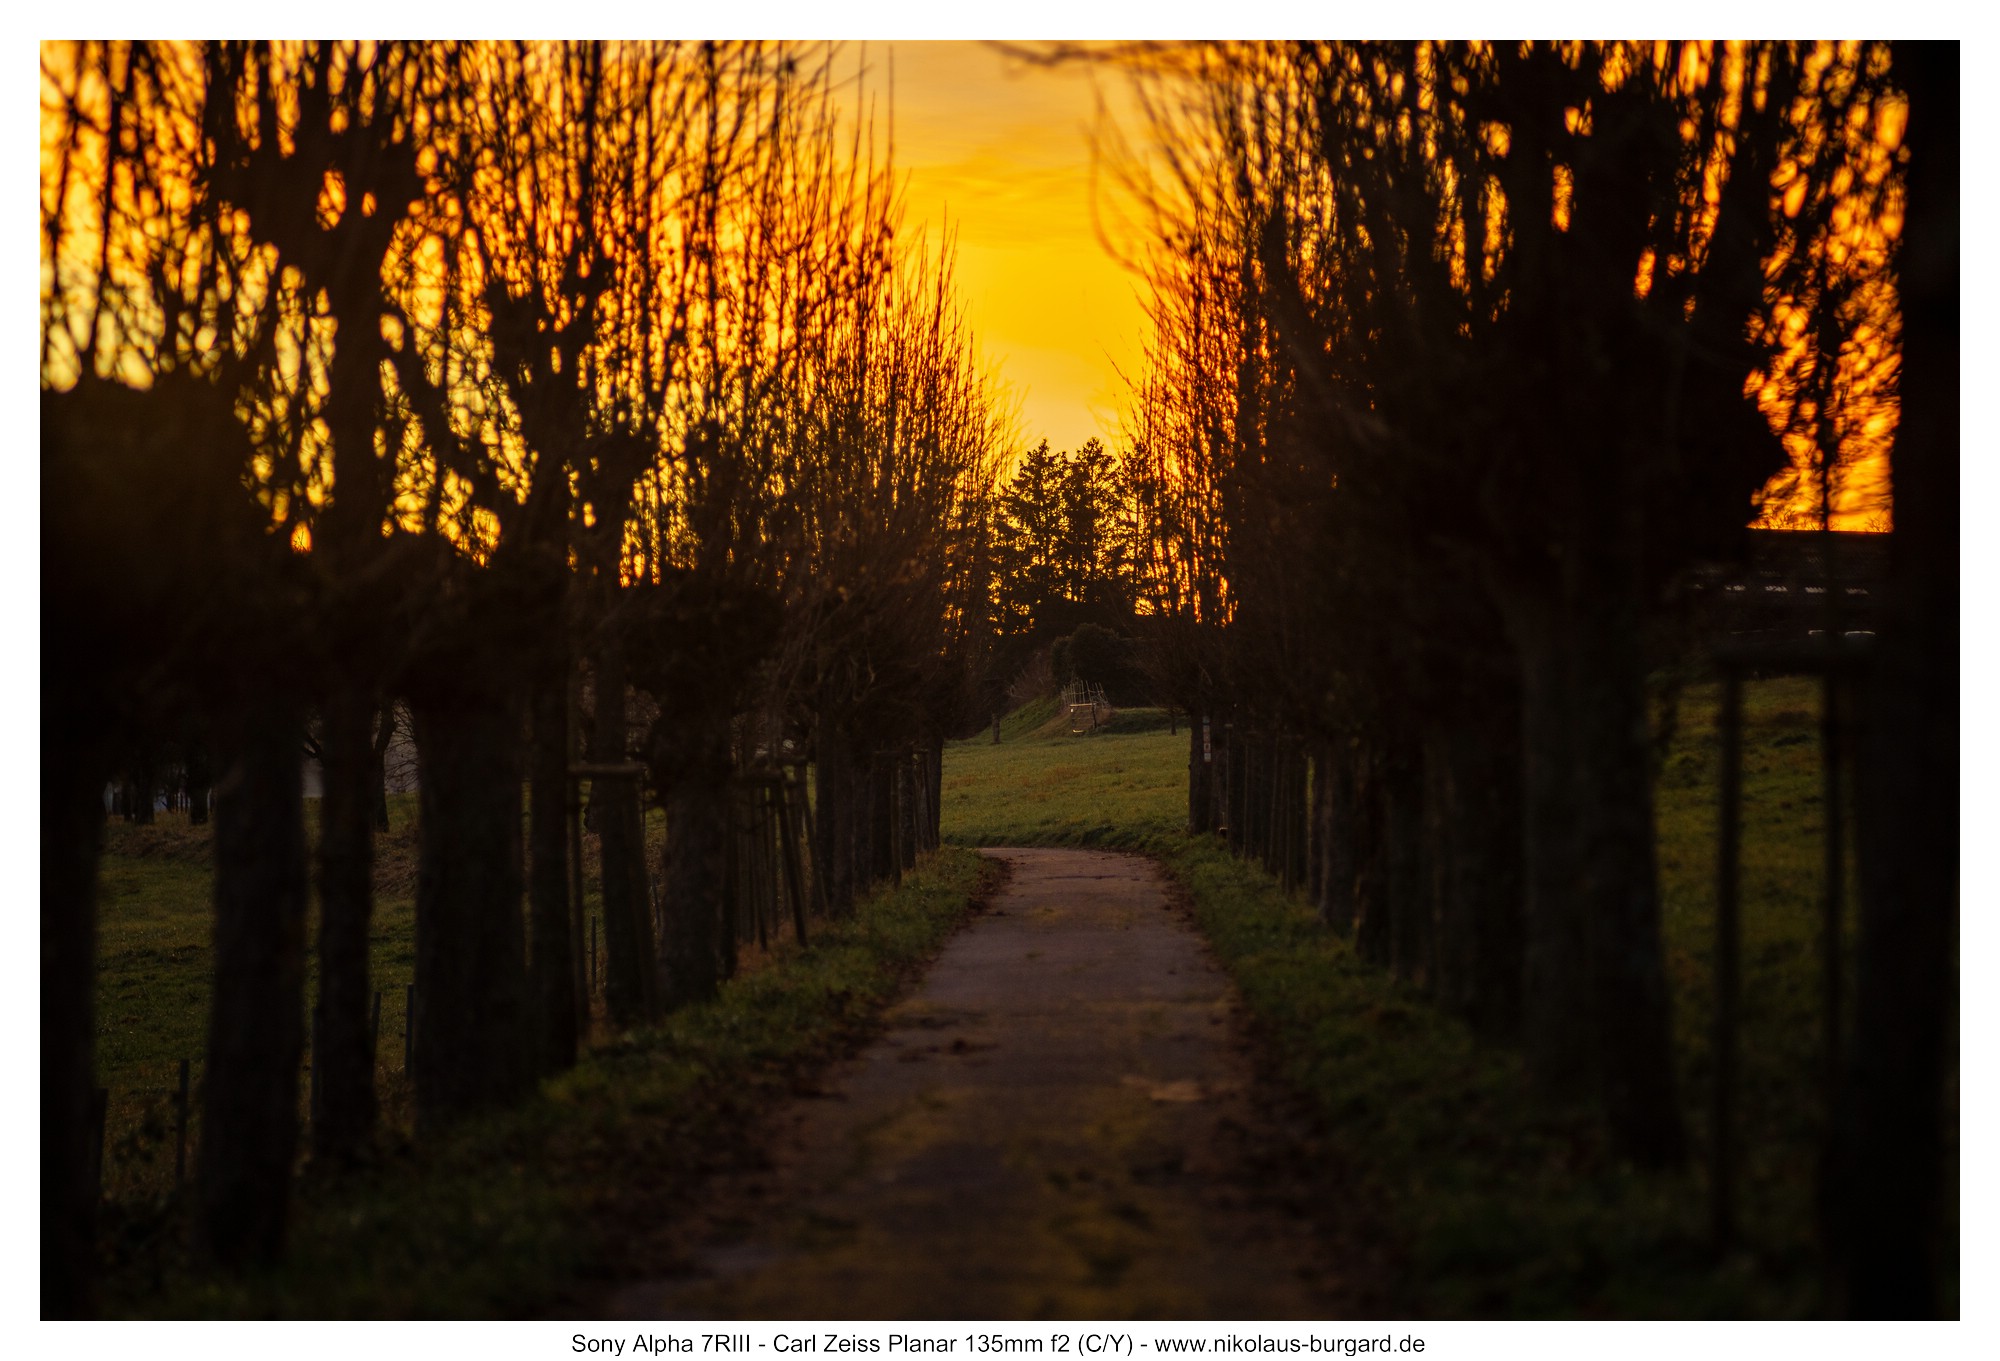
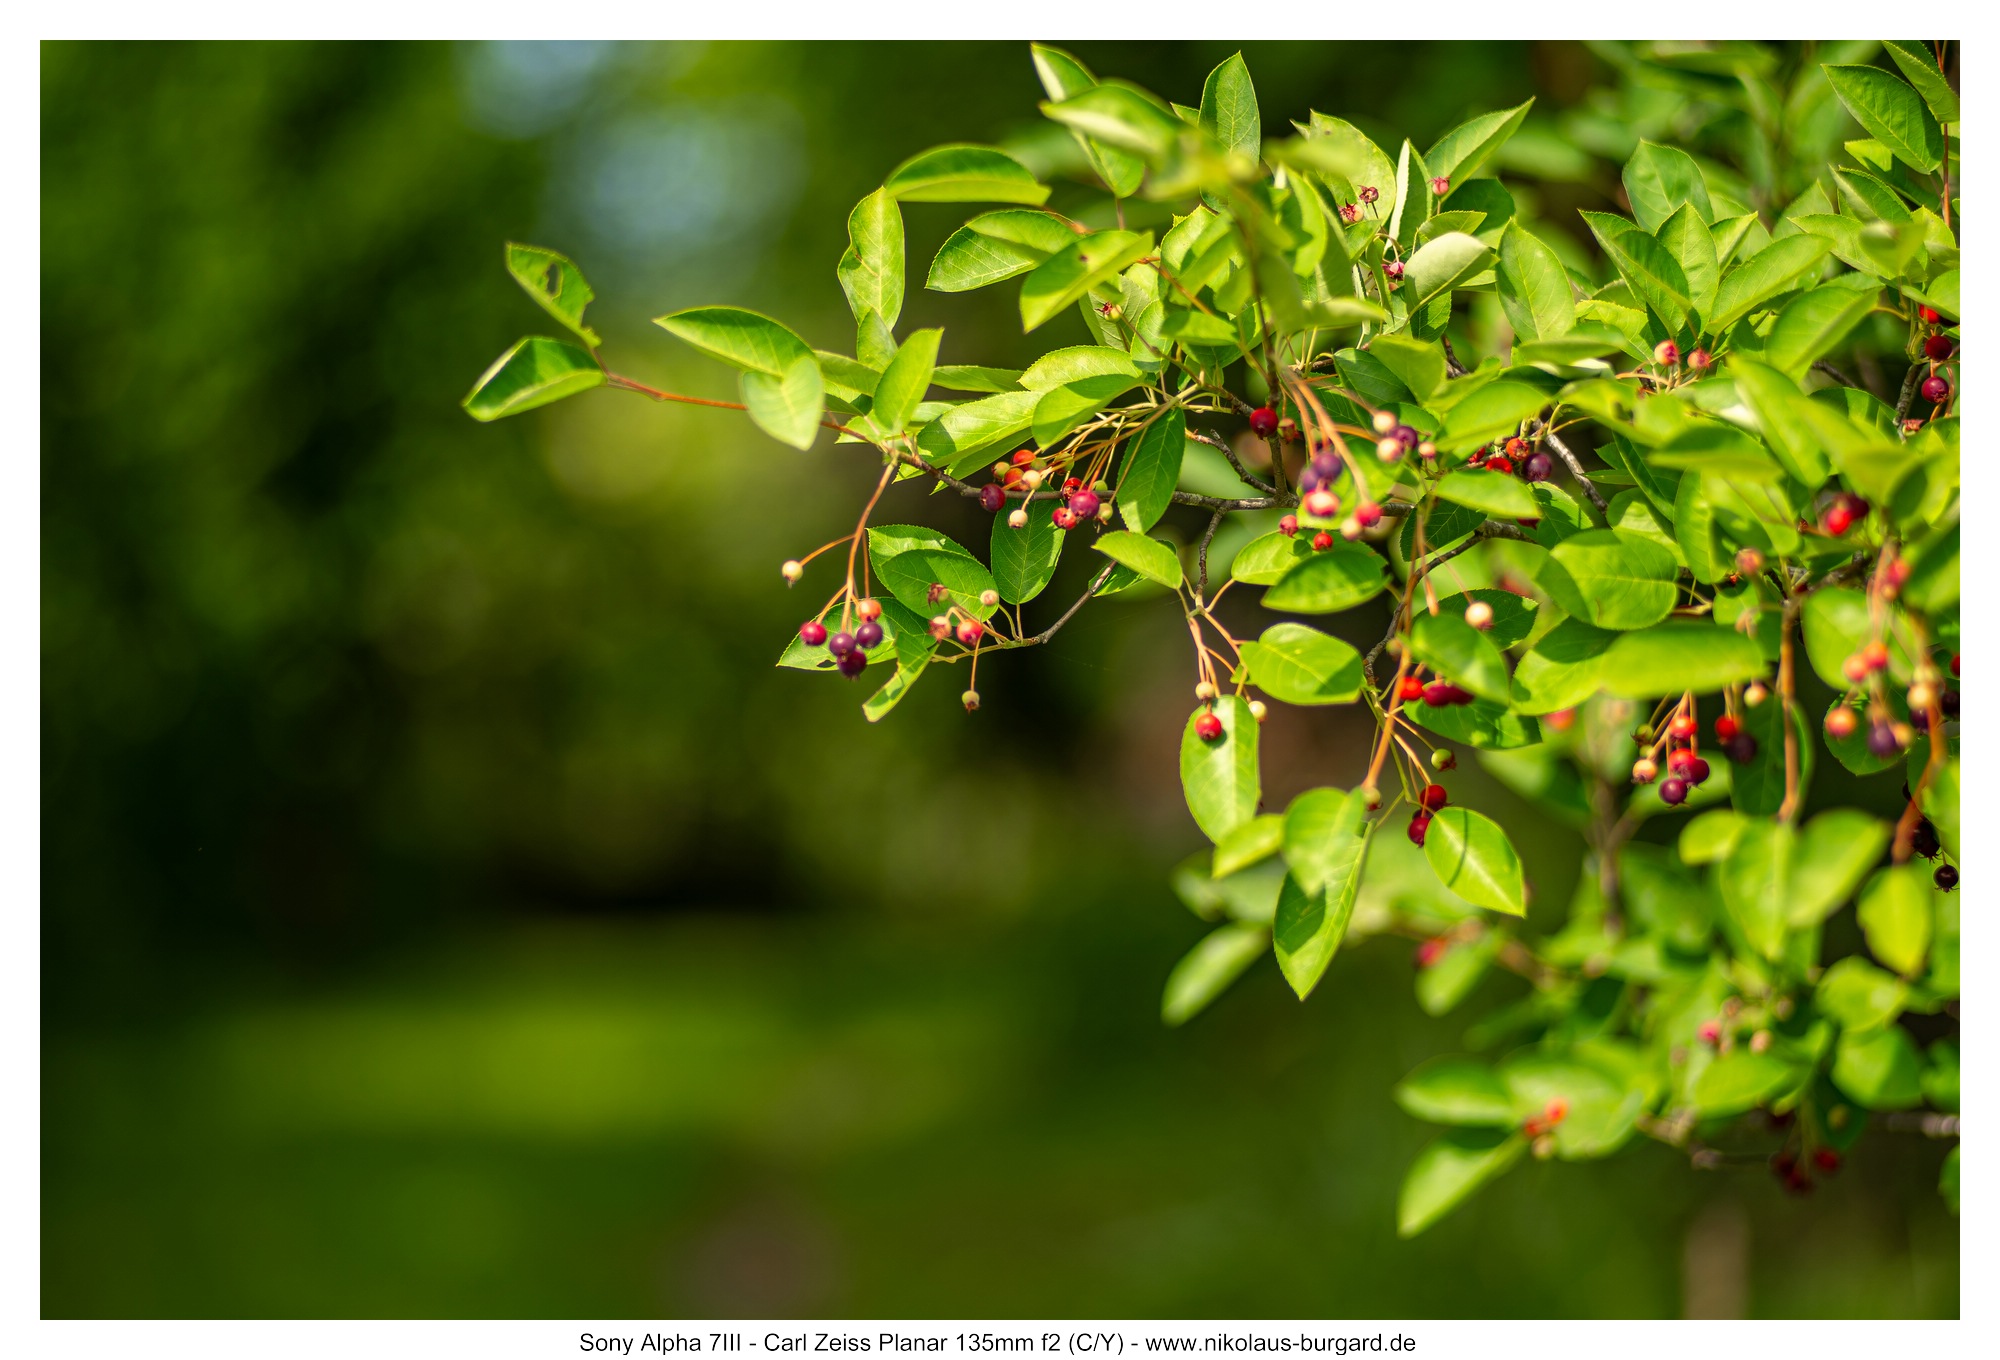
Bildserie / Picture Series: Summer at home
Zuhause ist es doch am Schönsten!
So oder so ähnlich heißt es ja oft, und irgendwo ist da natürlich auch was Wahres dran.
Jedenfalls geht nichts über schöne Spaziergänge an warmen Sommerabenden - und das Planar mit seinem sehr schönen Bokeh zaubert dann herrliche Impressionen und Portraits.
It is the most beautiful at home!
Either way, it is often said, and of course there is something true.
In any case, nothing beats beautiful walks on warm summer evenings - and the planar with its very beautiful bokeh then conjures up magnificent impressions and
portraits.


Verhalten im Gegenlicht / Flares and Ghosts
Das Planar reagiert "allergisch" auf Licht auf der Frontlinse.
Sobald dies passiert, erlebt man sofort einen deutlichen Kontrasteinbruch und Schleier über Teilbereichen des Bildes:
The planar responds "allergically" to light on the front lens.
As soon as this happens, you immediately experience a clear contrast intrusion and veil over partial areas of the image:


Auch diffuses Streulicht macht sich mit einem Schleier und Kontrasteinbruch bemerkbar: Hier habe ich mal leicht verschwenkt, um den Einfluss des Winkels deutlich zu machen:
Even diffuse scattered light is noticeable with a veil and contrast intrusion: Here I have pivoted slightly to make the influence of the angle clear:


Auch hier habe ich versucht, mit unterschiedlichen Einfallswinkeln zu spielen:
Again, I tried to play with different angles of incidence:


Auch abgeblendet (hier f4 oder f5.6) ist der Kontrasteinbruch selbst bei halbverdeckter Sonne sichtbar:
Also stopped down (here f4 or f5.6) the contrast intrusion is visible even in the case of semi-covered sun:

Zusammenfassend kann man sagen: Im Gegenlicht ist das Planar leider schwach.
Sobald die Lichtquelle direkt die Frontlinse trifft, sind die Auswirkungen (Schleier und Kontrasteinbruch) dramatisch.
Aber auch diffusen Lichteinfall quittiert es mit Schleiern und Kontrasteinbrüchen. Auch Abblenden ändert daran wenig.
Im direkten Vergleich mit dem Canon nFD 135mm f2 und dem Nikkor 135mm f2 AIS (Tests dieser beiden Objektive folgen demnächst), die ich beide sehr gut kenne, empfinde ich das Zeiss Planar als das Schwächste der Drei im Gegenlicht.
In summary, the planar is unfortunately weak in the backlight.
Once the light source directly hits the front lens, the effects (veil and contrast intrusion) are dramatic.
But also diffuse light incidence acknowledges it with veils and contrast intrusions. Even dimming does little to change that.
In direct comparison with the Canon nFD 135mm f2 and the Nikkor 135mm f2 AIS (tests of these two lenses will follow soon), both of which I know very well,
I find the Zeiss Planar to be the weakest of the three in the backlight.
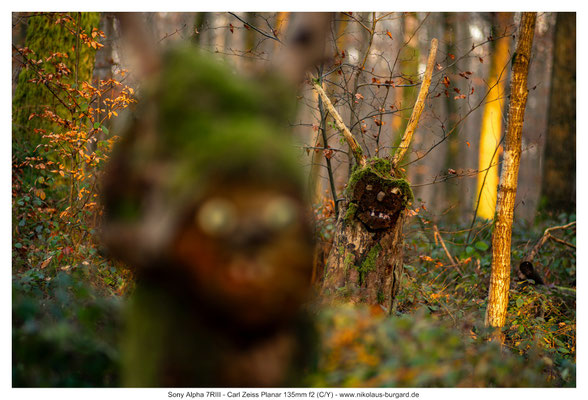
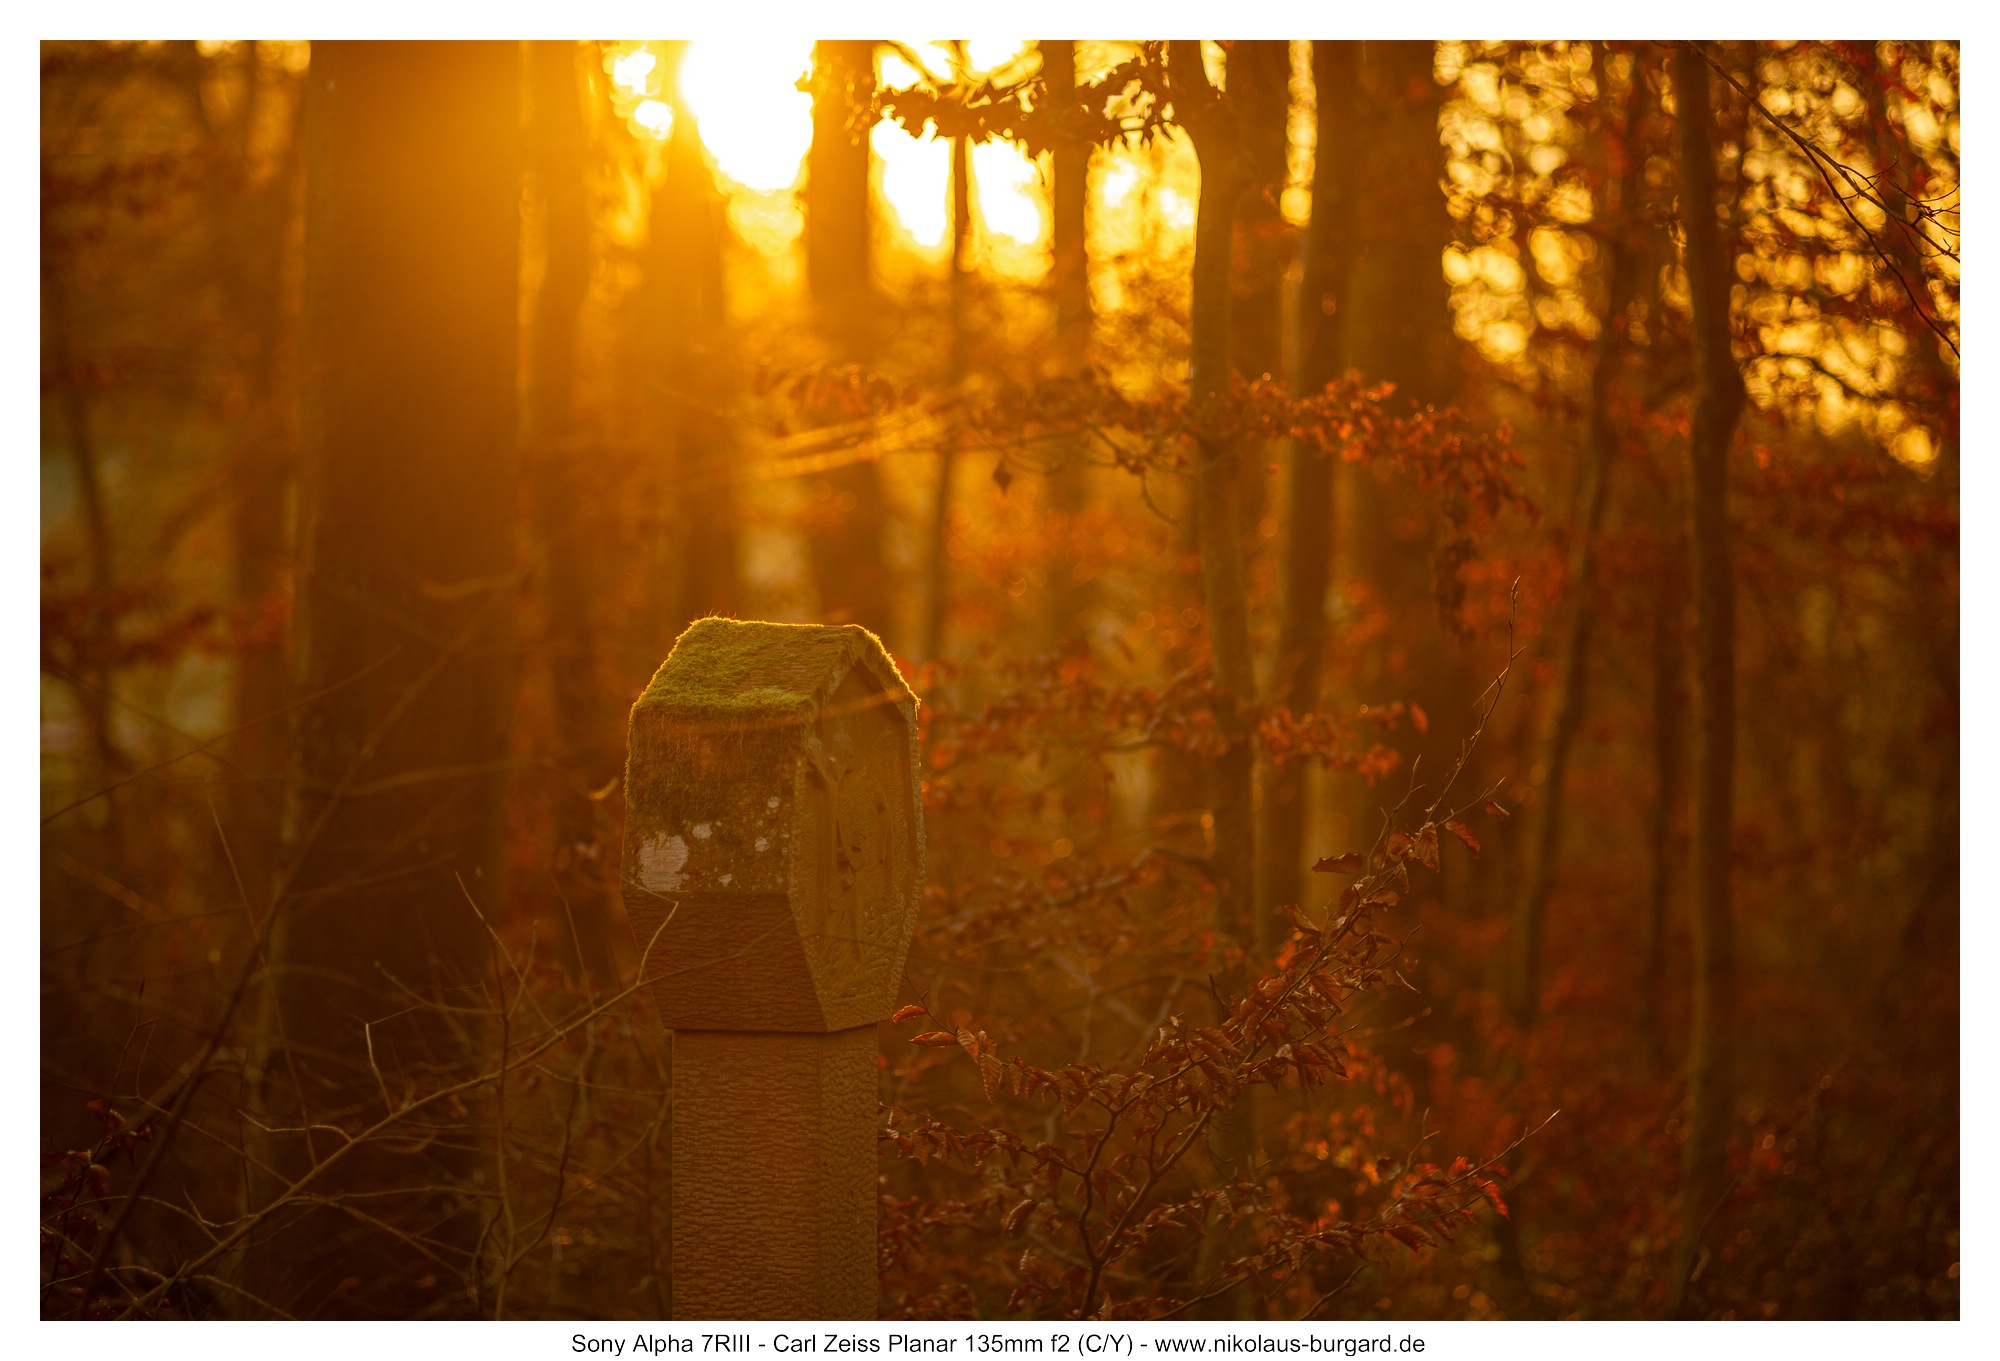
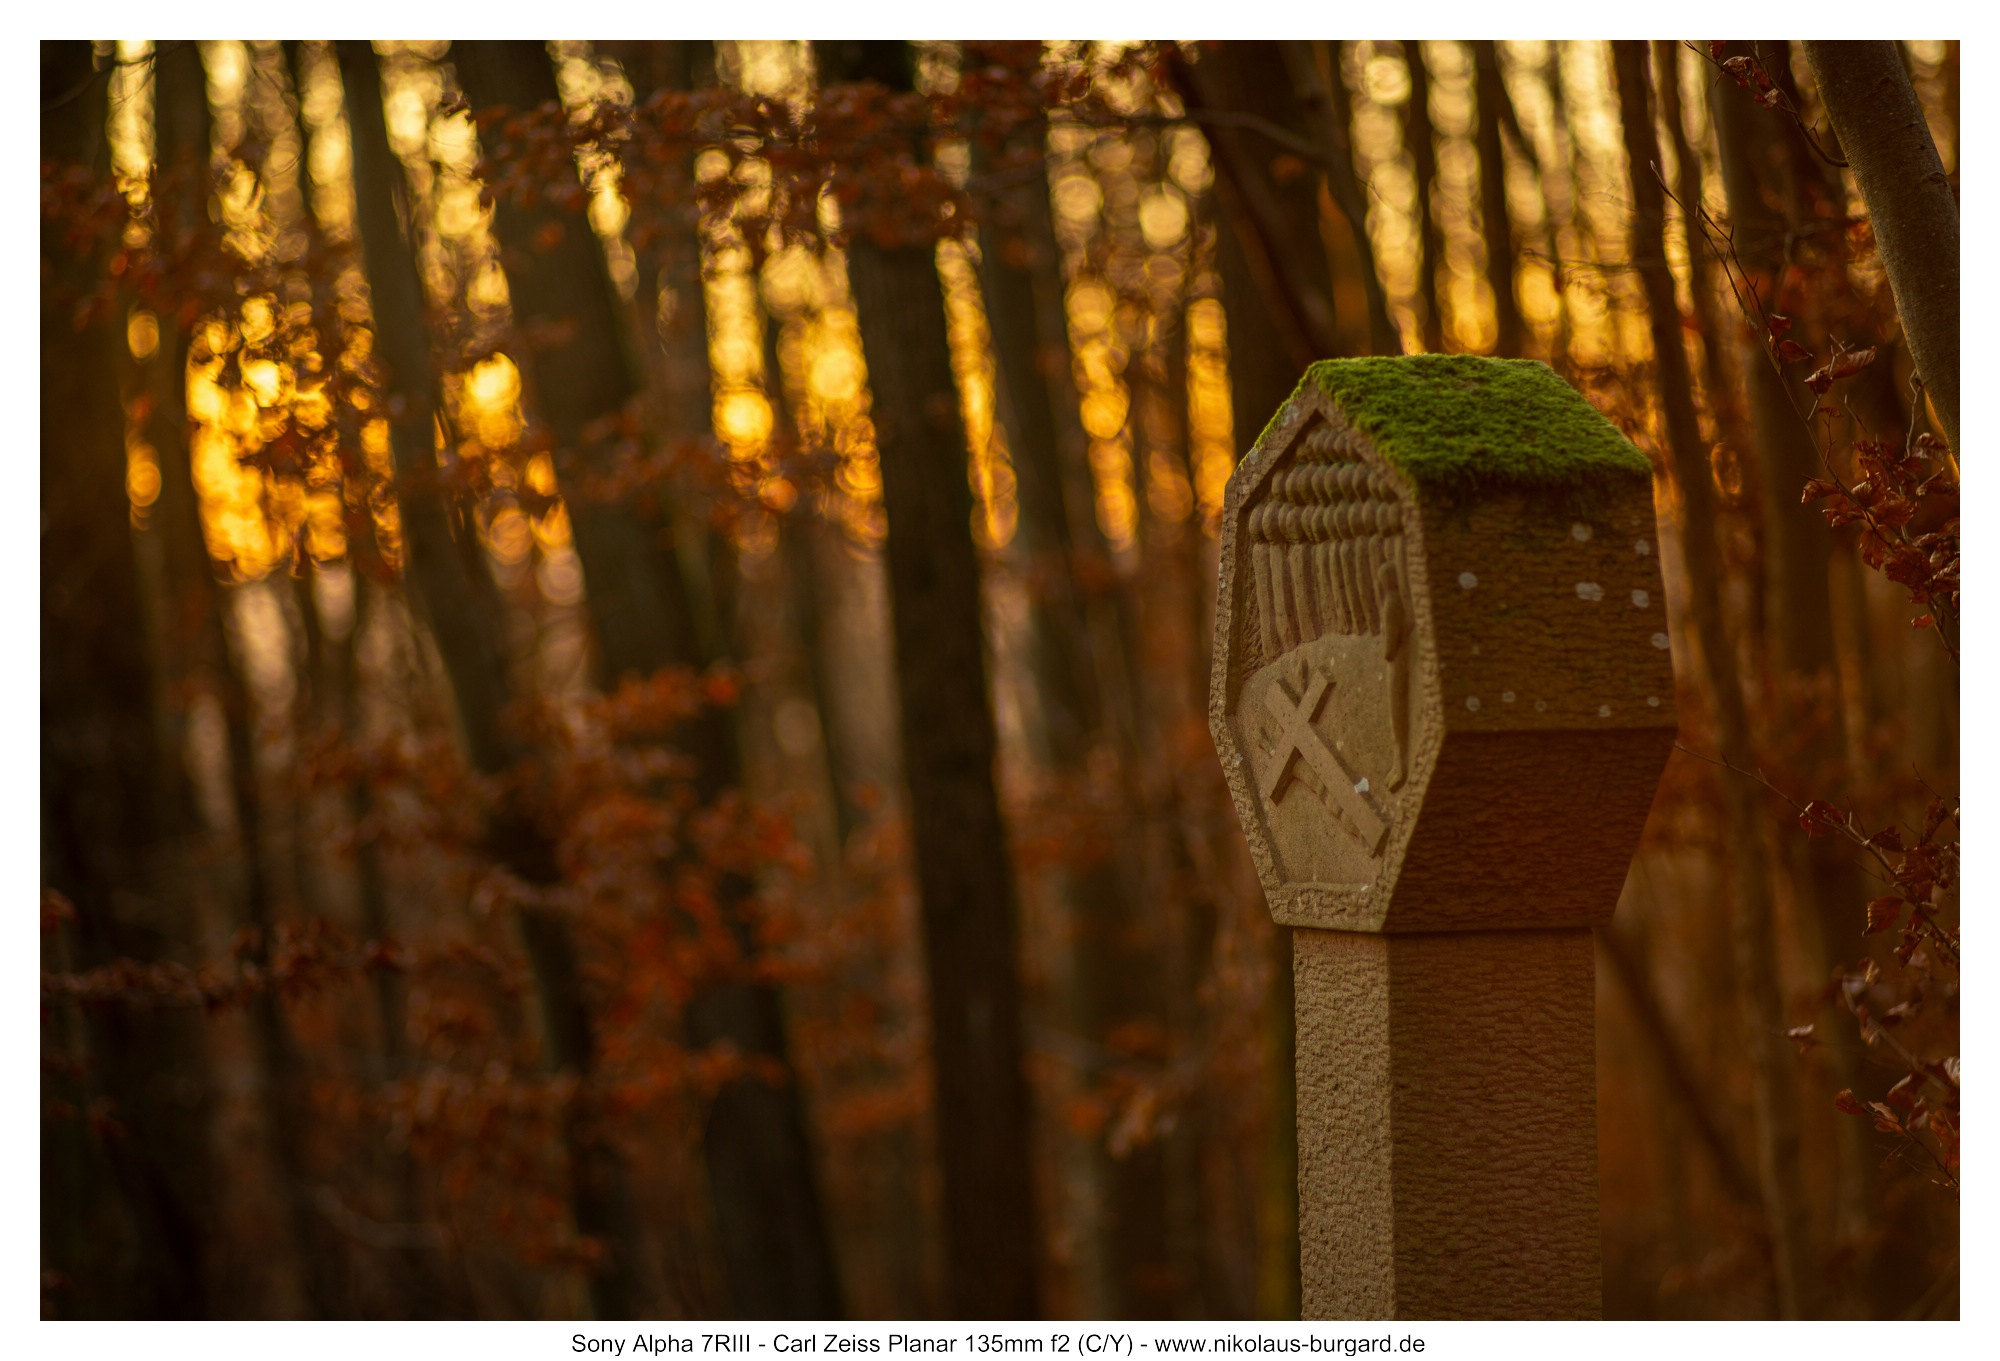
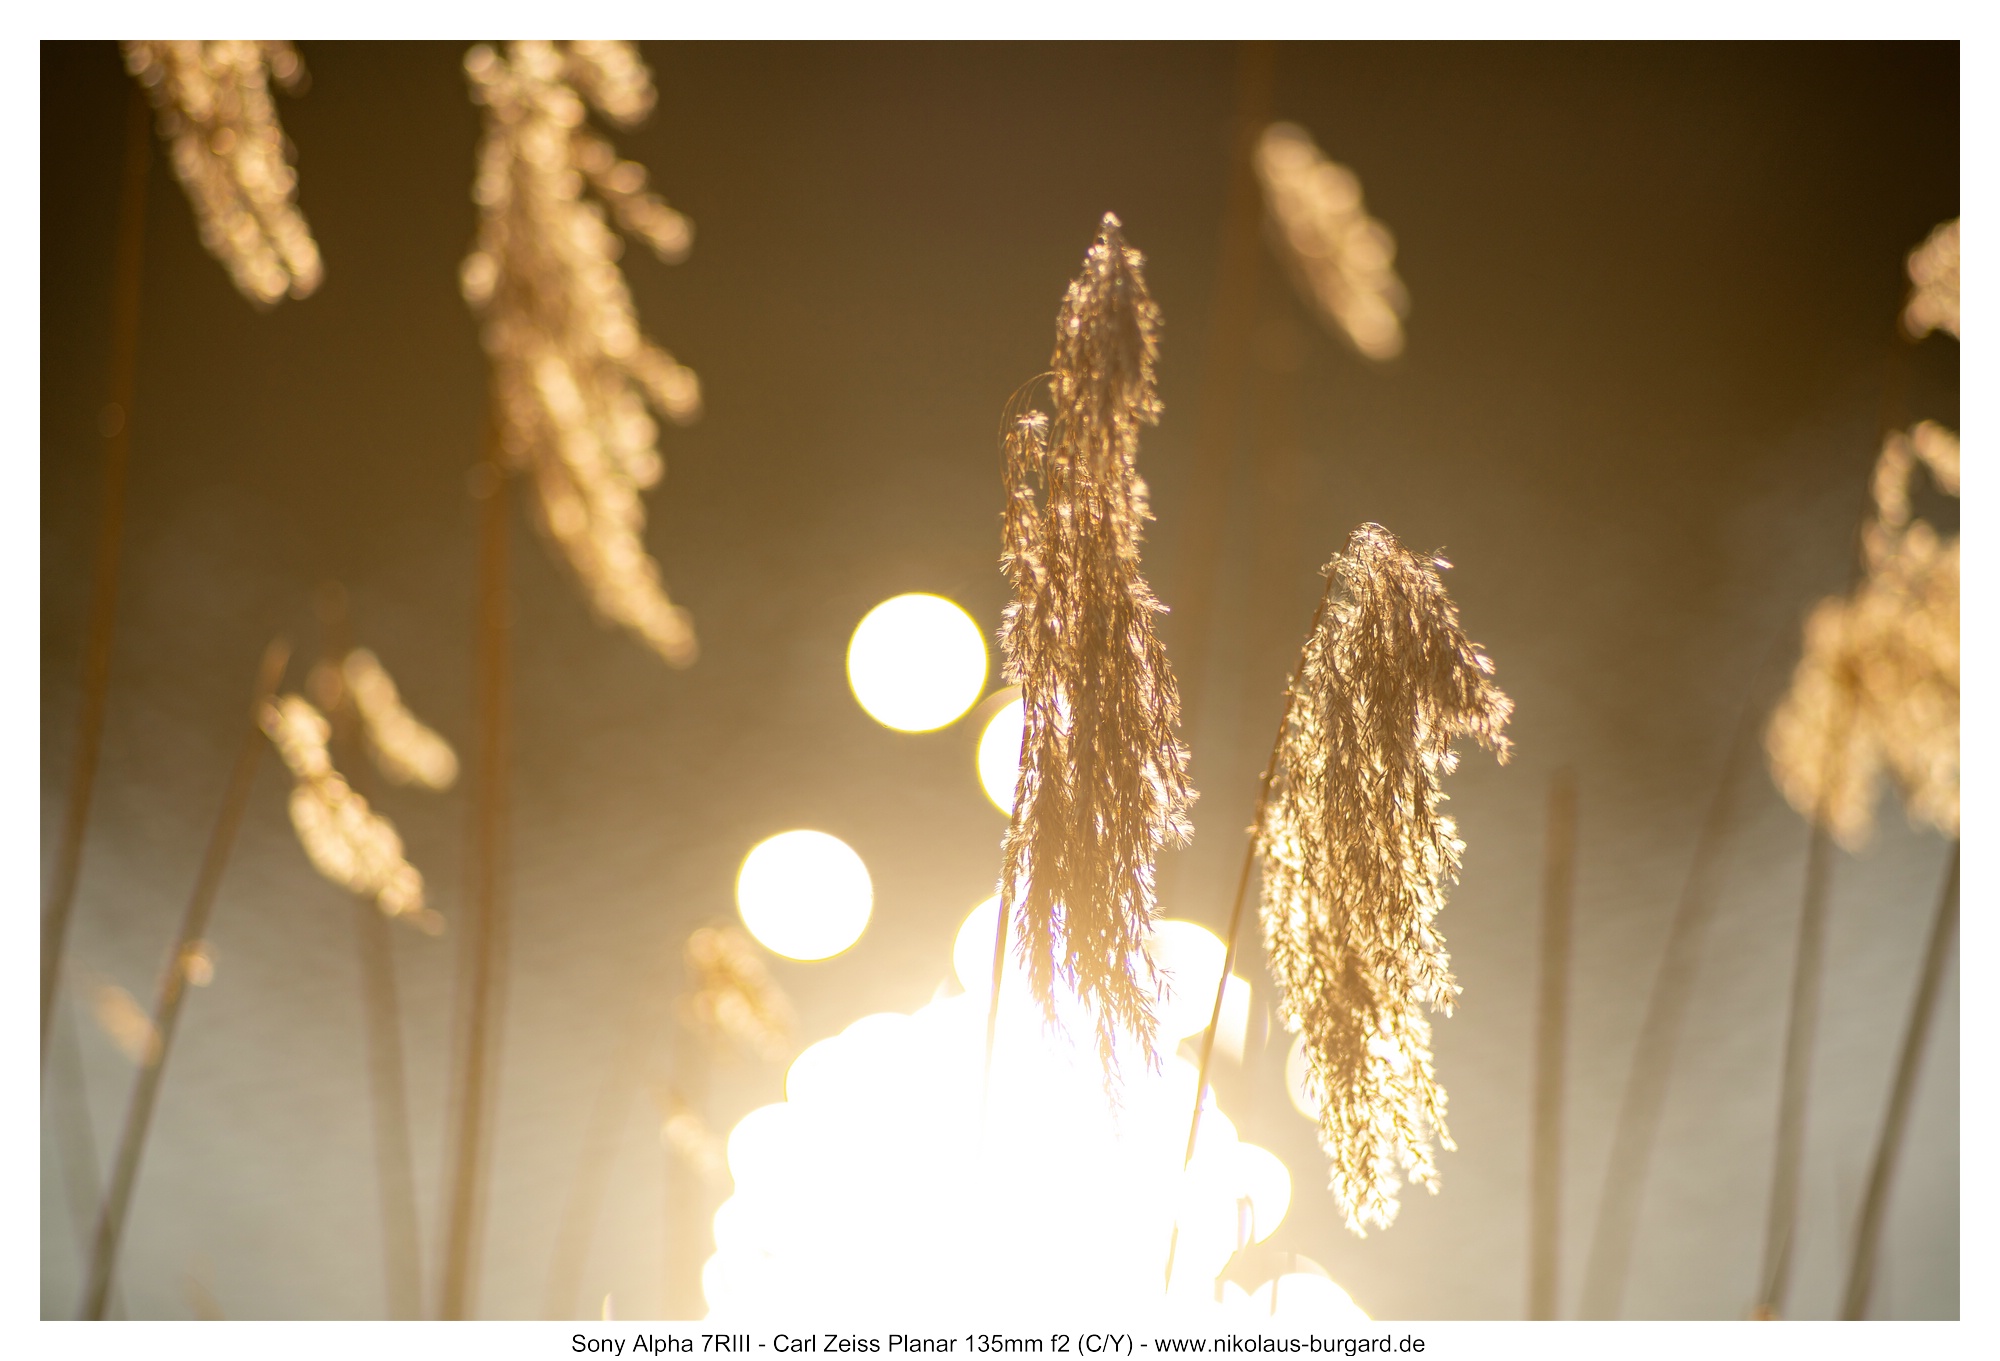
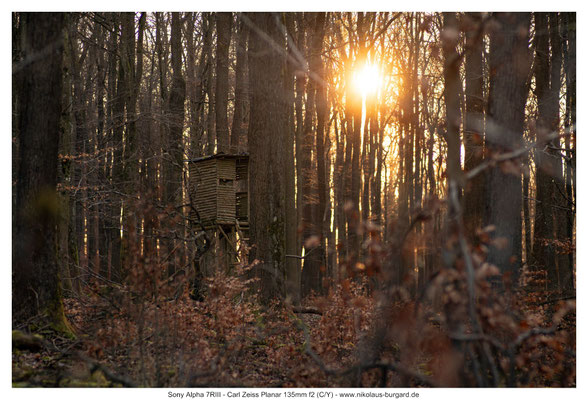
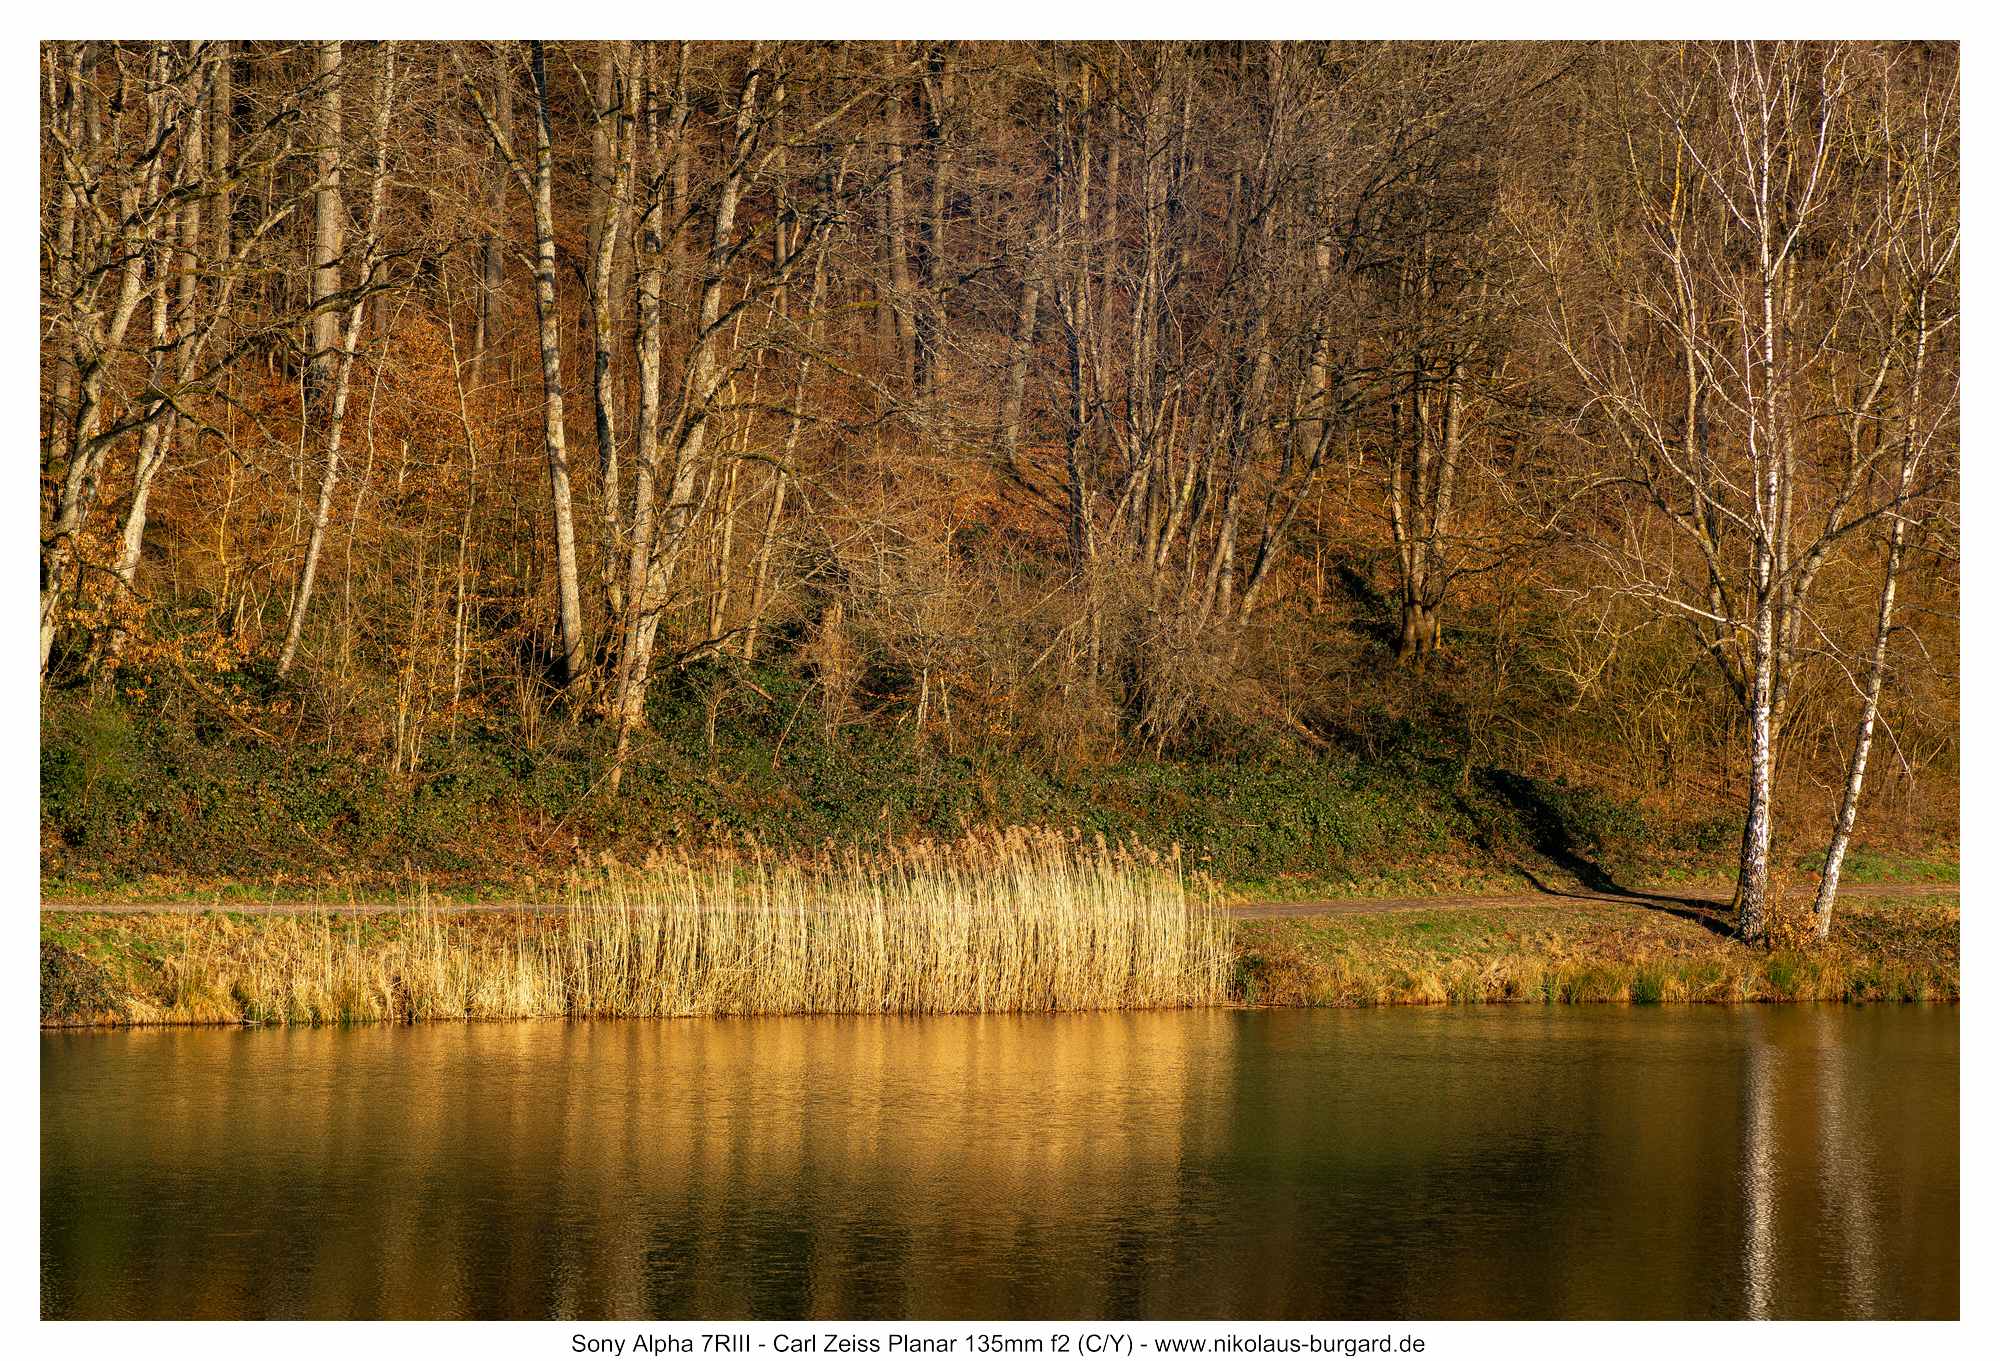
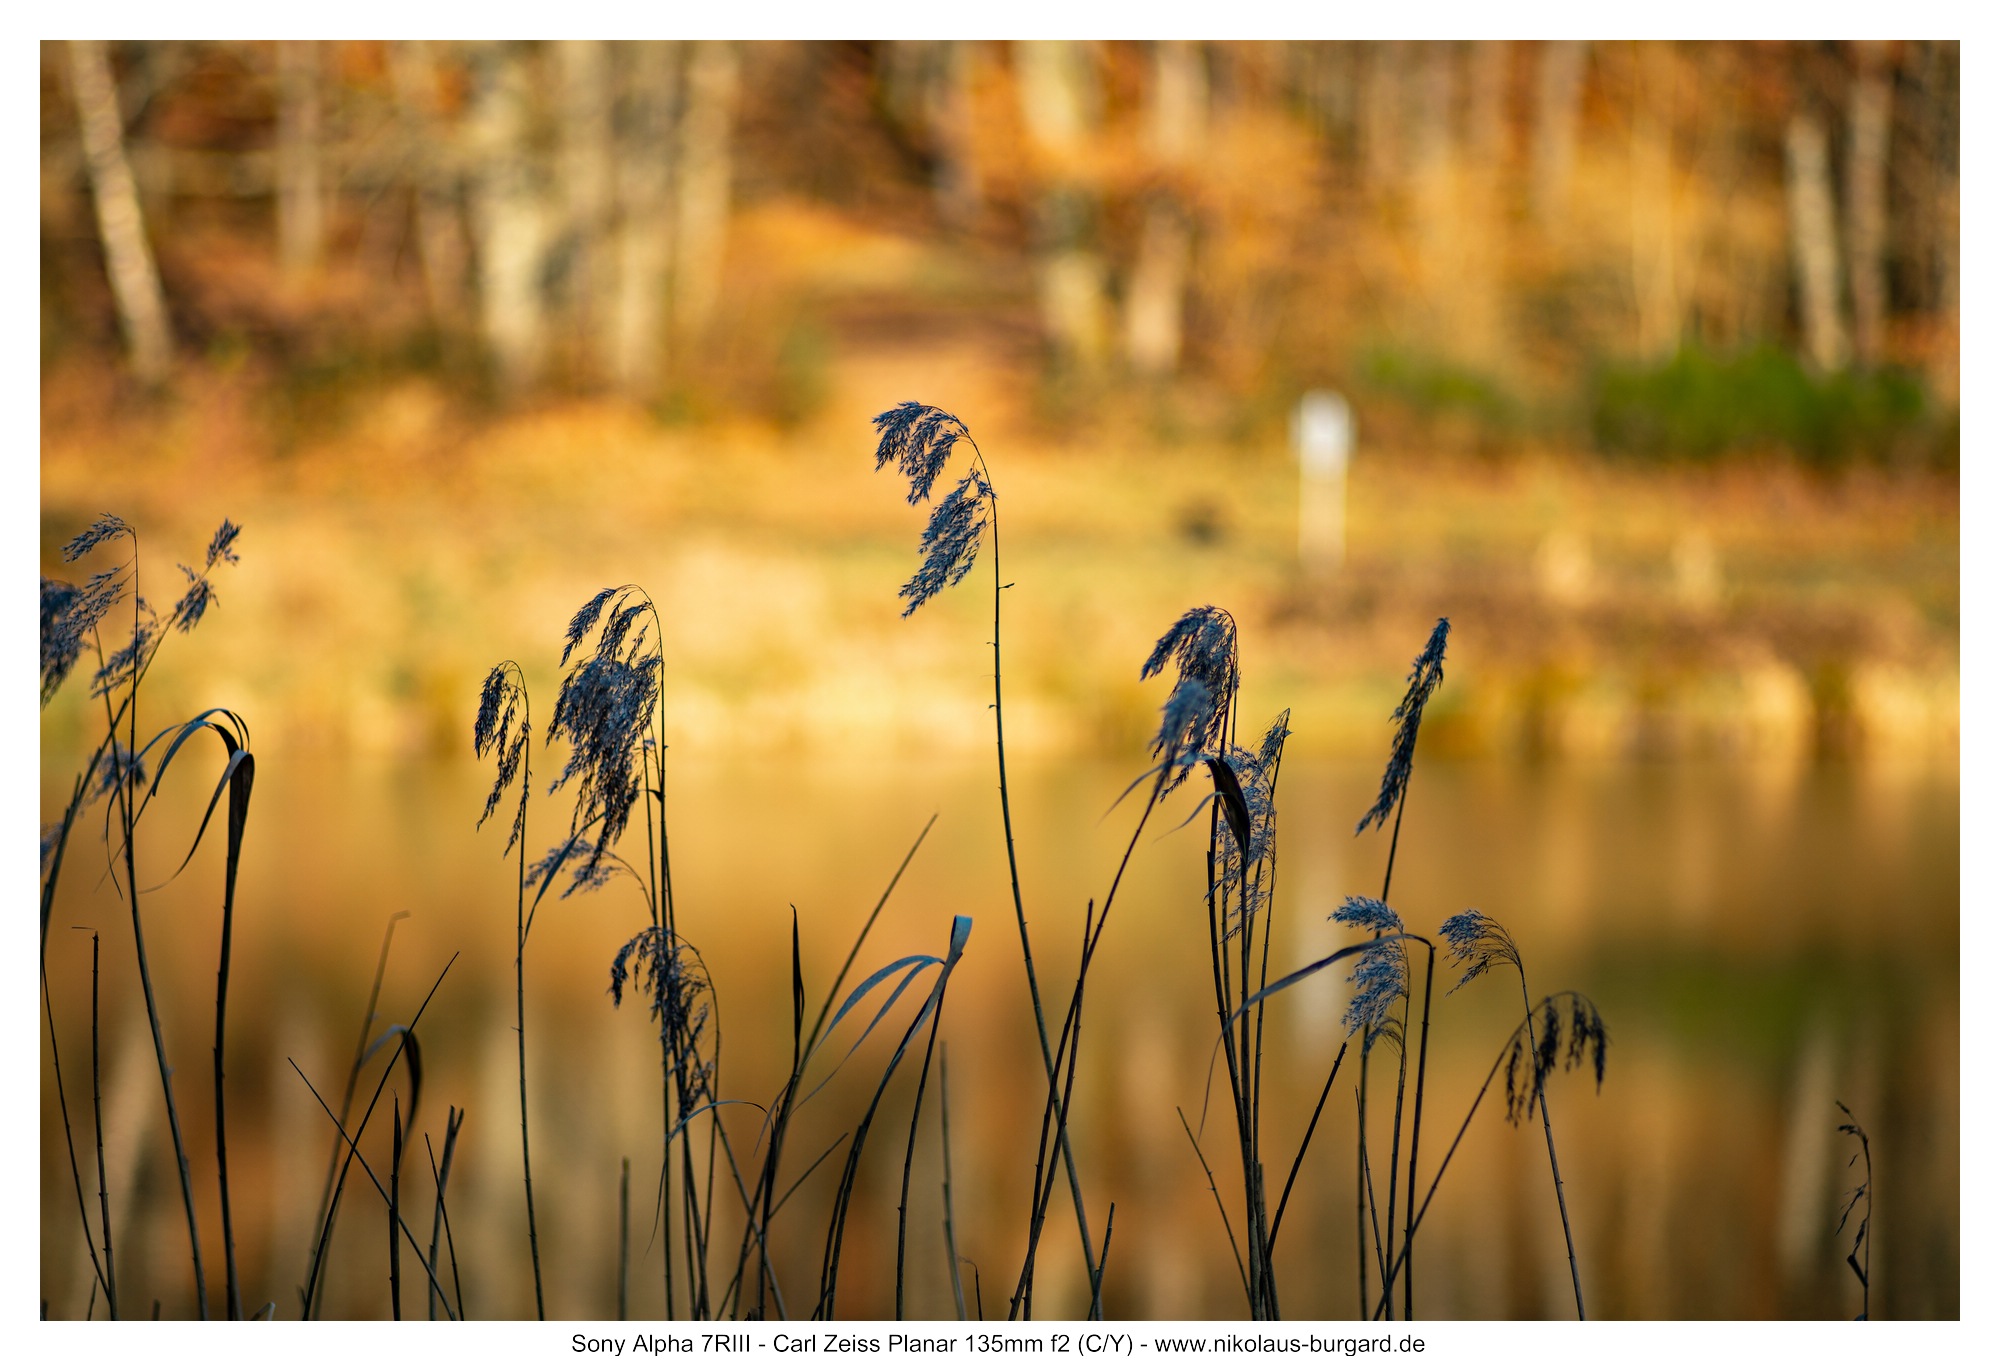
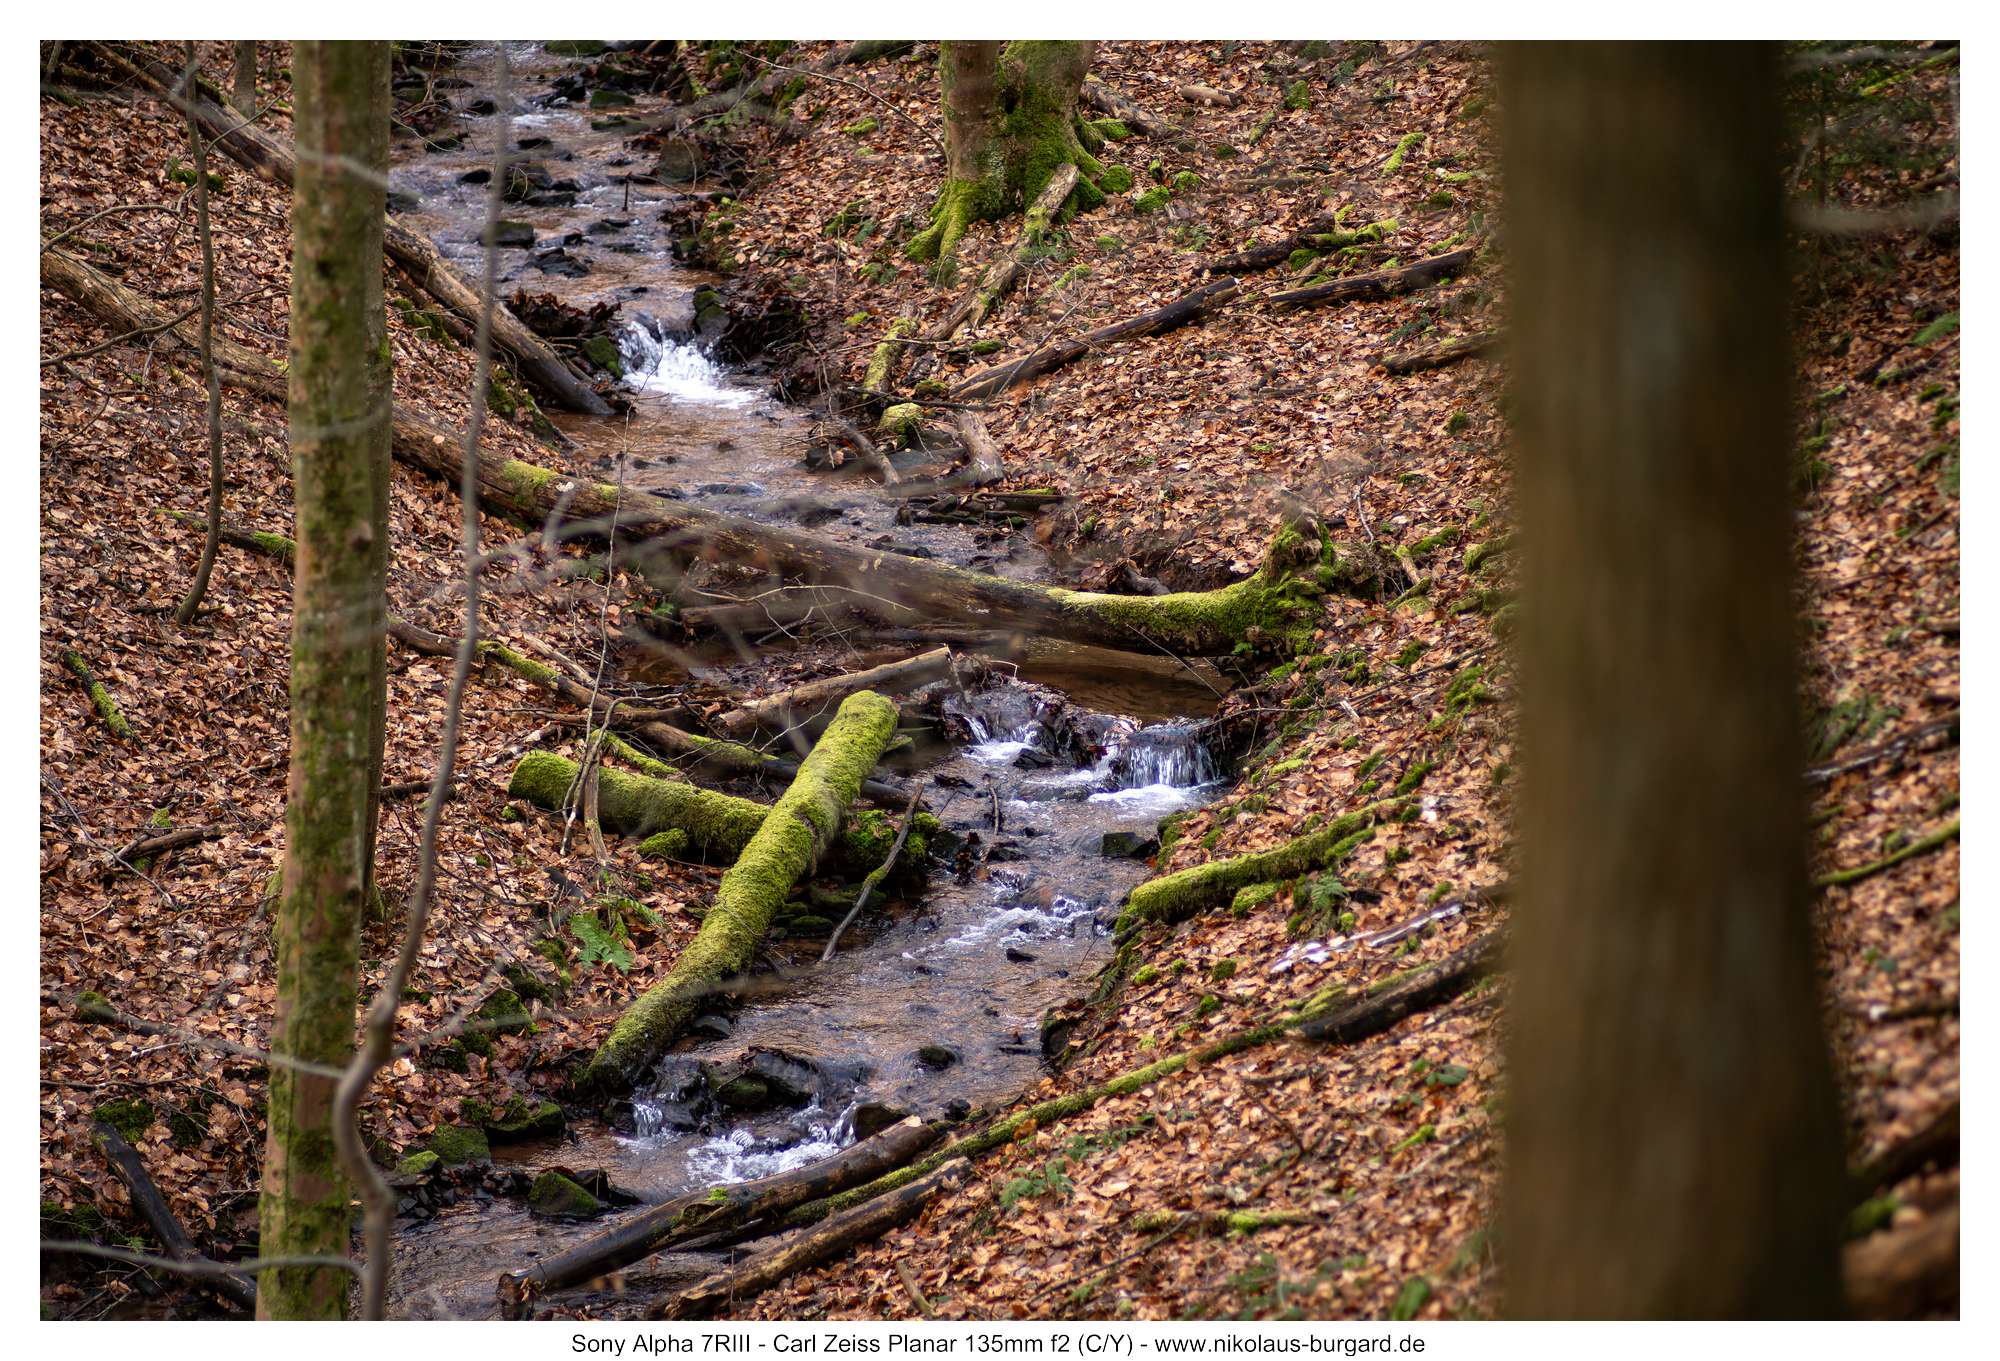
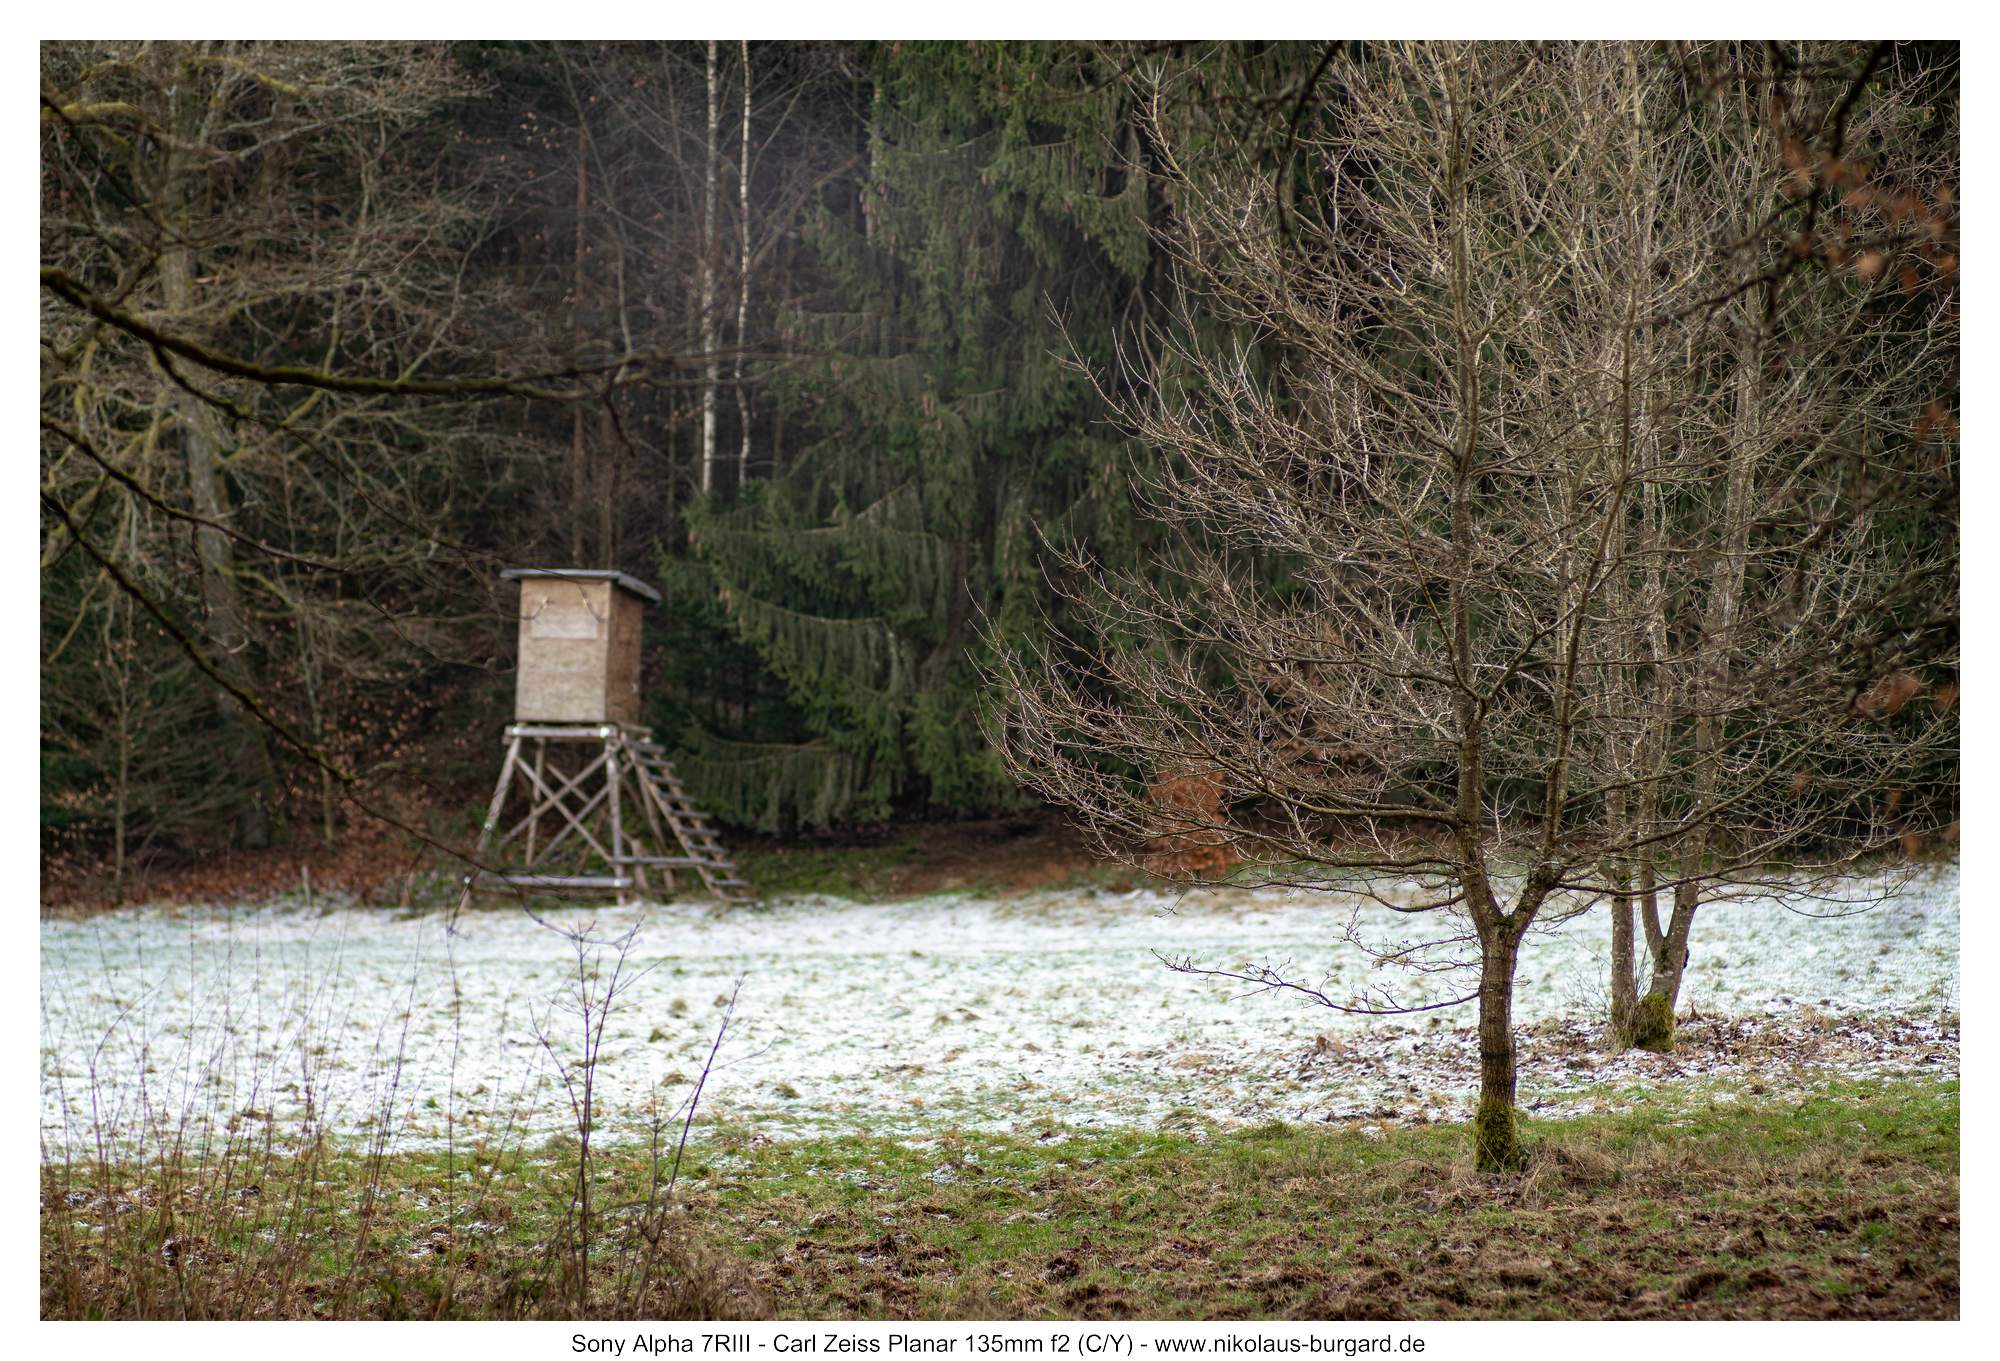
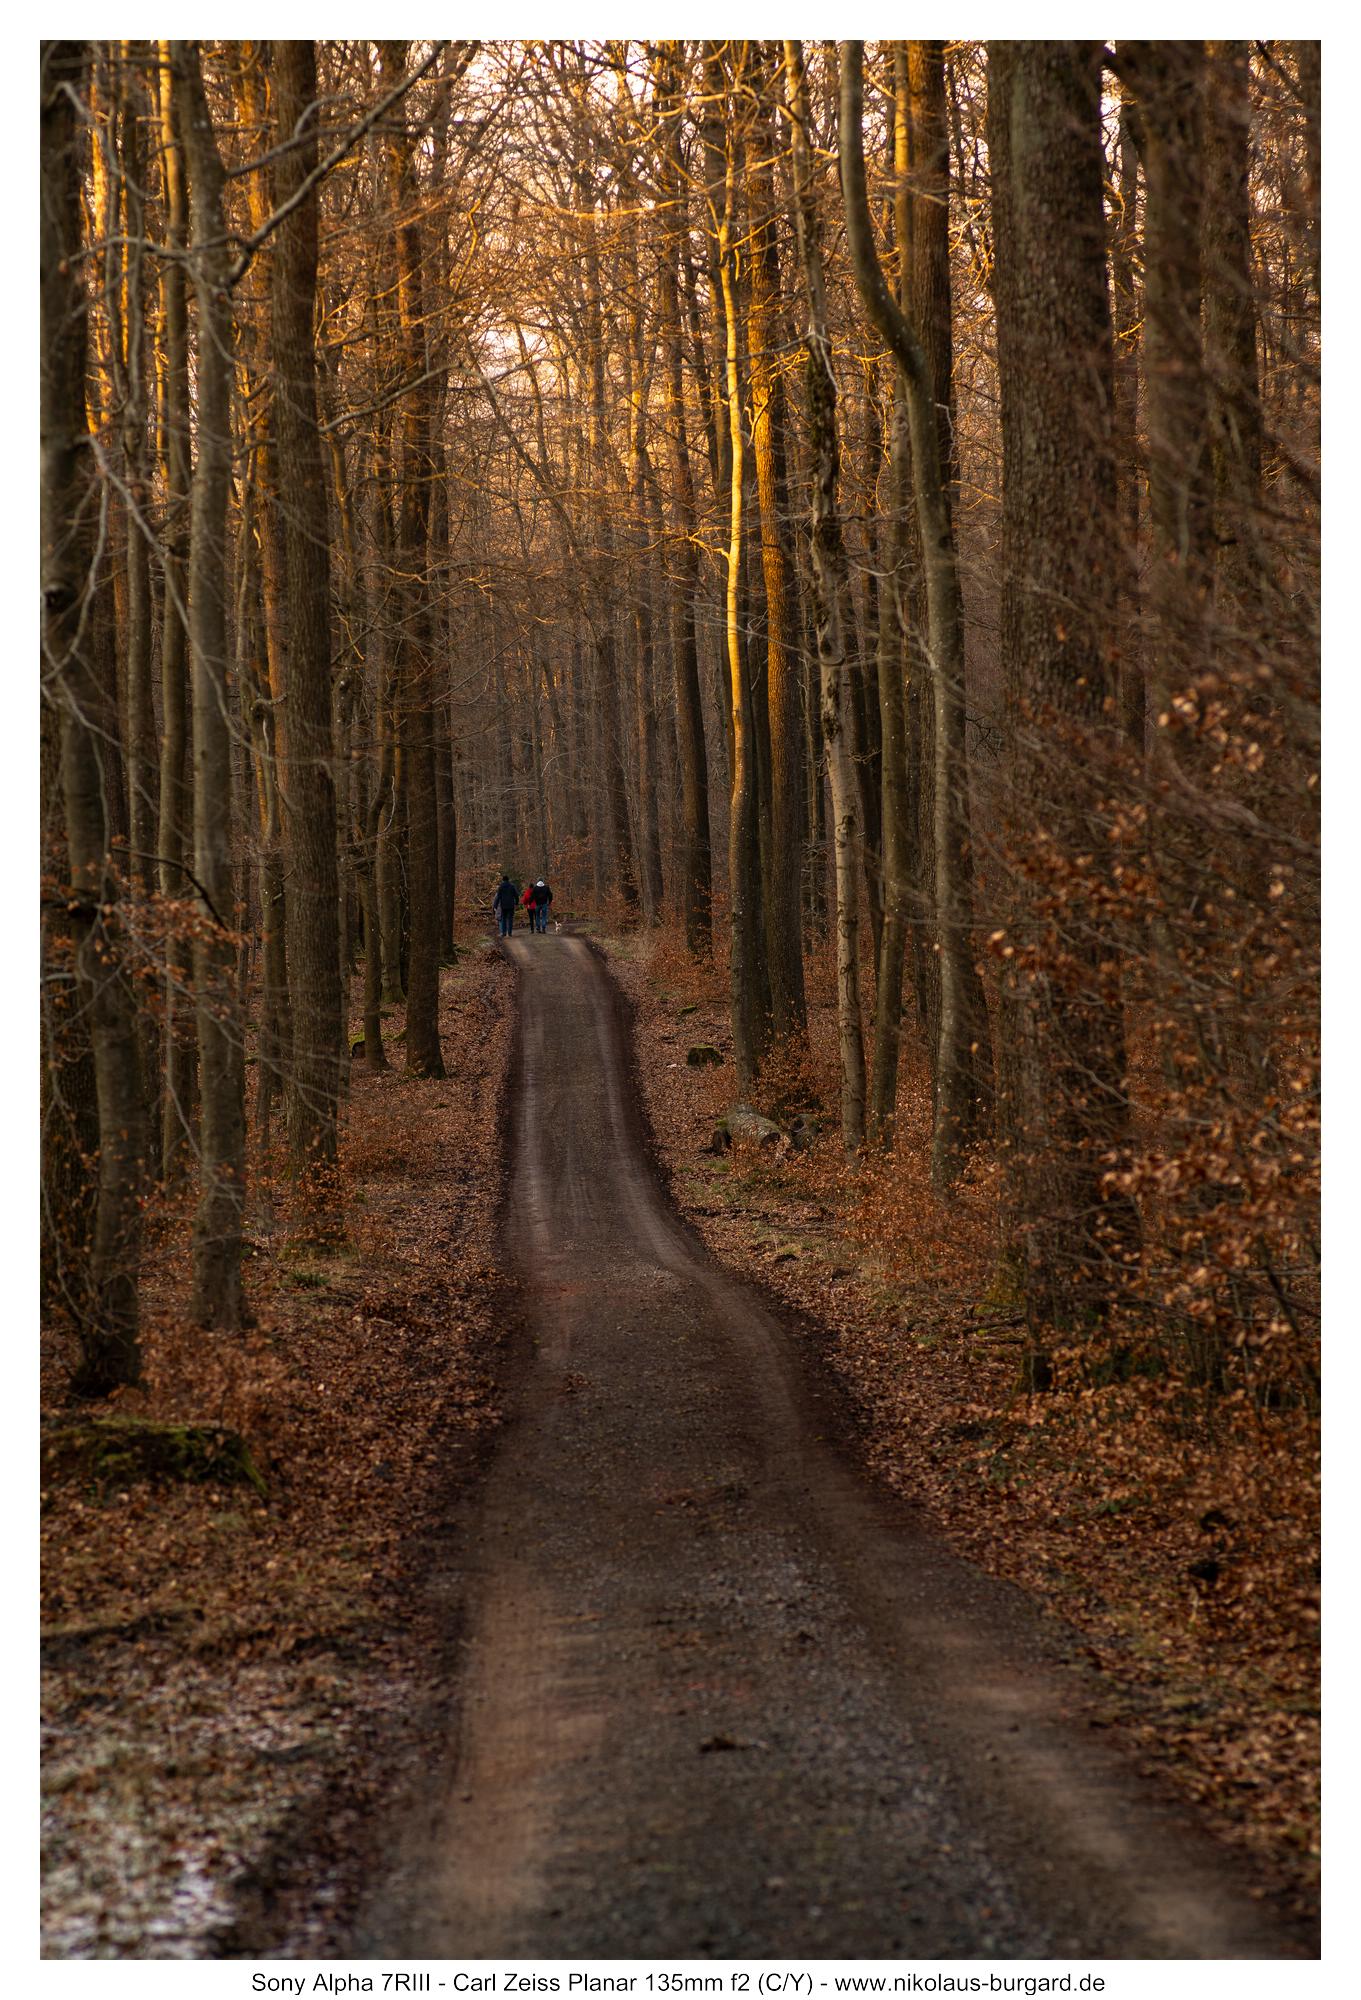
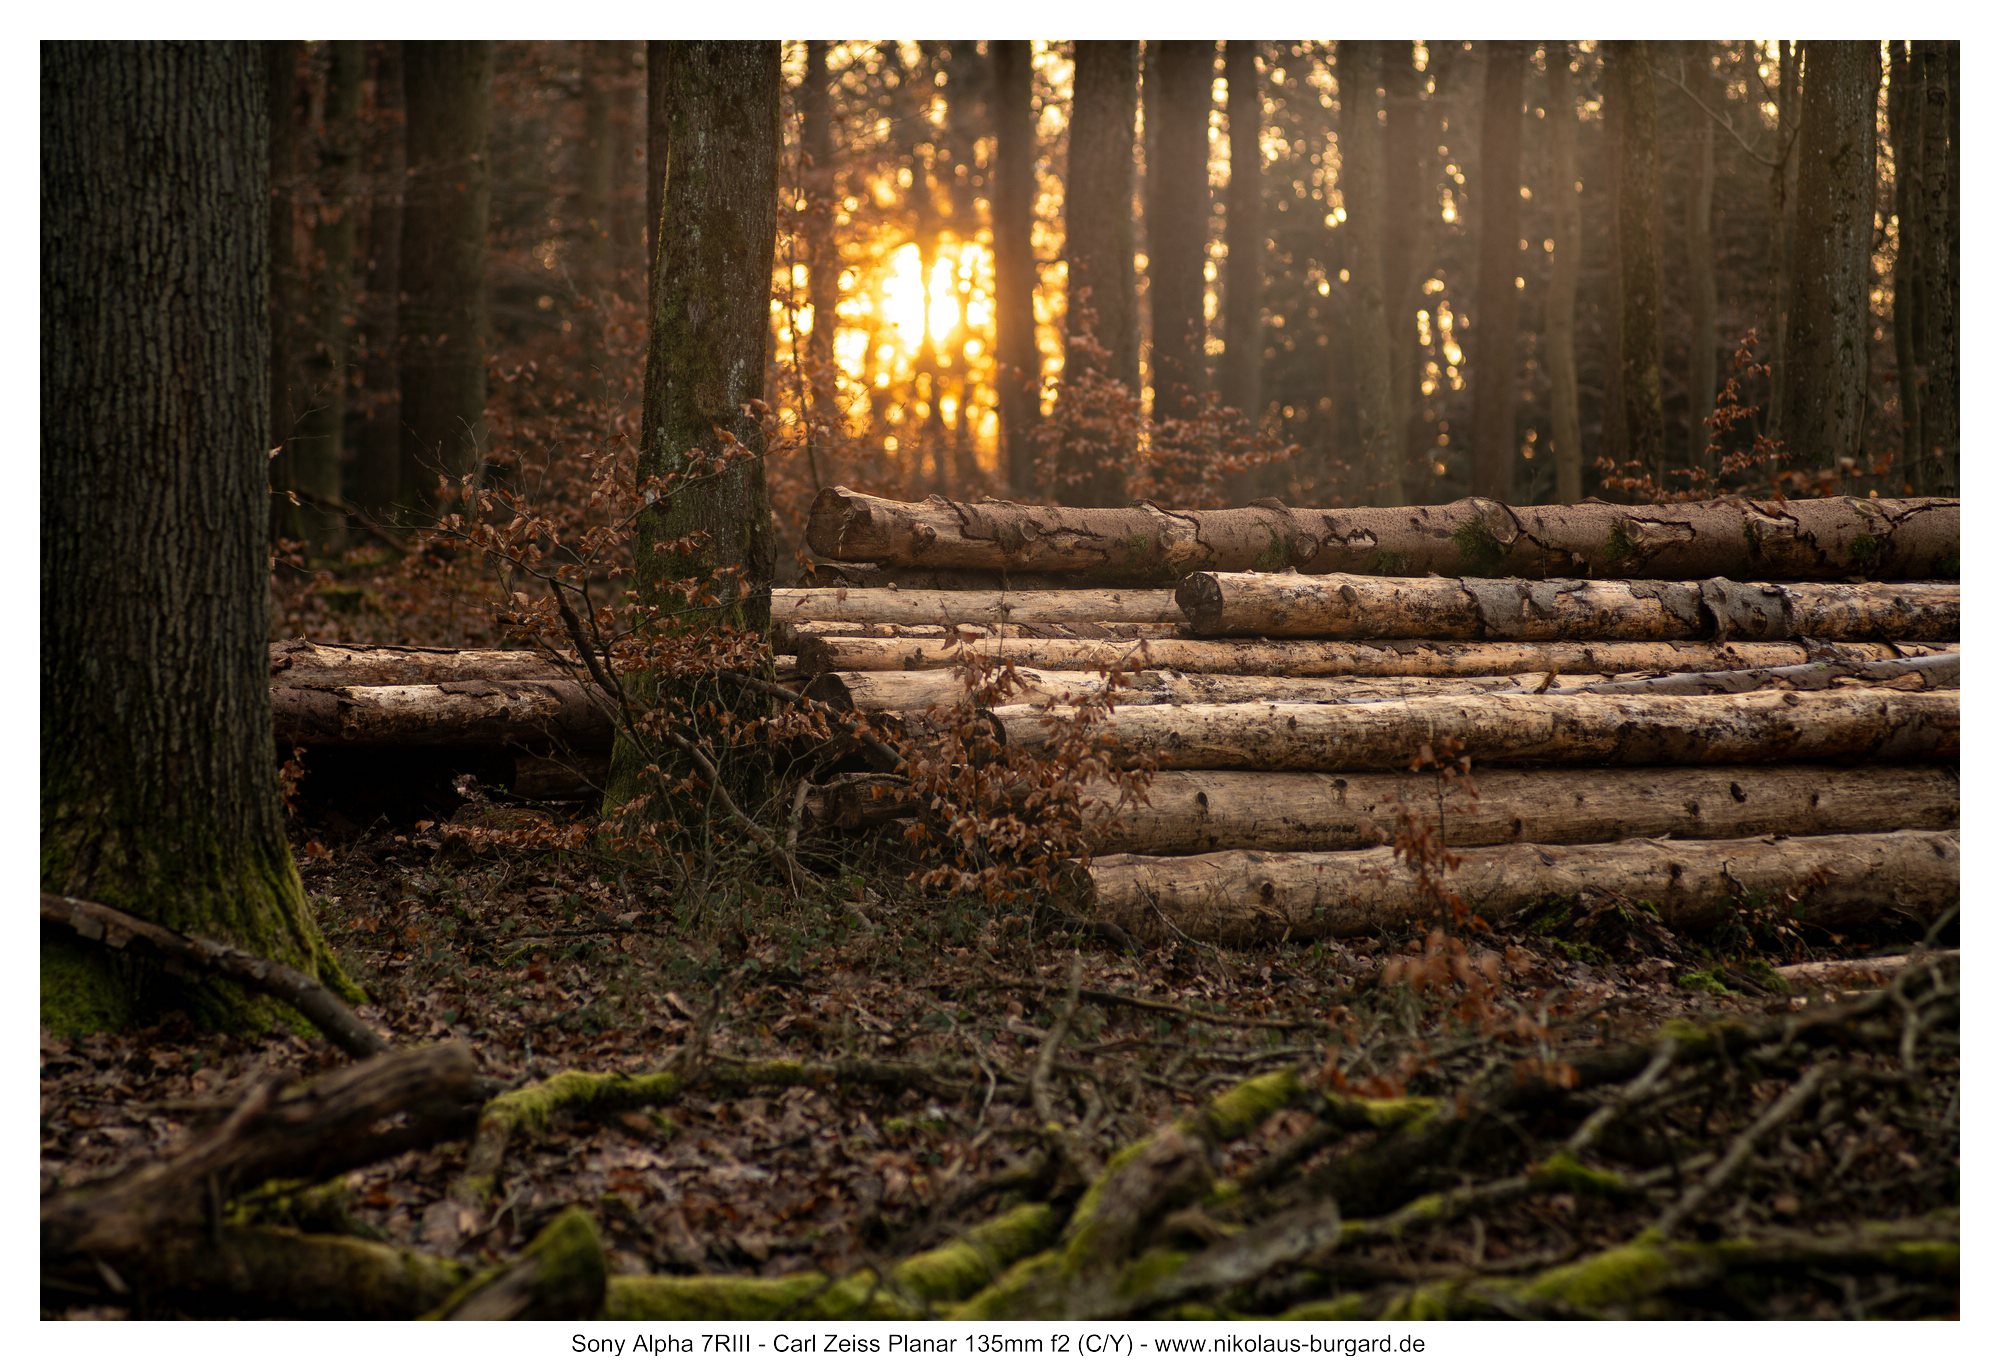
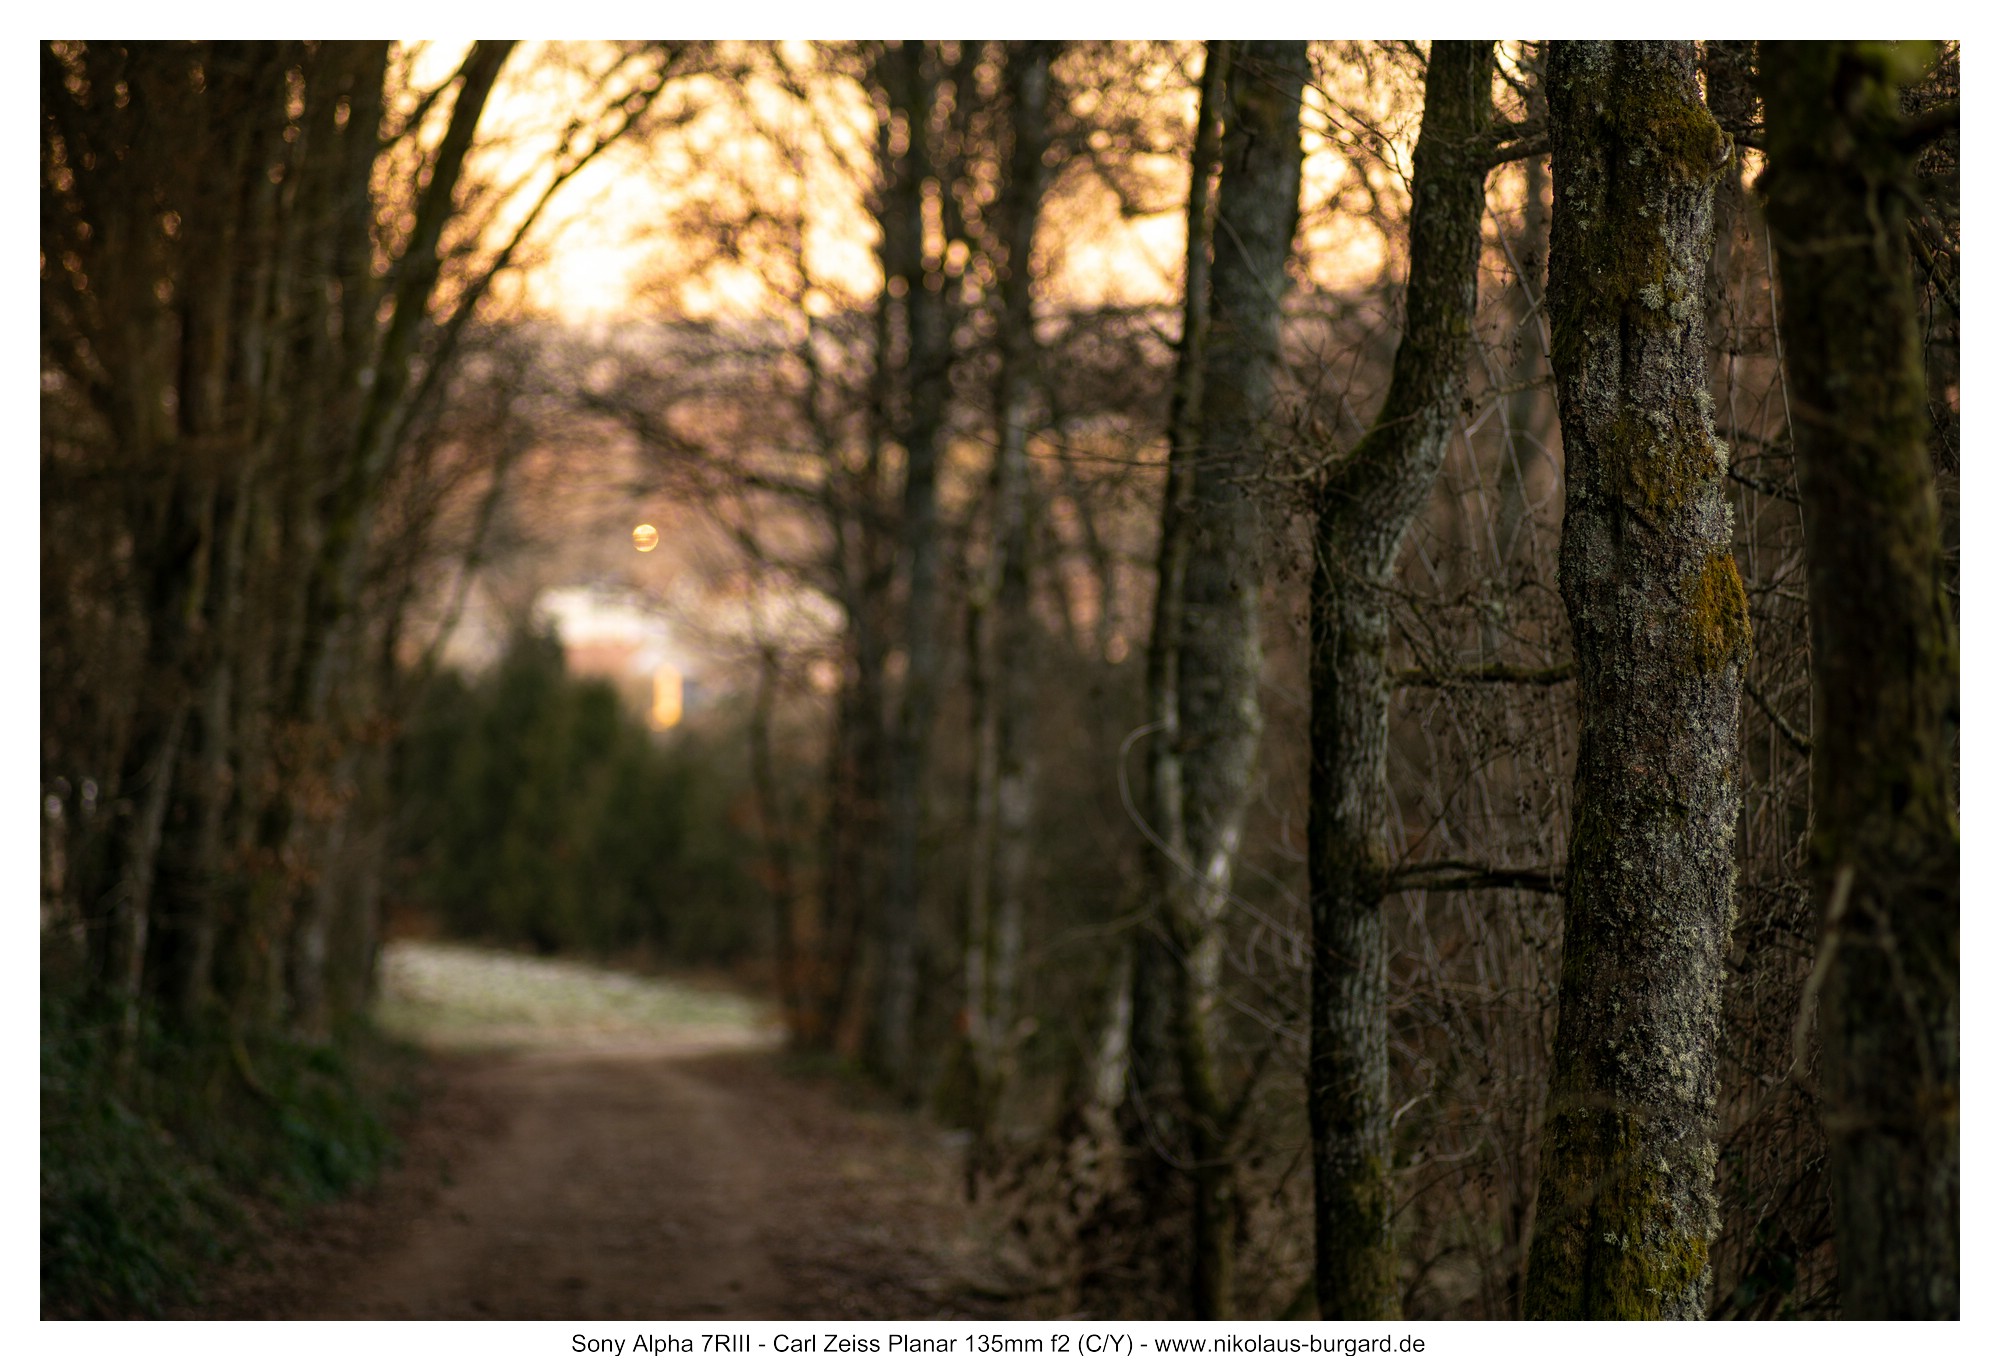
Bildserie: Winterwald / Picture Series: Winterforest
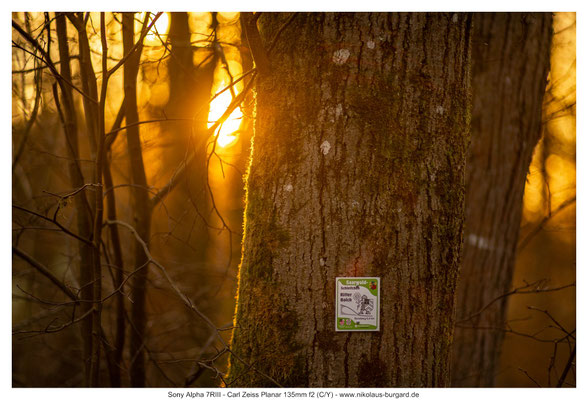
Eine Winterwanderung endet bei uns oft im nachmittäglichen Sonnenuntergang und zuvor der tiefstehenden Sonne.
Trotz seiner Schwächen im Gegenlicht konnte mich das Planar bei dieser Serie sehr überzeugen und belohnt "die Schlepperei" des schweren Objektives mit wunderbaren Impressionen, die mit einem lichtschwächeren Objektiv gar nicht erst möglich wären:
A winter hike often ends with us in the afternoon sunset and before the low sun.
Despite his weaknesses in the backlight, the planar was able to convince me very much in this series and rewards "the tug" of the heavy lens with wonderful
impressions that would not be possible with a light-fainting lens:


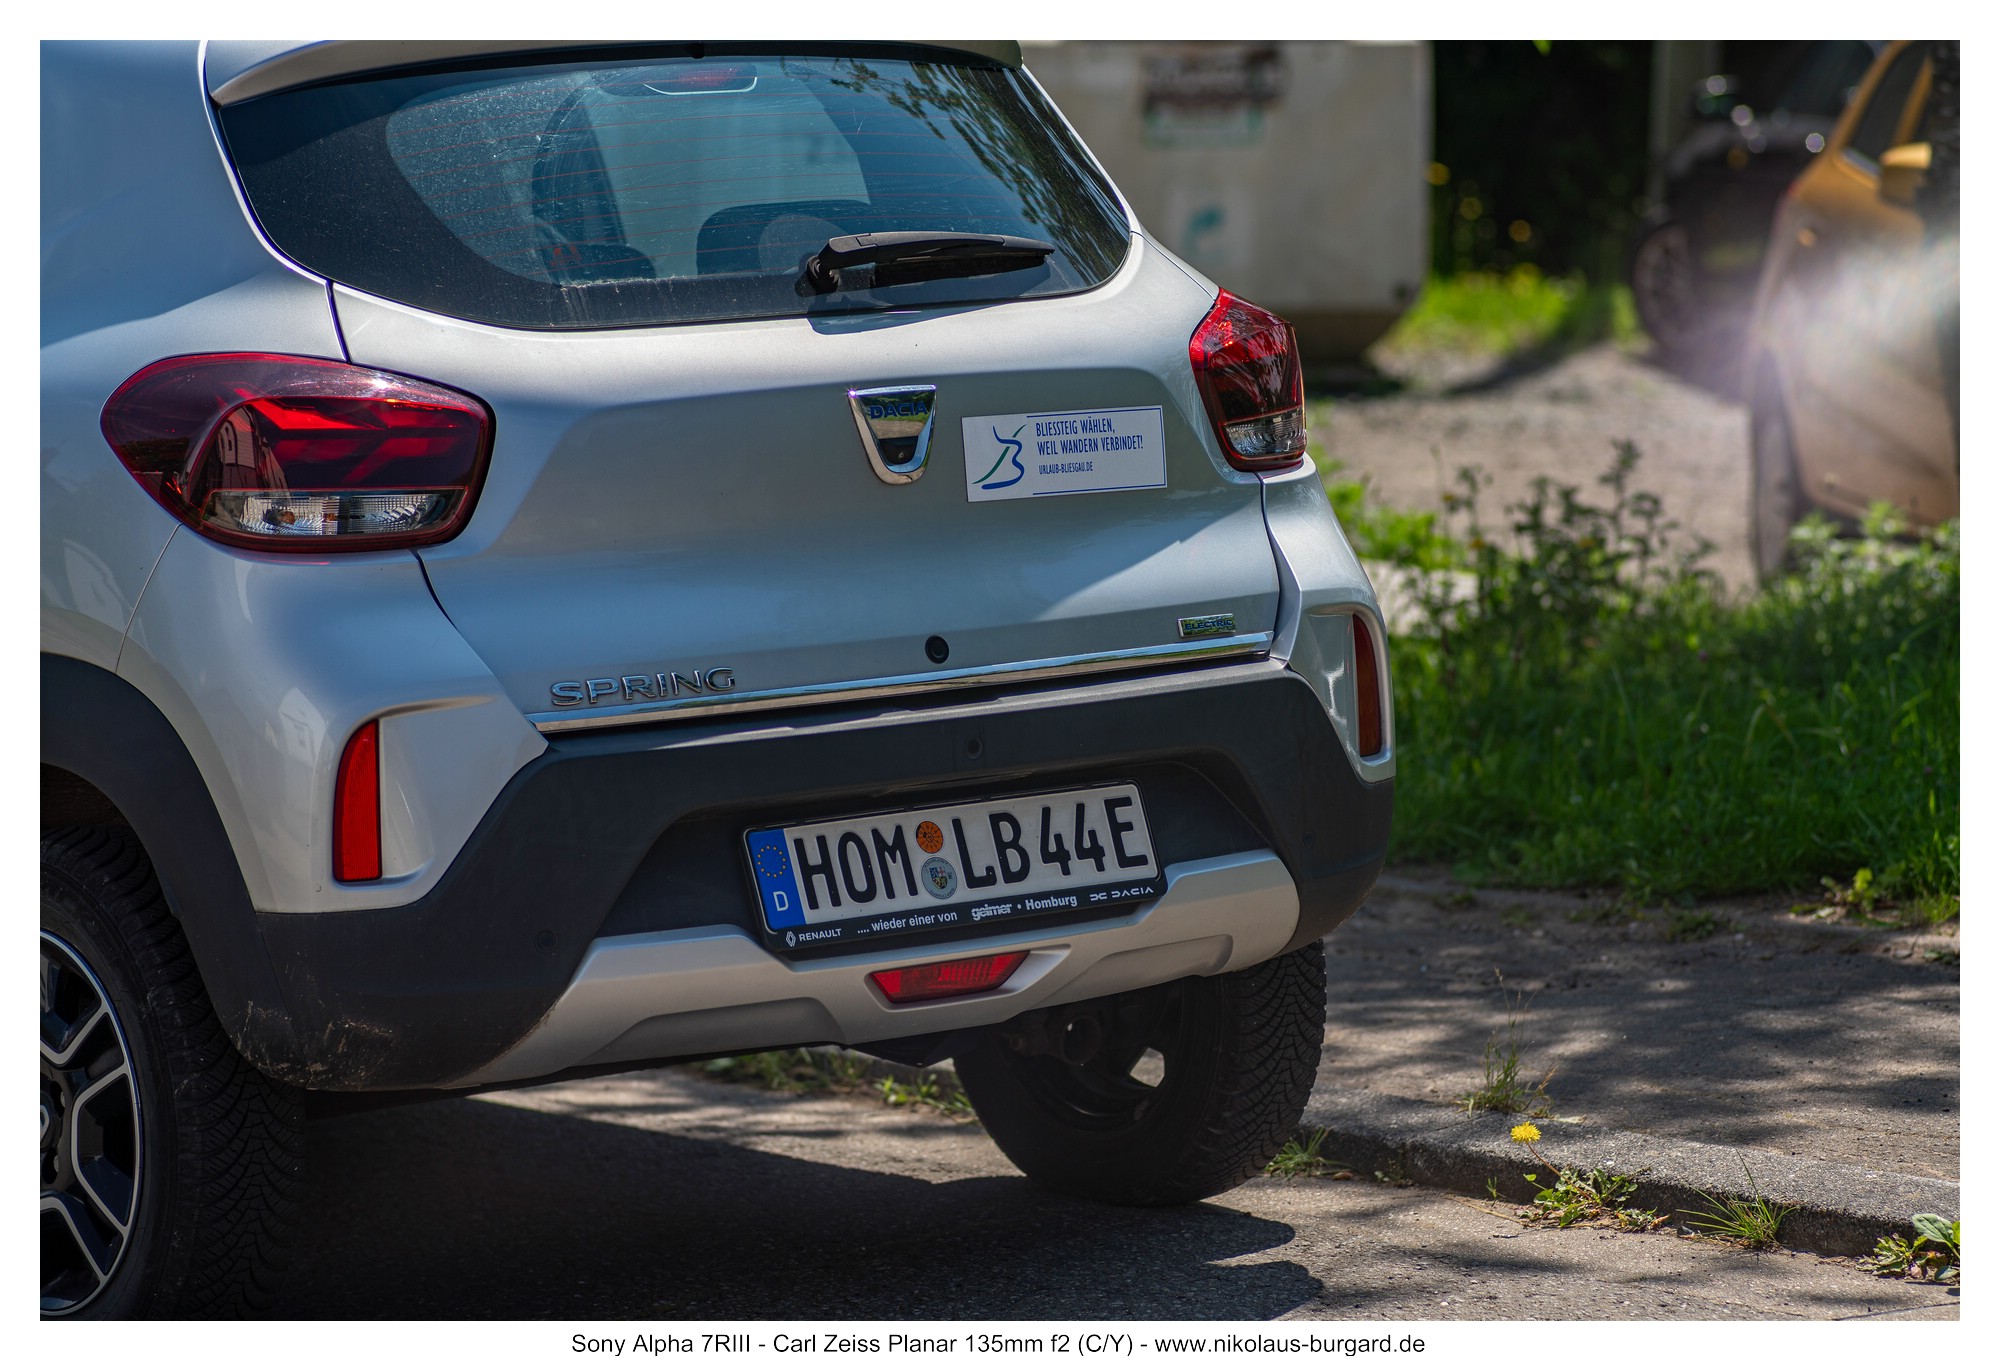
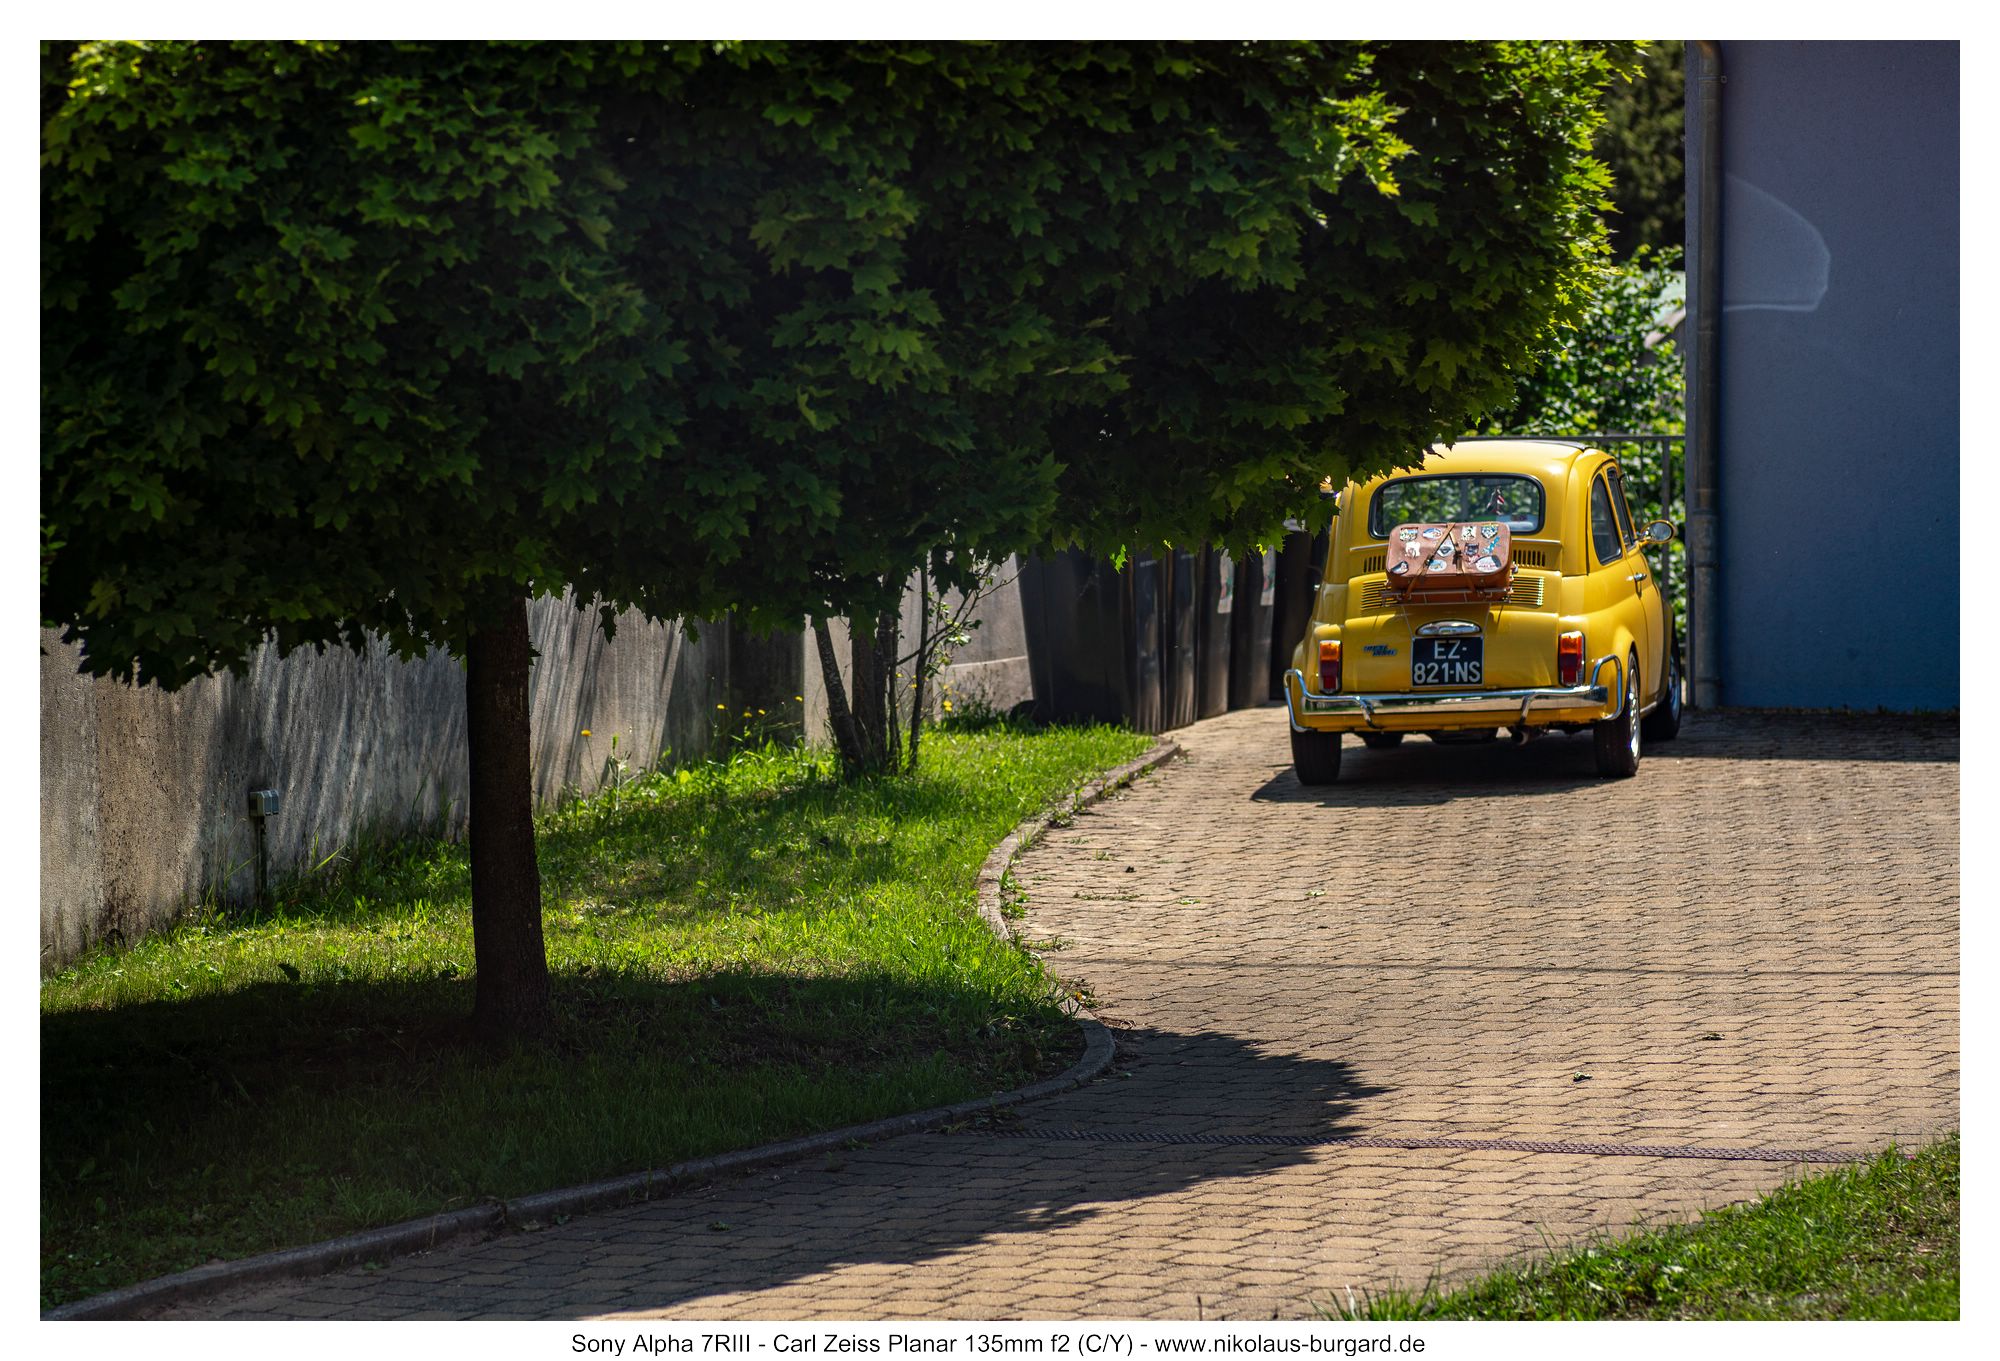
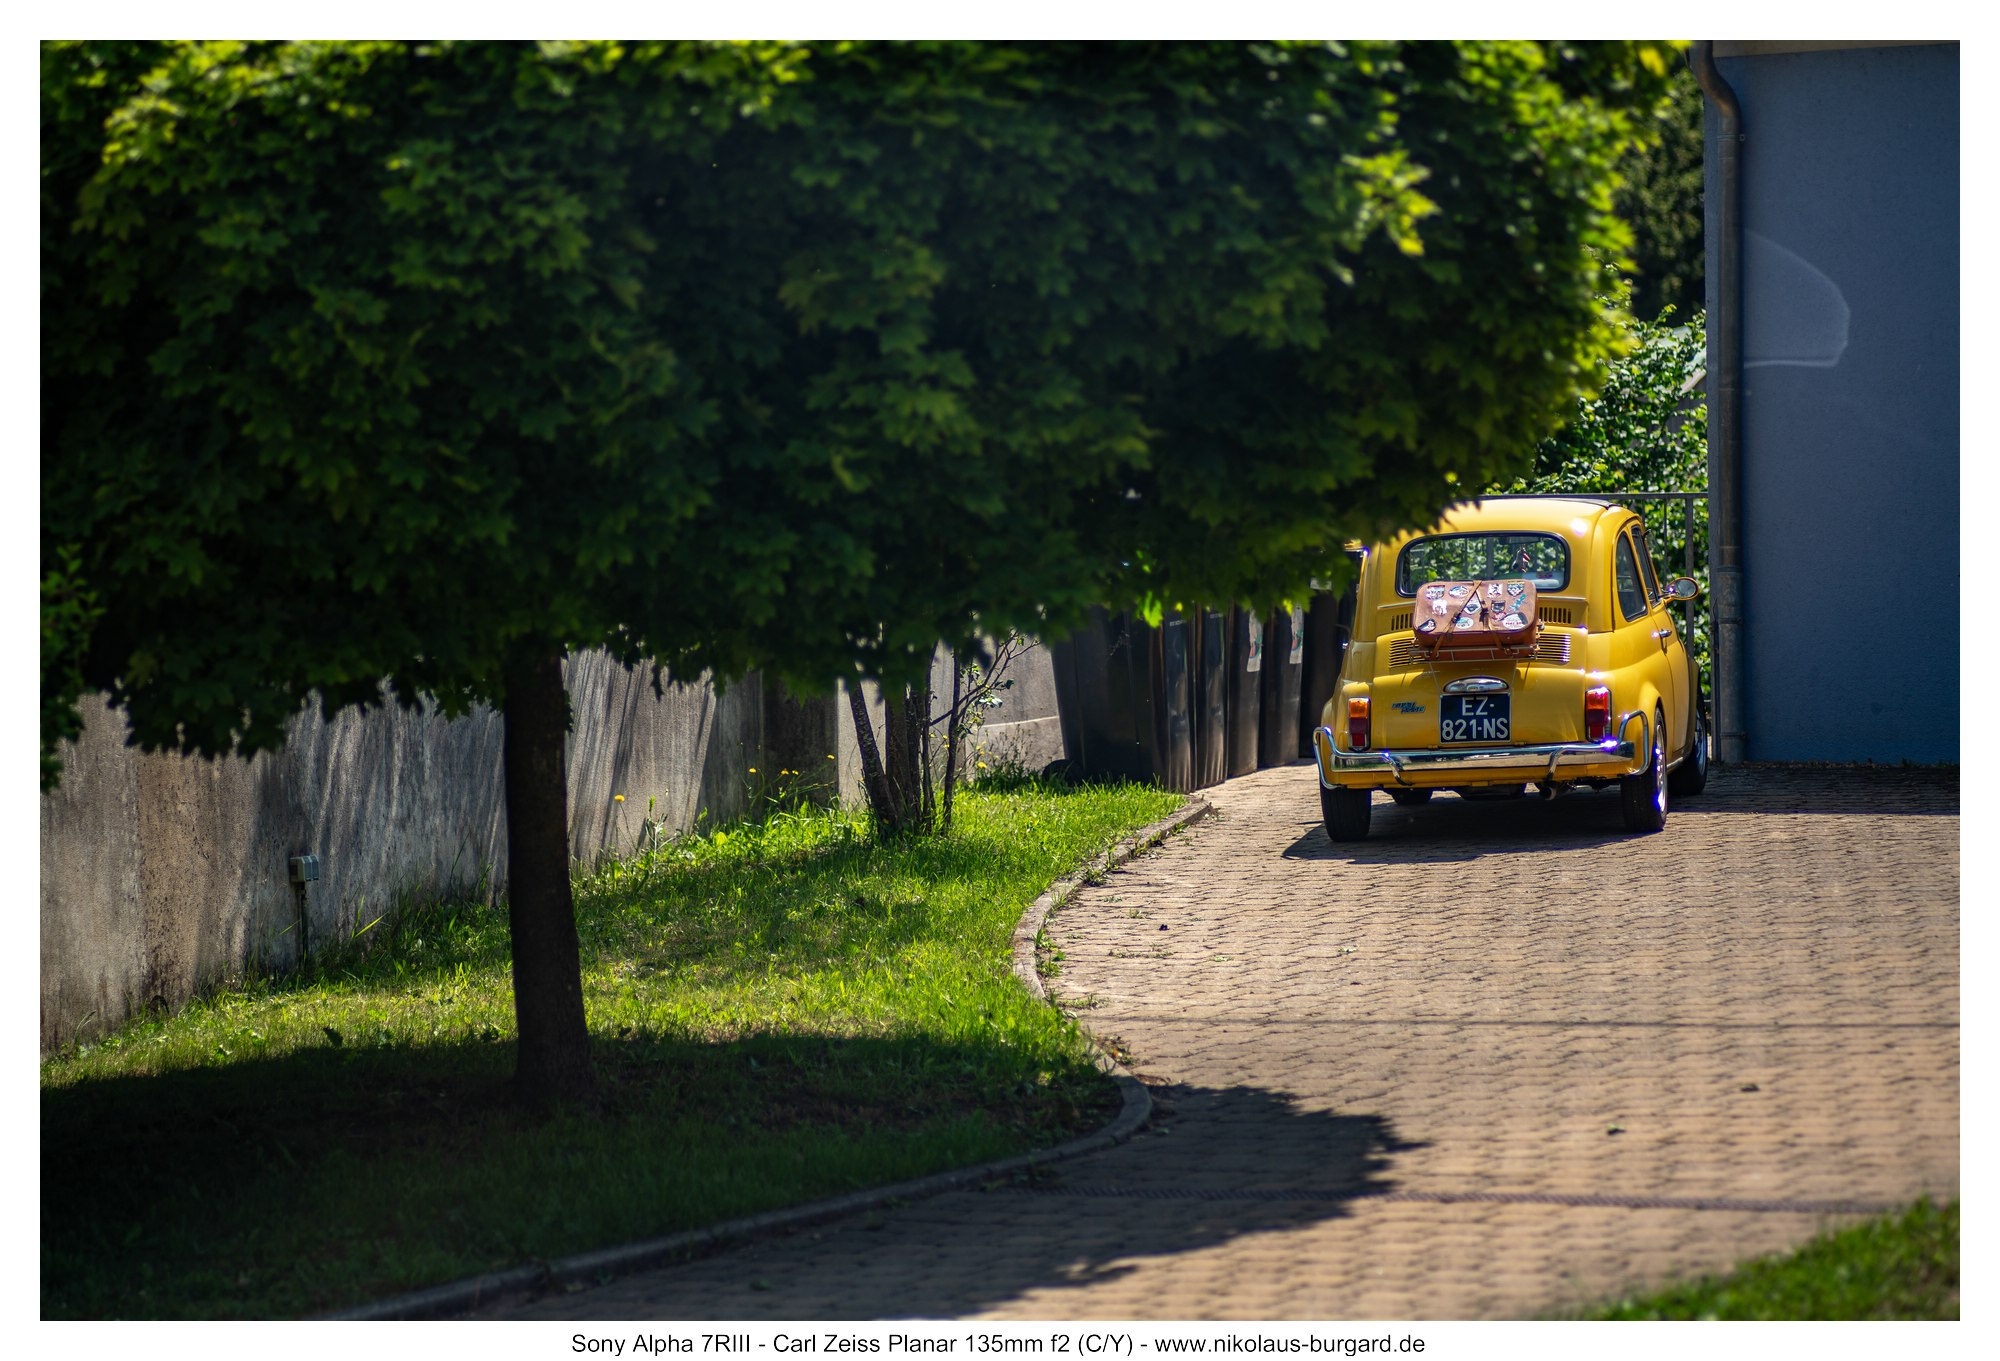
Bildserie / Picture Series: Heavy Metal
Heavy Metal oder auch "Findlinge am Straßenrand"...
Meine Schwäche für alles Motorisierte lässt mich beim Anblick solcher Gefährte natürlich sofort die Kamera zücken - und das Planar ist für solche Bilder natürlich eine hervorragende Wahl:
Heavy Metal or "Findlings on the Side of the Road"...
My weakness for everything motorized lets me immediately pull out the camera at the sight of such companions - and the planar is of course an excellent choice
for such images:


Es darf auch gerne mal etwas langsamer sein :-)
It may also be a little slower :-)


Mein Fazit / Conclusion
Das Carl Zeiss Planar 135mm f2 gilt zurecht als ein Hochleistungsobjektiv seiner Zeit.
Ein Objektiv , das diese Brennweite mit einer solch hohen Lichtstärke vereint, war einfach nichts Alltägliches.
Dabei mussten selbstverständlich Kompromisse eingegangen werden: Deutliches Mehrgewicht und deutliche Mehrgröße im Vergleich zu den gängigen 135mm f2.8-Objektiven, durch die größeren Glasflächen auch erhöhte Streulichtempfindlichkeit.
Trotzdem ist Zeiss mit "seinem" 135mm f2 ein sehr guter Wurf gelungen, der sich in einigen Kriterien an die Spitze der zeitgenössischen Konkurrenz setzen kann.
Doch bevor ich zu solchen individuellen Einordnungen komme, möchte ich zuerst die objektiv fassbaren Ergebnisse nochmal zusammenfassen:
Gute Schärfe im Bildzentrum ab Offenblende, hervorragend ab f4.
Randscharf ist das Objektiv ebenfalls bei f4, und ab f5.6 ist es bis in die äußerste Ecke sehr scharf.
Die Vignette ist bei Offenblende sichtbar, ab f4 verschwunden.
Farbfehler sind bei Offenblende deutlich in Form von Purple Fringing und Bokeh Fringing (loCA), die lateralen chromatischen Aberrationen sind nicht stark ausgeprägt und per Häkchen setzen in der Bildbearbeitung entfernbar.
Die Verzeichnung ist kaum wahrnehmbar kissenförmig.
Im Gegenlicht ist das Planar sehr empfindlich, auf Licht auf der Frontlinse reagiert es allergisch.
Neben diesen harten Fakten sammelt das Objektiv aber sehr viele Pluspunkte für das allgemeine Bildrendering. Trotz der guten Schärfe ist das Bokeh egal ob im Vorder- oder Hintergrund auf alle Distanzen sehr schön weich und flächig. Hintergründe wirken wie mit einem weichen Pinsel gemalt, die Farbflächen fließen ineinander.
Besonders bei Bildern in der Dunkelheit mit vielen Highlights weiss es zu überzeugen, da es nur wenig zu Catseyes tendiert und insgesamt wenig Swirl aufweist.
Ein ideales Objektiv, wenn man neutral-weiche Hintergründe mit trotzdem leichtem Vintage-Charme sucht.
Wie immer freue ich mich über eure Anmerkungen und Meinungen zu Test und Objektiv im Kommentarbereich!
The Carl Zeiss Planar 135mm f2 is rightly regarded as a high-performance lens of its time.
An objective that combines this focal length with such a high light intensity was simply nothing ordinary.
Of course, compromises had to be made: Significant extra weight and significant additional size compared to the common 135mm f2.8 lenses, due to the
larger glass surfaces also increased scattered light sensitivity.
Nevertheless, Zeiss has succeeded with "his" 135mm f2 a very good throw, which can sit in some criteria at the forefront of contemporary
competition.
But before I come to such individual classifications, I would first like to summarize the objectively tangible results
again:
Good sharpness in the picture center from open blende, excellent from f4.
The lens is also edge-sharp at f4, and from f5.6 it is very sharp down to the outermost corner.
The vignette is visible at open aperture, disappeared from f4.
Color errors are clearly in the form of Purple Fringing and Bokeh Fringing (loCA) in the case of open apertures, the lateral chromatic aberrations are
not strongly pronounced and set in image processing can be removed by checkmark.
The distortion is hardly perceptible cushion-shaped.
In the backlight, the planar is very sensitive, it is allergic to light on the front lens.
In addition to these hard facts, however, the lens collects many plus points for the general image rendering. Despite the good sharpness, the bokeh is
very nice and soft in the foreground or background at all distances. Backgrounds look like painted with a soft brush, the color areas flow into each other.
Especially with pictures in the dark with many highlights it is convincing, because it tends only little to Catseyes and has very little swirl
overall.
An ideal lens if you are looking for neutral-soft backgrounds with still light vintage charm.
As always, I am happy about your comments and opinions on the test and lens in the comments section!
Tests anderer Objektive im Contax/Yashica System:
Reviews of other Contax/Yashica System lenses:
- Carl Zeiss Planar 85mm f1.2 50th Anniversary
Diese Tests von Objektiven mit vergleichbarer Brennweite könnten auch interessant sein:
These tests of lenses with comparable focal length might also be interesting:
- Carl Zeiss Super-Dynarex 135mm f4
- Fuji X-Fujinon 135mm f3.5 EBC
- Konica Hexanon AR 135mm f2.5
- Schacht/Ulm Travenar 135mm f3.5
- Sigma Sigmatel Y/S 135mm f1.8
- Steinheil Cassarit 135mm f4.5
- Tokyo Kogaku RE Auto-Topcor 135mm f3.5
- Vivitar 100-200mm f4 Close Focusing Zoom
Tests anderer Carl Zeiss - Objektive:
Reviews of other Carl Zeiss lenses:
- Carl Zeiss Skoparex 35mm f3.4
- Carl Zeiss Planar 85mm f1.2 50th Anniversary
- Carl Zeiss Dynarex 90mm f3.4
- Carl Zeiss Super-Dynarex 135mm f4
- Carl Zeiss Super-Dynarex 200mm f4
Kommentar schreiben