

Schneider-Kreuznach Radionar 38mm f3.5 (Robot 24x24)
Deutsche Textversion /
English Text Version (sorry for errors, no native english speaker)

Die "Robot-Kameras", entwickelt und gebaut von Otto Berning und Heinz Kilfitt ab den 1930er-Jahren, sind wirklich eine Besonderheit.
Sie sind sogenannte "Federwerk-Kameras", bei denen der Filmvorschub und Verschluss durch die in der Feder gespeicherte Kraft angetrieben werden.
Zu diesen Kameras produzierten einige der renommierten Hersteller passende Objektive (u.a. Carl Zeiss Jena und Kilfitt), den größten Anteil an den verkauften Objektiven hatte aber die Firma Schneider aus Bad Kreuznach.
Das
Schneider-Kreuznach Radionar 38mm f3.5
war eines der angebotenen Normalobjektive für "den Robot".
Es ist eine sogenannte "Triplet"-Konstruktion,
d.h. das optische System besteht aus nur 3 Einzellinsen.
Einige technische Daten:
Optisches System: 3 Linsen in 3 Gruppen
Blende: f3.5 bis f22, mit Rastung, 8 Blendenlamellen
Naheinstellgrenze: 55cm
Die Robot-Kameras hatten das quadratische Bildformat mit Negativen von 24x24mm.
Für diesen Bereich sind auch die Objektive gerechnet.
Deshalb ist bei einer Nutzung am Kleinbildformat von 24x36mm mit einer starken Vignette zu rechnen.
Hier einige Bilder des Objektives (Schon mit Adapter):
The “robot cameras”, developed and built by Otto Berning and Heinz Kilfitt from the 1930s onwards, are truly something special.
They are so-called "spring mechanism cameras" in which the film advance and shutter are driven by the force stored in the spring.
Some of the well-known manufacturers produced suitable lenses for these cameras (including Carl Zeiss Jena and Kilfitt), but the Schneider company from Bad Kreuznach had the largest share of the lenses sold.
The
Schneider-Kreuznach Radionar 38mm f3.5
was one of the normal lenses offered for “the robot”.
It is a so-called "triplet" construction,
i.e. the optical system consists of only 3 individual lenses.
Some technical data:
Optical system: 3 lenses in 3 groups
Aperture: f3.5 to f22, with detent, 8 aperture blades
Closest focusing distance: 55cm
The robot cameras had the square image format with negatives of 24x24mm.
The lenses are also designed for this area.
Therefore, a strong vignette is to be expected when using the 35mm format of 24x36mm.
Here are some pictures of the lens (already with adapter):


Zur Adaption an die Sony Alpha benutze ich einen von Henry Feddersen produzierten Adapter,
bei dem sowohl die M26-Schraubobjektive als auch die moderneren Robot-Objektive mit größerem Durchmesser angeschlossen werden können.
In den folgenden Bildern seht ihr das Objektiv neben dem Adapter:
To adapt to the Sony Alpha I use an adapter produced by Henry Feddersen,
where both the M26 screw lenses and the more modern robot lenses with a larger diameter can be connected.
In the following pictures you can see the lens next to the adapter:


Sehr interessant ist die passende Original-Streulichtblende des Objektives.
Diese wird wie gewohnt vorne eingeschraubt, kann dann aber entweder zum Fotografieren ausgezogen oder aber komplett über das Objektiv "gestülpt" werden zum kompakten Transport.
Eine geniale Lösung:
The matching original lens hood of the lens is very interesting.
This is screwed in at the front as usual, but can then either be pulled out for taking photos or “put” completely over the lens for compact transport.
An ingenious solution:


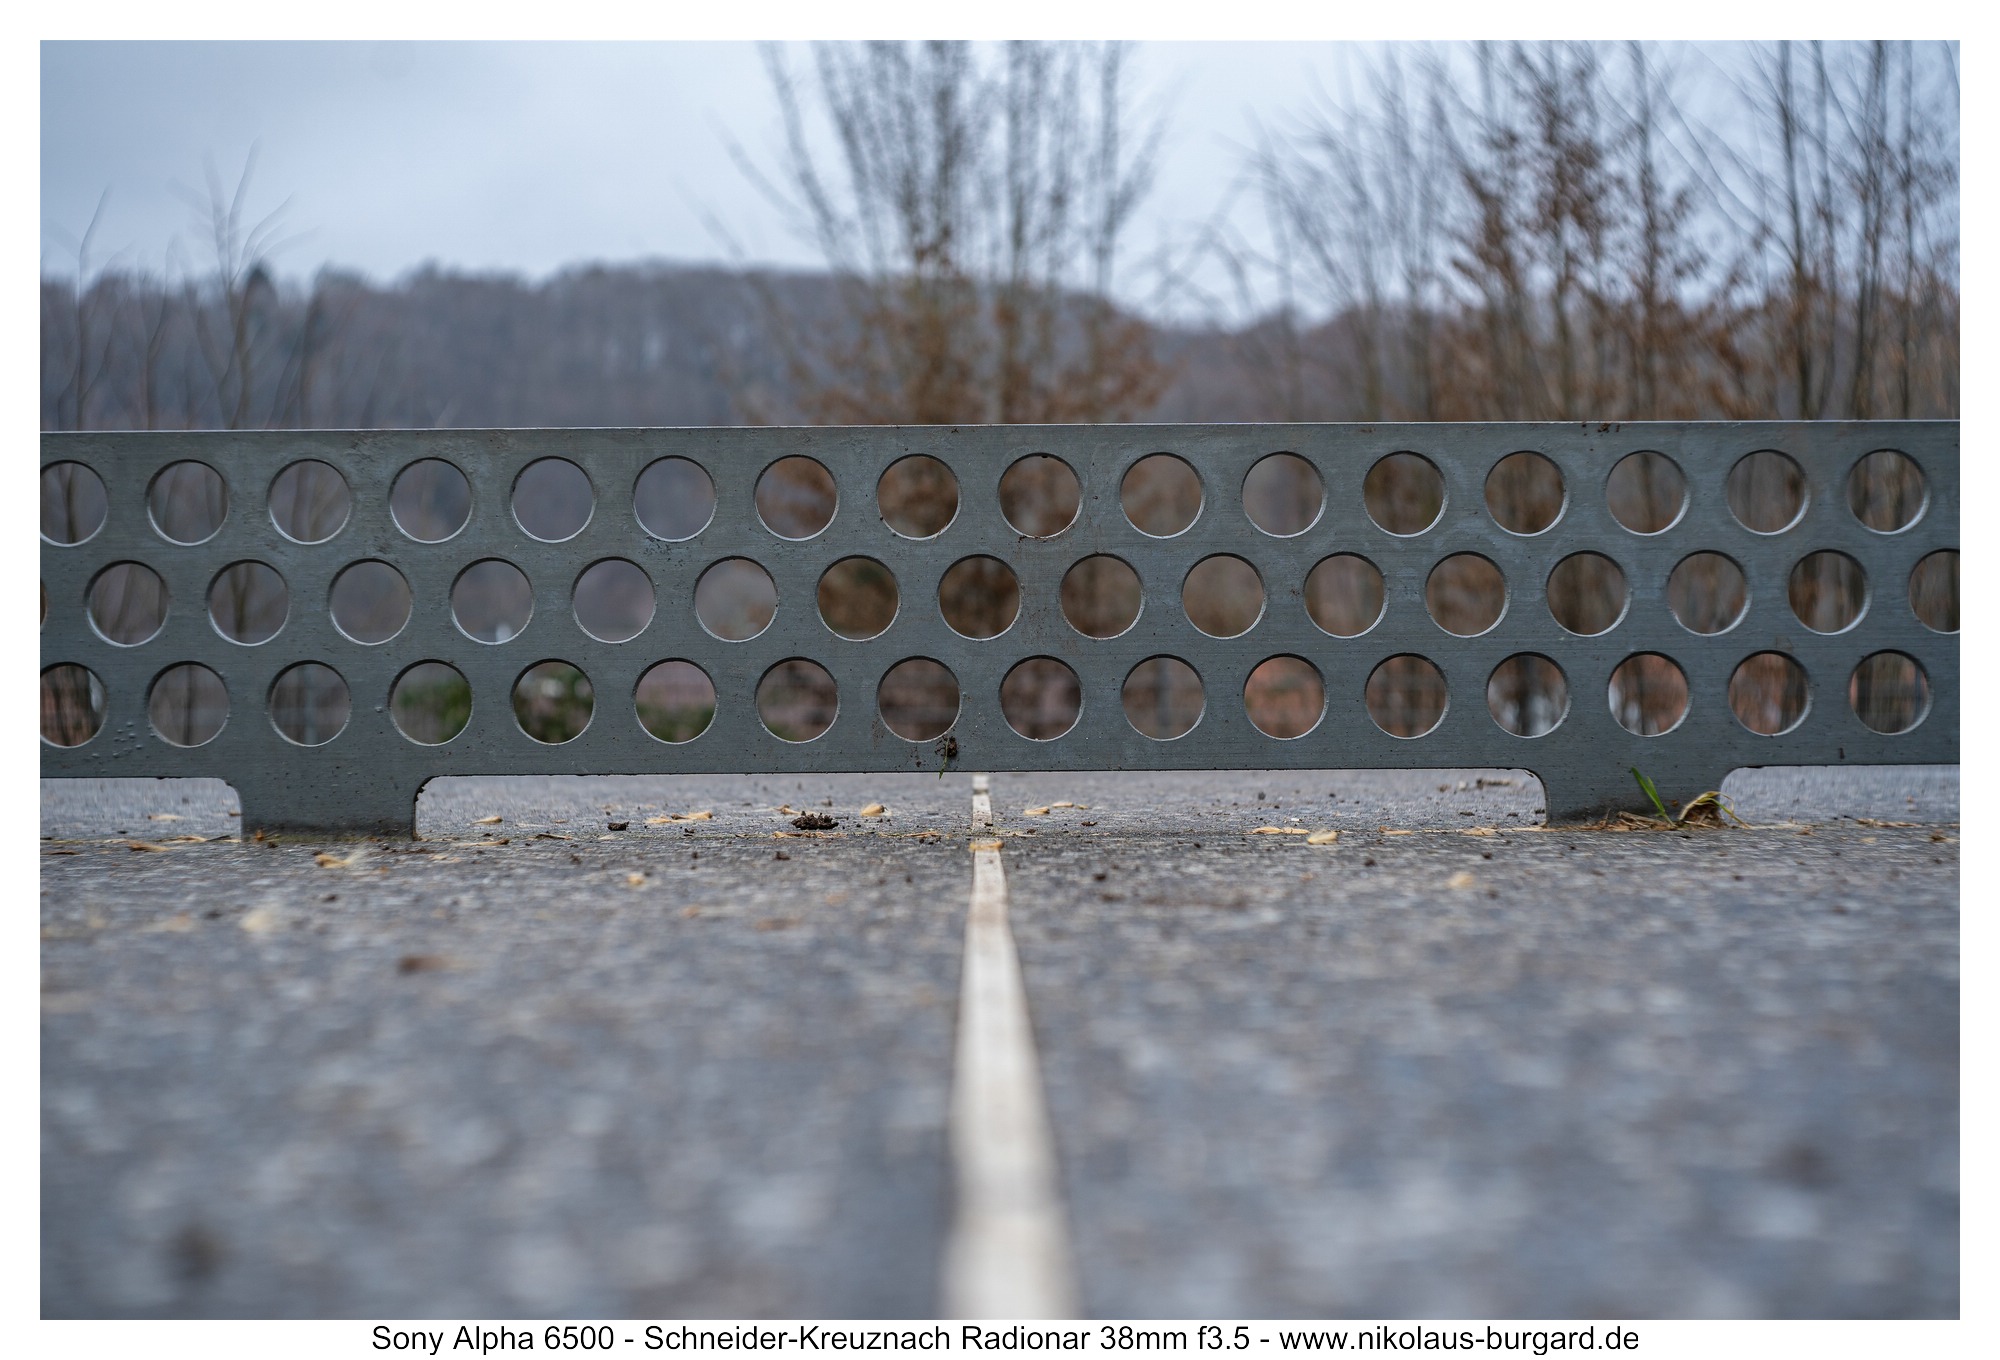
Montiert an die Testkamera, die Sony Alpha 6500, ergibt sich eine sehr schön kompakte Kombination mit ausgewogener Gewichtsverteilung.
Einziger Kritikpunkt ist die schlechte Erreichbarkeit des Blendenringes, der sich zudem bei der Fokussierung mitdreht. Dieser hat allerdings rechts neben der Zahl 3.5 einen "Noppen", an dem man ihn greifen kann zum Drehen.
Mounted on the test camera, the Sony Alpha 6500, the result is a very nicely compact combination with balanced weight distribution.
The only point of criticism is the difficulty of reaching the aperture ring, which also rotates when focusing. However, this has a "nub" to the right of the number 3.5 that you can grab to turn it.


Bildschärfe / Sharpness
Wir starten in den eigentlichen Testbericht direkt mit 2 Bildschärfereihen auf weite Entfernung.
Dieses Mal 2 Reihen, weil ich die Bildschärfe am Kleinbild/Fullframe-Sensor und an APS-C zeigen möchte.
Benutzt habe ich für diese Schärfereihen (und andere Kleinbild-/Fullframe-Bilder die Sony Alpha 7III.
We start the actual test report directly with 2 focus rows at a long distance.
This time 2 rows because I want to show the image sharpness on the 35mm/full frame sensor and on APS-C.
I used the Sony Alpha 7III for these focus series (and other 35mm/full frame images.
Kleinbildformat (36x24) / 35mm-format (36x24)
Die Objektive für Robot waren ja eigentlich für 24x24 gerechnet, das Kleinbild-Format mit 36x24 ist deutlich größer.
Deshalb ist mit einer starken Randabdunkelung inklusive schwarzer Ecken zu rechnen.
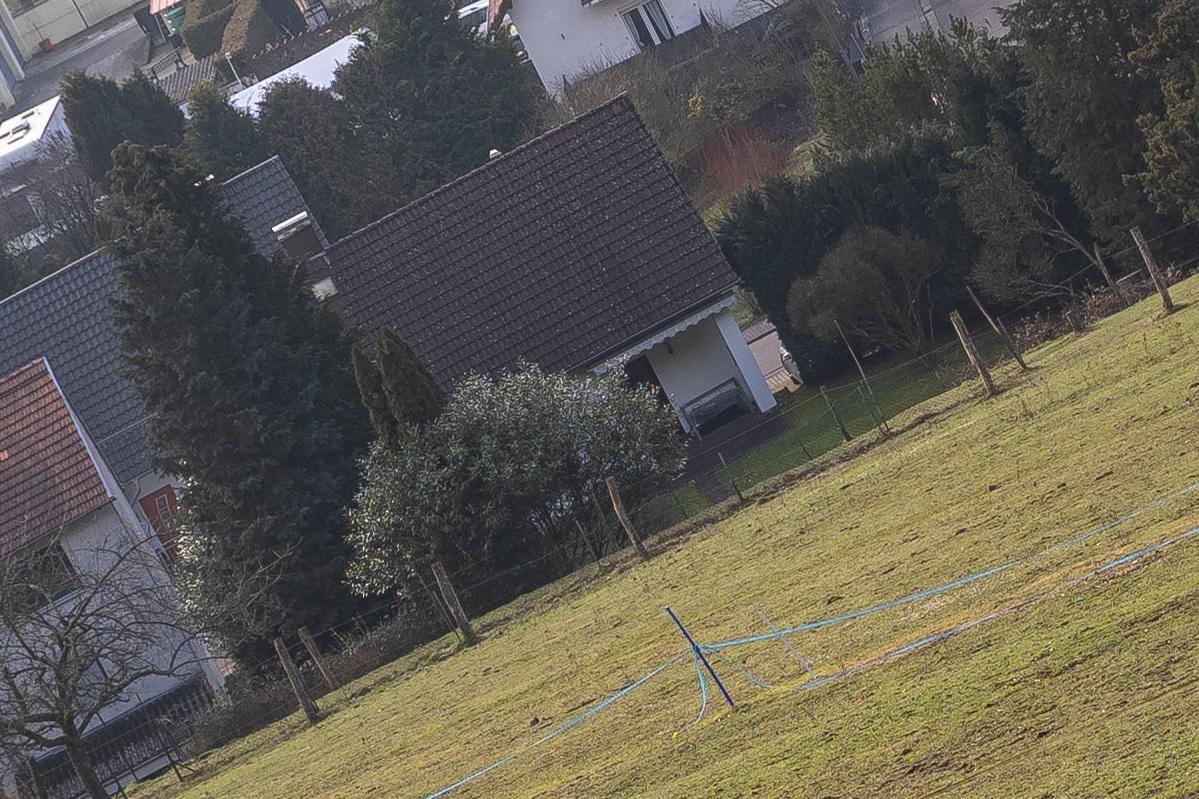
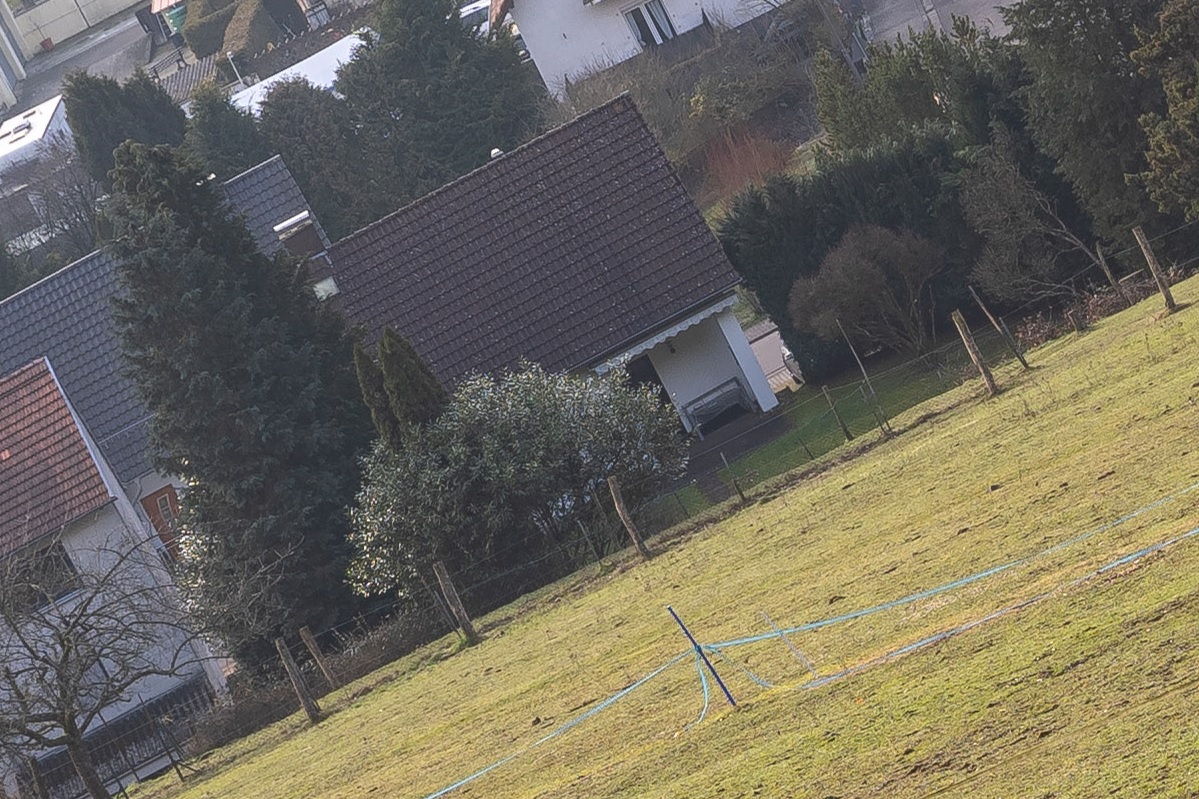
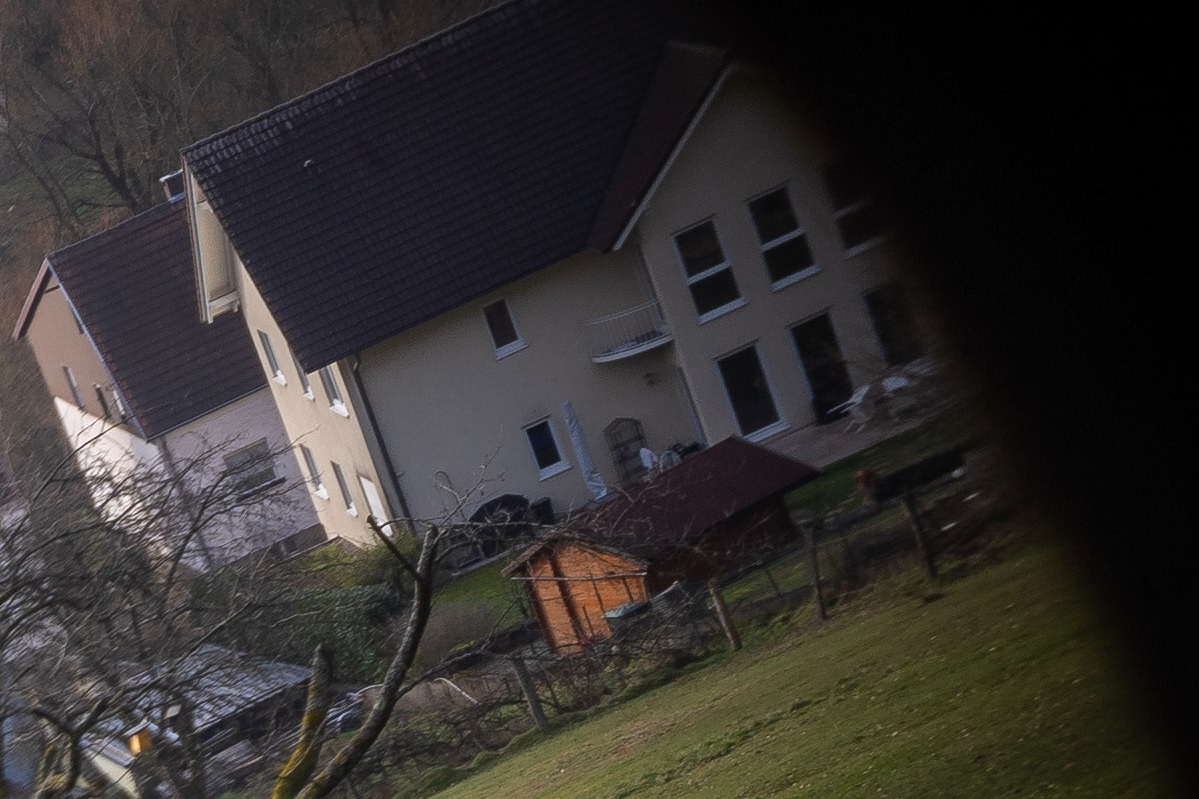
Ihr seht zuerst das komplette KB/FF-Bild in den Blendenstufen f3.5 - f4 - f5.6 - f8 - f11 - f16:
The lenses for Robot were actually designed for 24x24, the 35mm format of 36x24 is significantly larger.
Therefore, a strong darkening of the edges, including black corners, is to be expected.
You first see the complete 35mm-/FF-image in the aperture levels f3.5 - f4 - f5.6 - f8 - f11 - f16:

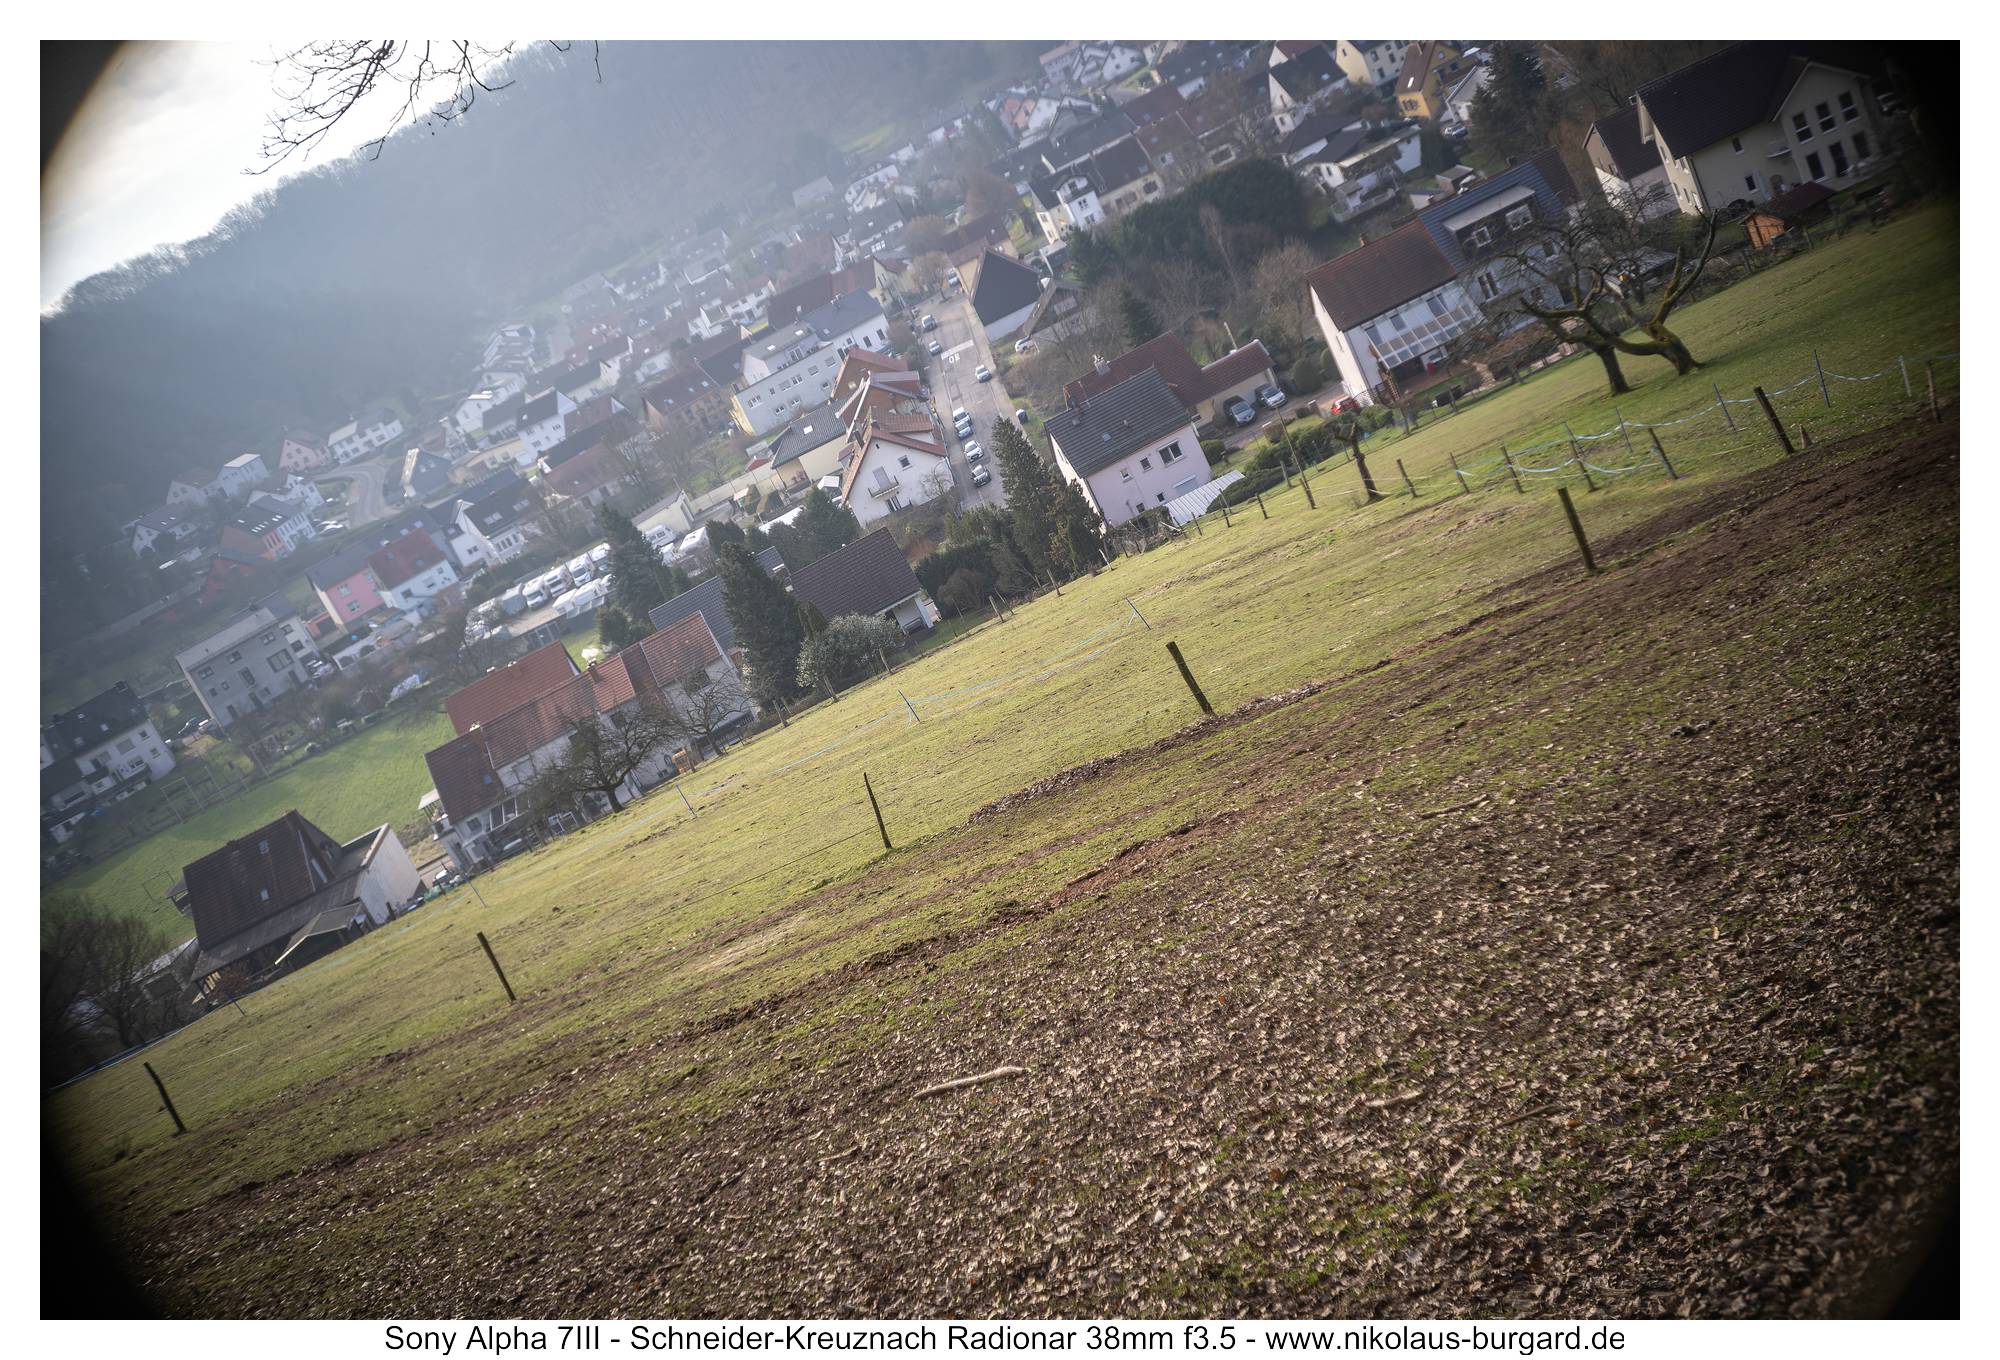


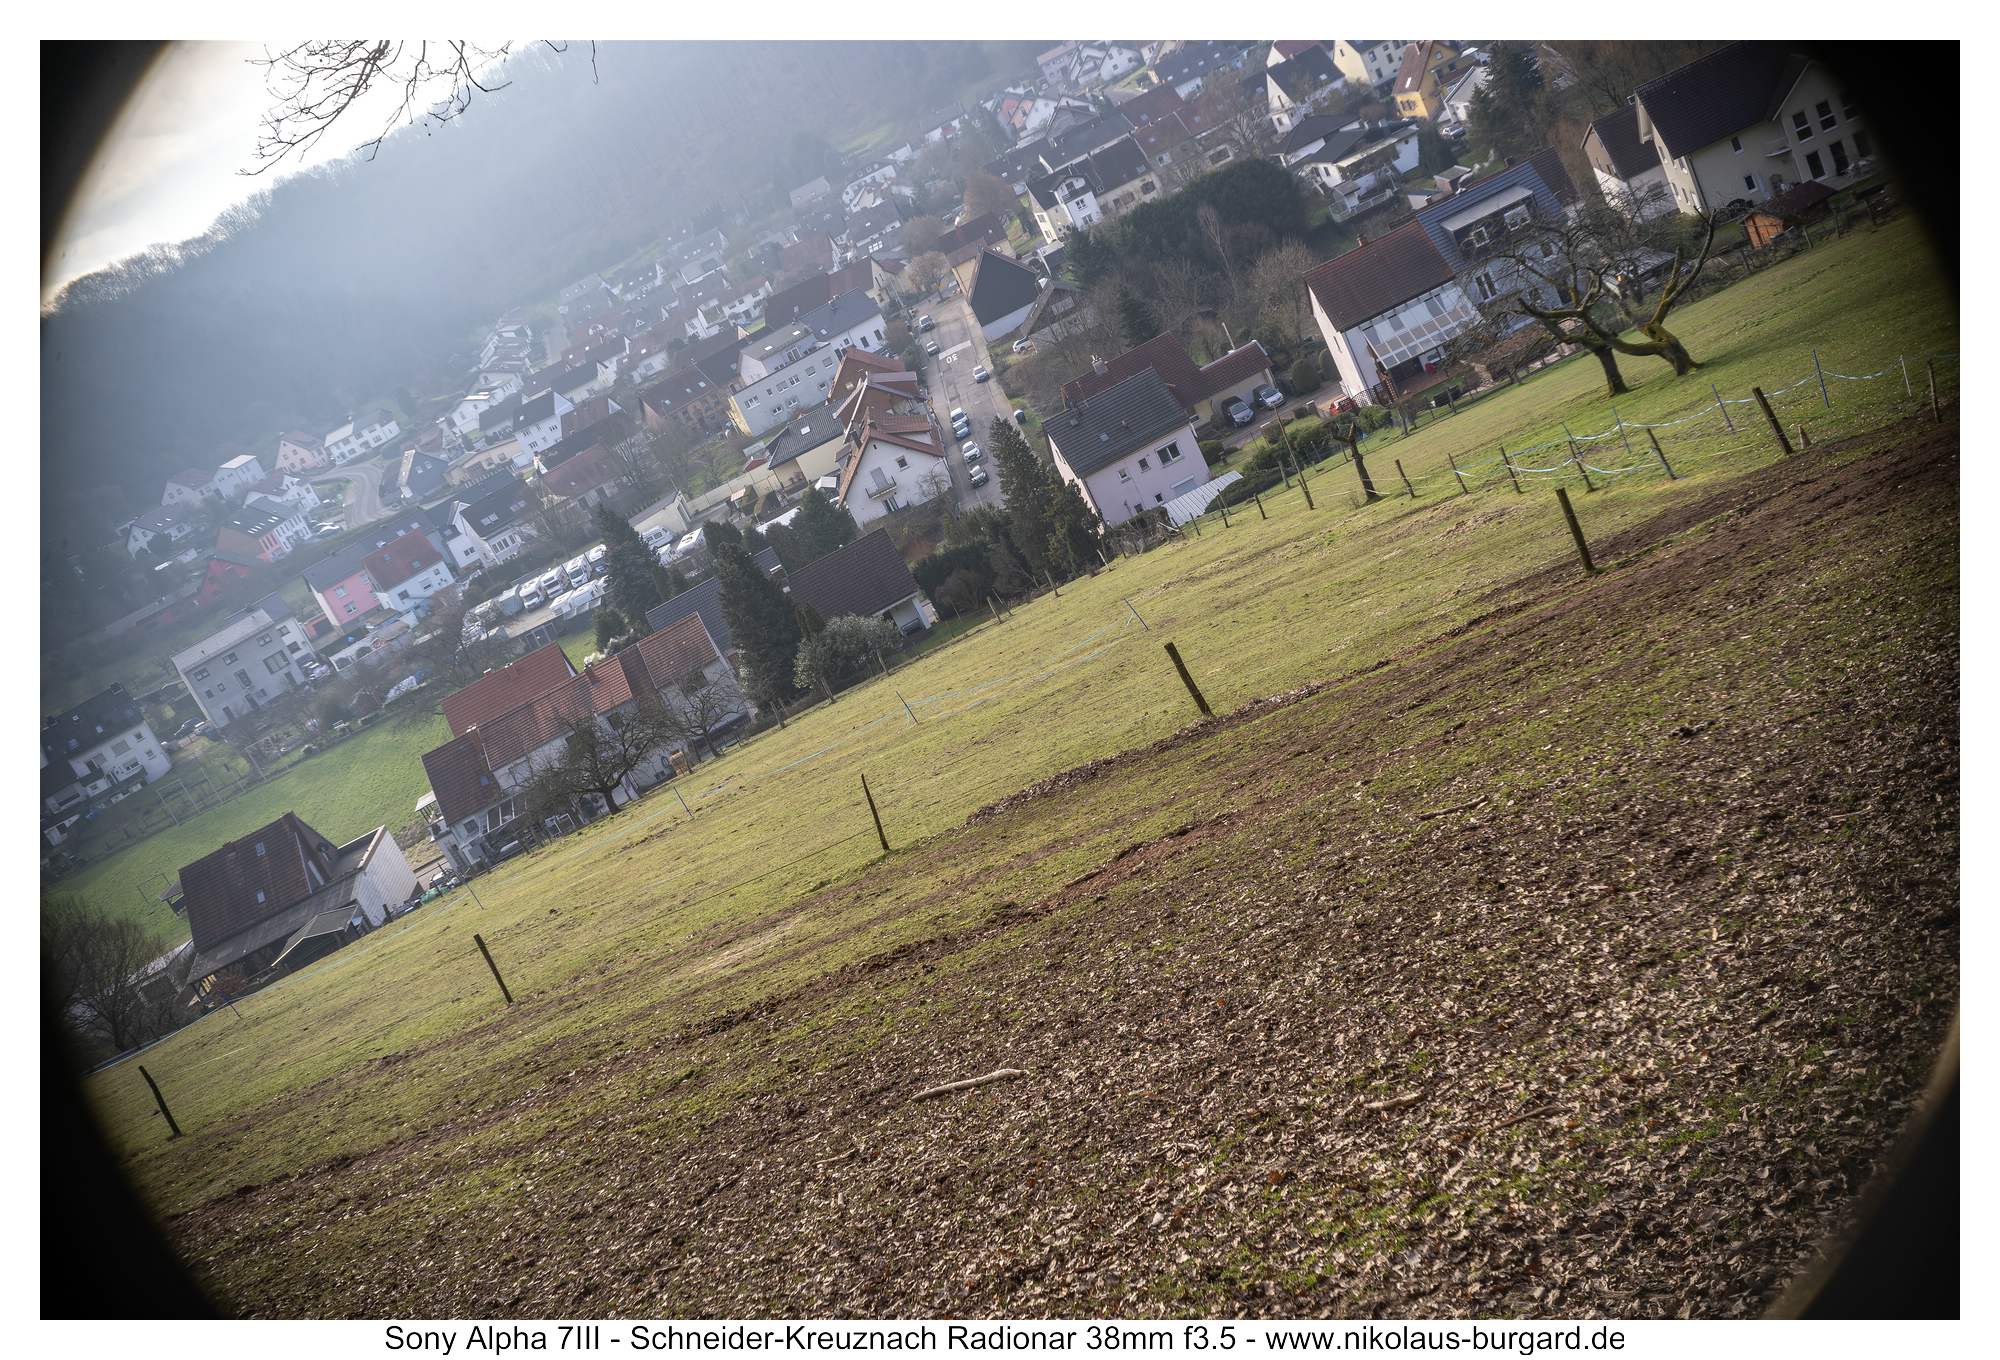


Wie erwartet haben wir bei allen Blendenstufen deutliche schwarze Ecken, der Bildkreis reicht sichtbar nicht aus für den Kleinbild-Sensor.
Bei f3.5 und auch bei f4 gibt es zusätzlich eine sehr starke Vignette, die weit ins Bild hineinreicht,
sich bei f5.6 aber deutlich verbessert.
Bei f8 sind die Bildbereiche, die nicht komplett schwarz sind, schon fast ohne zusätzliche Abdunklung im Vergleich zur Bildmitte,
Um genau zu sehen, wie scharf das Objektiv in der Bildmitte ist, habe ich 100%-Vergrößerungen vom anfokussierten Bildzentrum angefertigt:
As expected, we have clear black corners at all aperture levels; the image circle is visibly not sufficient for the 35mm sensor.
At f3.5 and also at f4 there is also a very strong vignette that extends far into the image,
However, it improves significantly at f5.6.
At f8, the areas of the image that are not completely black have almost no additional darkening compared to the center of the image.
To see exactly how sharp the lens is in the center of the image, I made 100% enlargements of the focused image center:


Bei Offenblende f3.5 ist das Objektiv schon gut scharf im Zentrum, es fehlen noch etwas die Kontraste und es gibt einen ganz leichten Schleier aufgrund der sphärischen Aberration.
Bei f4 verschwindet der Schleier und die Schärfe macht einen ersten Schritt auf sehr gutes Niveau,
die Kontraste sind noch nicht voll da.
Von f5.6 bis f11 ist die zentrale Schärfe ausgezeichnet,
bei f16 beugungsbedingt wieder etwas schwächer.
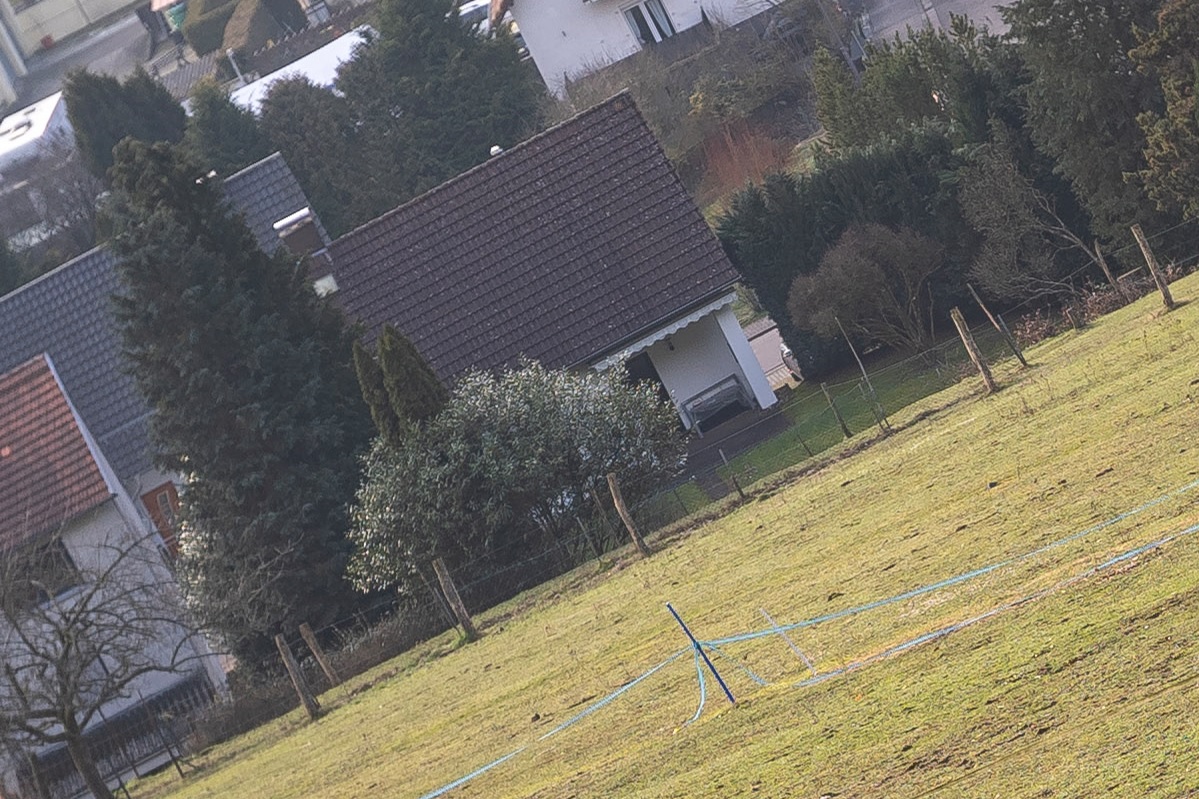
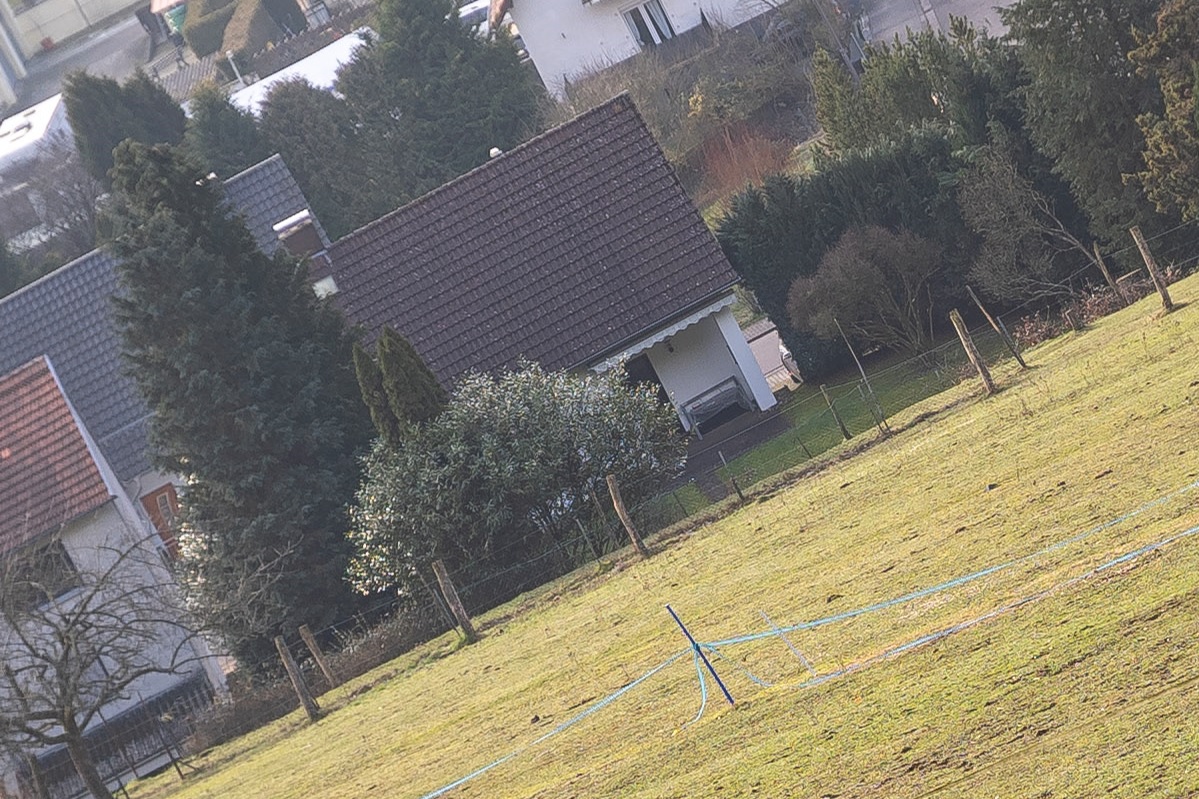
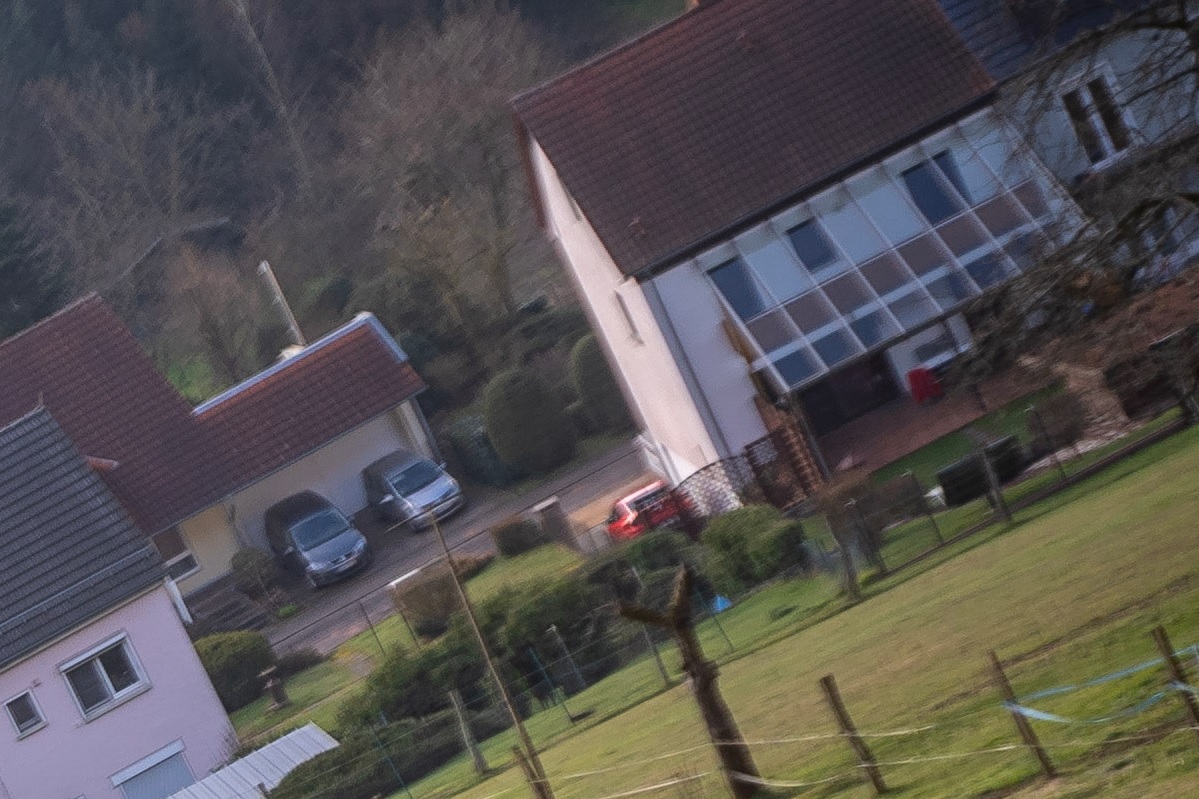
Auch aus den Kleinbild-/Fullframe-Ecken habe ich 100%-Vergrößerungen angefertigt:
At open aperture f3.5 the lens is already sharp in the center, the contrast is still a bit lacking and there is a very slight haze due to the spherical aberration.
At f4 the haze disappears and the sharpness takes a first step to a very good level,
the contrasts are not yet fully there.
From f5.6 to f11 the central sharpness is excellent,
At f16 it's a little weaker again due to diffraction.
I also made 100% enlargements from the 35mm/full frame corners:


Wie bereits in den Gesamtbildern zu sehen, bleibt die äußerste Ecke bei allen Blendenwerten schwarz, der Bildkreis reicht hier einfach nicht.
Von f3.5 bis f5.6 ist in den Bereichen, die noch ausgeleuchtet werden das Niveau schwach.
Hier liegen mehrere Abbildungsfehler gleichzeitig vor - trotzdem sind z.B. die Ziegel schon einigermaßen getrennt - die Auflösung ist also schon da, allerdings von Astigmatismus und sphärischer Aberration stark überlagert.
Bei f8 gibt es hier einen ersten Schritt auf ordentlich, erst bei f11 wird IN DEN AUSGELEUCHTETEN BEREICHEN ein vertretbares Niveau erreicht - f16 ist wieder schwächer.
As can already be seen in the overall images, the outermost corner remains black at all aperture values; the image circle is simply not enough here.
From f3.5 to f5.6 the level is weak in the areas that are still illuminated.
Here there are several imaging errors at the same time - the bricks, for example, are already somewhat separated - so the resolution is already there, but heavily overshadowed by astigmatism and spherical aberration.
At f8 there is a first step to proper, only at f11 is an acceptable level reached IN THE ILLUMINATED AREAS - f16 is weaker again.
APS-C-Format (24x18)
Am APS-C-Format macht die Nutzung des Objektives in meinen Augen deutlich mehr Sinn.
Es ergibt sich so der Bildwinkel eines 57mm-Objektives an Kleinbild,
eine sehr spannende Brennweite.
Und auch die Leistung in diesem Format ist deutlich besser - wir starten mit den Gesamtbildern:
In my opinion, using the lens in APS-C format makes much more sense.
This results in the angle of view of a 57mm lens on a 35mm film,
a very exciting focal length.
And the performance in this format is also significantly better - we start with the overall images:


Überraschenderweise gibt es auch bei den Aufnahmen im APS-C-Format immer noch eine Vignette bei Offenblende, soweit zur Mitte reicht diese. Verschwunden ist sie erst bei f8.
Auch hier habe ich aus den Bildecken die 100%-Vergrößerungen vorbereitet (die Bewertung der Mitte bleibt ja zu Kleinbild unverändert):
Surprisingly, even with the APS-C format recordings, there is still a vignette when the aperture is open, as far as the center goes. It only disappeared at f8.
Here too I have prepared the 100% enlargements from the corners of the image (the evaluation of the center remains unchanged from the 35mm image):


Auch hier sind die Blendenwerte f3.5 bis f5.6 noch schwach.
Erst bei f8 gibt es einen ersten Schärfeschritt auf immer noch mäßiges Niveau -
erst f11 wird akzeptabel.
Bei f16 wird die beste Eckschärfe erreicht - aber selbst diese erreicht kein "gut".
Mein Fazit:
Liebe Eckschärfen-Pixelpeeper, ihr müsst jetzt ganz stark sein:
Das Objektiv ist definitiv gar nichts für euch.....
Für alle anderen gilt:
Gute Zentrumsschärfe ab Offenblende, bei f4 sehr gut und ab f5.6 hervorragend.
Die Vollformat-Ecken sind aufgrund des zu kleinen Bildkreises und der daraus resultierenden harten schwarzen Vignette in meinen Augen unbrauchbar, auch wenn der ausgeleuchtete Bereich im Grunde der folgenden Bewertung der APS-C-Ecken entspricht.
Die Ecken im APS-C-Format sind bis f5.6 schwach und erst ab f11 "brauchbar" - richtig scharf werden sie nie.
Here too, the aperture values f3.5 to f5.6 are still weak.
Only at f8 is there a first sharpening step to a still moderate level -
only f11 becomes acceptable.
The best corner sharpness is achieved at f16 - but even this does not reach "good".
My conclusion:
Dear corner sharpening pixel peepers, you have to be very strong now:
The lens is definitely not for you...
For everyone else:
Good center sharpness from open aperture, very good at f4 and excellent from f5.6.
The full-frame corners are unusable in my eyes due to the image circle being too small and the resulting harsh black vignette, even if the illuminated area is basically the same as the APS-C corners rating below.
The corners in APS-C format are weak up to f5.6 and only "usable" from f11 - they never get really sharp.
Schärfe im Nahbereich (APS-C) / Sharpness at close range (APS-C)
Auf eine Distanz von ca. 1m wollte ich nochmal gegenchecken, wie die Schärfe und die Randschärfe auf kurze Distanzen sind:
At a distance of approx. 1m I wanted to check again how the sharpness and edge sharpness are at short distances:


Bei Offenblende und f4 ist die zentrale Schärfe schon gut bis sehr gut, ab f5.6 hervorragend.
Am Bildrand sind f3.5 und f4 noch weich, bei f5.6 ist die Schärfe schon sehr ordentlich und ab f8 sehr gut.
At open aperture and f4 the central sharpness is good to very good, and excellent from f5.6 onwards.
At the edge of the image, f3.5 and f4 are still soft, at f5.6 the sharpness is very good and from f8 onwards it is very good.
Vergleichsbilder Kleinbild vs. APS-C / Comparison pictures 35mm vs. APS-C
Ich habe einige Vergleichsbilder vom gleichen Standpunkt aus sowohl im vollen Kleinbild-Format als auch im APS-C-Format gemacht.
Starten möchte ich mit einem Beispielpaar auf mittlere Distanz von einigen Metern:
I took some comparison images from the same vantage point in both full 35mm format and APS-C format.
I would like to start with an example pair at a medium distance of a few meters:


Auf diese Distanzen ist das Kleinbild-Bild noch unbrauchbar. Man hat einen "Tunnel" mit schwarzen Ecken - hier müsste man zuviel beschneiden, als dass man einen Mehrwert gegenüber dem APS-C-Bild bekäme.
Im Nahbereich wie bei den folgenden beiden Beispielpaaren gibt es auch beim Kleinbild-Bild fast keine schwarzen Ecken. In den äußeren Bereichen des Bildes gibt es allerdings einen starken Swirl und Helligkeitsabfall. Trotzdem ist das ein interessanter Bildeffekt und durchaus nutzbar:
At these distances the 35mm image is still unusable. You have a "tunnel" with black corners - here you would have to crop too much to get any added value compared to the APS-C image.
At close range, as in the following two pairs of examples, there are almost no black corners, even in the 35mm image. However, there is a strong swirl and drop in brightness in the outer areas of the image. Nevertheless, this is an interesting image effect and definitely usable:


Die nächsten beiden Beispielpaare dienen einer Demonstration "des Machbaren".
Zuerst ein Bildpaar an der "nativen Naheinstellgrenze" des Objektives von 55cm:
The next two pairs of examples serve to demonstrate “what is possible”.
First a pair of images at the "native close focusing limit" of the lens of 55cm:


Und als Vergleich das gleiche Motiv an der per Adapter verkürzten Naheinstellgrenze.
Man sieht schön, dass an Kleinbild auch ein noch weiter Wegbringen der Optik vom Sensor nicht reicht, um das komplette Format auszuleuchten, die alleräußersten Ecken bleiben noch dunkel:
And as a comparison, the same subject at the closest focusing distance shortened using an adapter.
You can clearly see that on a 35mm image, moving the optics even further away from the sensor is not enough to illuminate the entire format, the very outermost corners still remain dark:


Das letzte Beispielpaar ist voll gegen die noch nicht zu hoch stehende Morgensonne fotografiert,
etwas, das man mit einer nur einfach vergüteten Optik nicht unbeding machen sollte.
Es gibt einen kräftigen Kontrastverlust - aber das Ergebnis hat durchaus Flair (oder Flare? :-) ).
The last example pair is photographed against the morning sun, which is not yet too high,
something that you shouldn't necessarily do with a single-coated optic.
There is a strong loss of contrast - but the result definitely has flair (or flare? :-) ).


Als Fazit kann man ziehen, dass das Radionar im Nahbereich durchaus auch im vollen Kleinbild-Format für "künstlerische" Aufnahmen nutzbar ist.
Bereits bei einer Distanz von wenigen Metern ist es dies nicht mehr, da die harte schwarze Vignette zuviel vom Bildformat raubt.
The conclusion we can draw is that the Radionar can also be used for “artistic” shots at close range in full 35mm format.
This is no longer the case at a distance of just a few meters, as the hard black vignette takes up too much of the image format.
Obwohl das Objektiv im Nahbereich auch an Kleinbild durchaus einsetzbar ist, passt es in meinen Augen viel besser zu APS-C.
Ab hier sind alle Bilder im APS-C-Format an der Sony Alpha 6500 entstanden!
Although the lens can also be used at close range on 35mm cameras, in my opinion it suits APS-C much better.
From here on out, all images were taken in APS-C format on the Sony Alpha 6500!
Rendering & Bokeh
Dies ist eine für mich persönlich sehr wichtige Testdisziplin,
wenn auch eine Bewertung naturgemäß immer sehr subjektiv ist.
Aber was nützt das schärfste Objektiv, wenn die unscharfen Bereiche als hässlich empfunden werden.
Bei einem "historischen" Objektiv wie diesem finde ich dies immer besonders interessant -
denn zur Zeit seiner Entwicklung war dies mit Sicherheit kein Kriterium,
das Bokeh bekommt erst in den letzten Jahren immer mehr Bedeutung.
Und bei einem Objektiv mit Offenblende f3.5 ist das Bokeh zugegebenermaßen nicht das erste, woran man denkt.
Wie sich die Bildhintergründe beim Abblenden entwickeln, könnt ihr an der folgenden Blendenreihe am von meinen anderen Tests bekannten Durchgang sehen:
This is a very important testing discipline for me personally,
although an evaluation is naturally always very subjective.
But what use is the sharpest lens if the out-of-focus areas are perceived as ugly.
With a "historical" lens like this I always find this particularly interesting -
because at the time of its development this was certainly not a criterion,
Bokeh has only become more and more important in recent years.
And with a lens with an open aperture of f3.5, bokeh is admittedly not the first thing that comes to mind.
You can see how the image backgrounds develop when stopping down in the following aperture row at the passage known from my other tests:


Bei Offenblende f3.5 ist das Hintergrundrendering nicht gerade weich, es gibt viele feinteilige Strukturen und einen deutlichen Swirl - in den Ecken ist es am unruhigsten.
Bei f4 verändert sich am Gesamteindruck nicht viel, aber die Ecken sind nicht mehr ganz so nervös.
Ab f5.6 ist dann halt nicht mehr viel Hintergrundunschärfe übrig.
Auch mein anderes bekanntes Testmotiv habe ich mit dem Radionar fotografiert:
At open aperture f3.5, the background rendering isn't exactly smooth, there are a lot of fine-grained structures and a clear swirl - it's most unsettled in the corners.
At f4 the overall impression doesn't change much, but the corners are no longer quite as nervous.
From f5.6 onwards there isn't much background blur left.
I also photographed my other well-known test subject with the Radionar:

Dieses Bild ist sehr exemplarisch für das Hintergrundrendering des Radionars im Nahbereich.
Scharf genug, mit deutlichem Swirl. Die Highlights eher elliptisch als kreisrund und etwas Outlining - ohne jedoch zu aufdringlich zu werden. Also von weicher, flächiger Darstellung weit entfernt.
Nicht jedermanns Geschmack, aber mit einem hohen Wiedererkennungswert.
This image is very exemplary of the background rendering of the radionar at close range.
Sharp enough, with clear swirl. The highlights are more elliptical than circular and have some outlining - but without being too intrusive. So it's far from a soft, flat representation.
Not to everyone's taste, but with a high recognition value.
Hintergrundrendering auf kurze Distanz / Short-distance background rendering
Als nächstes möchte ich euch einige Beispiele mit dem Radionar auf kurze Fokusdistanzen zeigen.
Starten werde ich hier mit einer besonderen Möglichkeit des verwendeten Adapters.
Bei ihm gibt es 2 Einsätze - einer ist für das M26-Gewinde der Robot 24x24-Objektive, der andere für die Objektive zur Robot Royal, die auch Kleinbild ausleuchten. Diese werden eingesetzt und mit der außen sichtbaren Schraube fixiert.
Wenn man den Einsatz aber nicht komplett einschiebt, sondern etwas hervorstehen lässt, kann man mit der Schraube trotzdem fixieren und die Naheinstellgrenze verkürzen.
Die folgenden Bilder zeigen die "native" Nahgrenze und die erweiterte Nahgrenze:
Next I would like to show you some examples with the radionar at short focus distances.
I will start here with a special option for the adapter used.
There are 2 inserts - one is for the M26 thread of the Robot 24x24 lenses, the other for the lenses for the Robot Royal, which also illuminate 35mm images. These are inserted and fixed with the screw visible on the outside.
However, if you don't push the insert in completely, but let it protrude a little, you can still fix it with the screw and shorten the closest focusing distance.
The following images show the "native" near-boundary and the extended near-boundary:


Neben der stärkeren Vergrößerung des Motives verändert sich auch die Hintergrunddarstellung deutlich zum Weicheren, sie wird fast schon aquarellartig.
Noch ein weiteres ebensolches Beispielpaar:
In addition to the greater magnification of the subject, the background image also changes significantly to become softer, becoming almost watercolor-like.
Another similar pair of examples:


Auch hier erreicht man eine schöne Vergrößerung - und die Schärfe und Darstellung im Nahbereich bei Offenblende ist sehr schön.
Die folgende Beispielgalerie enthält sowohl Bilder im erweiterten als auch im nativen Nahbereich:
Here, too, you can achieve a nice magnification - and the sharpness and display at close range with the aperture open is very nice.
The following sample gallery contains both extended and native close-up images:


Ich muss sagen, das ich die Bilder auf kurze Distanz mit dem Radionar sehr mag.
Es rendert deutlich anders als unsere modernen Objektive, und die vorhandenen "Bildfehler" wie der Swirl und das etwas "plättchenhafte" in den Unschärfebereichen gefallen mir.
Das wäre nicht immer meine präferierte Darstellungsart - aber als Abwechslung zum "Einheitsglatt" ist das auch mal sehr schön.
I have to say that I really like the short range images with the Radionar.
It renders significantly differently than our modern lenses, and I like the "image defects" such as the swirl and the somewhat "flaky" appearance in the out-of-focus areas.
That wouldn't always be my preferred type of representation - but as a change from the "uniform smooth" it's very nice.
Rendering auf mittlere und weitere Distanz / Rendering at medium and long distances
Auf mittlere und weite Distanz ist das Radionar ein "schwieriger" Kandidat.
Bei Offenblende und bis f8 ist es schwer, Motive im äußeren Bilddrittel oder auch auf der Drittellinie scharfzustellen, da überlagern sich schon "Triplet-typisch" einige Bildfehler und man hat nie den "hier ist es knackscharf"-Eindruck. Erst bei Blende f11 ist dieser Schärfeeindruck erreicht.
Zur Demonstration eine Blendenreihe auf wenige Meter Distanz mit dem Motiv im äußeren Bilddrittel:
At medium and long distances, the Radionar is a “difficult” candidate.
When the aperture is open and up to f8, it is difficult to focus on subjects in the outer third of the image or even on the third line. As is typical for the triplet, some image errors overlap and you never get the impression that "it's tack sharp here". This impression of sharpness is only achieved at aperture f11.
To demonstrate, a series of apertures at a distance of a few meters with the subject in the outer third of the image:


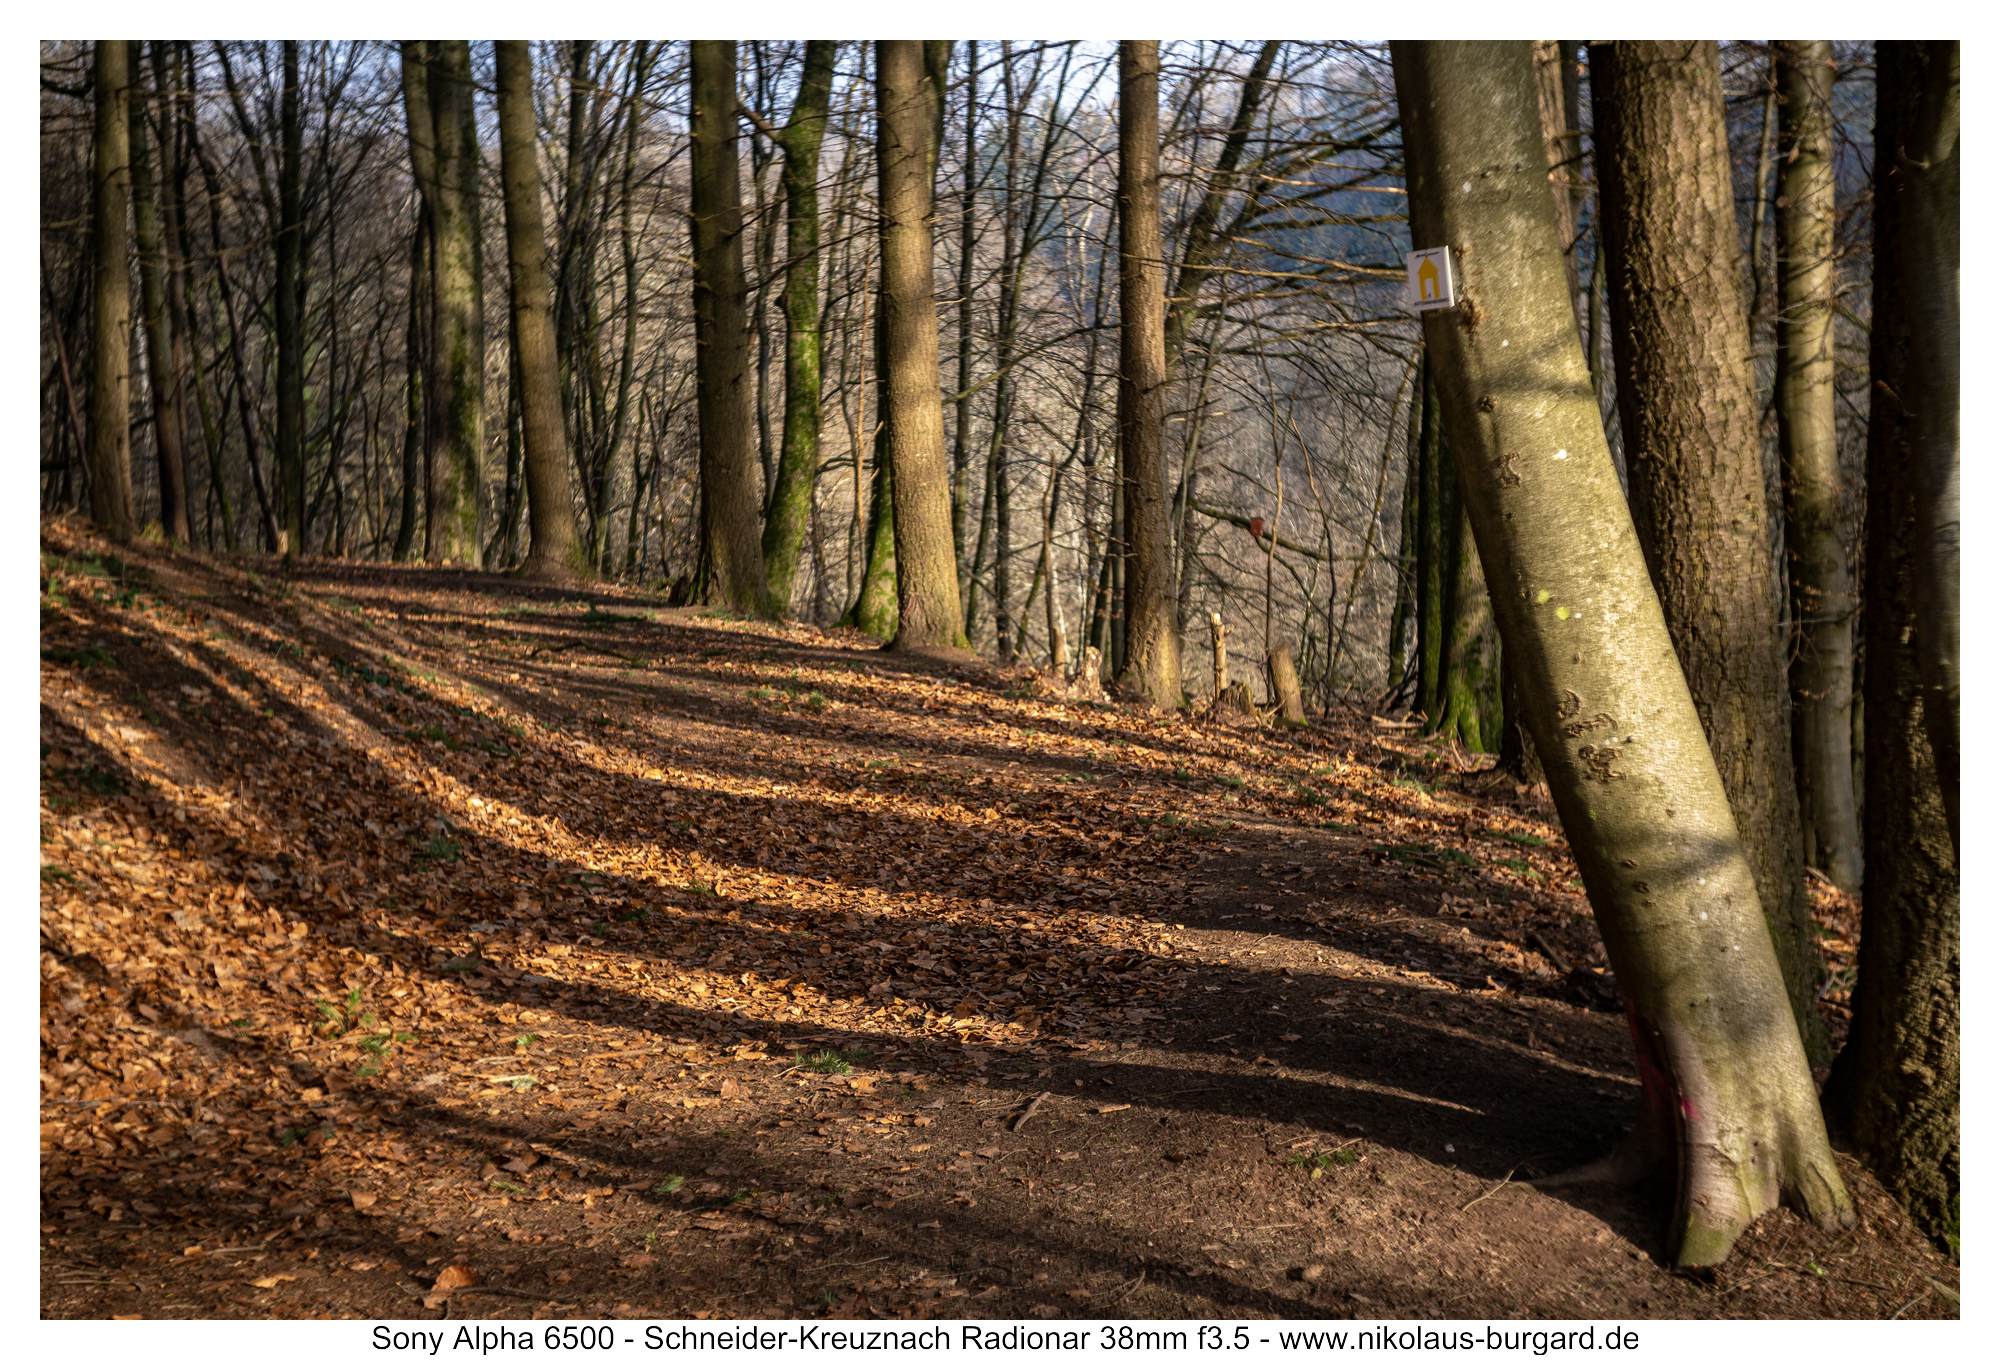
Auch hier ist das Wander-Schild im äußeren Bereich bei f3.5 noch unscharf und auch bei f8 noch nicht knackig:
Here too, the hiking sign in the outer area is still blurry at f3.5 and not yet crisp at f8:


Bei Offenblende ist das Objektiv auf größere Distanz nur in der erweiterten Bildmitte scharf:
When the aperture is open, the lens is only sharp in the extended center of the image at greater distances:


Verzeichnung
Das Objektiv ist an APS-C quasi verzeichnungsfrei,
ich kann keine Liniendurchbiegung erkennen.
The lens is virtually distortion-free on APS-C,
I can't see any line deflection.

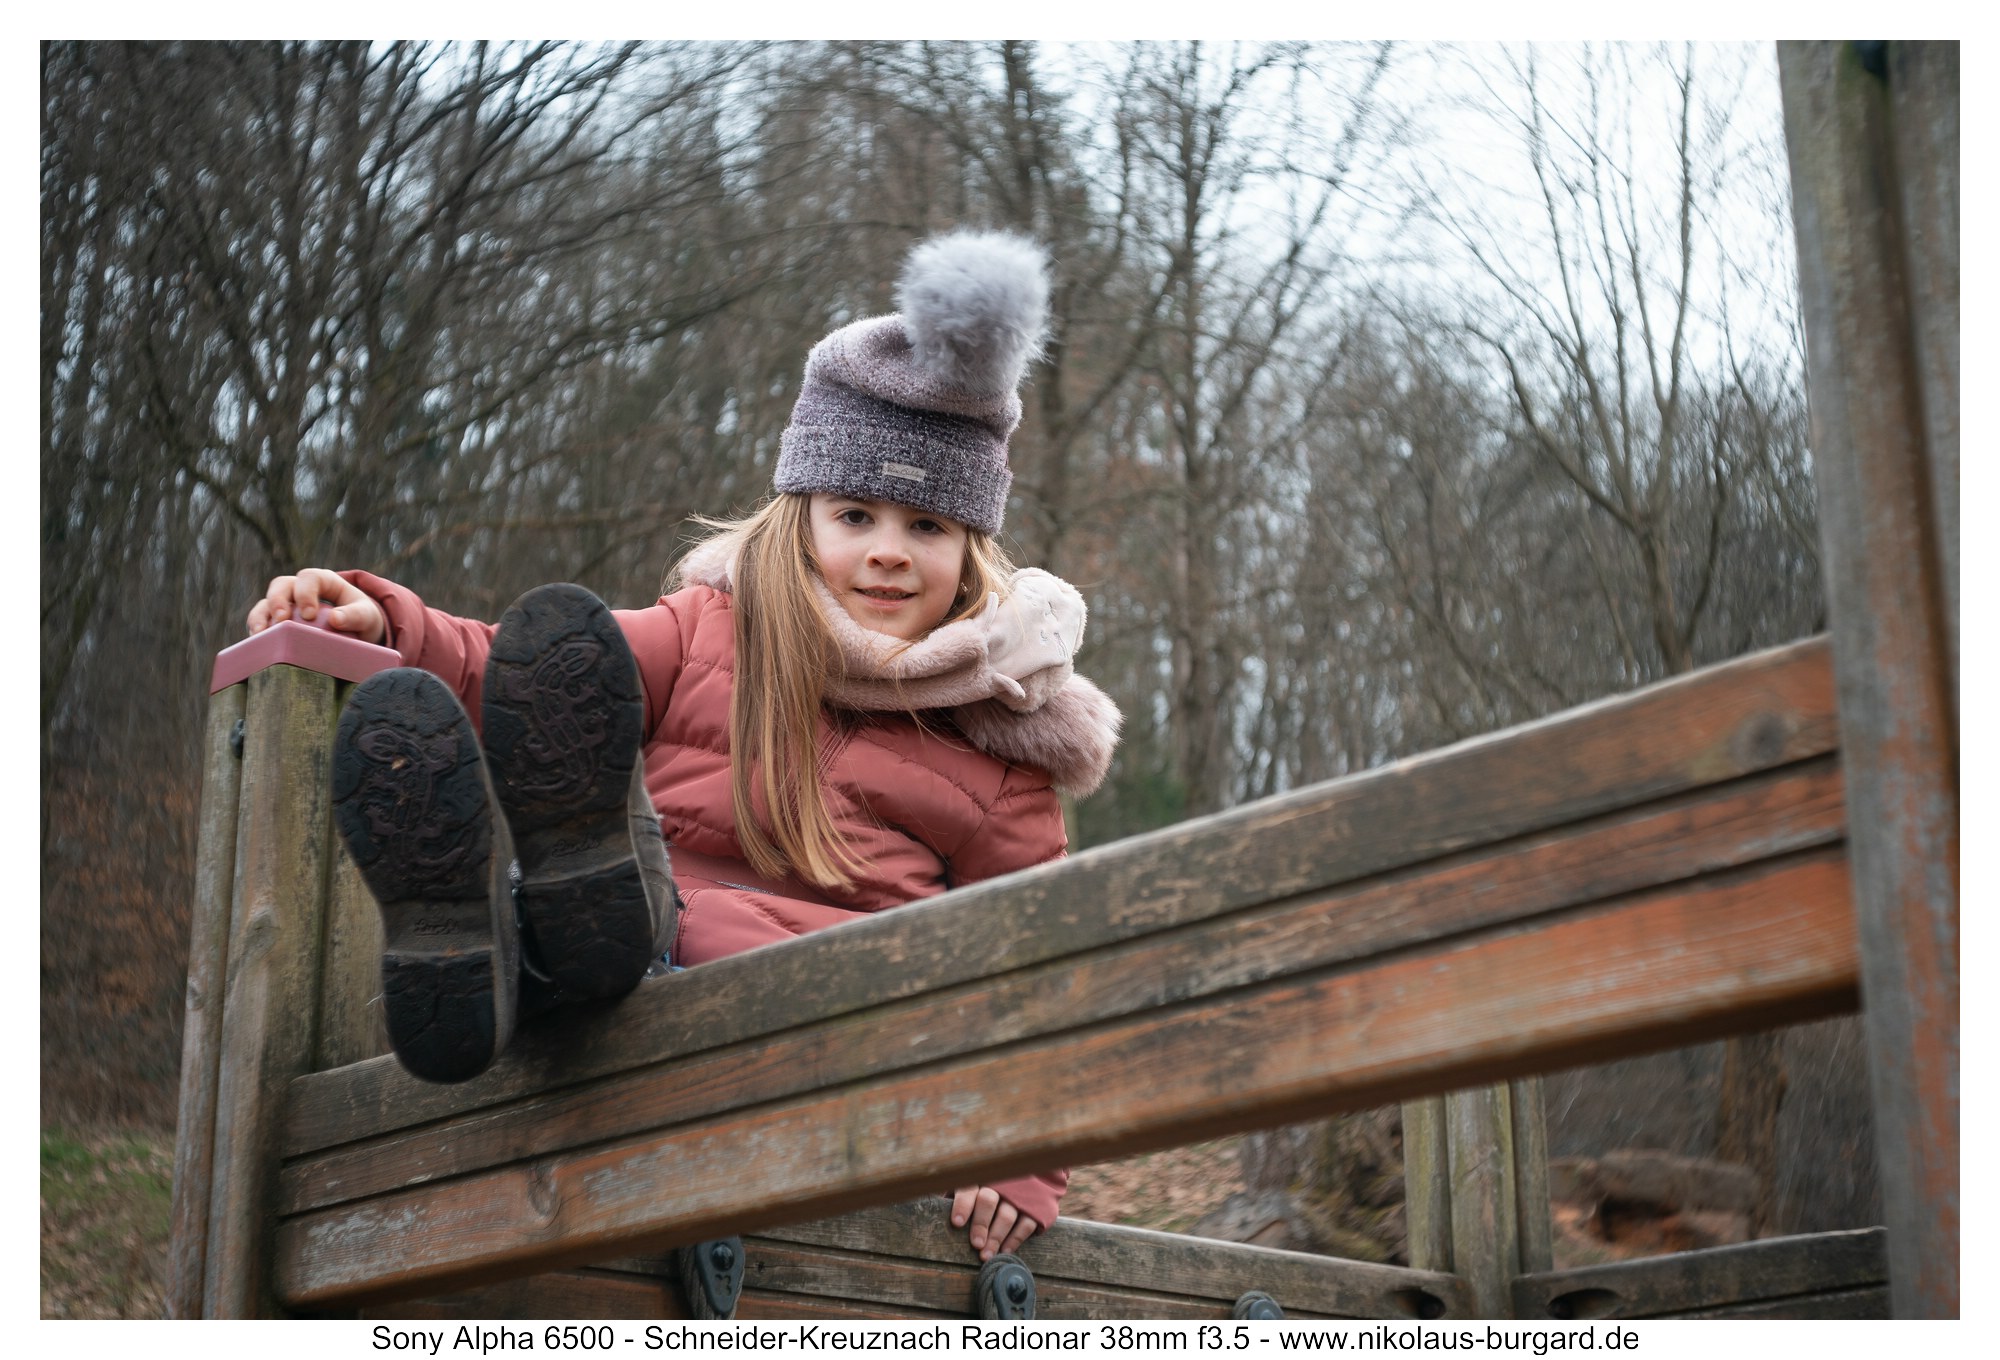
Portraits
Irgendwie durchaus überraschend für mich habe ich mit dem Radionar trotz "nur f3.5" einige Portrait-Aufnahmen gemacht.
Und sowohl auf Ganzkörper- als auch Halbkörperdistanz sind diese in meinen Augen sehr schön geworden.
Bei den Ganzkörper-Portraits ist der Swirl durchaus spannend, der sich ums Motiv legt und den Blick des Betrachters auf die Person richtet:
Somehow quite surprisingly for me, I took some portrait shots with the Radionar despite "only f3.5".
And in my opinion, these turned out very beautiful at both full-body and half-body distances.
In the full-body portraits, the swirl that surrounds the subject and directs the viewer's gaze to the person is quite exciting:
Ganzkörperdistanz / Full body distance

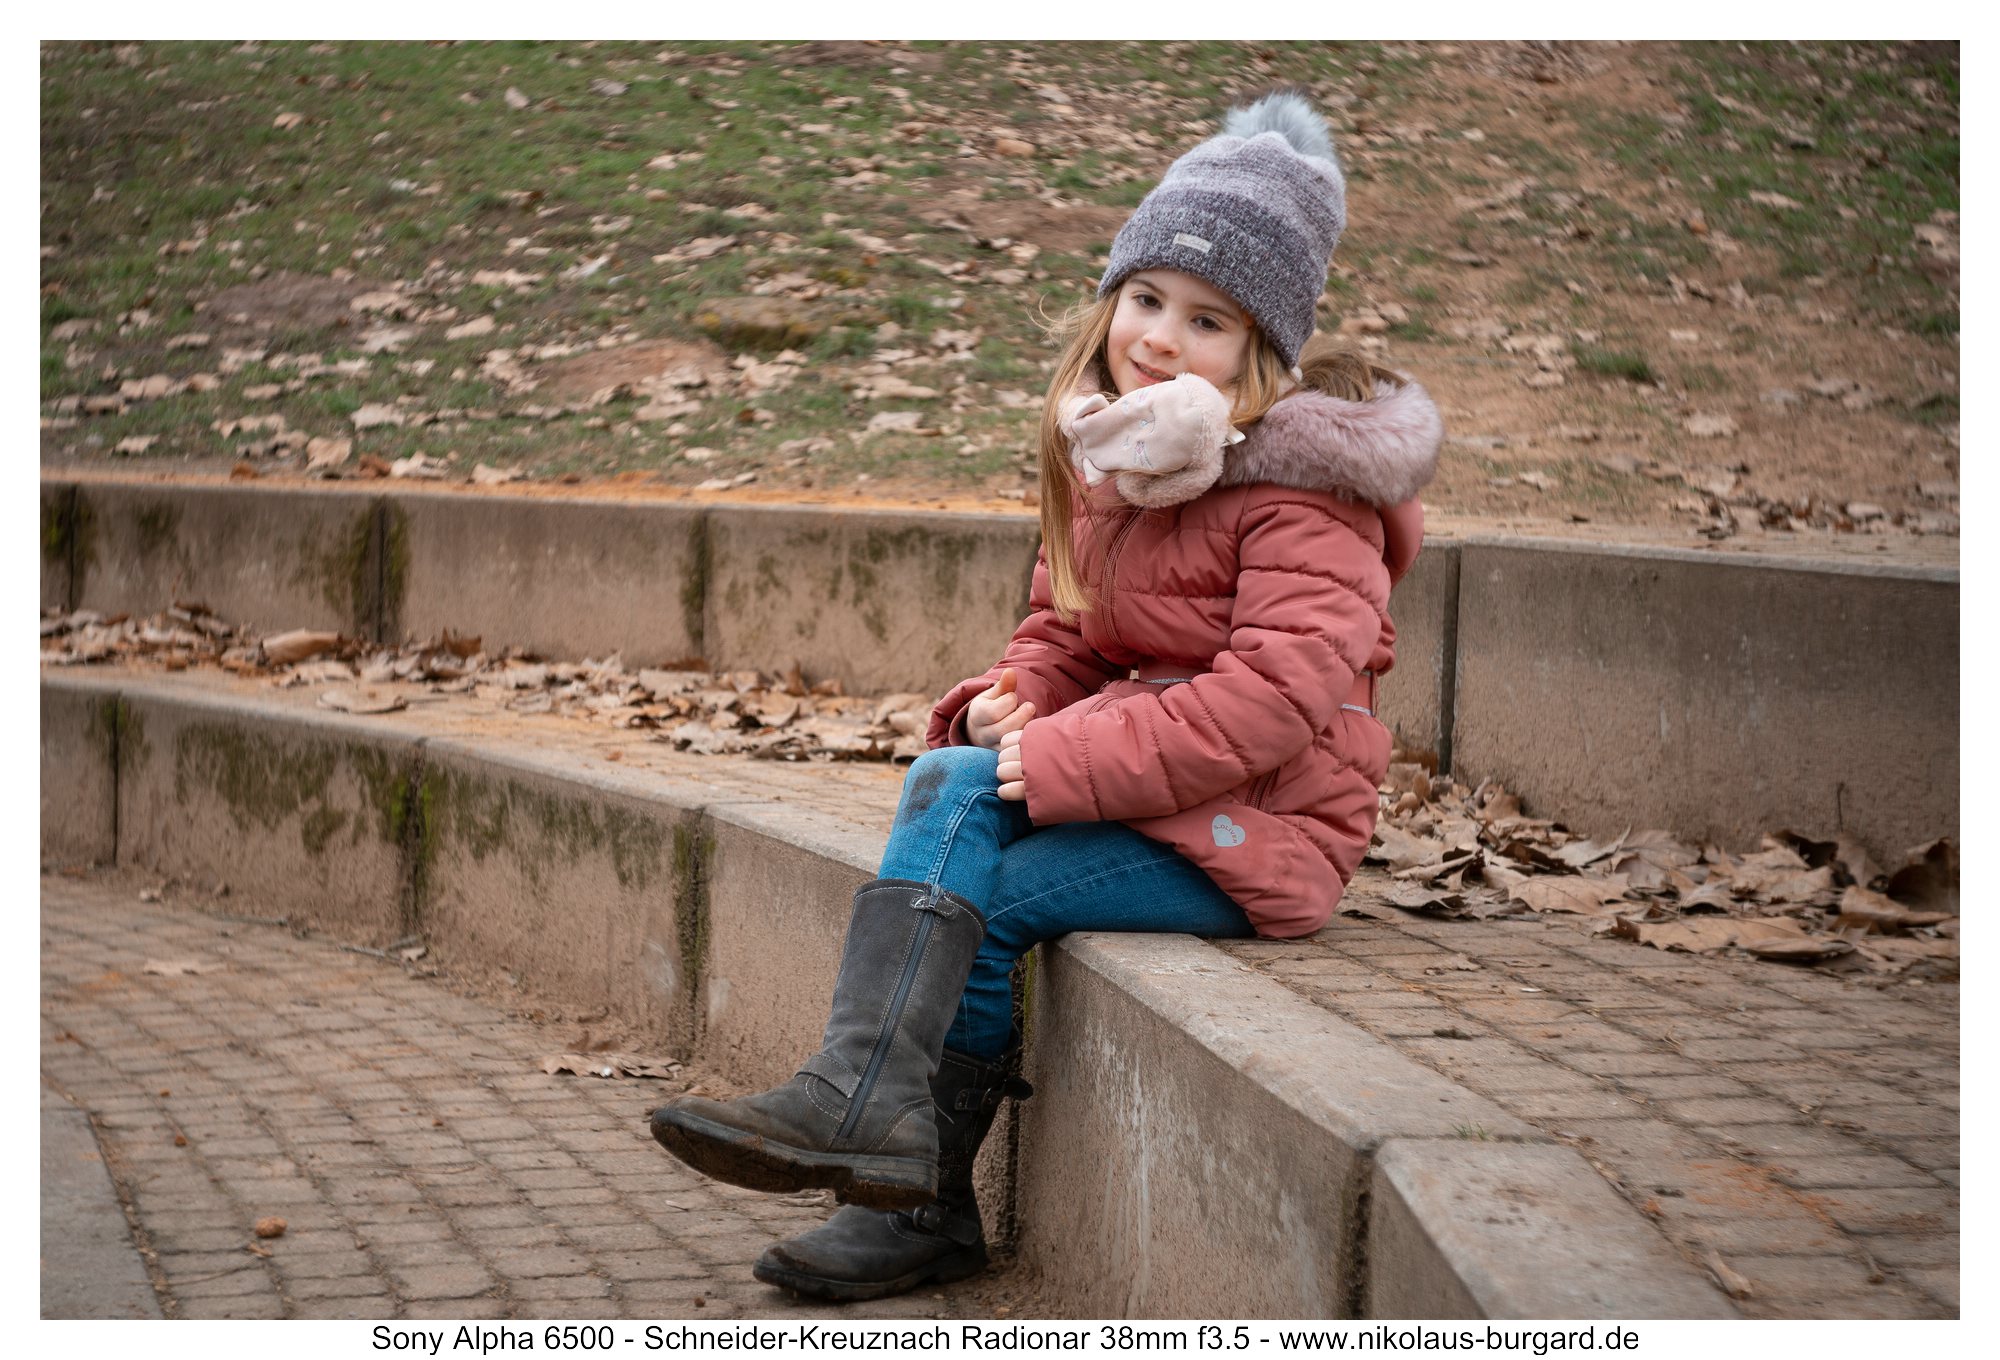

Halbkörperdistanz / Half body distance
Bei den Halbkörper-Portraits ist es schön, dass das Objektiv auf der kompletten Bildhöhe (im Querformat) scharf zeichnet. Man darf die Gesichter nur nicht zu weit nach außen setzen - wobei die Unschärfen auf diese Distanzen deutlich weniger sind als auf größere Distanzen.
Auch hier ist der umrahmende Swirl stets präsent.
With half-body portraits, it's nice that the lens draws sharply across the entire image height (in landscape format). You just shouldn't put the faces too far out - although the blurring at these distances is significantly less than at larger distances.
Here too, the surrounding swirl is always present.


Close-Up
Bei Close-Ups gefällt mir das Radionar nicht so gut, ich finde die Brennweiten-Motiventfernungskombination nicht sehr vorteilhaft für die Portraitierten.
I don't like the radionar that much for close-ups; I don't find the combination of focal length and subject distance to be very beneficial for the subjects.

Alles in allem ist das Radionar im Portraitbereich erstaunlich vielseitig und ermöglicht wirklich schöne Personenaufnahmen mit eigenem Charakter.
All in all, the Radionar is surprisingly versatile in the portrait area and allows for really beautiful photos of people with their own character.
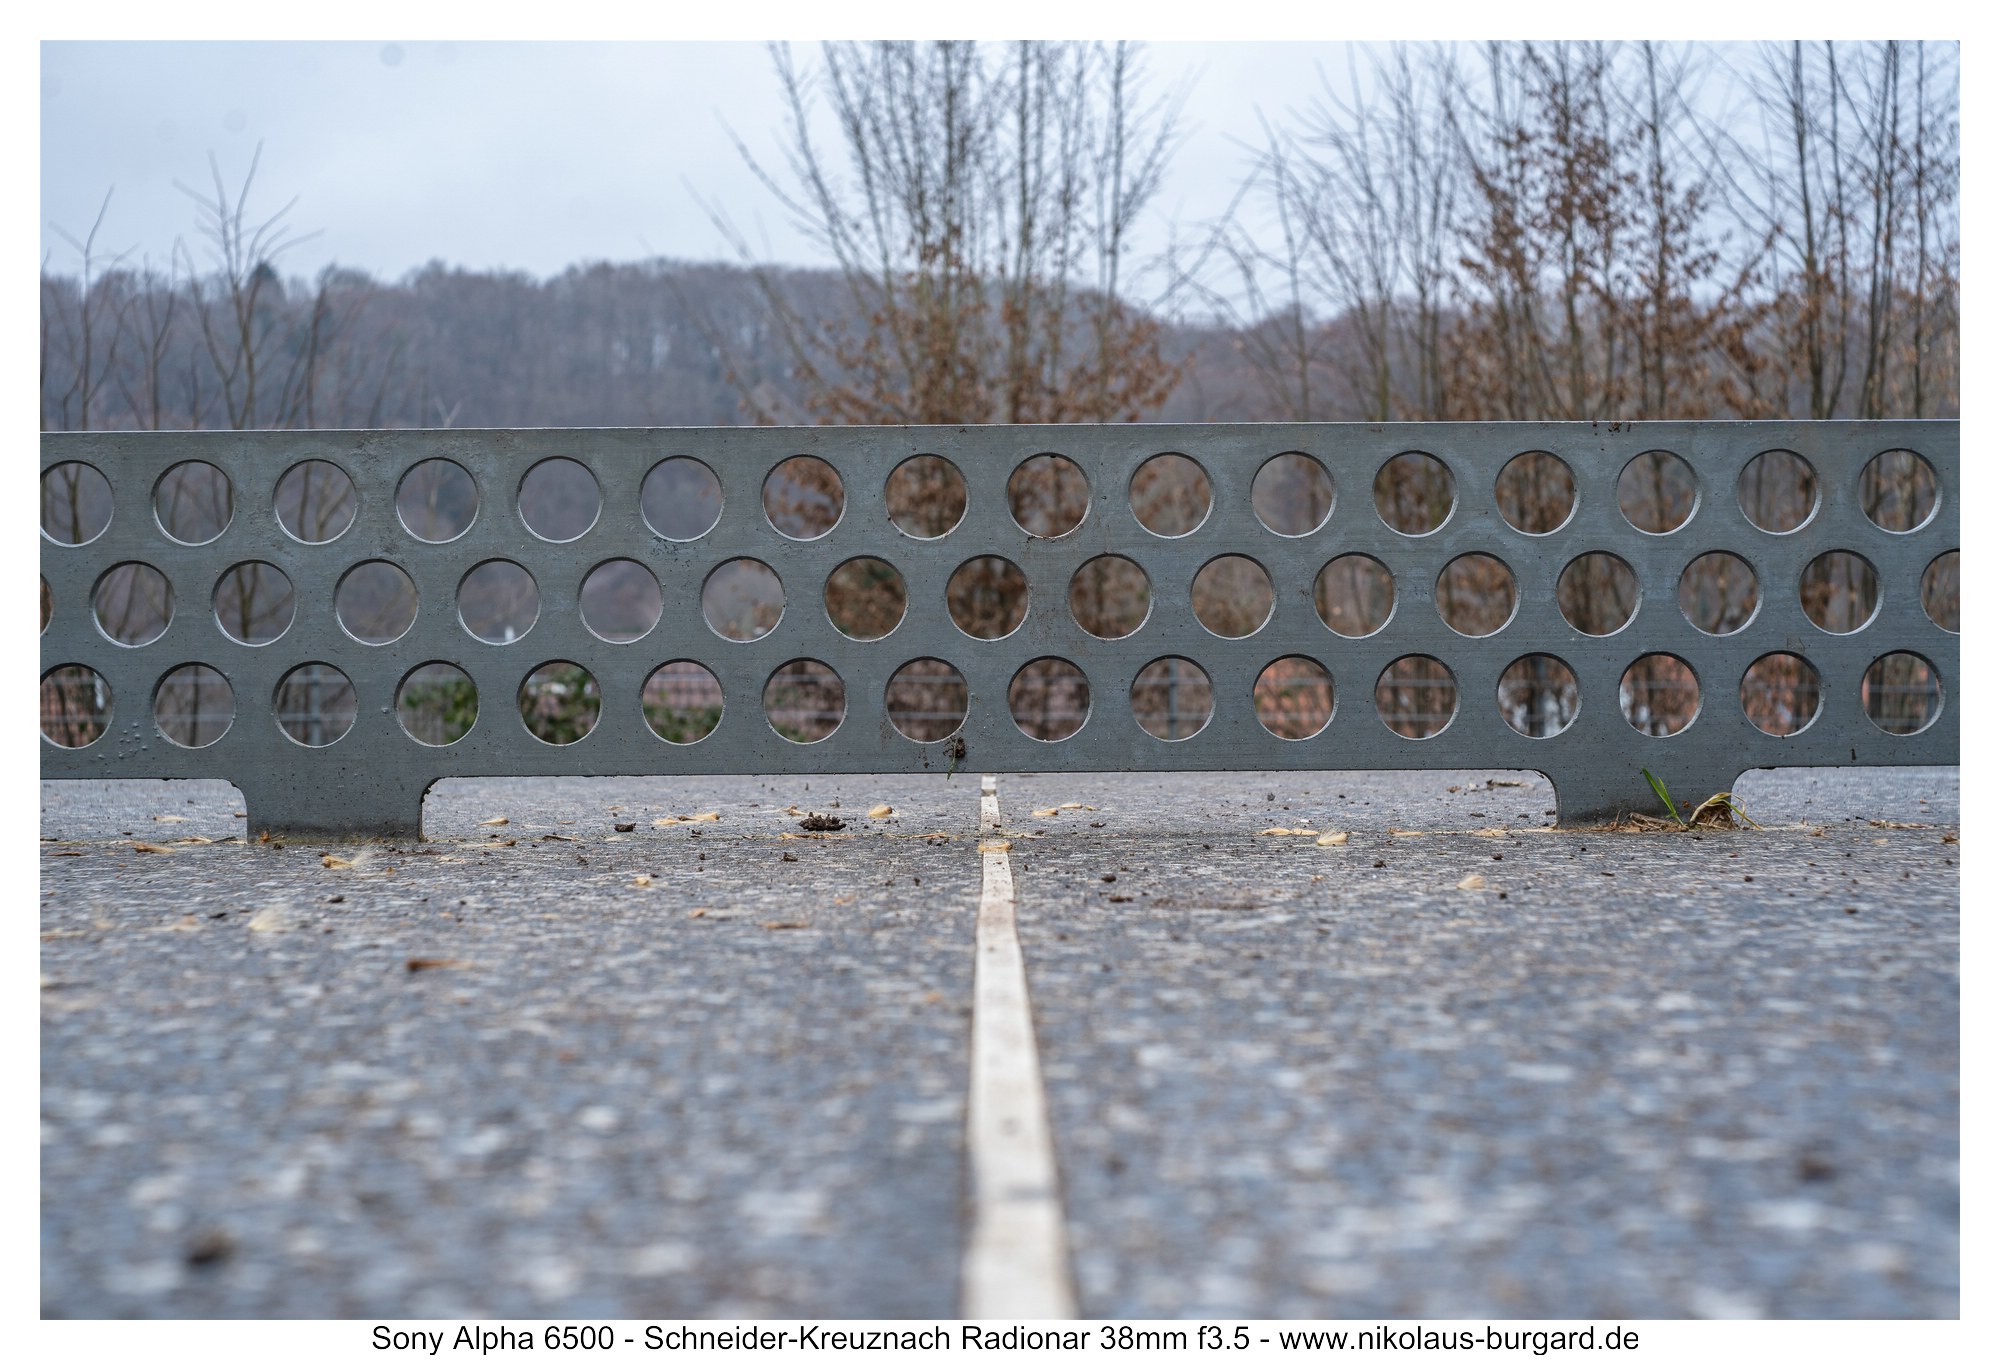
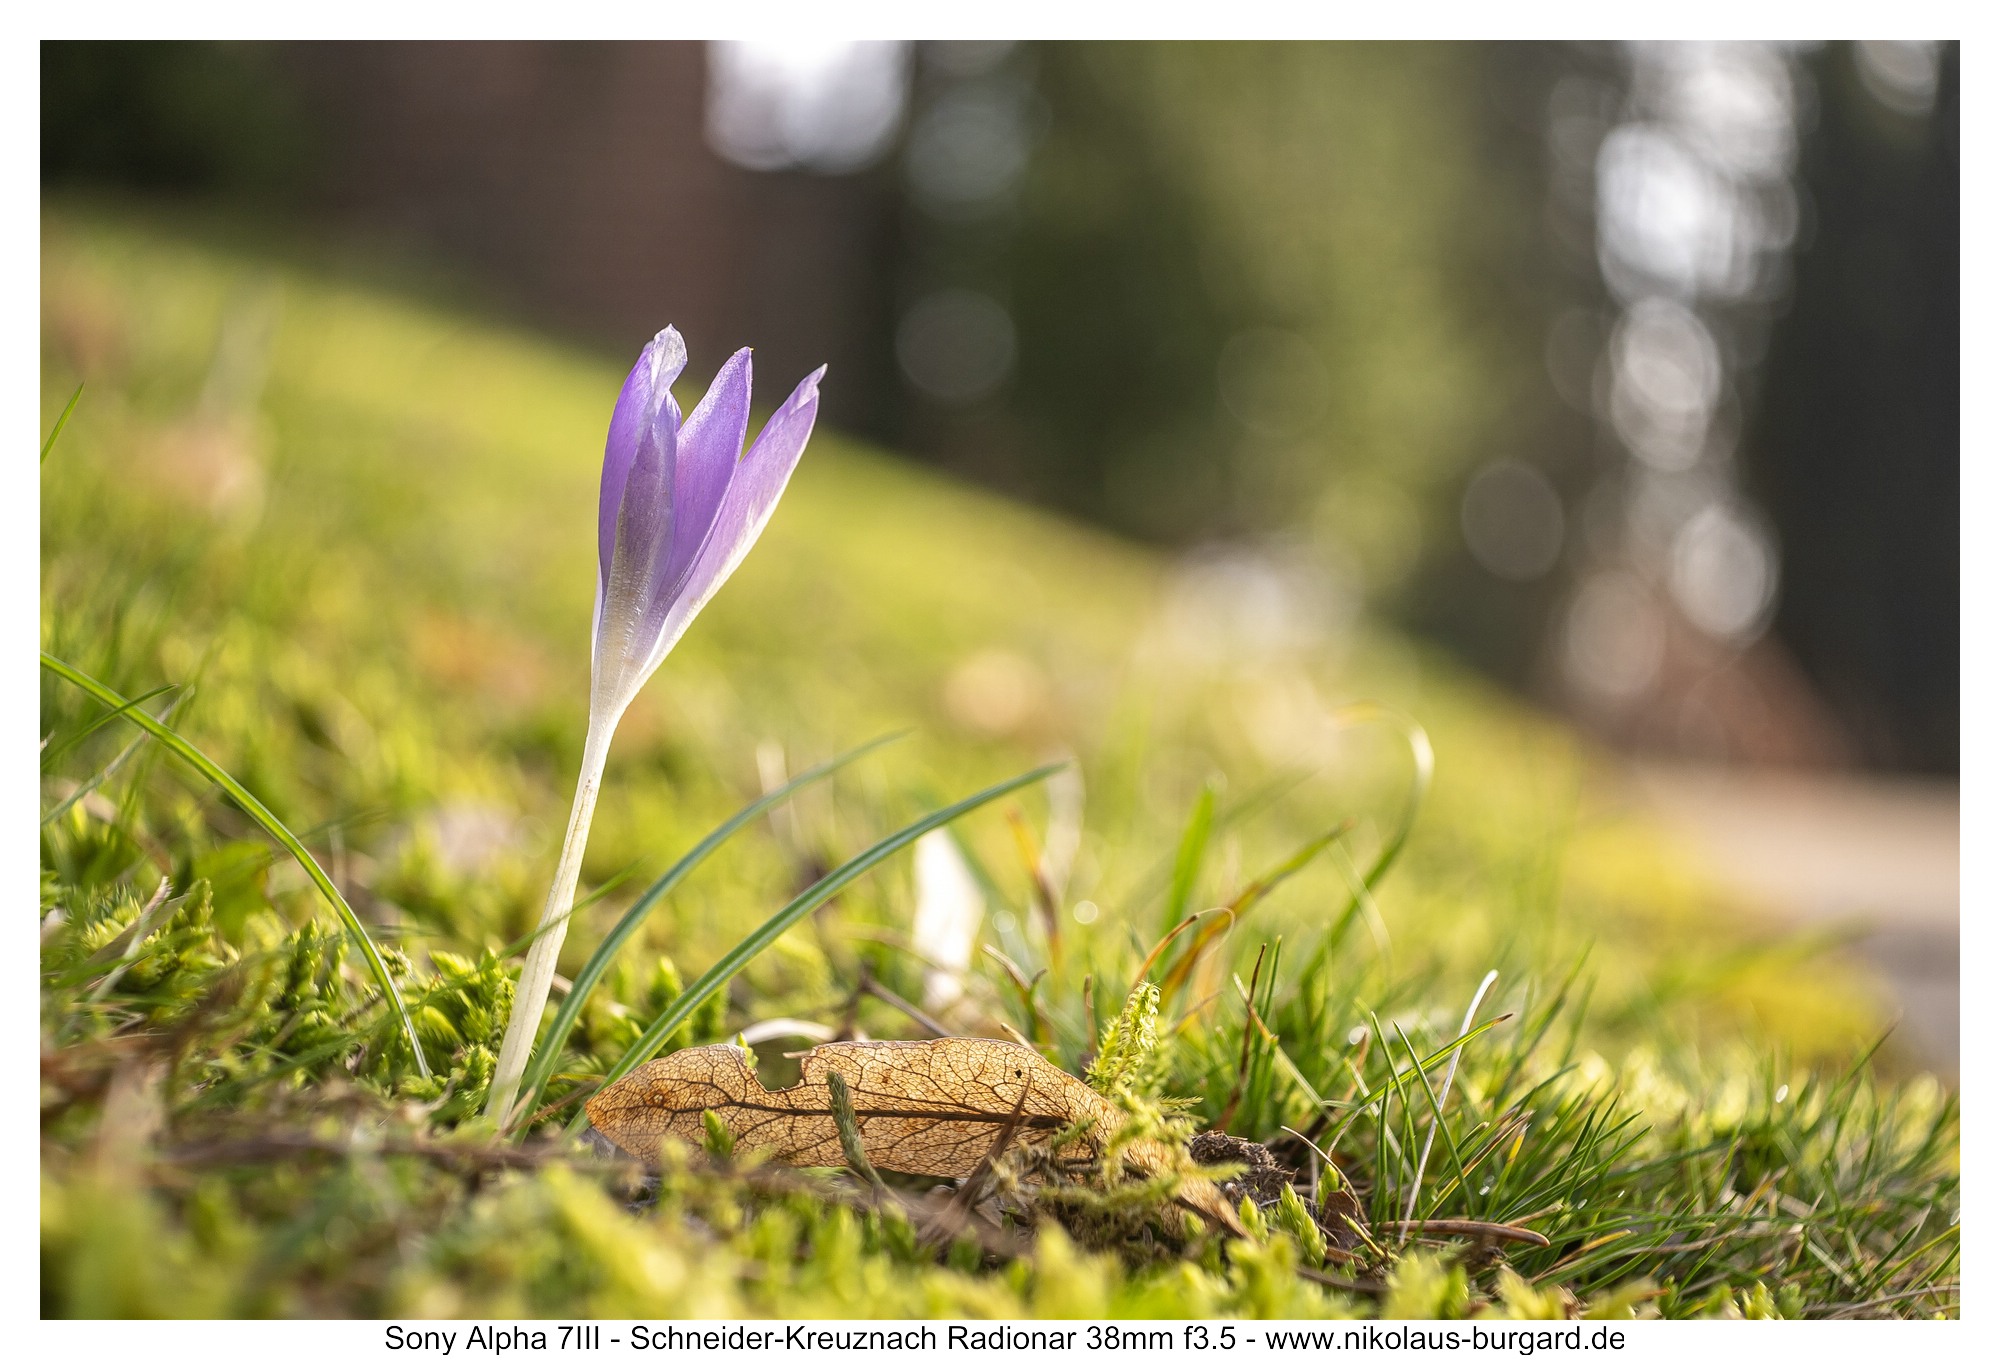
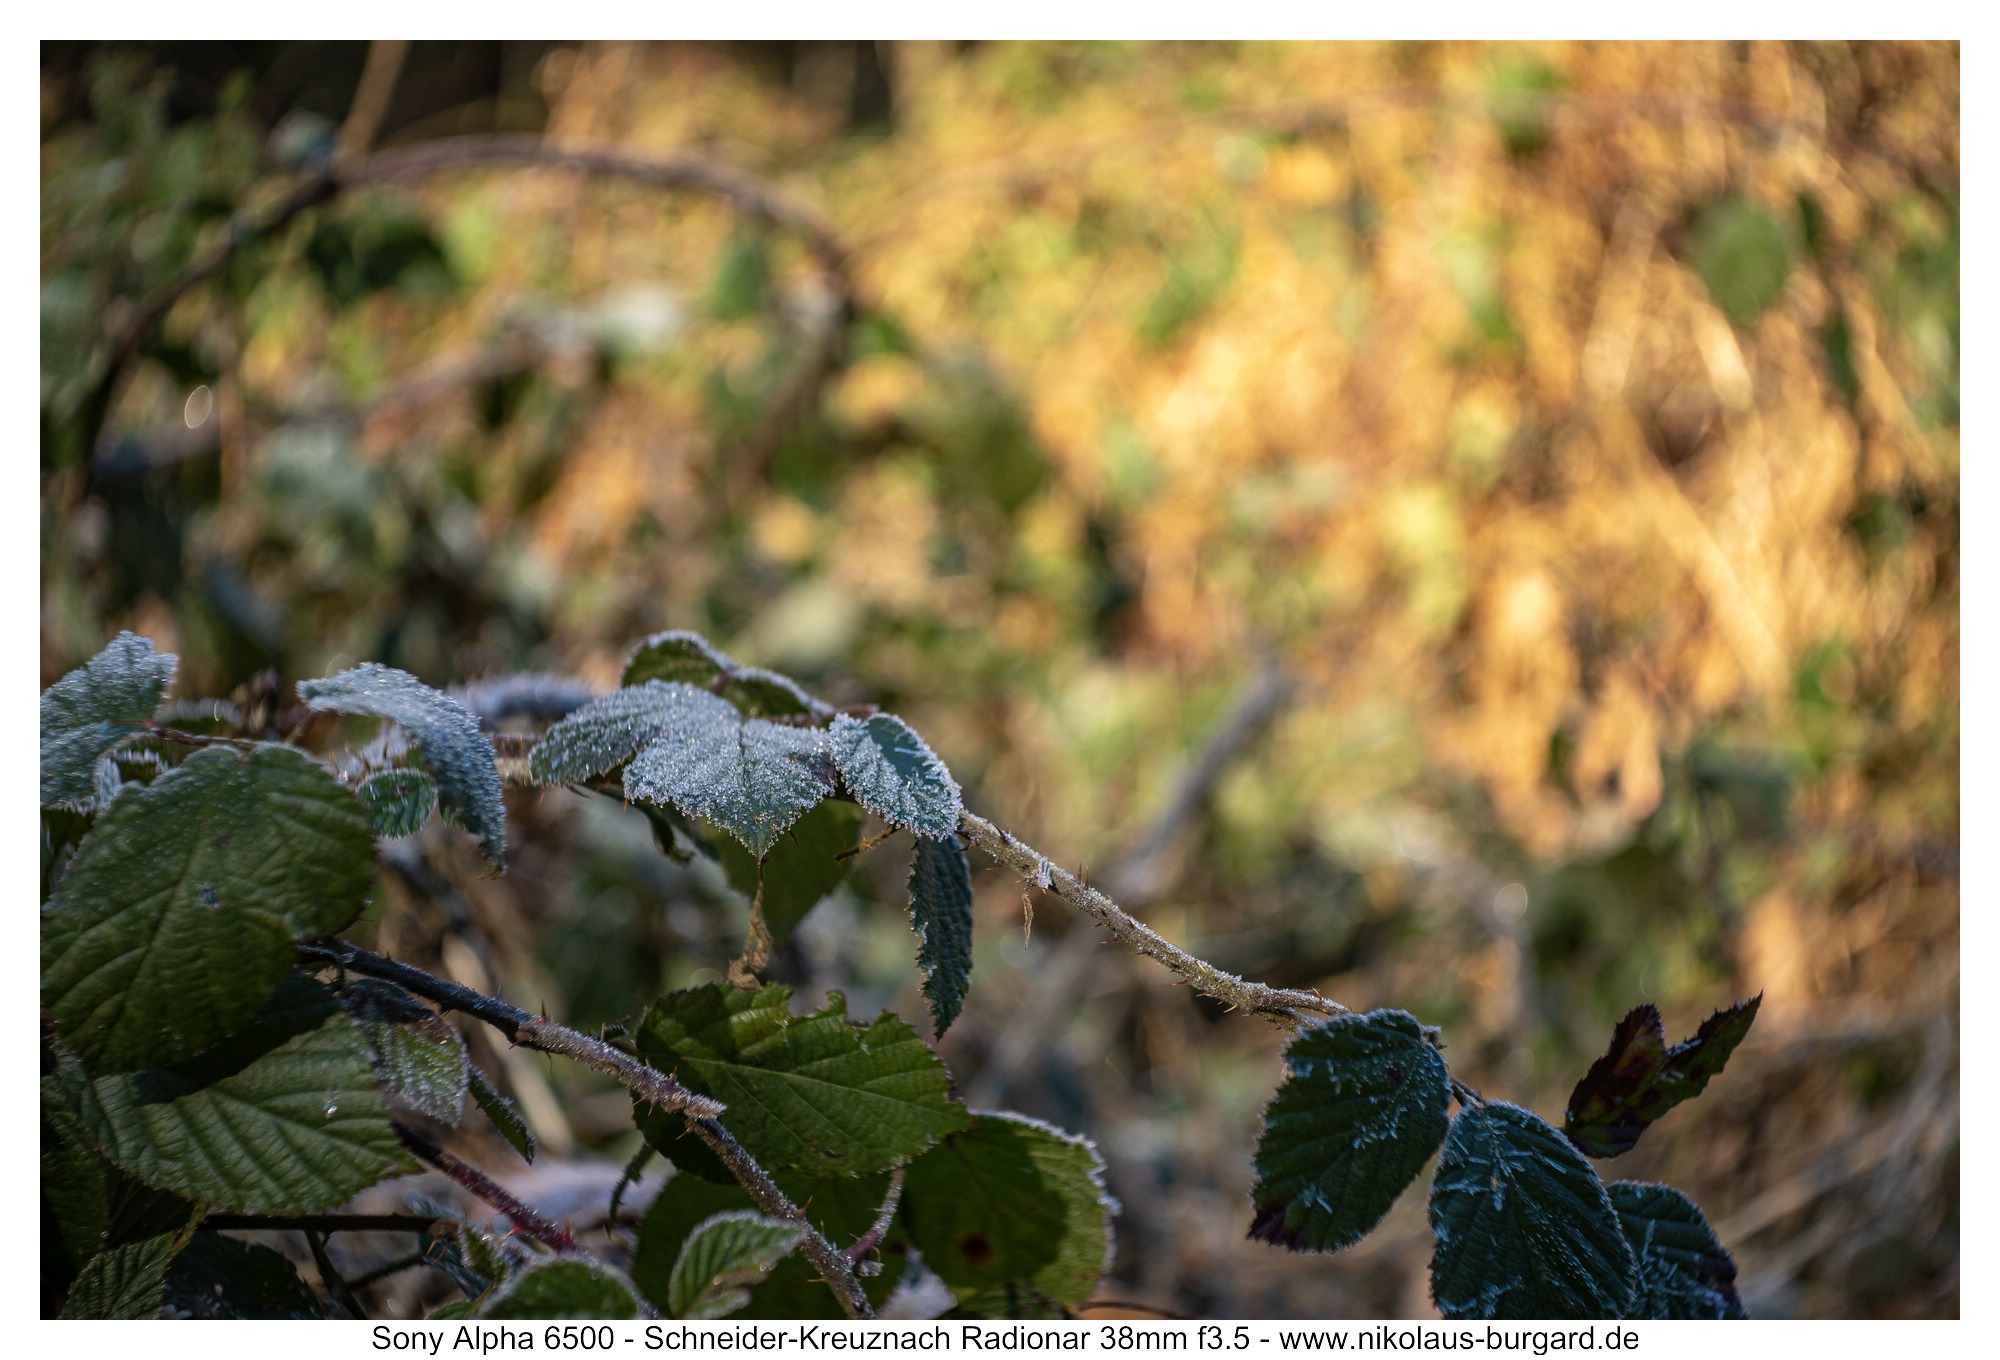
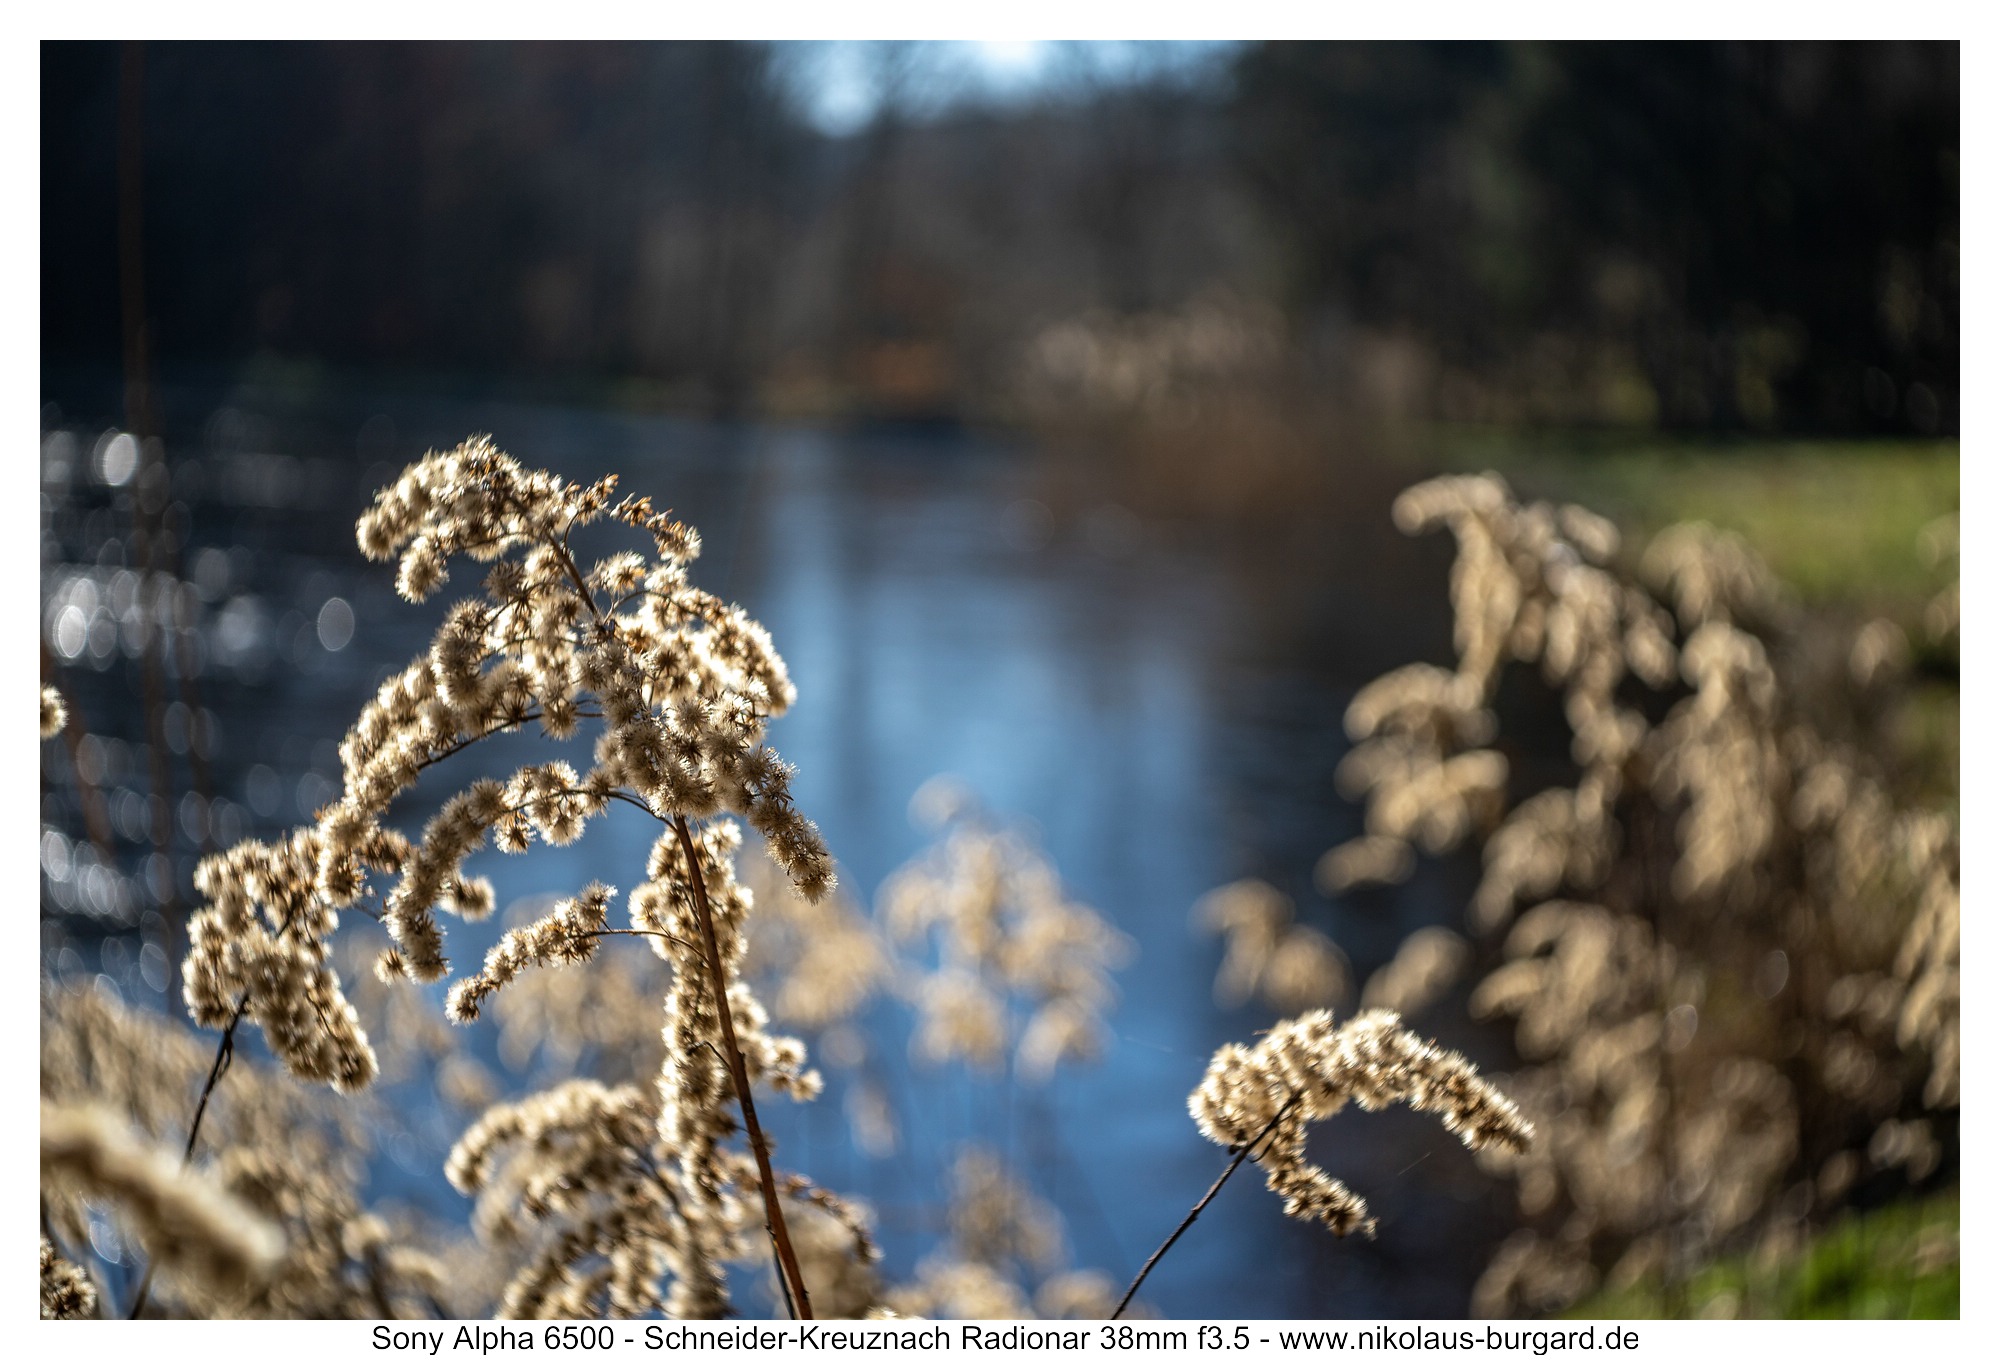
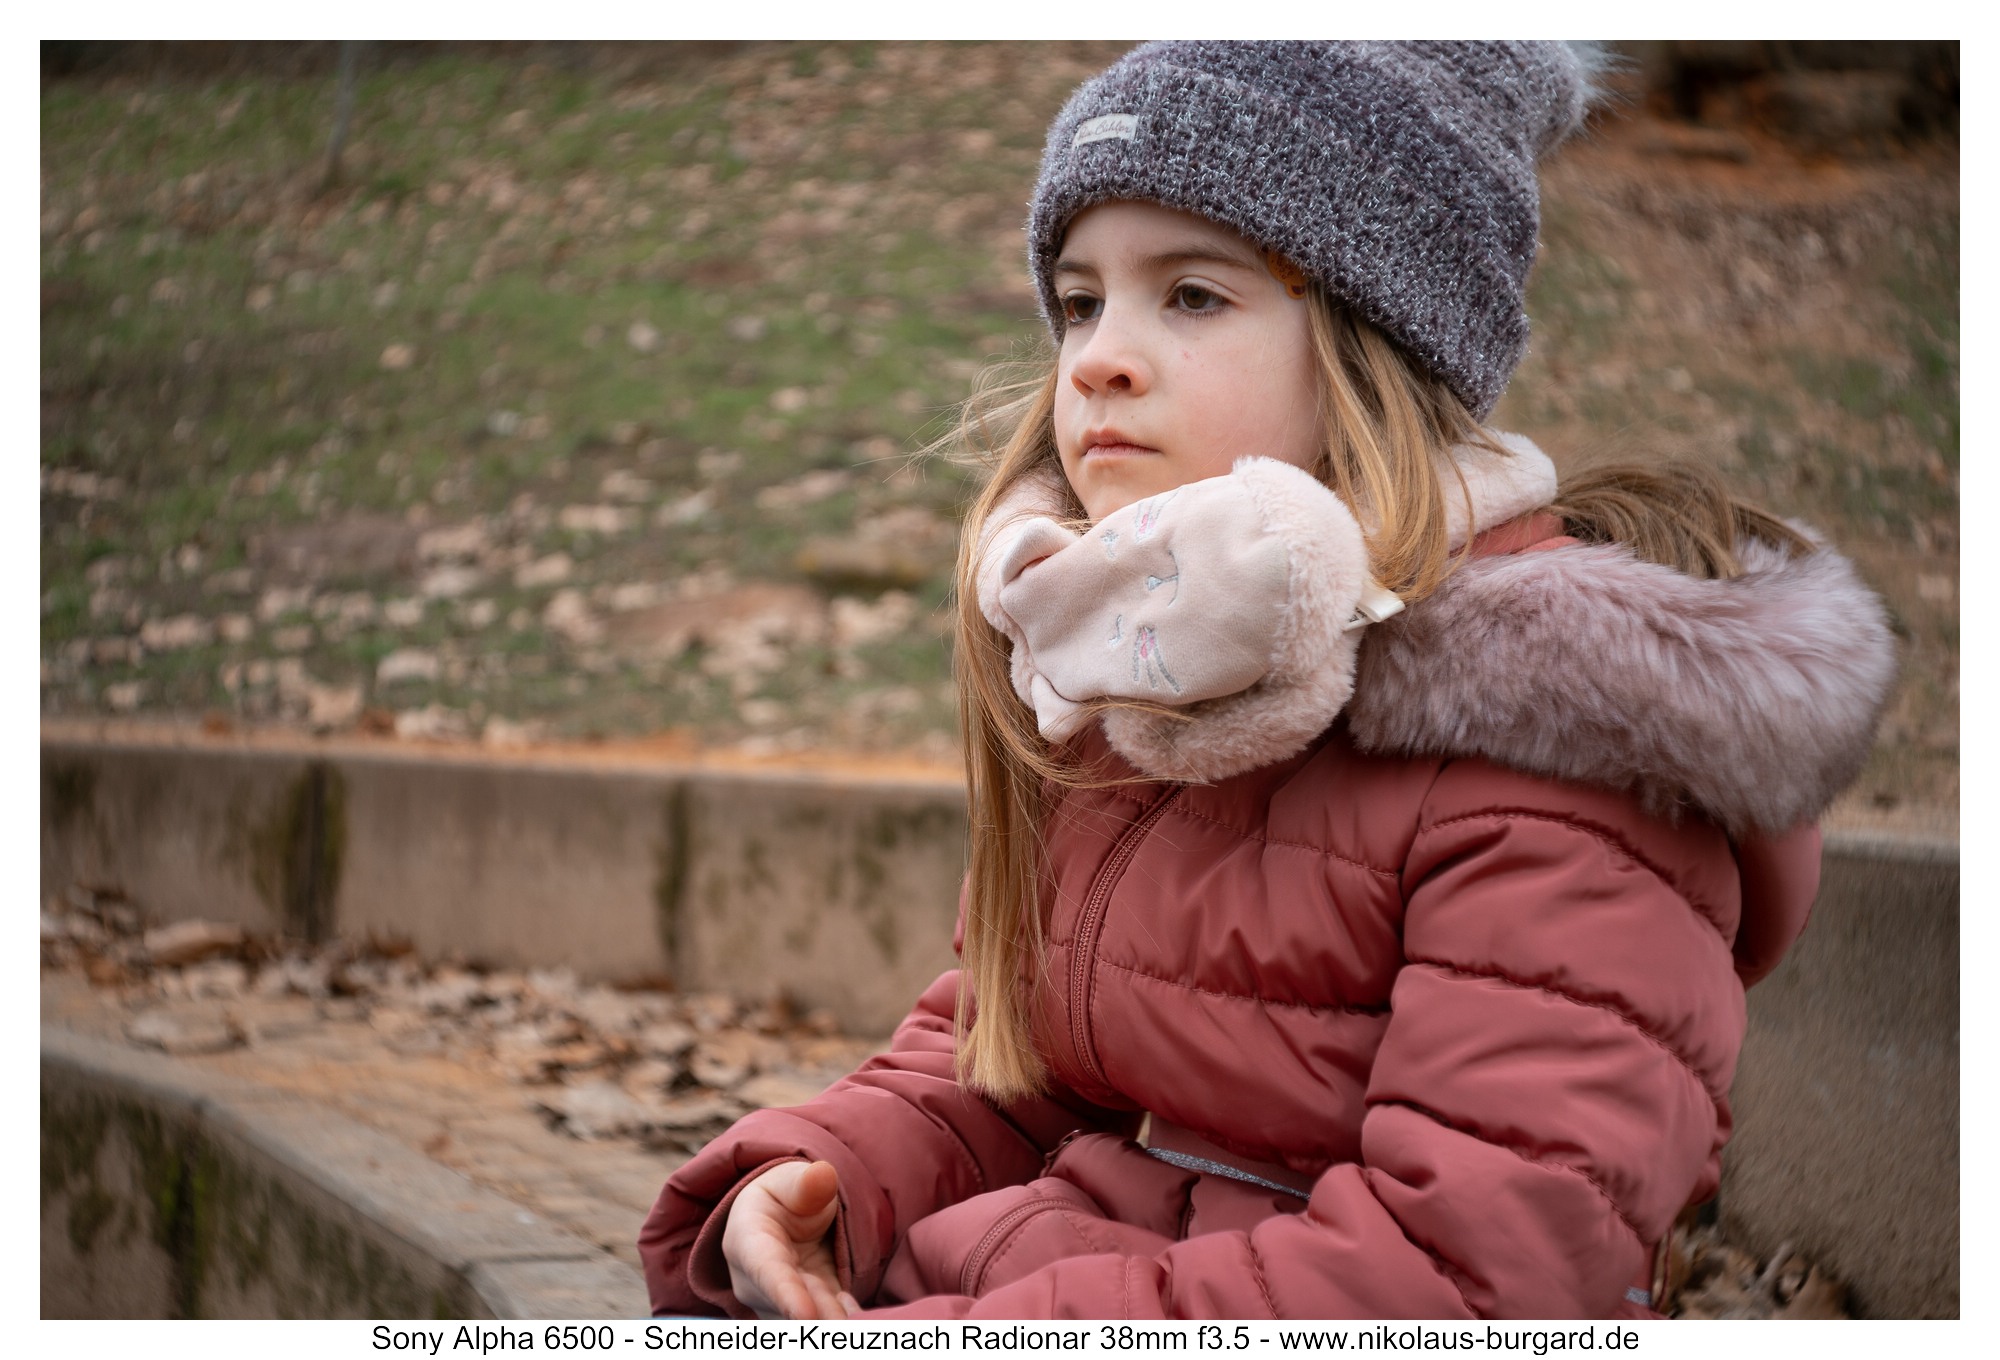
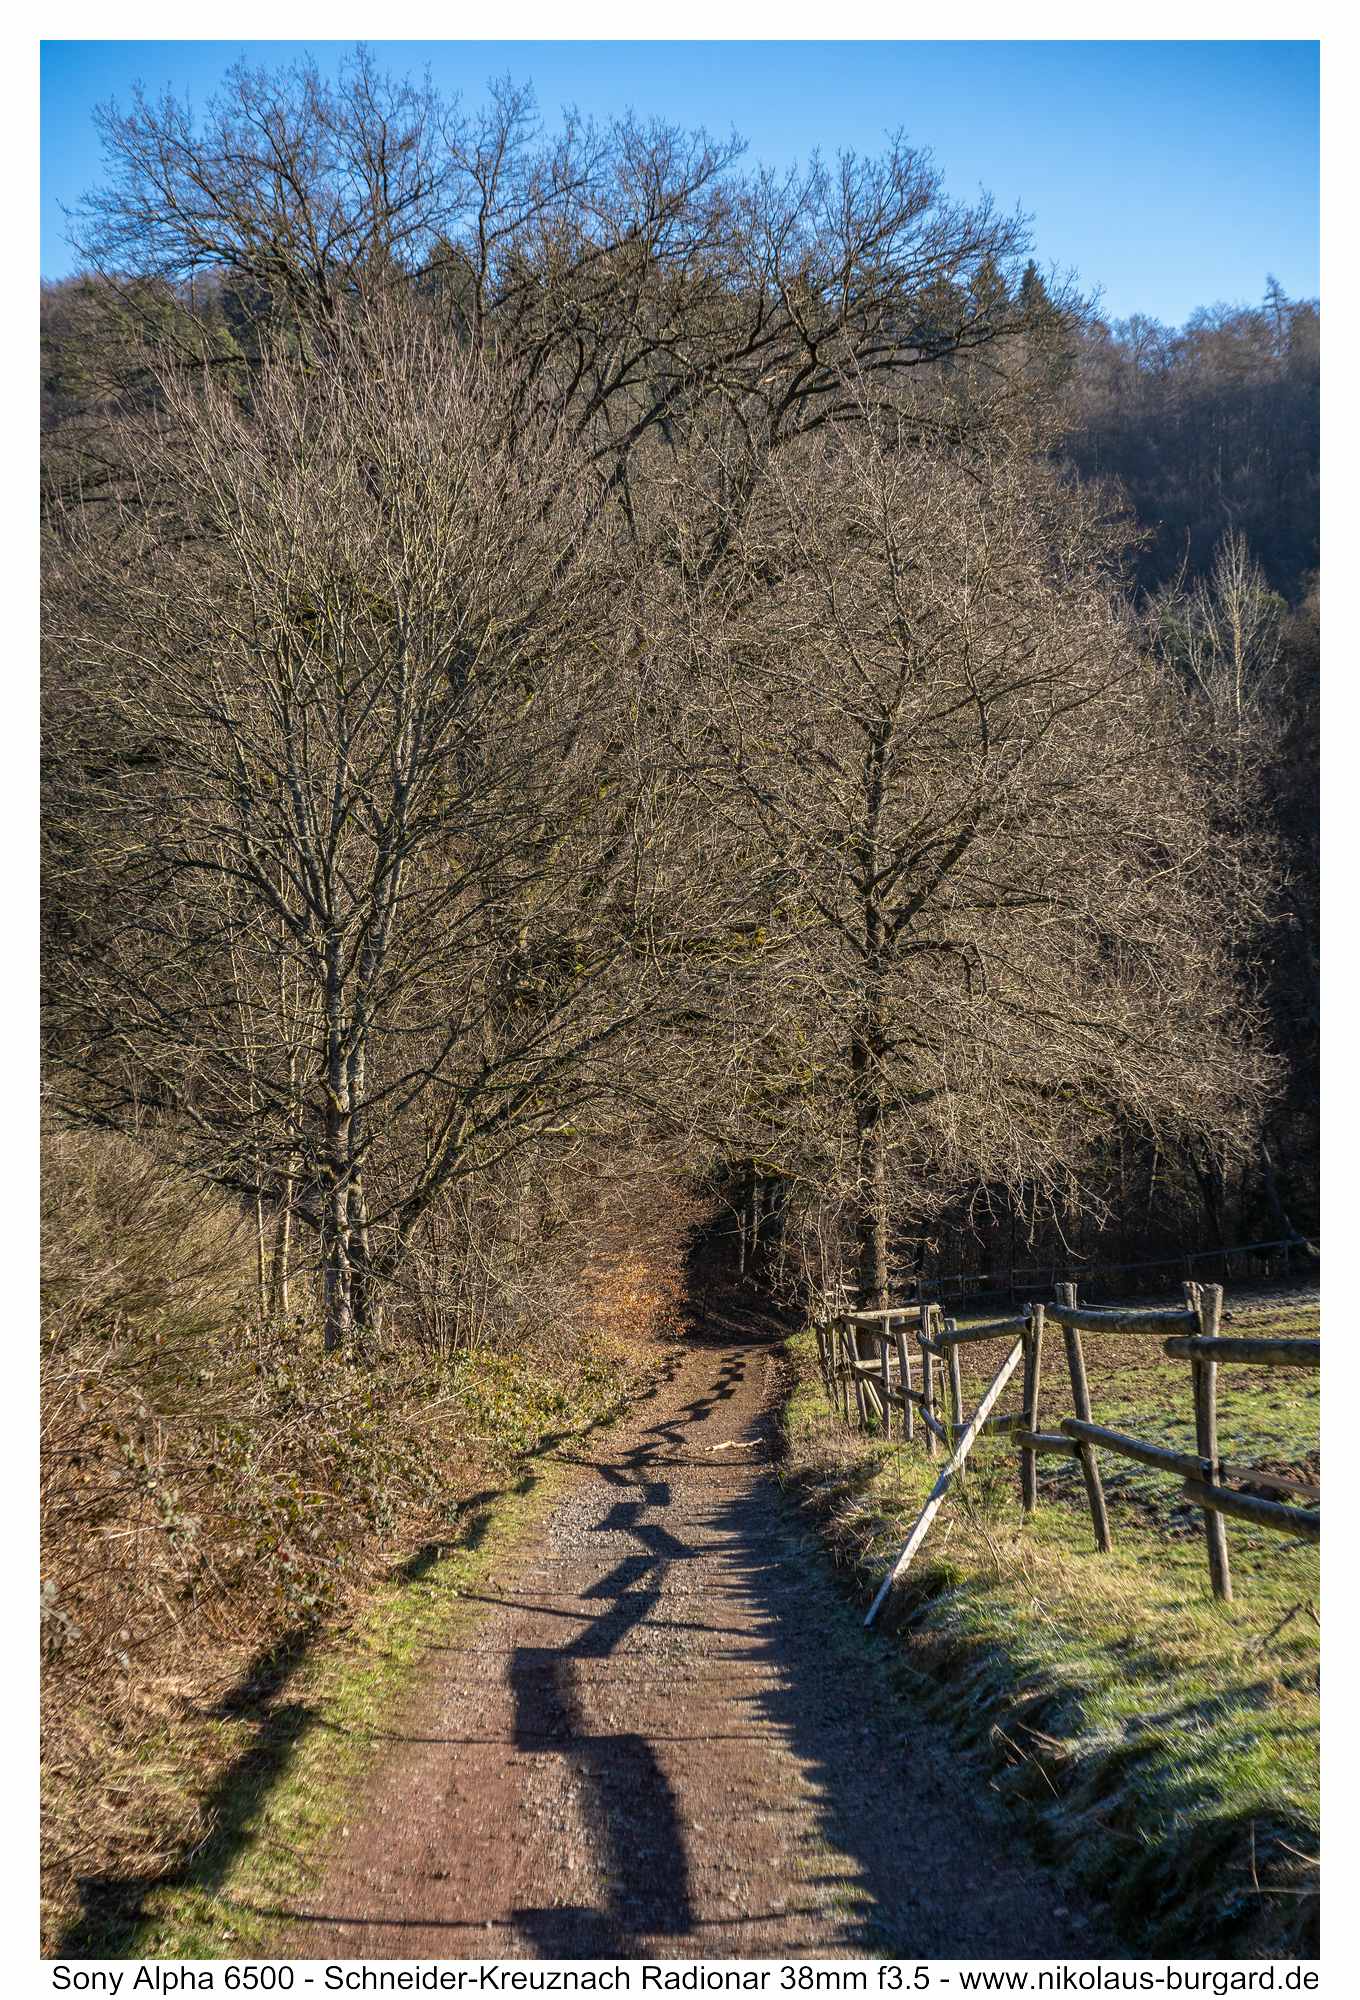
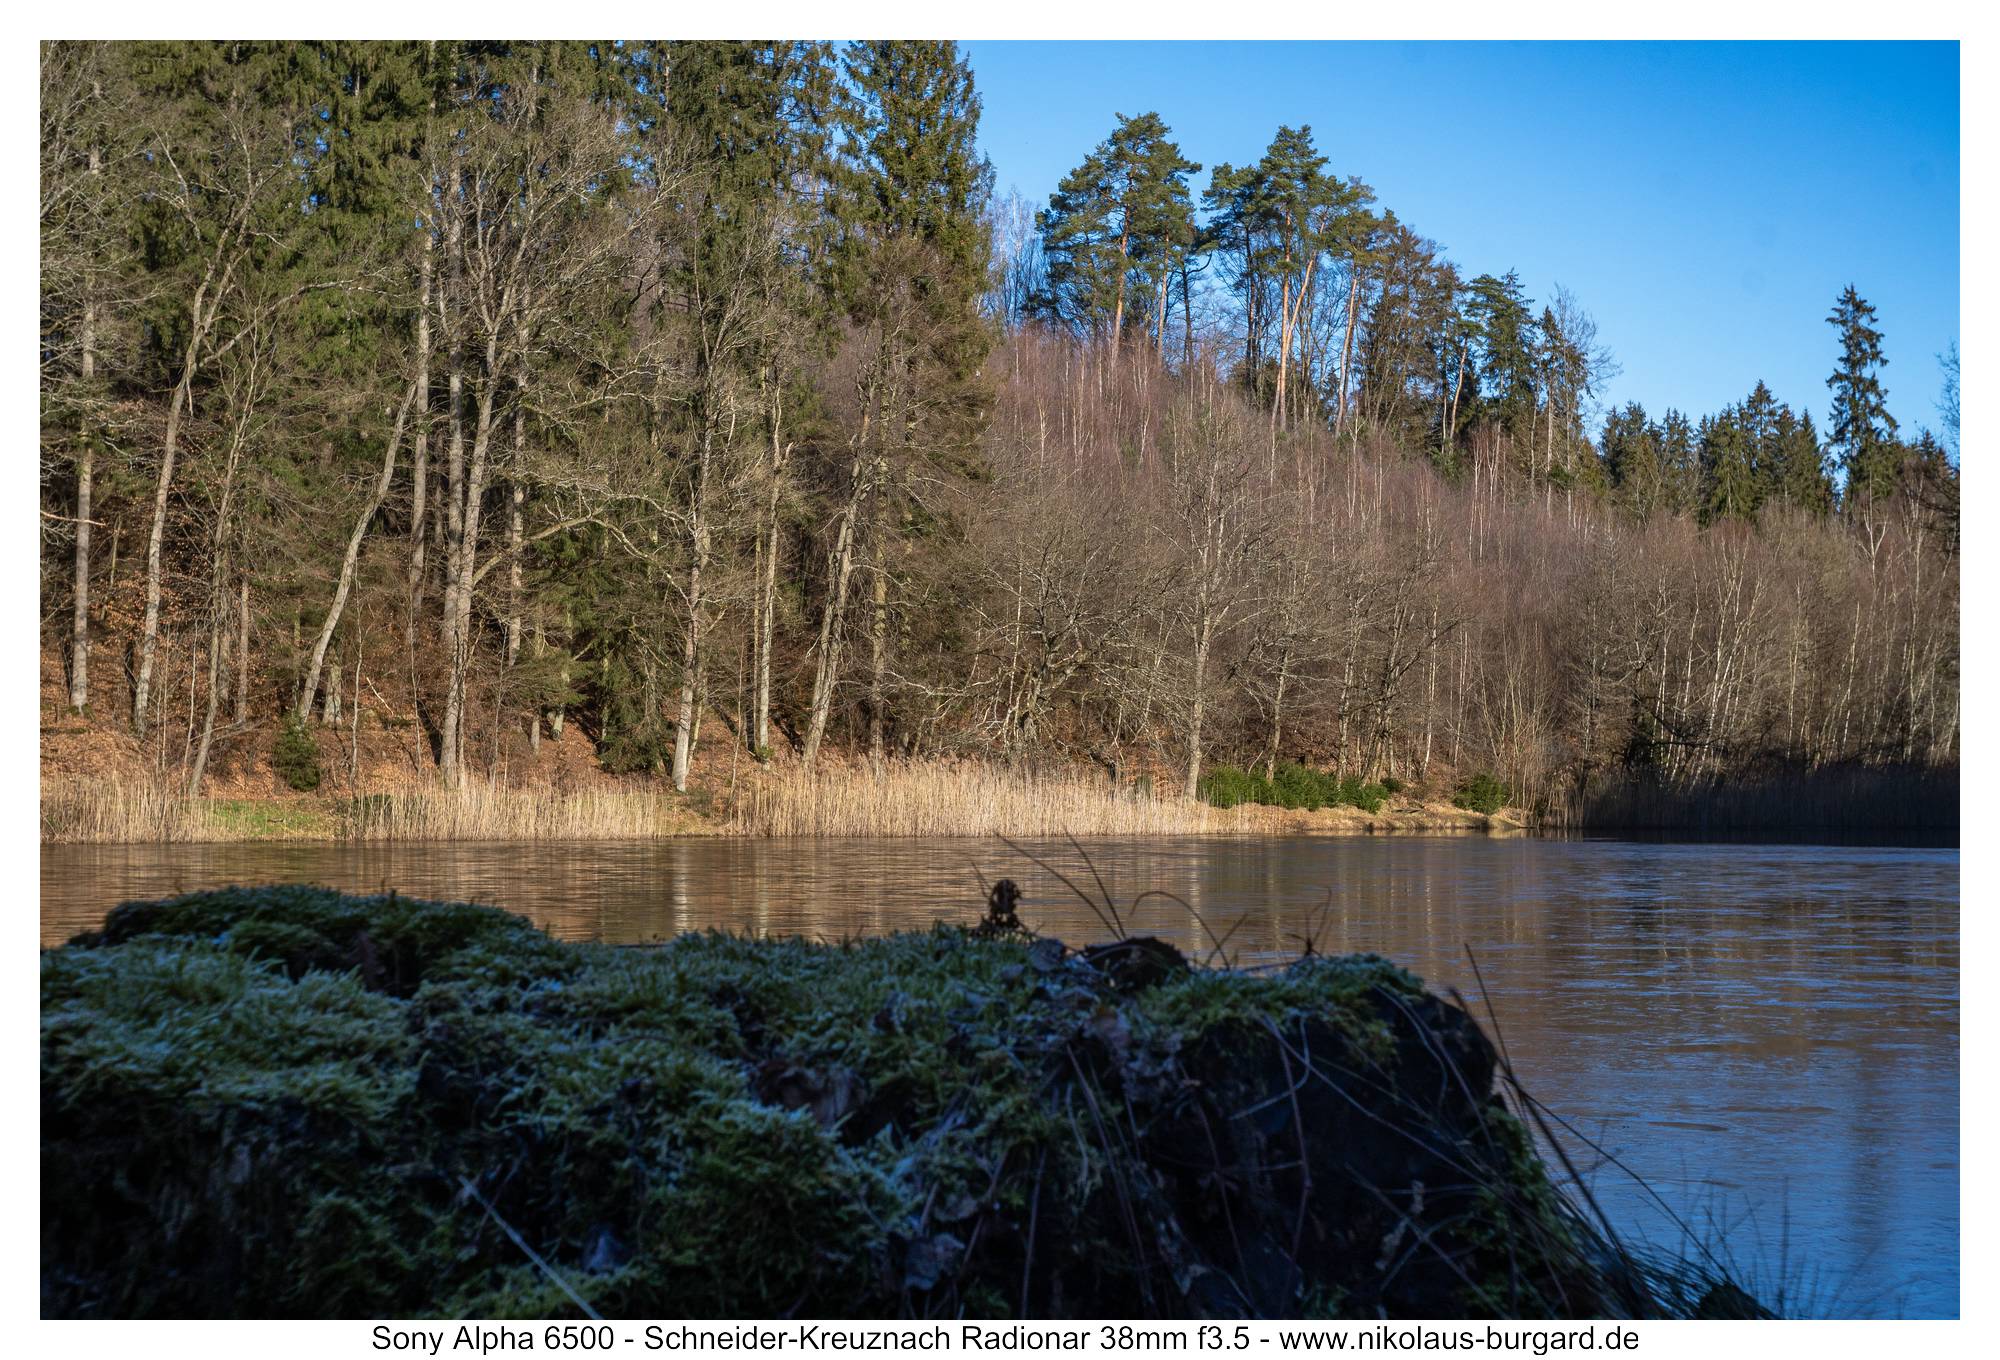
Bildserie: Ein frostiger, sonniger Wintermorgen / Picture Series: A sunny, frosty winter morning
So, nach all den analytischen Bildern bisher möchte ich mit einer Serie "aus der fotografischen Praxis" einfach mal zeigen, "was mit dem Radionar so geht".
Ein bitterkalter, frostiger aber wunderschön sonniger Wintermorgen rief mich in die Natur.
Alle Aufnahmen auf kurze und mittlere Distanzen bei Offenblende,
bei weiter entfernten Motiven auf f8 oder f11 abgeblendet:
So, after all the analytical images so far, I would like to show "what works with the radionar" with a series "from photographic practice".
A bitterly cold, frosty but beautifully sunny winter morning called me into nature.
All shots at short and medium distances with an open aperture,
For more distant subjects, dimmed down to f8 or f11:


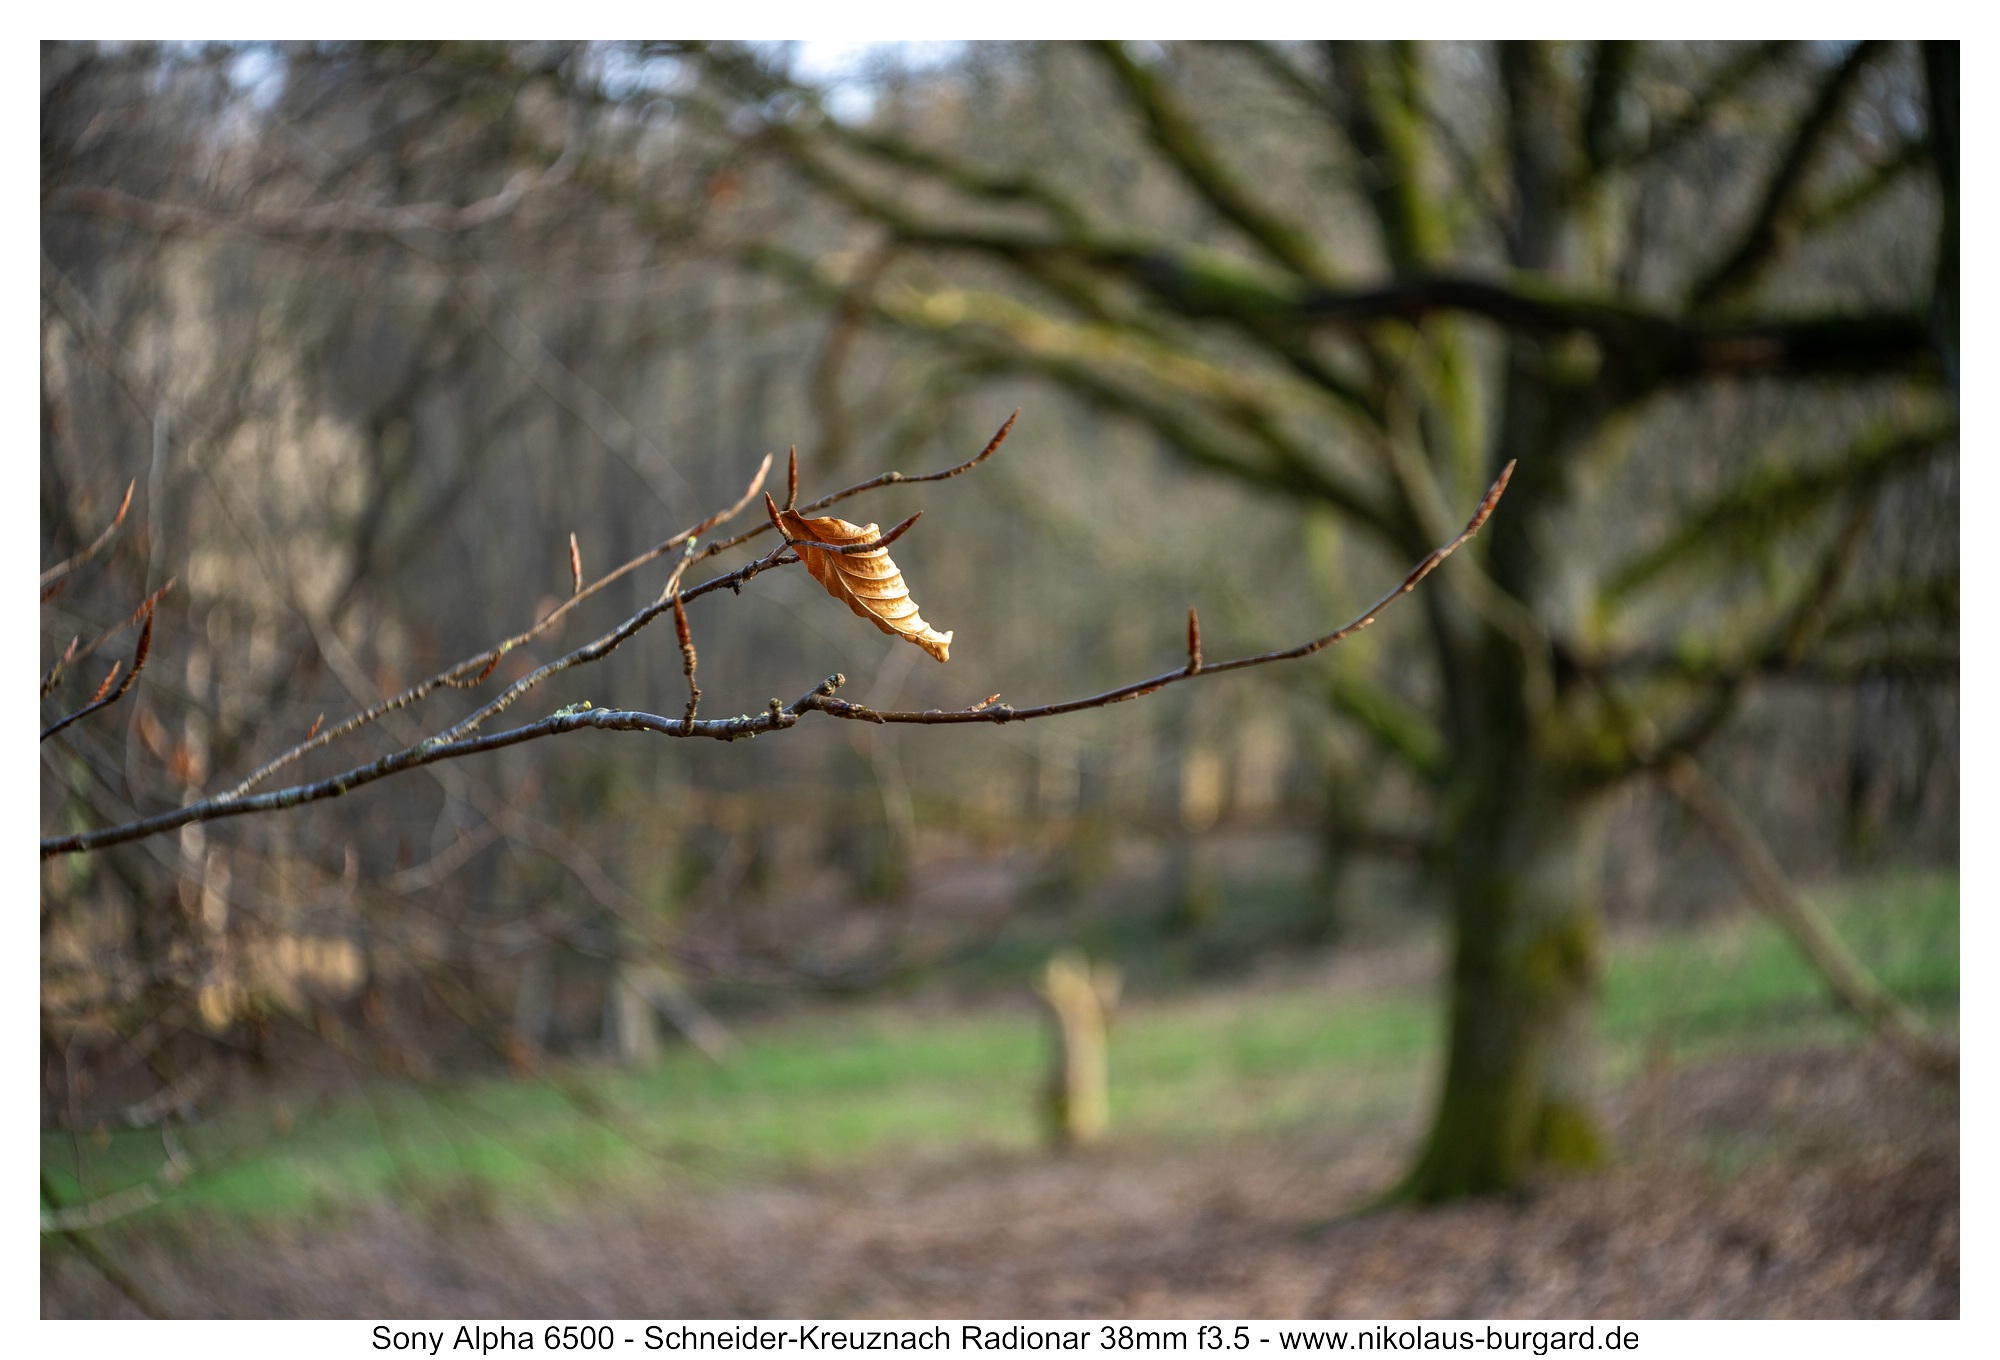
Als erstaunlich "lichtfest" in der Praxis empfinde ich das Radionar- eigentlich überraschend für ein nur einfach vergütetes Triplet.
Die Detailaufnahmen sind am Fokuspunkt schön scharf mit dem charakteristischen Rendering,
und die abgeblendeten Bilder sind randscharf, die äußersten Ecken leider nicht - aber da zähle ich bei solch stimmungsvollen Aufnahmen keine Pixel.
I find the radionar to be surprisingly "light-proof" in practice - actually surprising for a triplet that is only single-coated.
The detailed shots are nice and sharp at the focal point with the characteristic rendering,
and the dimmed images are sharp at the edges, unfortunately the outermost corners are not - but I don't count pixels in such atmospheric shots.
Farbfehler / Chromatic Aberrations
Hier gibt es zwei Bewertungsmöglichkeiten.
Variante eins: Das folgende Beispielbild mit den Vergrößerungen von vor und hinter der Fokusebene zeigt minimale Spuren von lila-/magentafarbenem Fringing vor und grünem Fringing hinter der Fokusebene.
Variante zwei (und das ist die in meinen Augen entscheidende Bewertung):
In allen Bildern dieses Testberichtes sind mir keine störenden Farbfehler aufgefallen, auch nicht in starken Kontrastsituationen. Eine hervorragende Korrektur, die heute wohl stolz ein APO-Label tragen würde.
There are two evaluation options here.
Variant one: The following example image with the enlargements of in front of and behind the focal plane shows minimal traces of purple/magenta fringing in front of and green fringing behind the focal plane.
Option two (and in my opinion this is the decisive assessment):
I didn't notice any color errors in any of the images in this test report, even in strong contrast situations. An excellent correction that would probably proudly wear an APO label today.


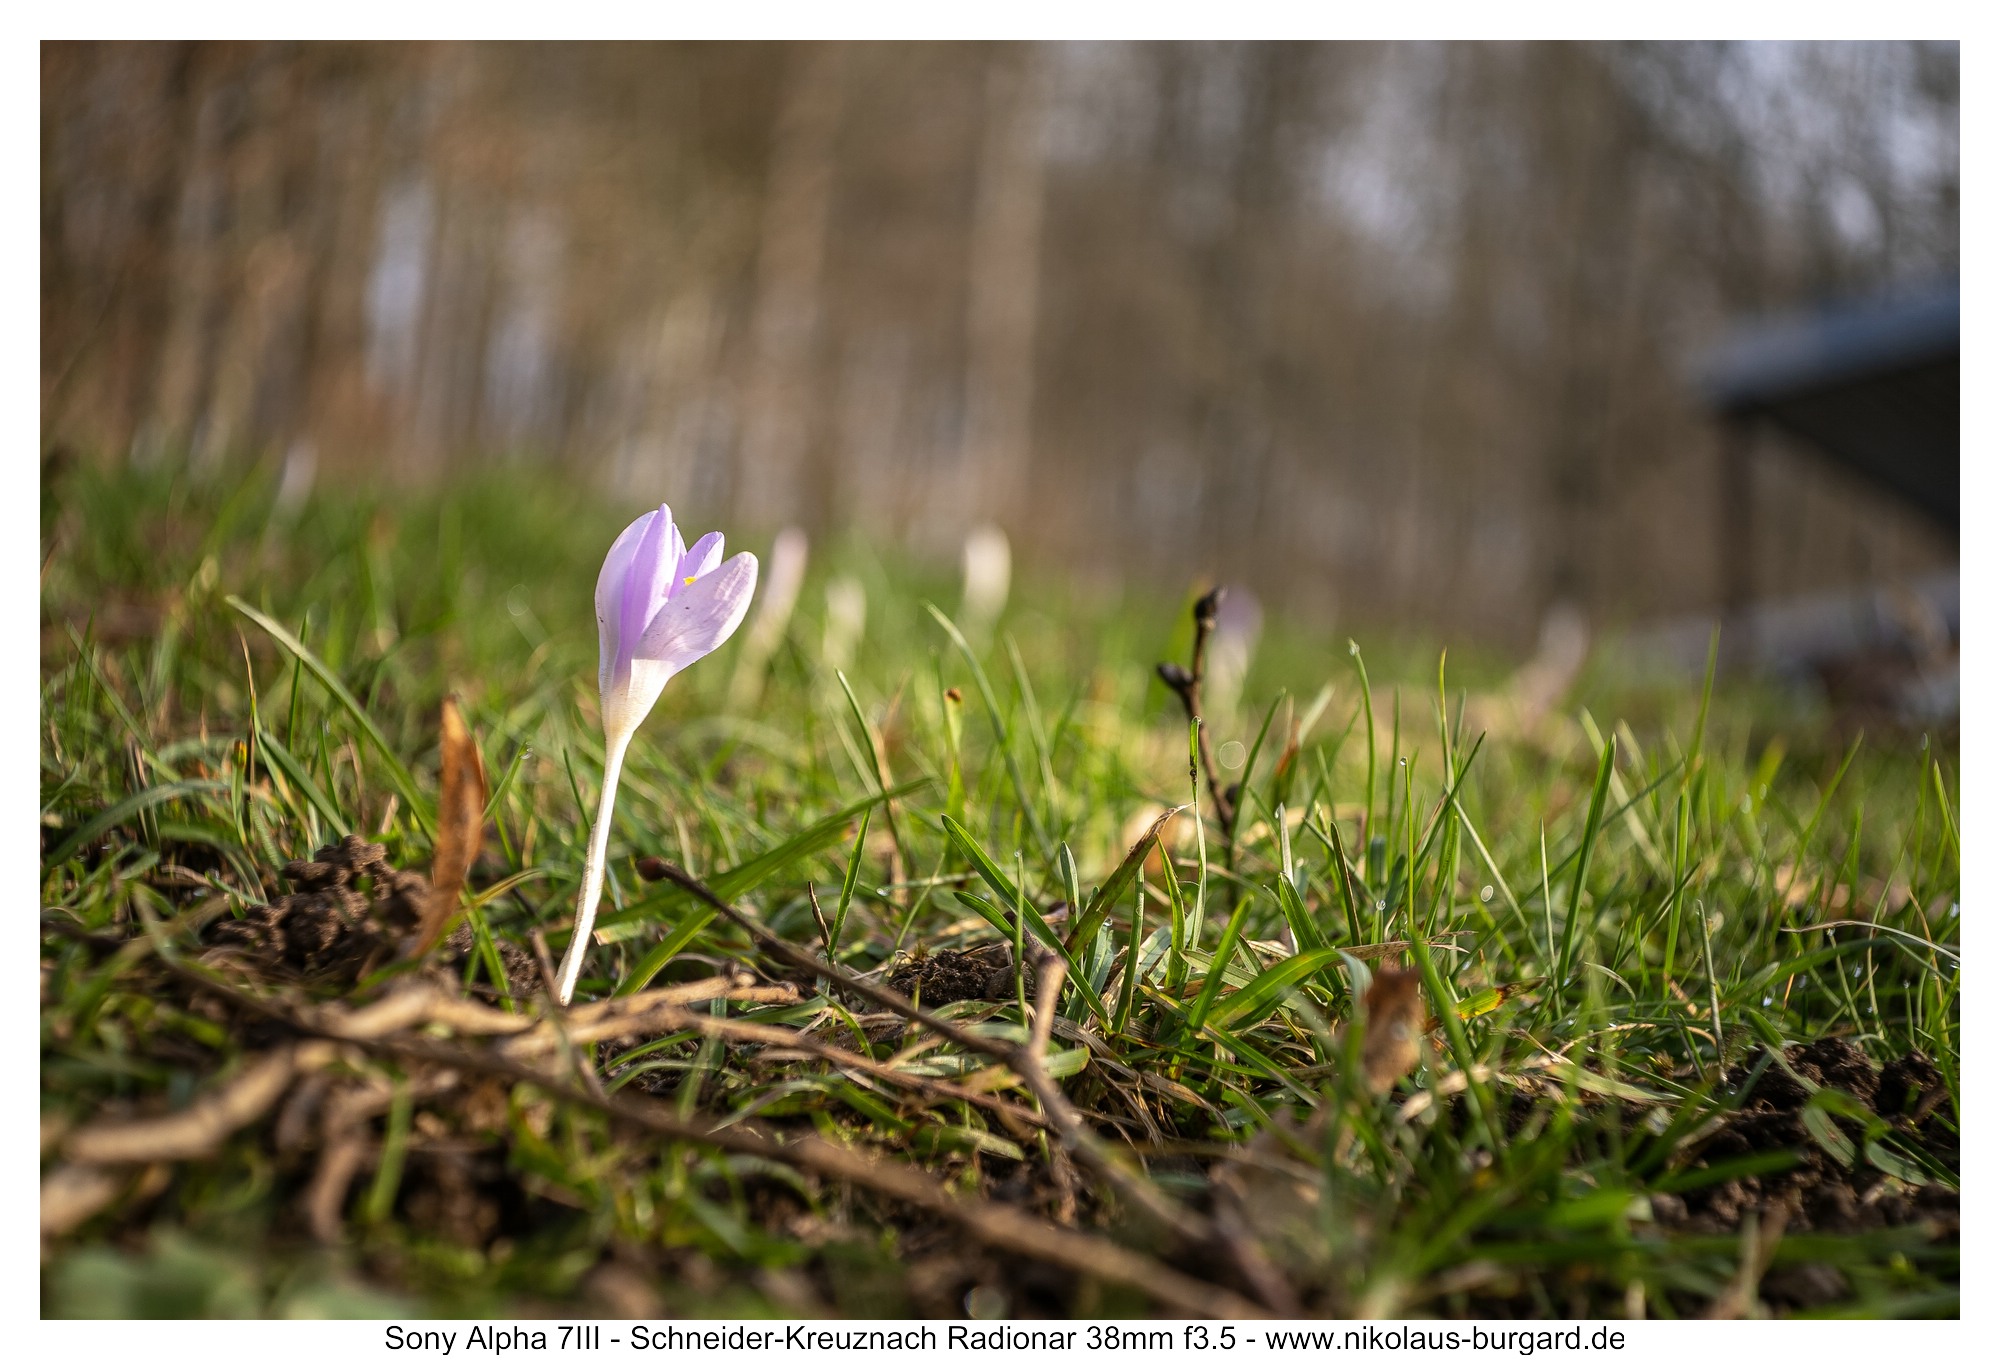
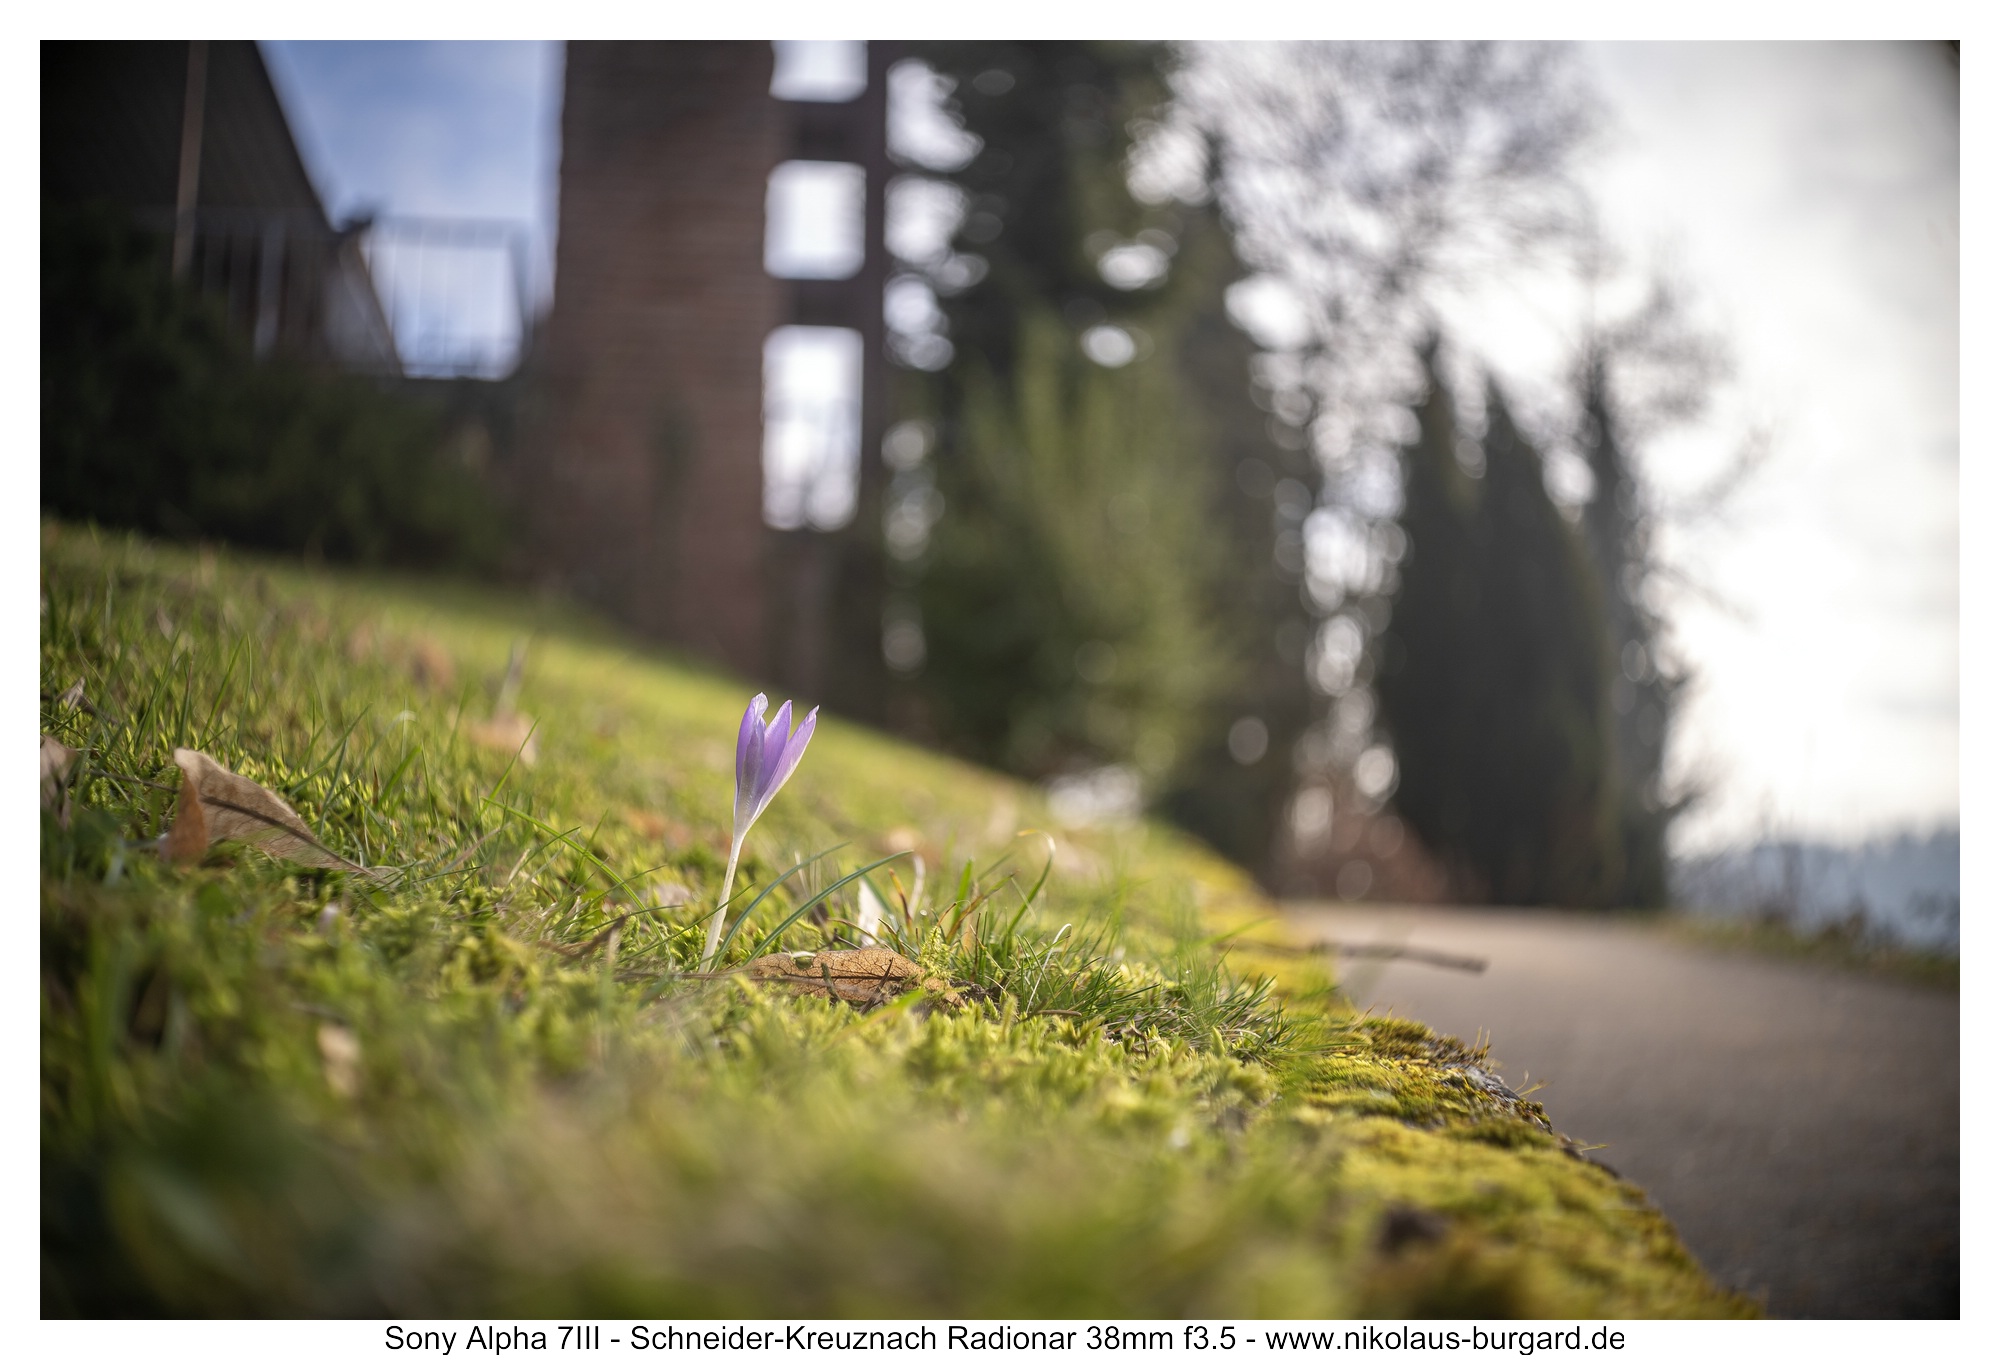
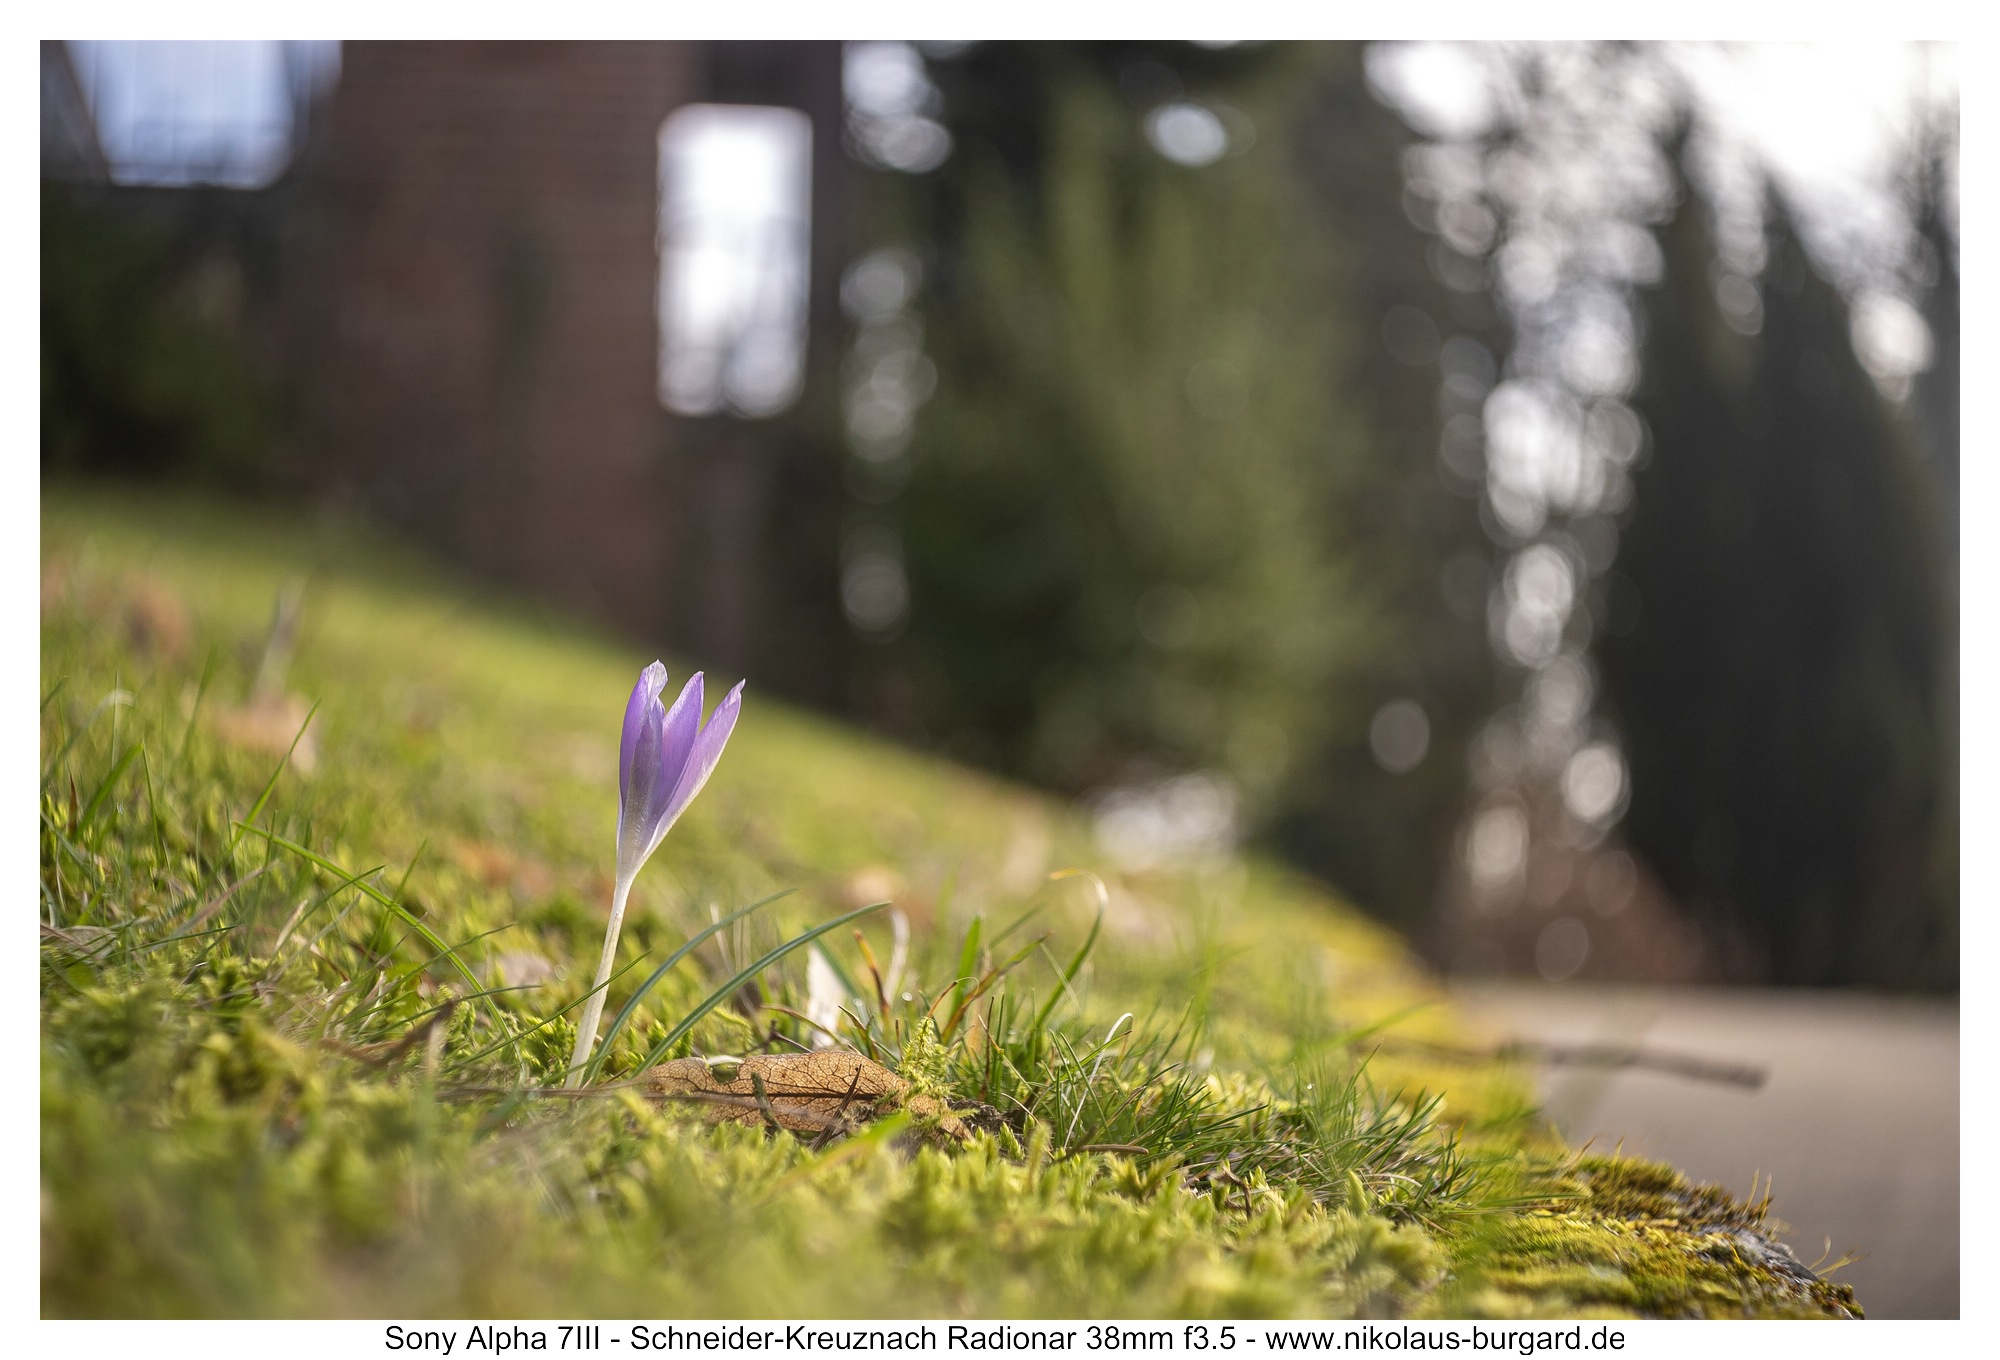
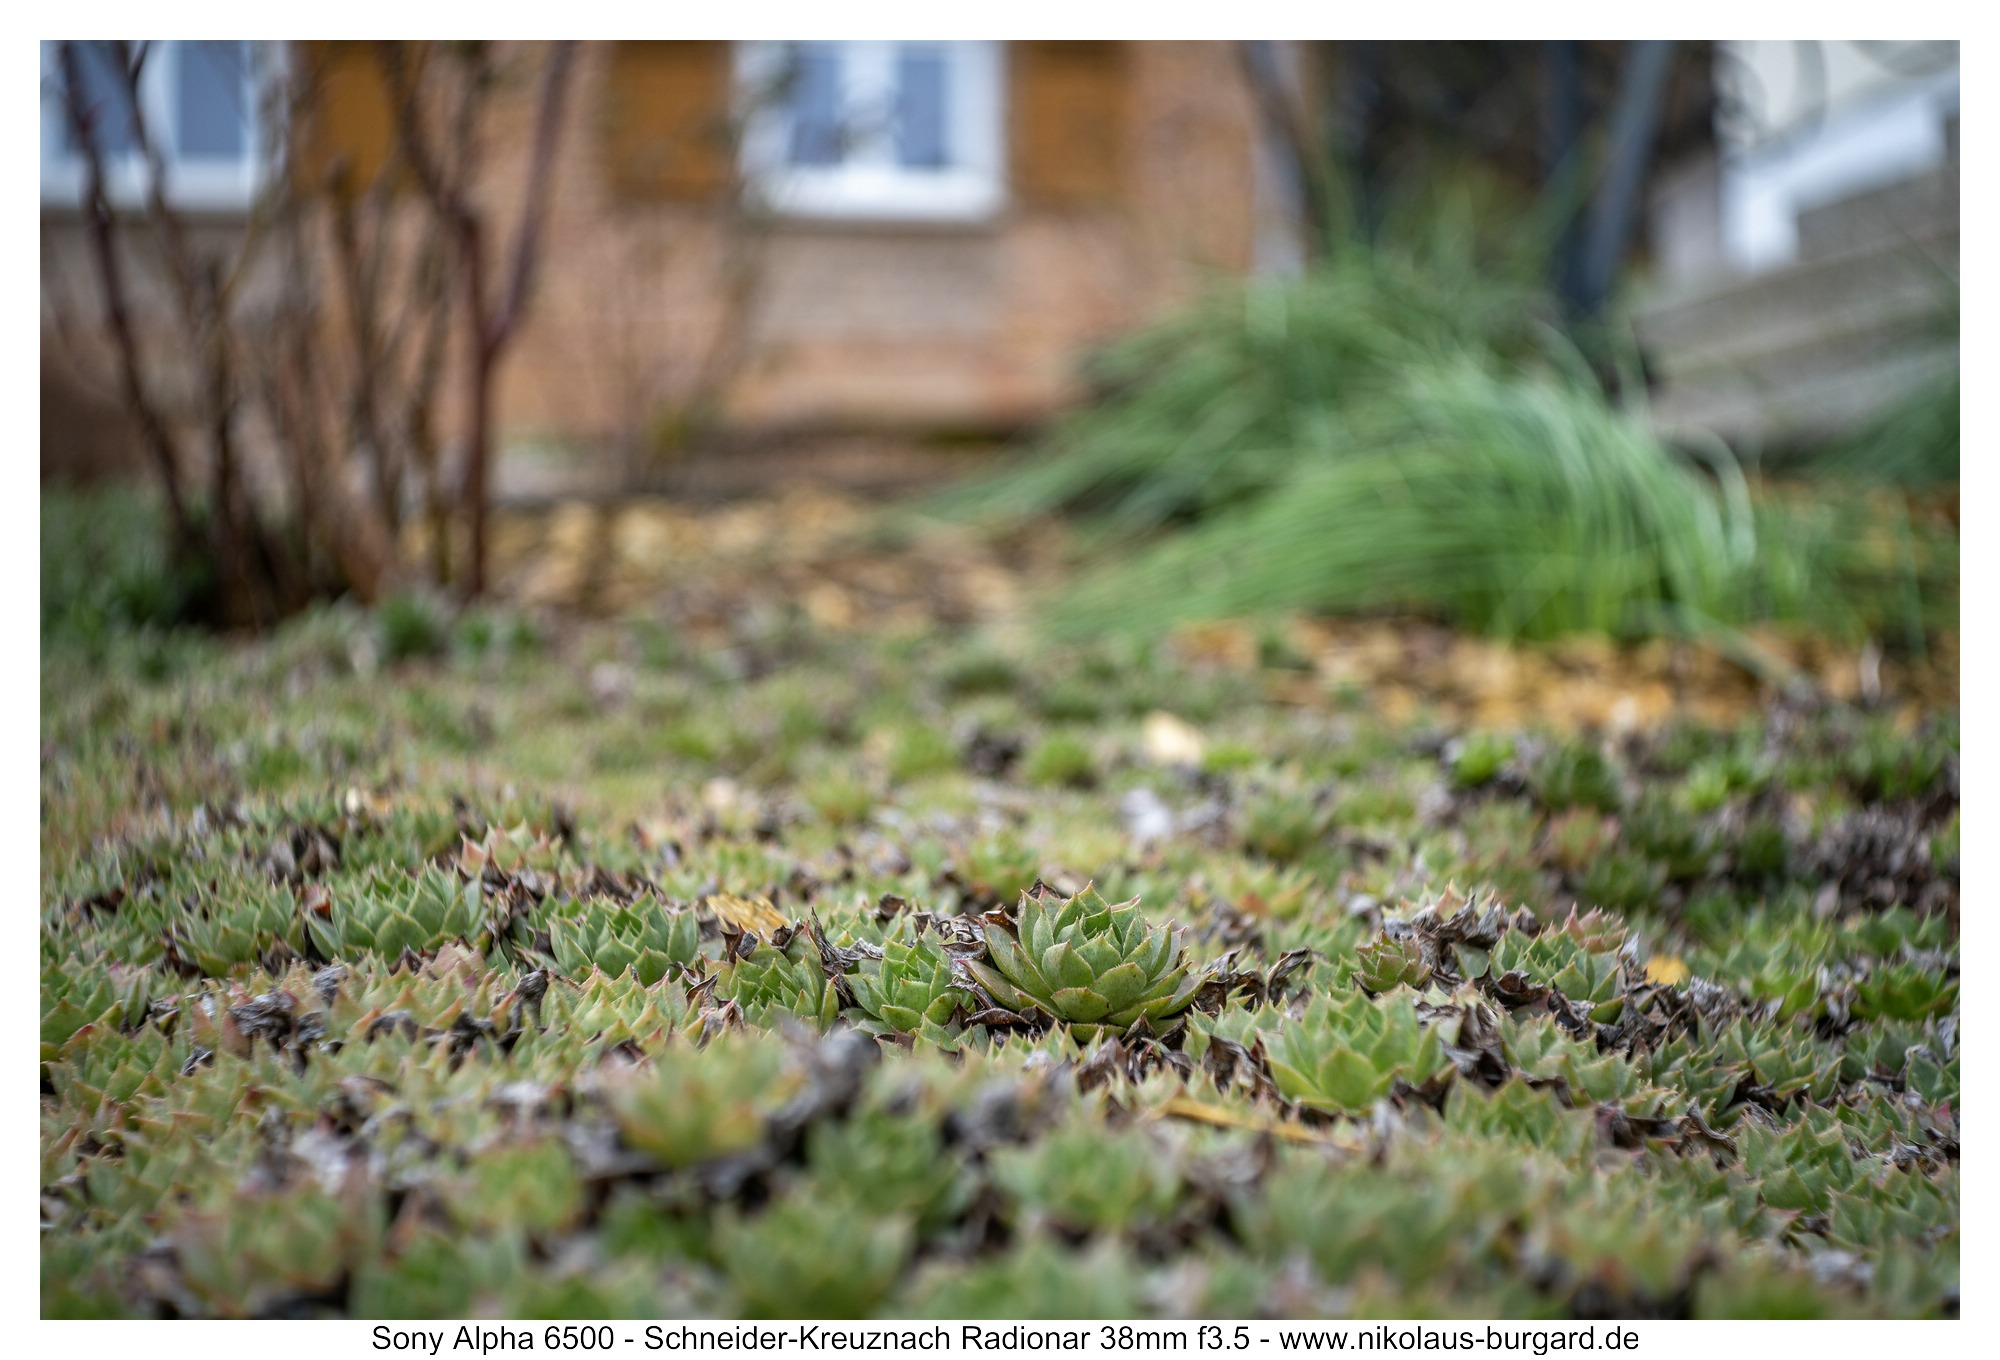
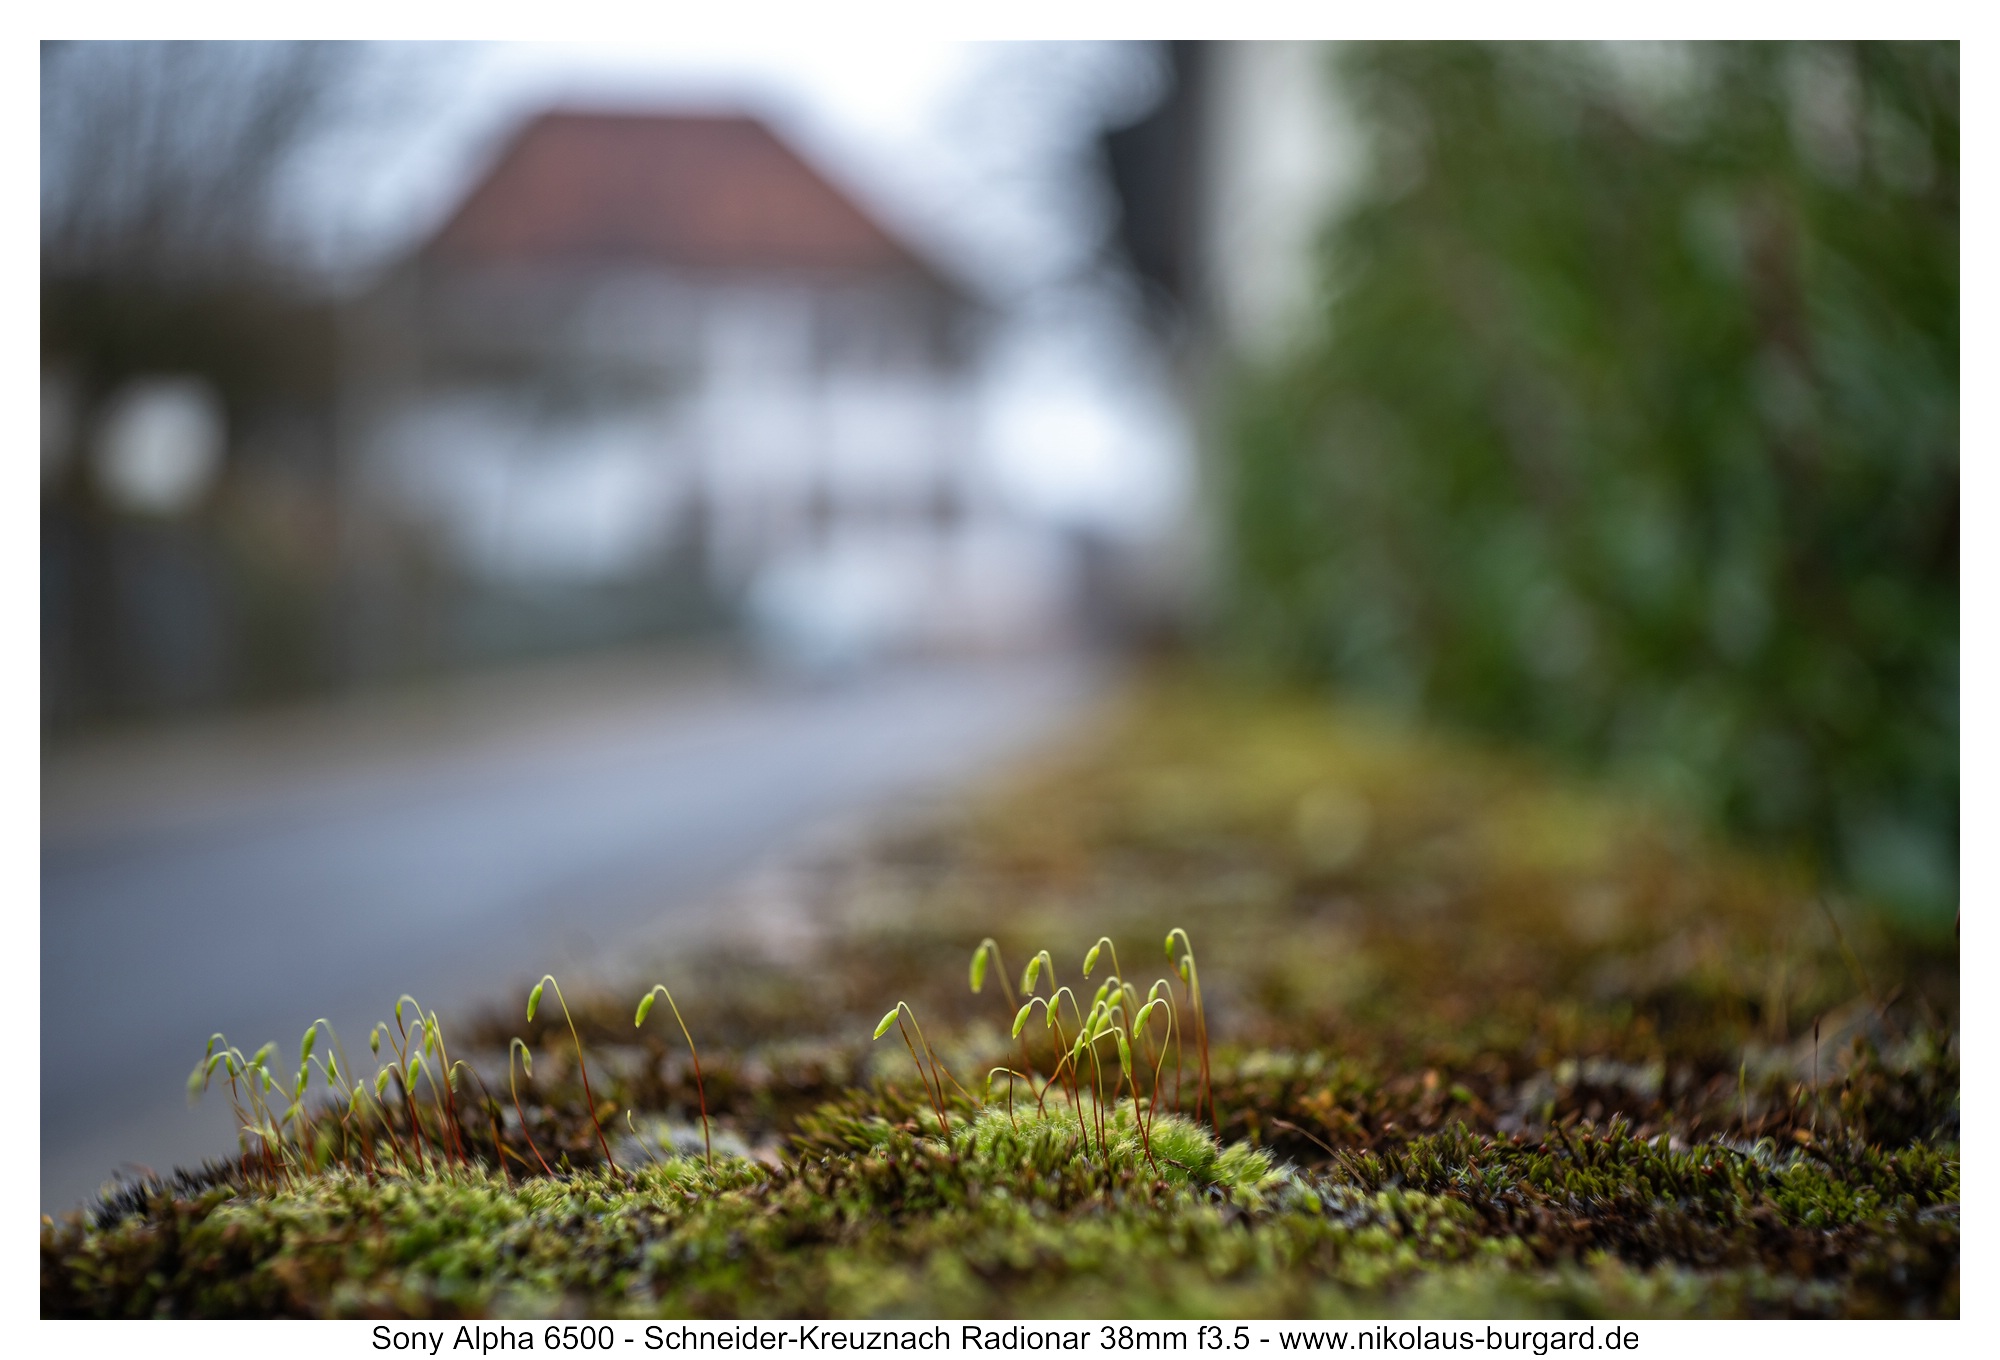
Bildserie: Sonntagmorgen im Wald / Picture Series: A sunday morning in the forest
Eine weitere kleine Bildserie aus der Praxis bei sich ständig ändernden Lichtbedingungen von sonnig bis dunstig - ich habe ganz bewusst keine Rücksicht genommen und häufig genau gegen das Licht fotografiert. Dabei sind einige stimmungsvolle Aufnahmen herausgekommen:
Another small series of images from practice in constantly changing lighting conditions from sunny to hazy - I deliberately took no consideration and often photographed exactly against the light. Some atmospheric shots came out:


Verhalten im Gegenlicht / Flares and ghosts
In dieser Testdisziplin kann man jedes Objektiv schlecht aussehen lassen, wenn man möchte.
Es kommt immer darauf an, wie sehr man es "darauf anlegt".
Ich versuche hier immer eine praxisgerechte Bewertung zu finden.
Wie bei der Bildserie "Ein sonniger Wintermorgen" bereits gezeigt,
ist das Radionar alles andere als eine "Vampirlinse".
Es hängt natürlich davon ab, wie weit man es pusht.
Bei Offenblende gibt es im seitlichen Streiflicht gerne eine Überlagerung mit einen Kontrastverlust. Ein gutes Beispiel dafür ist das erste folgende Bild.
In this testing discipline, you can make any lens look bad if you want.
It all depends on how much you “go for it”.
I always try to find a practical assessment here.
As already shown in the picture series "A sunny winter morning",
the radionar is anything but a “vampire lens”.
Of course it depends on how far you push it.
When the aperture is open, there is often an overlay in the side grazing light with a loss of contrast. A good example of this is the first image below.

Wenn man bei Offenblende direkt in die Sonne fotografiert, gibt es auch einen leichten, aber gut wieder herstellbaren Kontrastverlust:
If you take photos directly into the sun with the aperture open, there is also a slight but easily recoverable loss of contrast:

Abgeblendet auf f16 oder f22, um einen Sonnenstern zu erhalten, hat man ganz feine Flare-Blobs und auch den sichtbaren Kontrastverlust. Durch leichtes Umkomponieren kann man aber das Ausmaß beeinflussen:
Stopped down to f16 or f22 to get a sun star, you have very fine flare blobs and also a visible loss of contrast. However, you can influence the extent by slightly recomposing:


Und hier Beispiele dafür, wie das in der Praxis aussehen kann.
Die ersten beiden Bilder sind wirklich richtig schön und gut brauchbar, es gibt nur diesen Mini-Blob direkt neben der Sonne im Blendenstern - klasse.
Wenn man das Objektiv dann weiter pusht - also die Sonne weiter zum Bildrand und unverdeckter positioniert - bekommt man ein unbrauchbares Ergebnis.
And here are examples of what this can look like in practice.
The first two pictures are really nice and usable, there's just this mini blob right next to the sun in the aperture star - great.
If you then push the lens further - i.e. position the sun further towards the edge of the image and more uncovered - you will get an unusable result.


Das Radionar ist ein im Gegenlicht empfindliches Objektiv nach heutigen Maßstäben.
Trotzdem ist es in den meisten Situationen gut nutzbar.
Selbst direkte Aufnahmen im Gegenlicht gelingen, wenn man es nicht übertreibt.
The Radionar is a backlight-sensitive lens by today's standards.
Nevertheless, it can be used well in most situations.
Even direct shots against the light are successful if you don't overdo it.
Mein Fazit / Conclusion
Die Bewertung eines 70 Jahre alten Objektives in Triplet-Bauweise wie das Schneider-Kreuznach Radionar 38mm f3.5 kann in meinen Augen nicht ausschließlich nach objektiven Kriterien erfolgen.
Deshalb hier zunächst einmal eine Bewertung nach den objektiven Kriterien:
Die Bildschärfe ist im Zentrum gut ab Offenblende, ab f5.6 hervorragend.
Am Vollformat-Sensor ist das Objektiv nicht gut einsetzbar, der ausgeleuchtete Bildkreis ist zu klein.
Selbst in den APS-C-Ecken wird erst ab f11 eine brauchbare Schärfe erreicht - randscharf ist es auch erst ab diesem Wert.
Am APS-C-Sensor ist das Objektiv verzeichnungsfrei und zeigt keine Farbfehler.
Im Gegenlicht ist es empfindlich.
Diese objektive Bewertung möchte ich aber noch durch meine Subjektiven Eindrücke, die ich durch die intensive Nutzung des Objektives gewonnen habe, ergänzen.
Im Nahbereich kann der Einsatz am Kleinbild-Sensor durchaus spannende Bildeindrücke bescheren.
Überhaupt ist das kleine Radionar im Nahbereich sehr ernstzunehmen. Gute Schärfe am Motiv, und ein interessantes, charakterstarkes Rendering fernab der heute so beliebten "Flächigkeit".
Auch bei Portraitaufnahmen auf Ganz-und Halbkörperdistanzen finde ich das Rendering mit Swirl und Vignette sehr "anders" - auch weil ja aufgrund der "nur f3.5" der Schärfentiefebereich für das ganze Gesicht reicht und man dank der genannten Abbildungsfehler trotzdem eine schöne Freistellung hat.
Nicht vergessen darf man die wunderbare Kompaktheit des Objektives auch inklusive des Adapters - die es zu einer sehr komfortablen "Walkaround"-Lösung macht mit einer interessanten Brennweite und abgeblendet gut brauchbaren Ergebnissen bis zum Rand.
Mir hat das Objektiv viel Spaß bereitet - und ich denke die Bildergebnisse sprechen für sich - trotz aller technischer Schwächen.
Wie immer freue ich mich unter der abrundenden Bildergalerie im Kommentarfeld auf eure Anmerkungen und Gedanken zu Objektiv und Test!
In my opinion, the evaluation of a 70-year-old triplet lens like the Schneider-Kreuznach Radionar 38mm f3.5 cannot be based solely on objective criteria.
Therefore, here is an assessment based on the objective criteria:
The image sharpness is good in the center from open aperture and excellent from f5.6.
The lens cannot be used well on the full-format sensor; the illuminated image circle is too small.
Even in the APS-C corners, usable sharpness is only achieved from f11 onwards - the edges are only sharp from this value onwards.
With the APS-C sensor, the lens is distortion-free and shows no color errors.
It is sensitive to backlighting.
However, I would like to supplement this objective assessment with my subjective impressions that I gained from intensive use of the lens.
At close range, use of the 35mm sensor can provide exciting image impressions.
In general, the small radionar is to be taken very seriously at close range. Good sharpness on the subject, and an interesting, characterful rendering far away from the “flatness” that is so popular today.
I also find the rendering with swirl and vignette very “different” when taking portrait shots at full and half-body distances - also because the depth of field range is enough for the entire face due to the “only f3.5” and you still have a nice cropping thanks to the aforementioned imaging errors .
Don't forget the wonderful compactness of the lens, including the adapter - which makes it a very comfortable "walkaround" solution with an interesting focal length and usable results right up to the edge when stopped down.
I had a lot of fun with the lens - and I think the image results speak for themselves - despite all the technical weaknesses.
As always, I look forward to your comments and thoughts about the lens and test in the comments section of the picture gallery!


Kommentar schreiben